Configure the PHP front end
Since Zabbix 5.2.0, it is no longer necessary to configure the timezone settings in the configuration files.
You can now set it within the Zabbix GUI, down the bottom left in the User Settings page,
or in Administration ⇾ Users ⇾ Username
The commands in this video are,
Ubuntu 20.04, 18.04
sudo nano /etc/zabbix/apache.conf Centos 8, 7
sudo nano /etc/php-fpm.d/zabbix.conf sudo nano /etc/opt/rh/rh-php72/php-fpm.d/zabbix.conf sudo nano /etc/httpd/conf.d/zabbix.conf If you get an error that nano is not installed,
Scroll down and uncomment the lines
# php_value date.timezone Europe/Riga And edit to your time zone.
My time zone is London, so my line looks like,
php_value date.timezone Europe/London PHP timezone strings can be found here,
If you installed your Zabbix Server using the NGINX web server option then your time zone settings may be in the file /etc/php.d/99-zabbix.ini
Troubleshooting
Time zone for PHP is not set
Q. You see the error ‘Time zone for PHP is not set (configuration parameter «date.timezone»).’
A. You most likely didn’t remove the comment symbol (#) from the line containing php_value date.timezone and your time zone.
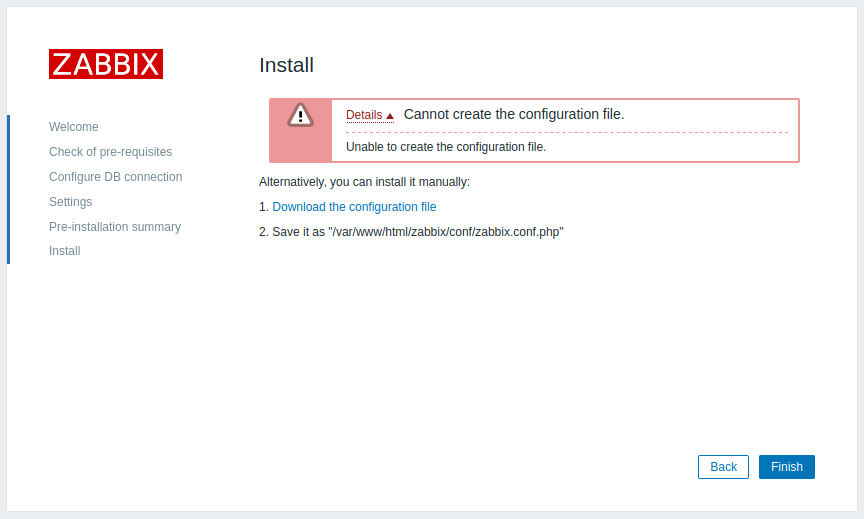
Cannot create the configuration file
Q. You get an error ‘unable to create the configuration file’ and you are then asked to download the configuration file and save it into a folder.
A. It is likely that the configuration file can no longer be automatically saved due to permissions between the web user running the Zabbix web interface and the operating system.
Download the file using the link as shown in the error screen and open it using a text editor, so you can see it.
The error screen also shows which folder to save the configuration into.
SSH onto your server, and cd into the folder.
Paste the contents of the file that you downloaded locally into the Nano view. If using the Putty ssh client, you can right-click the mouse and the clipboard will be pasted in.
In Nano, press ctrl-X and y to save.
Press [next] on the error screen and continue with the login process.
6 Web interface installation
This section provides step-by-step instructions for installing Zabbix web interface. Zabbix frontend is written in PHP, so to run it a PHP supported webserver is needed.
You can find out more about setting up SSL for Zabbix frontend by referring to these best practices.
Welcome screen
Open Zabbix frontend URL in the browser. If you have installed Zabbix from packages, the URL is:
You should see the first screen of the frontend installation wizard.
Use the Default language drop-down menu to change system default language and continue the installation process in the selected language (optional). For more information, see Installation of additional frontend languages.

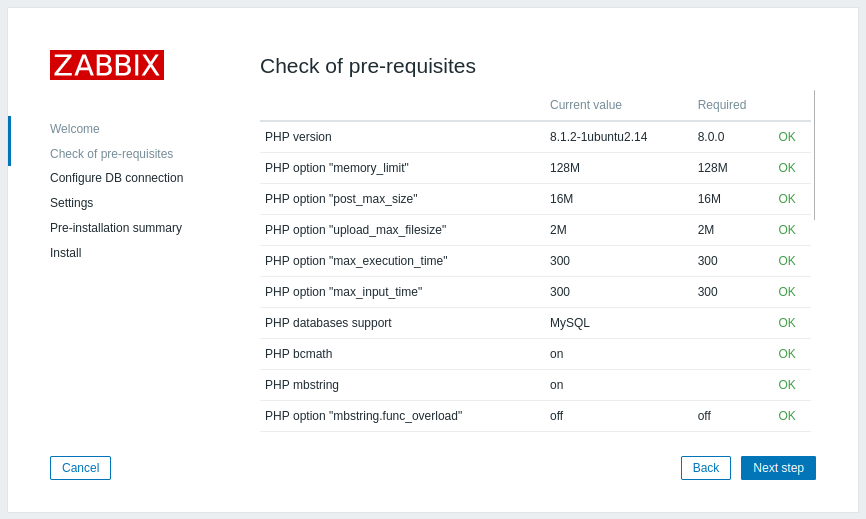
Check of pre-requisites
Make sure that all software prerequisites are met.
| Pre-requisite | Minimum value | Description |
|---|---|---|
| PHP version | 7.4.0 | |
| PHP memory_limit option | 128MB | In php.ini: memory_limit = 128M |
| PHP post_max_size option | 16MB | In php.ini: post_max_size = 16M |
| PHP upload_max_filesize option | 2MB | In php.ini: upload_max_filesize = 2M |
| PHP max_execution_time option | 300 seconds (values 0 and -1 are allowed) | In php.ini: max_execution_time = 300 |
| PHP max_input_time option | 300 seconds (values 0 and -1 are allowed) | In php.ini: max_input_time = 300 |
| PHP session.auto_start option | must be disabled | In php.ini: session.auto_start = 0 |
| Database support | One of: MySQL, Oracle, PostgreSQL. | One of the following modules must be installed: mysql, oci8, pgsql |
| bcmath | php-bcmath | |
| mbstring | php-mbstring | |
| PHP mbstring.func_overload option | must be disabled | In php.ini: mbstring.func_overload = 0 |
| sockets | php-net-socket. Required for user script support. | |
| gd | 2.0.28 | php-gd. PHP GD extension must support PNG images (—with-png-dir), JPEG (—with-jpeg-dir) images and FreeType 2 (—with-freetype-dir). |
| libxml | 2.6.15 | php-xml |
| xmlwriter | php-xmlwriter | |
| xmlreader | php-xmlreader | |
| ctype | php-ctype | |
| session | php-session | |
| gettext | php-gettext Since Zabbix 2.2.1, the PHP gettext extension is not a mandatory requirement for installing Zabbix. If gettext is not installed, the frontend will work as usual, however, the translations will not be available. |
Optional pre-requisites may also be present in the list. A failed optional prerequisite is displayed in orange and has a Warning status. With a failed optional pre-requisite, the setup may continue.
If there is a need to change the Apache user or user group, permissions to the session folder must be verified. Otherwise Zabbix setup may be unable to continue.
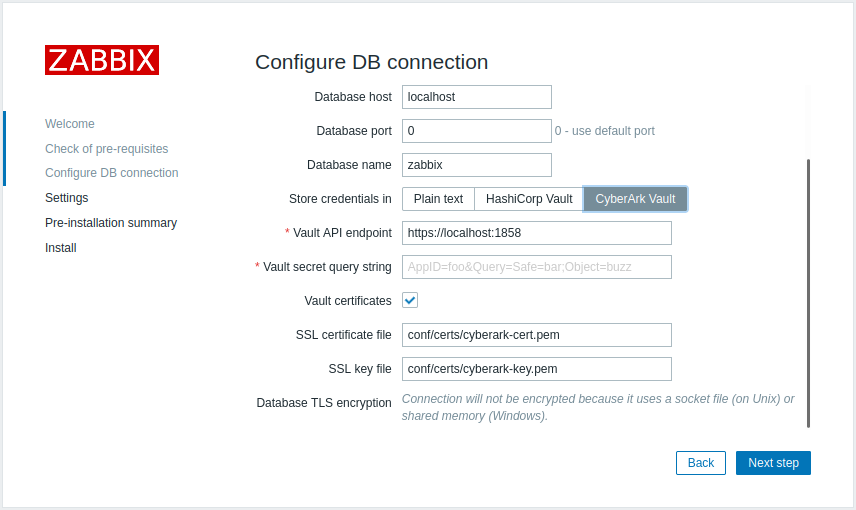
Configure DB connection
Enter details for connecting to the database. Zabbix database must already be created.

If the Database TLS encryption option is checked, then additional fields for configuring the TLS connection to the database appear in the form (MySQL or PostgreSQL only).
If Store credentials in is set to HashiCorp Vault or CyberArk Vault, additional parameters will become available:
- for HashiCorp Vault: Vault API endpoint, secret path and authentication token;
- for CyberArk Vault: Vault API endpoint, secret query string and certificates. Upon marking Vault certificates checkbox, two new fields for specifying paths to SSL certificate file and SSL key file will appear.
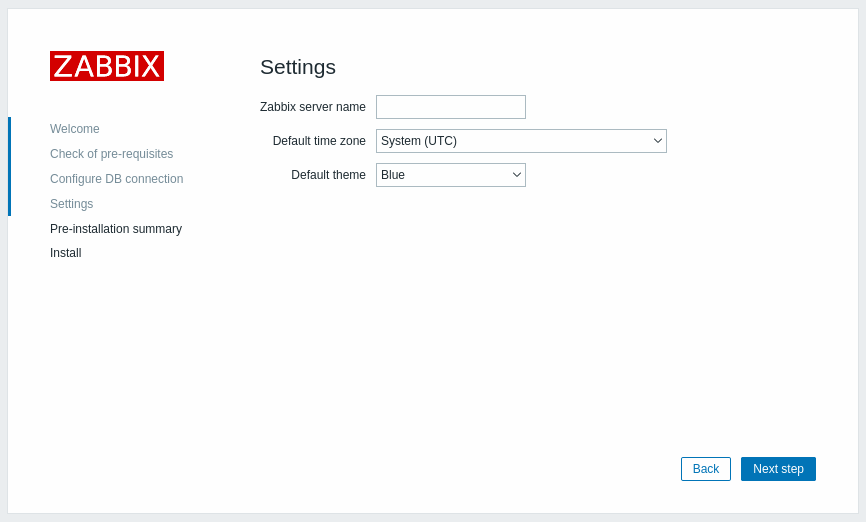
Settings
Entering a name for Zabbix server is optional, however, if submitted, it will be displayed in the menu bar and page titles.
Set the default time zone and theme for the frontend.
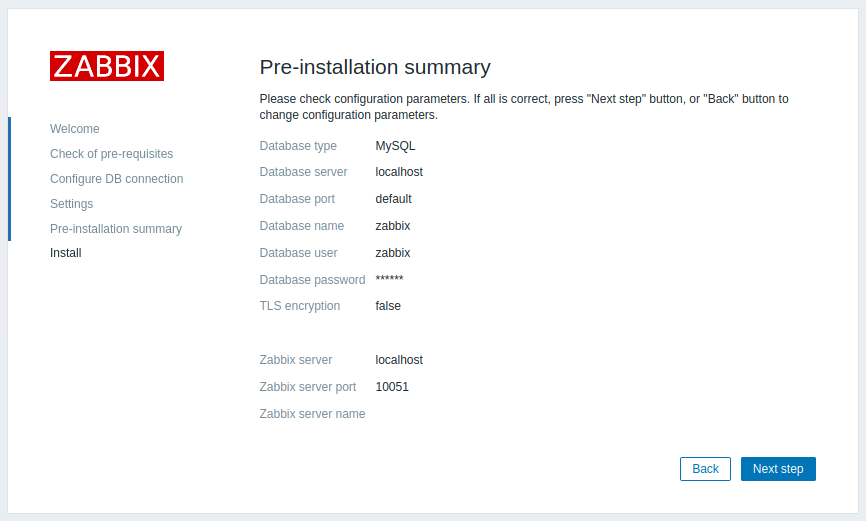
Pre-installation summary
Review a summary of settings.
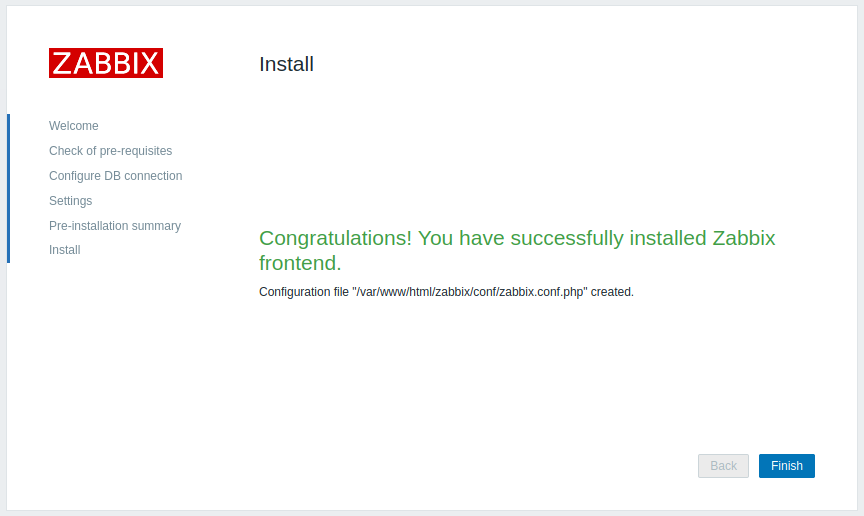
Install
If installing Zabbix from sources, download the configuration file and place it under conf/ in the webserver HTML documents subdirectory where you copied Zabbix PHP files to.

Providing the webserver user has write access to conf/ directory the configuration file would be saved automatically and it would be possible to proceed to the next step right away.
Log in
Zabbix frontend is ready! The default user name is Admin, password zabbix.