- Как создать и настроить страницу авторизации для WordPress
- Пользовательская страница авторизации
- Форма входа
- Проверка связки имя-пароль
- Сообщение об ошибке
- Заключение
- Beginner’s Guide: How to Find Your WordPress Login URL
- Video Tutorial
- Using ‘Remember Me’ to Bypass Login Page in WordPress
- Adding a Login Link to Your WordPress Website
- Adding A Custom WordPress Login Form in WordPress
- Logging in to WordPress from Your Web Hosting Dashboard
- Further WordPress Login Customizations and Resources
- Troubleshooting WordPress Login Errors
Как создать и настроить страницу авторизации для WordPress
Многим из вас наверняка хорошо известна страница WordPress wp-login.php , использующаяся как страница для авторизации. Выглядит и работает она отлично.
Но когда дело доходит до создания веб-сайта для клиентов, скорее всего, вы захотите иметь более гибко настраиваемую страницу авторизации, чтобы она была едина с идеей дизайна сайта.
Кроме того, зайдя на нестандартную страницу авторизации, которая была сделана специально под ваш сайт, клиенты будут иметь наглядное представление об уровне вашей организации.
Если это то, чего вам не хватает на сайте — приступайте к изучению инструкции, изложенной в данной статье.
Пользовательская страница авторизации
Итак, первое, что нам нужно, это создать шаблон пользовательской страницы входа. Для этого мы создаем страницу шаблона и называем ее, к примеру, page-login.php .
Затем, создаем новую страницу в панели администрирования и ставим постоянную ссылку для страницы авторизации.
WordPress автоматически подцепит шаблон page-login.php :

Форма входа
Поместите тег wp_login_form в код шаблона page-login.php для отображения формы авторизации:
Следующая часть необязательна, но в некоторых случаях она может быть использована. Мы можем настроить такие части формы, как страница для редиректа после успешной авторизации, поля смены пользователя и пароля и так далее:
home_url(), ‘id_username’ => ‘user’, ‘id_password’ => ‘pass’, ) ;?>
Здесь же вы можете, к примеру, добавить такие штуки как логотип и описание вашего сайта:
Теперь приступим к настройке внешнего вида страницы с помощью CSS-стилей. В этом примере я покажу, как выглядит моя страница для входа.
У нее темный фон с голубой кнопкой, которые соответствуют теме сайта Hongkiat.com :
Проверка связки имя-пароль
В этой части страница уже функционирует. Мы можем попытаться авторизоваться, и если вход выполнен успешно, нас перебросит на страницу, которую мы указали в параметре redirect на предыдущем шаге. Но есть еще кое-что, на что мы обратим наше внимание.
Во-первых, страница wp-login.php до сих пор остается доступной. Стоит поставить редирект с wp-login.php на созданную нами страницу, чтобы наши клиенты могли на неё попасть.
Для этого нужно добавить следующий код в файл functions.php используемой вами темы WordPress:
function redirect_login_page() < $login_page = home_url( '/login/' ); $page_viewed = basename($_SERVER['REQUEST_URI']); if( $page_viewed == "wp-login.php" && $_SERVER['REQUEST_METHOD'] == 'GET') < wp_redirect($login_page); exit; >> add_action('init','redirect_login_page');Не забудьте присвоить переменной $login_page значение адреса вашей страницы для входа.
Во-вторых, страница авторизации работает так как задумано только в случае, если попытка входа удалась. Но, что происходит, если вход не удался?
К примеру, введена неверная пара логин-пароль или оставлено пустое поле. Нас снова выбросит на wp-login.php .
Чтобы избежать этого добавляем следующую функцию в файл functions.php :
function login_failed() < $login_page = home_url( '/login/' ); wp_redirect( $login_page . '?login=failed' ); exit; >add_action( 'wp_login_failed', 'login_failed' ); function verify_username_password( $user, $username, $password ) < $login_page = home_url( '/login/' ); if( $username == "" || $password == "" ) < wp_redirect( $login_page . "?login=empty" ); exit; >> add_filter( 'authenticate', 'verify_username_password', 1, 3);Две эти функции выполняют несколько задач: переадресуют пользователей в случае неудачной попытки входа и дописывают к URL-адресу строки запроса login значение failed или empty :
Последняя проблема, которую мы решим это редирект к wp-login.php при выходе с сайта. Нам стоит определить страницу редиректа для корректного перехода при нажатии кнопки выхода:
function logout_page() < $login_page = home_url( '/login/' ); wp_redirect( $login_page . "?login=false" ); exit; >add_action('wp_logout','logout_page');Сообщение об ошибке
Мы будем показывать пользователю сообщение, и когда случается ошибка, и когда он выходит с сайта при помощи query string , значение которой мы поместили в URL. Для того чтобы получить значение из строки запроса, мы будем использовать переменную $_GET .
Поместите код, приведенный ниже, в шаблон страницы авторизации:
$login = (isset($_GET['login']) ) ? $_GET['login'] : 0;Код, приведенный выше, проверяет, содержит ли переменная login что-либо и в противном случае приравнивает ее к значению 0.
Также мы будем отображать сообщения, основанные на значении переменной $error :
if ( $login === "failed" ) < echo ''; > elseif ( $login === "empty" ) < echo '
elseif ( $login === "false" ) < echo '
И ниже, собственно, пример того, как может такое сообщение выглядеть:
Заключение
Осталось еще несколько вещей, которые мы можем добавить к странице авторизации. К примеру, ссылка на страницу для восстановления пароля, ссылка на страницу регистрации нового пользователя и персонализированные сообщения об ошибках.
Но с другой стороны, наша страница полностью функциональна, позволяет пользователям входить на сайт и выходить из него, и поэтому я считаю это неплохой точкой для старта. Далее можно добавлять тот функционал, который вы посчитаете нужным.
Надеюсь, это руководство окажется для вас полезным!
Beginner’s Guide: How to Find Your WordPress Login URL
Last updated on February 21st, 2022 by Editorial Staff | Reader Disclosure Disclosure: Our content is reader-supported. This means if you click on some of our links, then we may earn a commission. See how WPBeginner is funded, why it matters, and how you can support us.
‘How do I log in to WordPress?’ That’s one of the most common WordPress questions that we get asked.
Beginners often have a hard time finding their WordPress login page URL, and this prevents them from working on their website.
In this article, we will show you how to find your WordPress login URL. We’ll also show you different ways to log in to your WordPress admin area.
This is a comprehensive guide. Use the table of contents to jump to the section you are most interested in:
Video Tutorial
If for some reason, your WordPress login URL is not working properly, then you can easily access the WordPress login page by going to this URL:
However, if you installed WordPress in a subdirectory such as /wordpress/, then you would need to access your WordPress blog login page like this:
www.example.com/wordpress/login/ www.example.com/wordpress/wp-login.phpIf you installed WordPress on a subdomain, then you can access the WordPress admin login page like so:
subdomain.example.com/login/ subdomain.example.com/wp-login.phpOnce you are logged in, you will be redirected to the WordPress admin area of your site which is located in the wp-admin folder.
You can directly access your admin area by entering the website URL like this:
www.example.com/admin/ www.example.com/wp-admin/This URL checks if you were previously logged in, and if your session is still active.
If both are true, then you will be redirected to the WordPress dashboard. If your session has expired, then you will be redirected back to the WordPress login page.
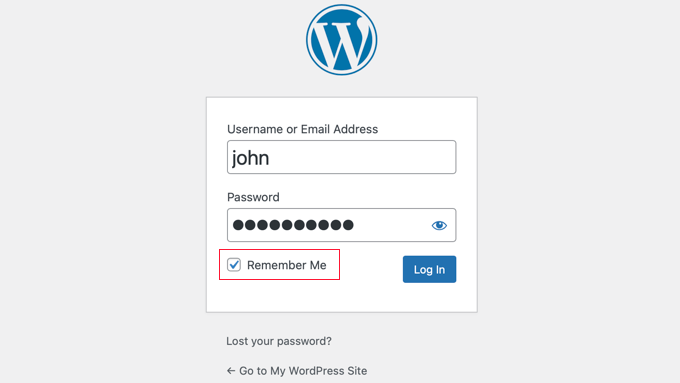
Using ‘Remember Me’ to Bypass Login Page in WordPress
On your WordPress login page, there is a checkbox labeled ‘Remember Me’. When you check this box before you log in, it will allow you to directly access the admin area without a login on your subsequent visits for 14 days or your browser’s cookie settings.
If you keep forgetting to check the ‘Remember Me’ option during login, then you can install the Remember Me plugin. It will automatically check the remember me checkbox every time you log in to WordPress.
Adding a Login Link to Your WordPress Website
If you find it difficult to remember your WordPress login link, then we recommend you add a bookmark to your browser’s bookmark bar.
Alternatively, you can add your WordPress login link on your website footer, sidebar, or menu. There are two very easy ways to do this.
Adding a Login Link to a Menu
The first option is adding your WordPress login link to a menu. Simply log in to your WordPress admin area and go to Appearance » Menus.
Next, click on the ‘Custom Links’ tab to expand it and add your WordPress login link and text. Once you are done, click on the ‘Add to Menu’ button to add this link to your menu. Also, don’t forget to click on the ‘Save Menu’ button.
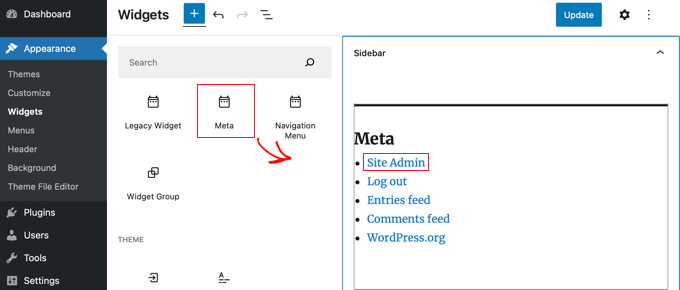
Using the Meta Widget
The second option is to use the default widget called ‘Meta’. This widget adds a link to the login page, links to your site’s RSS feeds, and a link to the WordPress.org website.
Start by going to Appearance » Widgets and click the ‘+ Block Inserter’ button. You need to find the Meta widget and drag it to your website’s sidebar or widget-ready area. If you don’t want to use the Meta widget, then you can use the Navigation Menu widget here as well.
You can add the WordPress login link in the footer, sidebar, or any other widget-ready area in your theme.
Adding A Custom WordPress Login Form in WordPress
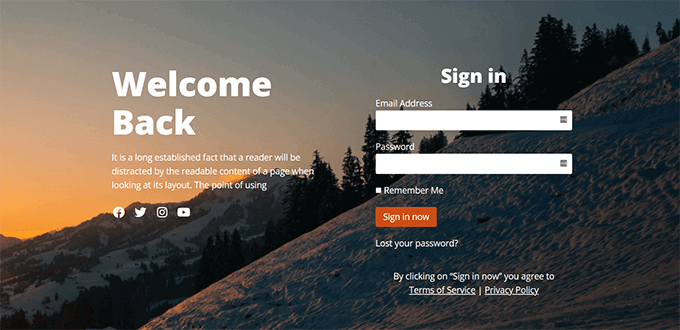
If you have multiple users on your WordPress site, then it makes sense to add the WordPress login form to the sidebar or create a custom login page that matches your site’s design.
There are multiple ways to do that, but we recommend using the SeedProd page builder plugin.
It allows you to create custom login pages with a drag-and-drop page builder. It includes plenty of professionally-designed templates, or you can design your own page from scratch.
You can also use WPForms to create your own custom login forms with additional form fields. It is the best WordPress contact form plugin and allows you to easily create login forms and add them anywhere on your website.
If you’re looking to customize the login form just to remove the language switcher, we have a guide on that too.
Logging in to WordPress from Your Web Hosting Dashboard
Many WordPress hosting companies provide easy shortcuts to directly access your WordPress admin area and skip the WordPress login page altogether.
Here is how to log in to WordPress via popular hosting dashboards.
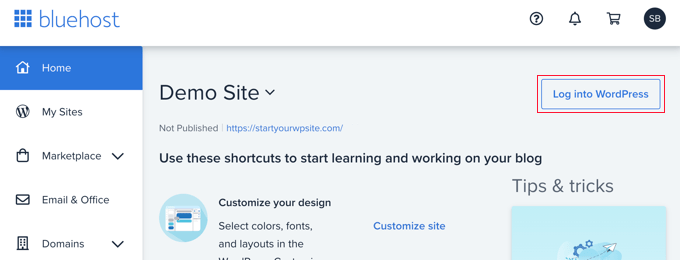
1. WordPress Login Shortcut in Bluehost
Bluehost is one of the biggest hosting companies in the world. They offer a beginner-friendly dashboard with quick shortcuts to manage your WordPress site.
Simply log in to your Bluehost dashboard and on the Home page you will be able to log in to your main site by clicking the ‘Log into WordPress’ button.
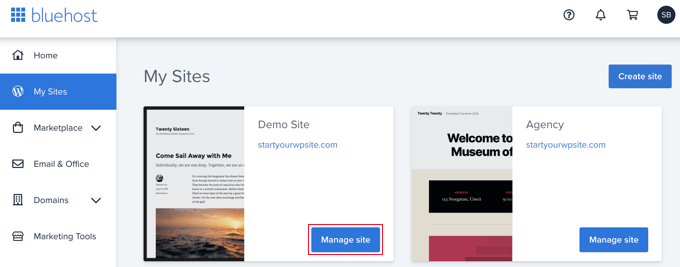
If you have multiple sites, then you should switch to the ‘My Sites’ tab. From here, you’ll see all the WordPress sites you have installed on your hosting account.
You should find the site you wish to log in to and click the ‘Manage site’ button. You’ll then find a ‘Log into WordPress’ button for that site.
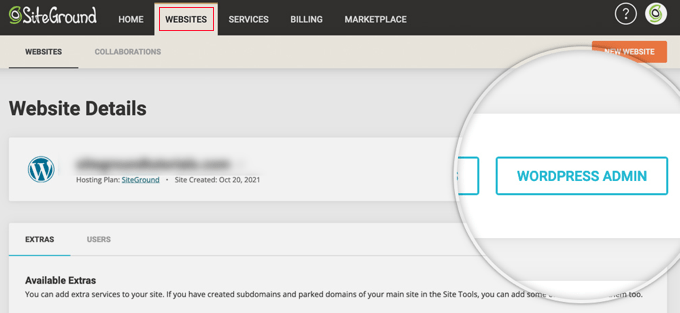
2. WordPress Login Shortcut in SiteGround
SiteGround also has a quick shortcut to log in to your WordPress site.
Simply log in to your SiteGround hosting dashboard and then click on the ‘Websites’ tab on the top. From here, you’ll see a list of websites you have installed under your hosting account.
You simply need to click the ‘WordPress Admin’ button next to the desired website.
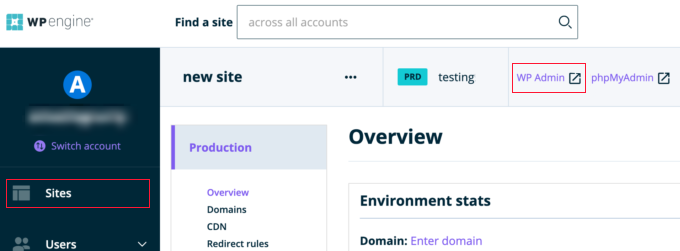
3. WordPress Login Shortcut in WP Engine
WP Engine is the best managed WordPress hosting company. They offer ‘seamless login’ that will take you directly to your WordPress admin page.
Simply visit your WP Engine dashboard and then click the Sites tab. After that, you should click the WordPress install that you’d like to access.
Now you just need to click the ‘WP Admin’ link at the top of the screen to be logged in to your WordPress site.
Further WordPress Login Customizations and Resources
We’ve written a lot of articles about WordPress login customization and fixing common errors.
If you are looking to create a custom WordPress login page with your branding, then see our ultimate guide on how to create a custom WordPress login page (no HTML/CSS required).
WordPress login forms can be abused by brute force attacks. If you are facing such attacks on your website, then you can add CAPTCHA to WordPress login and registration form to protect your site.
Troubleshooting WordPress Login Errors
Sometimes, you may encounter weird errors related to the WordPress login page. We have covered several of them in detail along with troubleshooting tips:
We hope this article helped you learn how to find your WordPress login link. You may also want to see our step by step WordPress security guide and our ultimate guide on how to speed up WordPress.
If you liked this article, then please subscribe to our YouTube Channel for WordPress video tutorials. You can also find us on Twitter and Facebook.