- How to Run WordPress on OpenBSD 7.0 with HTTPD
- Prerequisites
- Install PHP
- Configure HTTPD to serve WordPress
- Create a new WordPress Database
- Install and Configure WordPress
- Conclusion
- Want to contribute?
- How to Fix the XAMPP Localhost index.php Error (2 Methods)
- An Introduction to XAMPP index.php Errors
- Is your WordPress site slow?
- Info
- How to Fix the XAMPP Localhost index.php Error (2 Methods)
- 1. Rename index.php to index.txt
- 2. Edit the httpd-vhosts.conf File
- Summary
- Hand-picked related articles
- How to Fix the XAMPP Error “Apache Shutdown Unexpectedly”
- How to Fix the XAMPP Error “MySQL Shutdown Unexpectedly” (3 Methods)
- How to Install WordPress Locally (Windows, macOS, Linux)
- Subscribe to our Newsletter
How to Run WordPress on OpenBSD 7.0 with HTTPD
OpenBSD is known for excellent server security, making it a good choice for a popular content management system (CMS) like WordPress. This guide explains how to run WordPress on OpenBSD 7.0 with the native httpd web server package.
Prerequisites
- Deploy a Vultr OpenBSD 7.0 server
- Configure a domain name for your server’s IP address (optional)
- Configure MariaDB on the server
Install PHP
Select your preferred version. WordPress requires PHP 7.4 (option 2) and above.
Ambiguous: choose package for php a 0: 1: php-7.3.33 2: php-7.4.26 3: php-8.0.13 Your choice: 2 . Install necessary PHP Modules for WordPress to run well, php-mysqli , php-pdo_mysql allow PHP to communicate with MySQL.
# pkg_add php php-gd php-intl php-xmlrpc php-curl php-zip php-mysqli php-pdo_mysql pecl74-mcrypt pecl74-imagick # cp /etc/php-7.4.sample/* /etc/php-7.4/ # rcctl enable php74_fpm # rcctl start php74_fpm Configure HTTPD to serve WordPress
Create the main httpd configuration file.
Using your favorite editor, open the file and enter new configurations for your server.
Edit the file /etc/httpd.conf .
Paste the following code and replace * with your Vultr Server IP.
ext_ip="*" #Enter Your Vultr IP Address here server "default" < listen on $ext_ip port 80 root "/htdocs/" directory index "index.php" location "*.php*" < fastcgi socket "/run/php-fpm.sock" >location "/posts/*" < fastcgi < param SCRIPT_FILENAME \ "/htdocs/index.php" socket "/run/php-fpm.sock" >> location "/page/*" < fastcgi < param SCRIPT_FILENAME \ "/htdocs/index.php" socket "/run/php-fpm.sock" >> location "/feed/*" < fastcgi < param SCRIPT_FILENAME \ "/htdocs/index.php" socket "/run/php-fpm.sock" >> location "/comments/feed/*" < fastcgi < param SCRIPT_FILENAME \ "htdocs/index.php" socket "/run/php-fpm.sock" >> location "/wp-json/*" < fastcgi < param SCRIPT_FILENAME \ "htdocs/index.php" socket "/run/php-fpm.sock" >> > types < text/css css ; text/html htm html ; text/txt txt ; image/gif gif ; image/jpeg jpg jpeg ; image/png png ; application/javascript js ; application/xml xml ; >server "www.example.net"
Now, for WordPress core to reach wordpress.org using the server’s internet connection, create a new etc directory at /var/www/ .
Then, copy /etc/resolv.conf and /etc/hosts to the directory.
# cp /etc/resolv.conf /var/www/etc/. # cp /etc/hosts /var/www/etc/. # rcctl enable httpd # rcctl restart httpd Create a new WordPress Database
Initialize MariaDB and start the database server.
# mysql_install_db # rcctl start mysqld Create the WordPress database and a new user with a strong password.
MariaDB [(none)]> CREATE DATABASE wpdb; MariaDB [(none)]> CREATE USER 'wpuser'@'localhost' IDENTIFIED BY 'strongpassword'; Grant the user full rights to the database and refresh privileges.
MariaDB [(none)]> use wpdb; MariaDB [wpdb]> GRANT ALL PRIVILEGES ON wpdb.* TO 'wpuser'@'localhost'; MariaDB [wpdb]> FLUSH PRIVILEGES; Install and Configure WordPress
Download the latest WordPress archive file.
# wget https://wordpress.org/latest.tar.gz Move Extracted files to your webroot directory, by default, httpd points to /var/www/htdocs/ .
# mv wordpress/* /var/www/htdocs/ Grant HTTPD ownership rights to the modified /var/www/htdocs directory.
# chown -R www:www /var/www/htdocs/ Now, launch the WordPress web installer by visiting your server’s IP Address through a web browser.
Click Let’s Go to get started with your WordPress configuration.
Enter the Database name created earlier, a Username and associated Password . Then, under Database Host replace localhost with 127.0.0.1 or localhost:/var/run/mysql/mysql.sock .

Next, a wp-config.php file will be automatically created. Click Run the Installation to enter your first website title and administrator account details to set up WordPress.
Now, login to your WordPress dashboard, install themes, plugins and create users necessary to develop your websites on the platform.

To limit potential attacks on your WordPress server, you can install security plugins such as Wordfence or Sucuri to limit password guesses and access to the wp-login page.
Also, delete the WordPress installation script to limit any duplicate installations.
# rm /var/www/htdocs/wp-admin/install.php Conclusion
Congratulations, you have successfully installed WordPress on an OpenBSD 7.0 server. You can fine-tune your installation by installing a free let’s encrypt SSL certificate and enable `HTTPS access on your server.
Want to contribute?
You could earn up to $600 by adding new articles.
How to Fix the XAMPP Localhost index.php Error (2 Methods)

XAMPP is a fantastic tool for quickly setting up local WordPress installations to use in testing. However, like with any WordPress site, things can sometimes go wrong with your local installation. If you’re attempting to access your site’s index.php file and you’re receiving error messages, you’re not alone—this is a fairly common problem.
Fortunately, this issue is relatively easy to resolve. Plus, since we’re dealing with WordPress, there are multiple ways to go about it. So you should be able to find a solution that matches your comfort level.
In this article, we’ll explain the localhost/xampp/index.php error and its different presentations. Then we’ll walk through two methods to fix it.
An Introduction to XAMPP index.php Errors
The index.php error shows up when you’re attempting to access localhost/xampp/index.php in your browser. This WordPress file serves as an entry point to your website; thus, it needs to be accessible.
The error typically presents itself in one of two ways. In the first, you attempt to load the page and receive an “Object not found!” error message. The other presentation occurs when you attempt to load the page and get redirected to “localhost/dashboard”.
Obviously, that’s not very helpful. This group of XAMPP errors is particularly frustrating because they don’t indicate what the problem could be. Instead, things just don’t work the way you expect, and you’re left scratching your head.
Is your WordPress site slow?
Uncover performance bottlenecks to deliver a better user experience and hit your business’s revenue goals. Free Audit
However, regardless of the presentation, the end result is the same: you can’t access the page you need to do your work. Fortunately, this issue is simple enough to fix. It stems from how XAMPP treats files in its directories, so correcting it involves adjusting those files.
Info
Looking for a powerful tool for local WordPress development? DevKinsta features one-click site creation, built-in HTTPS, powerful email and database management tools, and more. Learn more about DevKinsta!
How to Fix the XAMPP Localhost index.php Error (2 Methods)
There are two ways to fix this issue. The first involves switching the file extension from “.php” to “.txt”, while the second focuses on changing where your site looks for the file. Both options are extremely simple, and either can work, so we recommend picking the solution you’re most comfortable with and giving it a try. If you still get the error at localhost/xampp/index.php afterward, you can try the second method as well.
1. Rename index.php to index.txt
This method involves changing the file extension (the short abbreviation that comes after the file name) of index.php to “.txt”. This is very easy and can be done from any file browser, and the results are normally instantaneous. The simplest way to get to your XAMPP folder is from the XAMPP Control Panel. Open the panel from your system tray. 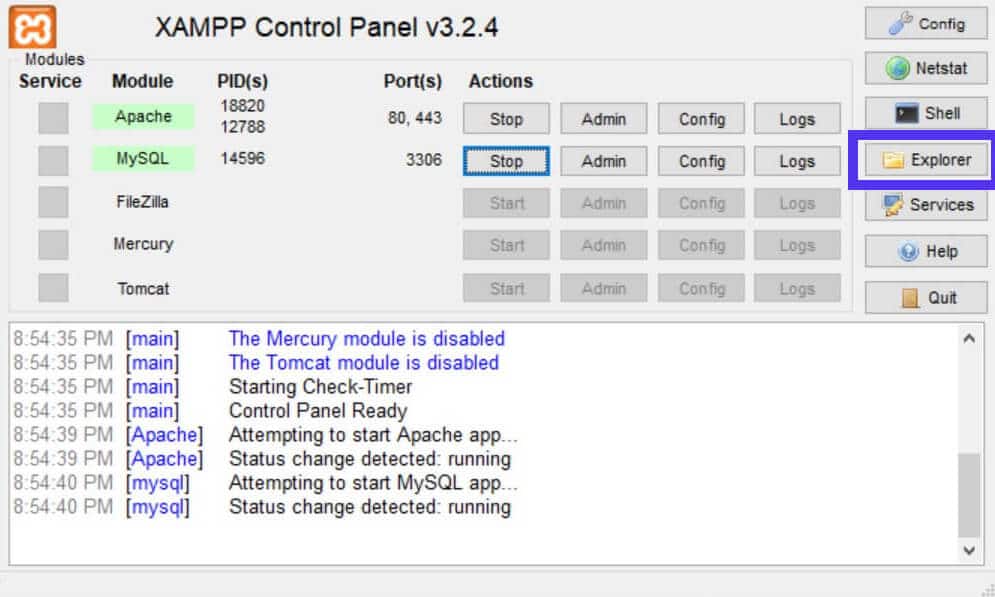 Click on the Explorer button on the right side of the window to open a file browser directly to the XAMPP folder.
 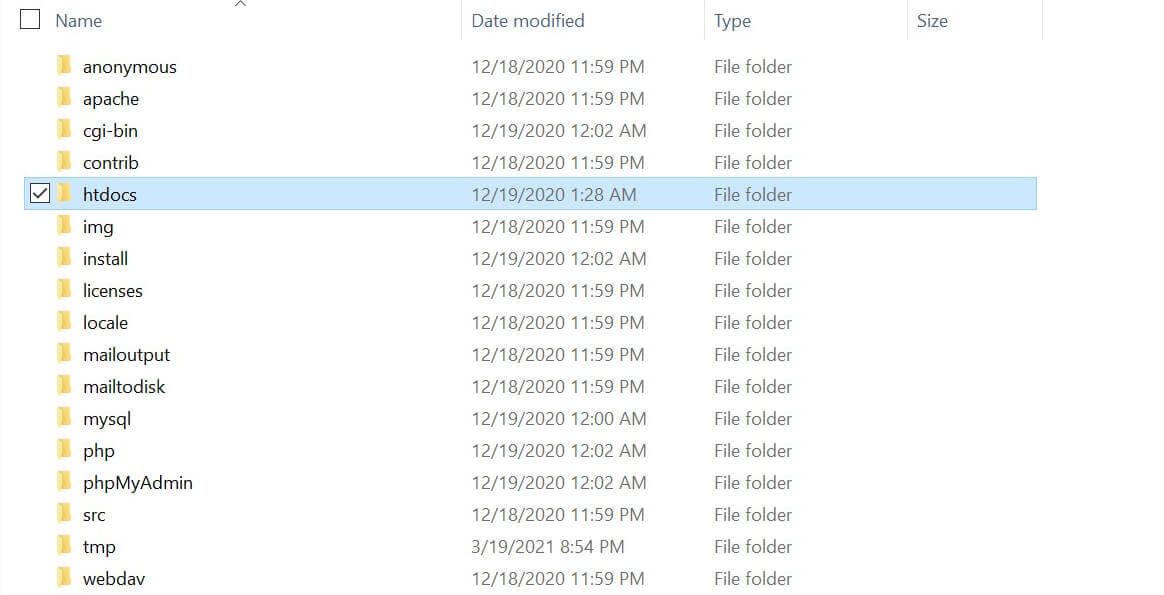 Navigate to the htdocs folder and then locate the index.php file. If you’re on Windows, it might simply say “index”. This is because file extensions are hidden by default. To correct this, click on View in the File Explorer ribbon and check the box beside File name extensions.
 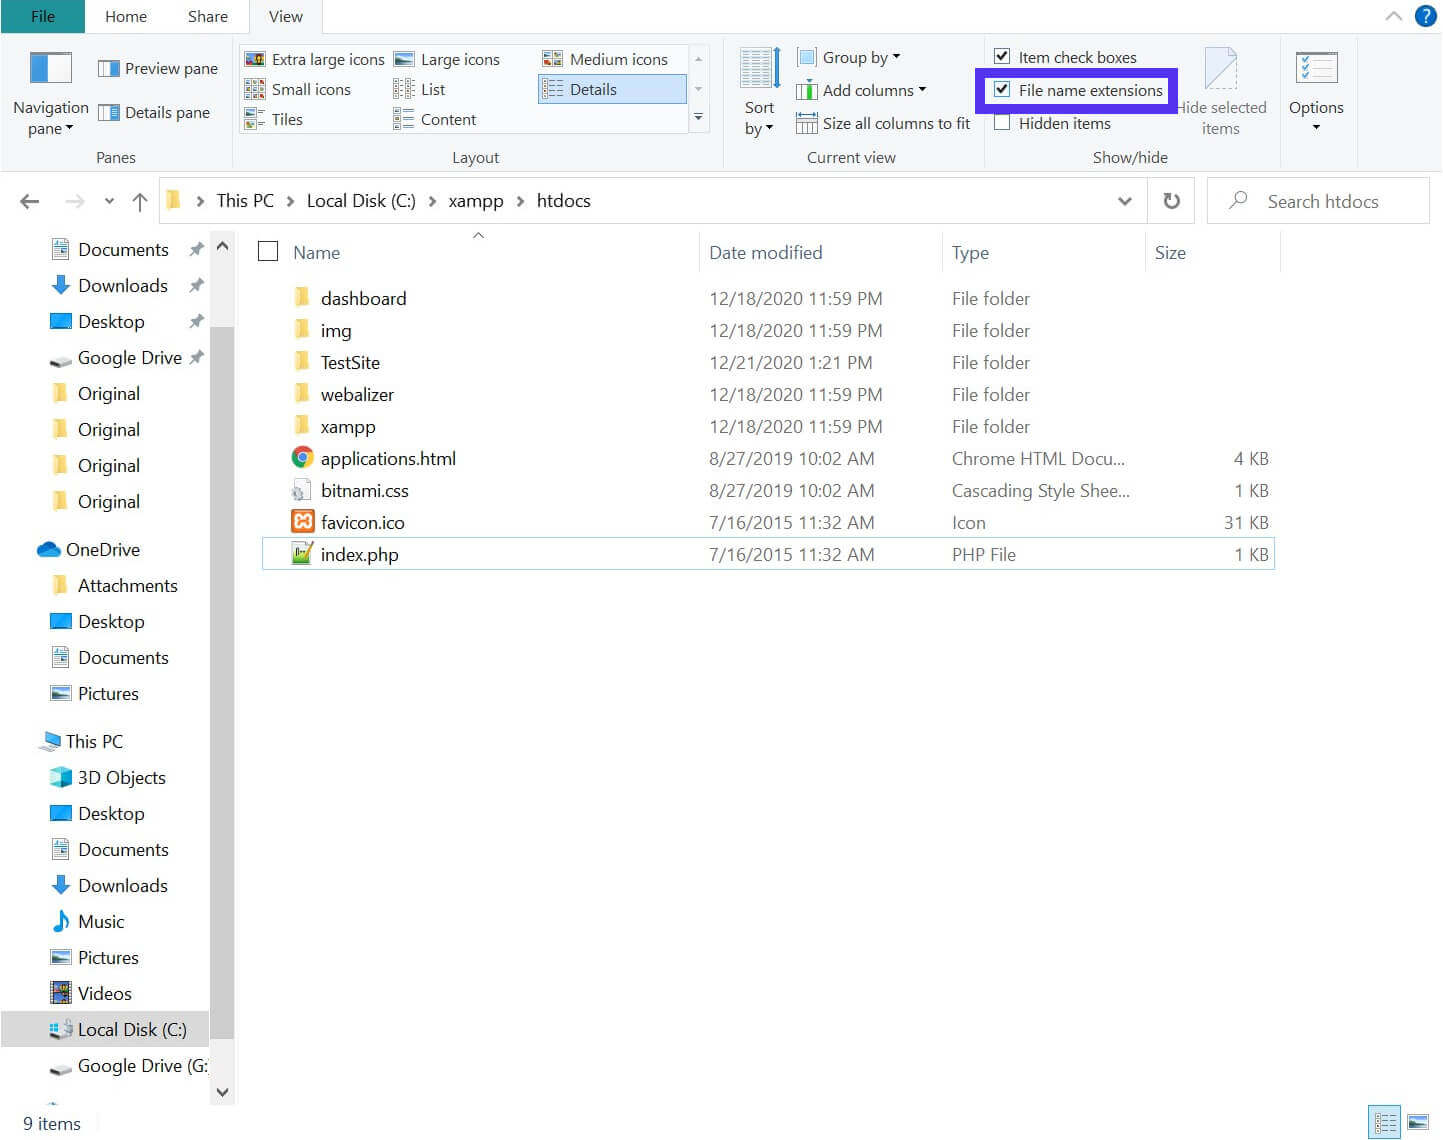 Next, right-click on the file and select Rename. Simply delete “php” and replace it with “txt”:
 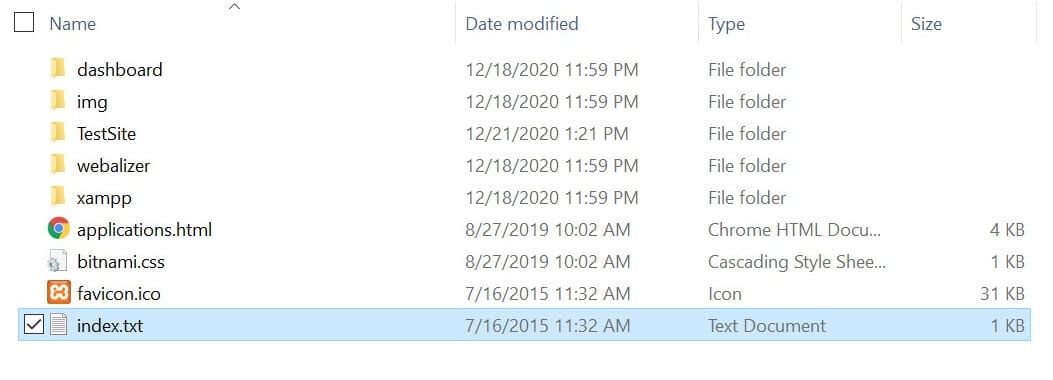 If you receive a prompt asking if you’re sure you want to change the file name, choose Yes. Then open a browser and try to navigate to “localhost”. You should now be presented with your list of directories.
2. Edit the httpd-vhosts.conf File
- On a Windows machine, the path to the file is: C:\xampp\apache\conf\extra\httpd-vhosts.conf
- On a Mac, the path is significantly different: ~/.bitnami/stackman/machines/xampp/volumes/root/etc/extra/httpd-vhosts.conf
In either case, start by opening the XAMPP Control Panel and clicking on Explorer.

Then navigate to the appropriate directory from the options listed above. When you get there, open the httpd-vhosts.conf file in a text editor.

Look at the “VirtualHost” sections. The line you’re looking for is “DocumentRoot”. If the path specified here ends at “htdocs”, that’s the problem. You should change it so that it ends at your project’s folder.
For example, the file may currently look like this:

After tweaking it, you’ll have something that looks like this:

The “DocumentRoot” line should end with the folder name of your website as listed in the “htdocs” folder. When you’re finished, save the changes and try to load localhost/xampp/index.php again.
Summary
If you’re unable to access your local site’s index at localhost/xampp/index.php, you’re not alone. This frustrating issue is relatively common, and unfortunately, the error provides little indication of what the problem might be.
Thankfully, it’s also a fairly simple issue to resolve, and you can go about it in two ways:
- Rename the index.php file to index.txt
- Edit the httpd-vhosts.conf file and change the “DocumentRoot” property
To help ensure your live site doesn’t experience any similar issues, consider hosting it with Kinsta. Our application hosting, database hosting, and managed WordPress hosting help keep your site running smoothly while you focus on what matters: providing an outstanding experience for your users.
Get all your applications, databases, and WordPress sites online and under one roof. Our feature-packed, high-performance cloud platform includes:
- Easy setup and management in the MyKinsta dashboard
- 24/7 expert support
- The best Google Cloud Platform hardware and network, powered by Kubernetes for maximum scalability
- An enterprise-level Cloudflare integration for speed and security
- Global audience reach with up to 35 data centers and 260 PoPs worldwide
Get started with a free trial of our Application Hosting or Database Hosting. Explore our plans or talk to sales to find your best fit.
Hand-picked related articles

How to Fix the XAMPP Error “Apache Shutdown Unexpectedly”
Learn how to fix the «Apache Shutdown Unexpectedly» error in the XAMPP local development tool following these steps.

How to Fix the XAMPP Error “MySQL Shutdown Unexpectedly” (3 Methods)
Have you encountered the «MySQL Shutdown Unexpectedly» error in XAMPP? This is common when you don’t run the software using administrator privilege…
Reading time 8 min read Publish date March 9, 2021 Topic MySQL Database Topic MySQL Error Topic XAMPP

How to Install WordPress Locally (Windows, macOS, Linux)
Sometimes it can be convenient to work on your own machine. Check out how to install WordPress locally using DevKinsta, XAMPP, WAMP, or MAMP.
Reading time 30 min read Publish date July 29, 2020 Topic DevKinsta Topic Localhost Topic WordPress Development
Subscribe to our Newsletter
Keep up with the latest web development trends, frameworks, and languages.