- Create a Custom Navigation Menu in WordPress Without Using Plugins
- Register Your New Custom Menu Location
- How to Display Our Custom Menu
- Additional Menu Customization
- ‘theme_location‘
- ‘menu_class’
- ‘menu_id’
- ‘container’
- ‘container_class’
- The Walker Parameter
- Conclusion
- Stay tuned!
- Вывод меню с помощью функции wp_nav_menu
- Примеры использования функции wp_nav_menu
Create a Custom Navigation Menu in WordPress Without Using Plugins
No matter what WordPress theme you are using it will almost certainly provide at least one menu location where you can display your menu (normally in your website header). The menus can be easily created from inside the admin area and quickly added to these pre-set location(s). But what do you do if you need another menu to display elsewhere on your website? In this tutorial we’re going to look at how you can create your own navigation menu that can be displayed in a location of your choice without having to use a plugin.
Register Your New Custom Menu Location
The first thing we need to do is to register your new custom menu’s location. To do this, open your active theme’s functions.php file with your text editor of choice (like Sublime) and add the following code:
function my_custom_menu() < register_nav_menu('my-custom-menu',__( 'My Custom Menu' )); >add_action( 'init', 'my_custom_menu' );In this piece of code we#’ve used the add_action() hook to add a callback function my_custom_menu() . This means that the my_custom_menu() function will be executed along with the default core functions that are executed every time the init action is called. The “My Custom Menu” string is the readable version that you will see in the admin page.
Inside the function, the core function register_nav_menu is used in order to register a navigation menu location for our theme. In case you want to register multiple menus you can use the register_nav_menus() and define the menu locations inside an array like this:
function my_custom_menu() < register_nav_menus( array( 'my-custom-menu' =>_( 'My Custom Menu' ), 'my-custom-menu-2' =>_('My Second Custom Menu') ) ); > add_action( 'init', 'my_custom_menu' );To confirm the results, go to your admin area under Appearance >Menus. You will notice that your custom menu location is included in the Menu Settings.
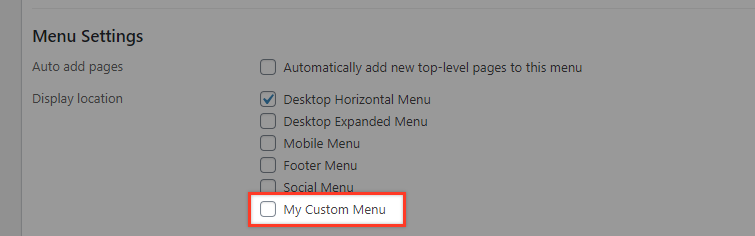
Note: If we select this location at this point, the menu will not display anything at all at the frontend.
How to Display Our Custom Menu
Let’s say that we want the new menu location to be used for a secondary horizontal menu that will be located below the “Desktop Horizontal Menu” that’s already present in our theme.
To achieve this we will insert some code in the theme’s template where we want the menu to be displayed. In this example we use the Twenty Twenty theme and edit its header.php file to display our menu. You will find this file under the theme’s folder.
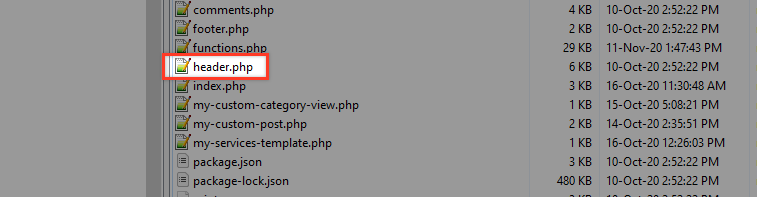
Open the header.php file with your editor and find this element in the code around line 33.
Right below this section we will put our code to display our new custom menu location: ‘my-custom-menu’.
The theme_location value must be identical to the name you provided for your menu in the functions.php code we pasted before. In our case: ‘my-custom-menu’.
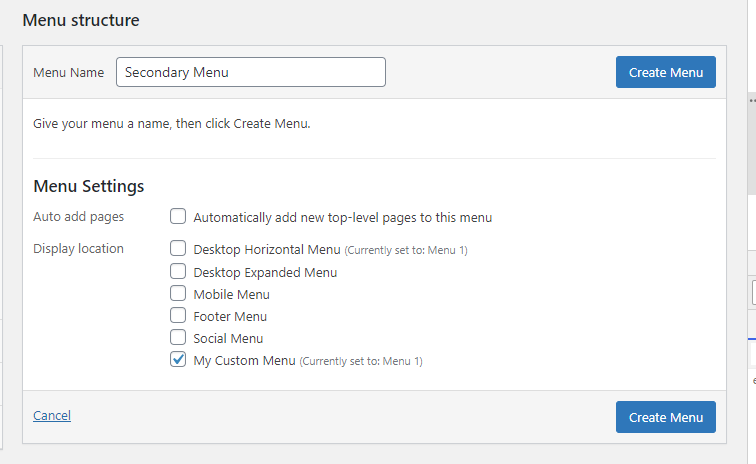
Now let’s create a test menu to see if this is working. To do this go to Appearance >Menus and start creating a new menu.

Give the menu the title “Secondary Menu”, select “My Custom Menu” for a location and then hit the “Create Menu” button.
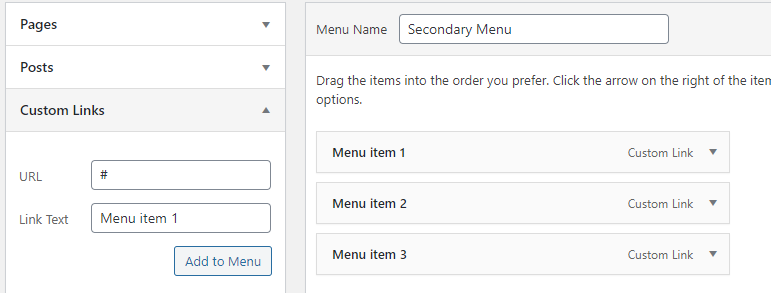
Finally add some items to the menu (for example Menu item 1, Menu item 2, Menu item 3) and then save the menu.
Let’s see what we have now in the frontend.
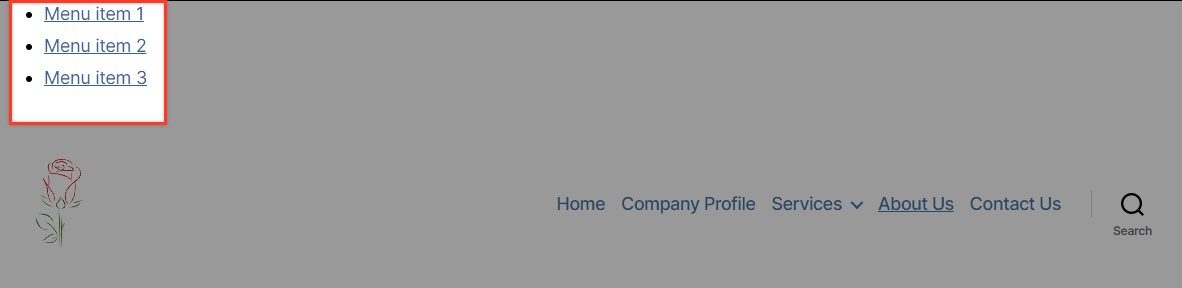
We’ve managed to show our new menu, but it is quite messy, isn’t it?
Try our Award-Winning WordPress Hosting today!


If we view our source code we will notice that the wp_nav_menu() function created this HTML piece of code
So, we can use the classes described in the code to beautify our menu. To do this we’ll use some CSS. Find style.css (this is normally in the same location as the header.php file) and then open it with your editor to add this code:
ul#menu-secondary-menu < text-align: right; padding: 10px 30px; >ul#menu-secondary-menu li < list-style: none; display: inline-block; padding: 1px; >ul#menu-secondary-menu li:hover < border: 1px solid #c00202; padding: 0; border-radius: 3px; >ul#menu-secondary-menu li a
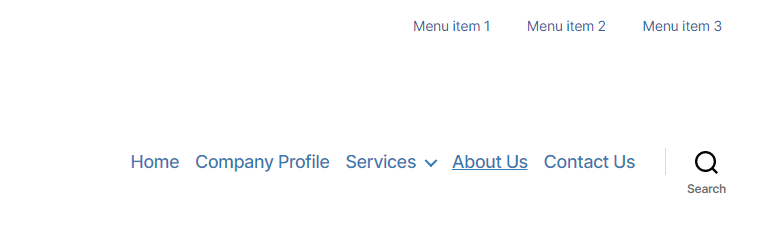
The result will be much neater now and much more in keeping with the style of our demo website.
Additional Menu Customization
The wp_nav_menu() function that WordPress provides for displaying menus comes with a range of options that allow you to customize it further.
‘theme_location‘
As we described above, this parameter corresponds to the keys passed to the register_nav_menus() function in functions.php
wp_nav_menu( array( 'theme_location' => 'my-custom-menu' ) ); ‘menu_class’
There is the ‘menu_class‘ option that allows you to specify your own class for the menu.
wp_nav_menu( array( 'theme_location' => 'my-custom-menu', 'menu_class' => 'my-custom-menu' ) ); 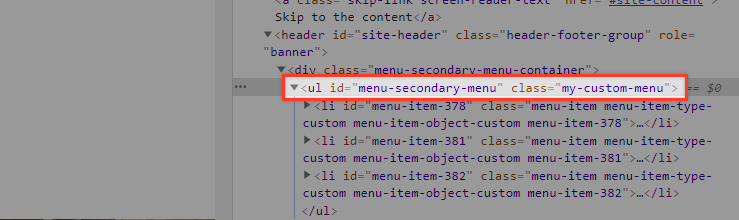
As you may have already noticed the class does not replace any other class but is added in the ul element instead.
‘menu_id’
- element will be something like this.
When this option is not used, the id will be the menu slug, which will be incremented when using multiple instances.
‘container’
This parameter define the type of element that surrounds the menu. The default is ‘div’. If for example you use this code:
wp_nav_menu( array( 'theme_location' => 'my-custom-menu', 'container' => 'nav', ) ); 
‘container_class’
This is a class that is applied to the menu parent element:
wp_nav_menu( array( 'theme_location' => 'my-custom-menu', 'container_class' => 'my-custom-menu-wrapper', ) ); 
You can also insert content before or after each menu item link by using the ‘before’ and ‘after’ parameters. This is very useful if you want to prepend a dash or icon or wrap the menu items in a span tag. You can try the example below yourself to see this in action:
wp_nav_menu( array( 'theme_location' => 'my-custom-menu', 'before' => '', 'after' => '', ) );wp_nav_menu( array( 'theme_location' => 'my-custom-menu', 'before' => '-', ) );wp_nav_menu( array( 'theme_location' => 'my-custom-menu', 'before' => '-', ) );You can also add icons to the menu items. Try for example installing the Font Awesome plugin to include their icon library and use the ‘before’ menu option to apply a font-awesome icon to the menu items.
wp_nav_menu( array( 'theme_location' => 'my-custom-menu', 'before' => ' ', ) ); You can find the code for each icon in the plugin’s icon list.
The Walker Parameter
Last but not least, we will provide an example of how the walker parameter helps customize menus. If you don’t know what the WordPress walker class is then the following probably won;t make much sense. We’d suggest reading ‘Getting Familiar with the WordPress Walker Class‘ first.
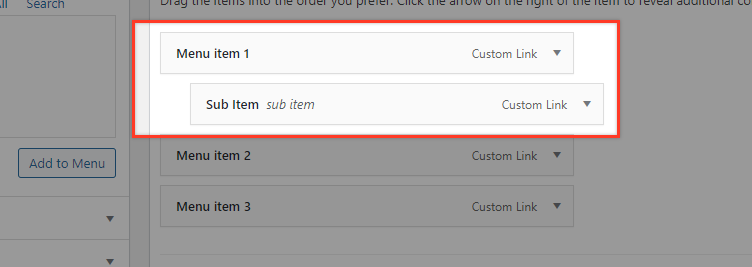
wp_nav_menu( array( 'walker' => new Walker_Custom_Menu ) ); To demonstrate the Walker class, we will add a “Sub item” on our menu.
We will override the default Walker Class that WordPress provides. This is located in the wp-includes/class-walker-nav-menu.php file. To achieve that go to your function.php file and insert the code below:
if ( !class_exists('My_Nav_Menu_Walker') ) < class My_Nav_Menu_Walker extends Walker < var $tree_type = array( 'post_type', 'taxonomy', 'custom' ); var $db_fields = array( 'parent' =>'menu_item_parent', 'id' => 'db_id' ); function start_lvl(&$output, $depth) \n"; $output .= " function end_lvl(&$output, $depth) < $indent = str_repeat("\t", $depth); $output .= "$indent\n"; > function start_el(&$output, $item, $depth, $args) < $value = ''; $classes = empty( $item->classes ) ? array() : (array) $item->classes; $classes = in_array( 'current-menu-item', $classes ) ? array( 'current-menu-item' ) : array(); $class_names = join( ' ', apply_filters( 'nav_menu_css_class', array_filter( $classes ), $item, $args ) ); $class_names = strlen( trim( $class_names ) ) > 0 ? ' ' : ''; $id = apply_filters( 'nav_menu_item_id', '', $item, $args ); $id = strlen( $id ) ? ' ' : ''; $attributes = ! empty( $item->attr_title ) ? ' title="' . esc_attr( $item->attr_title ) .'"' : ''; $attributes .= ! empty( $item->target ) ? ' target="' . esc_attr( $item->target ) .'"' : ''; $attributes .= ! empty( $item->xfn ) ? ' rel="' . esc_attr( $item->xfn ) .'"' : ''; $attributes .= ! empty( $item->url ) ? ' href="' . esc_attr( $item->url ) .'"' : ''; $item_output = $args->before; $item_output .= ''; $item_output .= ''; $item_output .= $args->link_before . apply_filters( 'the_title', $item->title, $item->ID ) . $args->link_after; $item_output .= ''; $item_output .= "\n"; $item_output .= $args->after; $output .= apply_filters( 'walker_nav_menu_start_el', $item_output, $item, $depth, $args ); > > >Now in your headers.php replace your menu code with this one (we will output both menu versions on purpose just to compare the results):
wp_nav_menu(); // Default 'walker' => new Walker_Nav_Menu() wp_nav_menu( array( 'walker' => new My_Nav_Menu_Walker() ) ); 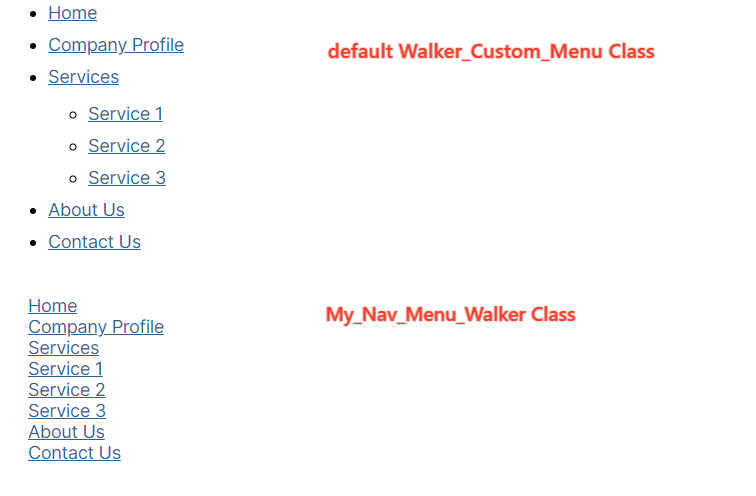
Comparing this code with the original Walker_Nav_Menu Class you will notice that $tree_type and $db_fields remained untouched but the rest are changed. Take your time and compare both code and HTML outputs on these two versions of the same menu and try to experiment yourself by playing around with My_Nav_Menu_Walker Class.
If you are interested in taking your custom plugin to the next level, we highly recommend that you study our extensive series on how to create a WordPress plugin with object-oriented programming.
In these articles, we have tutorialized the techniques that will improve your plugin’s reusability and extensiveness, as well as security and scalability. Don’t miss out on this valuable resource!
Conclusion
Menus on websites are clearly pretty important! Being able to have full control over the placement and output of menus extends your capabilities as a theme developer and opens up a range of exciting new possibilities when designing websites without having to rely on plugins which is always great to be able to do.
Start Your 14 Day Free Trial
Try our award winning WordPress Hosting!


Stay tuned!
Subscribe to our blog and get awesome WordPress content straight to your inbox.
Вывод меню с помощью функции wp_nav_menu
В позапрошлой статье блога я писал про интересное нововведения последней версии wordpress — специальный механизм создания и управления меню в wordpress 3.0. Теперь стало намного удобнее и проще обычным пользователям создавать различные по сложности меню, которые могут состоять не только страницы или категории блога, но и иметь ссылки на любые URL. Для отображения меню в шаблоне используется специальная функция wp_nav_menu — про нее сегодня и расскажу.
Если в админке wordpress нету раздела меню, то его можно активировать добавлением специального кода в файл functions.php
if (function_exists('add_theme_support')) { add_theme_support('menus'); } ?> Далее создаете меню в соответствующему пункте раздела «Внешний вид» (Appearence). После этого в шаблоне блога в нужном нам месте выводим само меню через код:
Здесь first — название созданного нами меню. Это использование функции в общем случае без виджетов, с ними там нужно будет немного по другому работать. Тем не менее функция wp_nav_menu может выводиться и без аргументов, в результате чего будут «просматриваться» разные ситуация — сначала совпадение по названию меню, если для него указан хотя бы один пункт меню, в противном случае будет просто отображено непустое меню ну и т.п. Но опять же советую просто использовать приведенный выше код и не разбираться потом что должна выводить функция без аргументов. Ее синтаксис выглядит следующим образом:
Здесь используются следующие параметры:
$menu — выбранный идентификатор для меню — ID, slug или название меню.
$container — меню UL по умолчанию «оборачивается» в контейнер DIV с помощью данной настройки.
$container_class — указывает класс контейнера, по умолчанию его значение menu—container, то есть в нашем случае, например, будет класс menu-first-container.
$container_id — можно добавить контейнеру ID, по умолчанию не указано.
$menu_class — класс для элемента меню UL, его значение — menu.
$menu_id — ID для элемента ul, по умолчанию равно значению menu-
$echo — если вы не хотите отображать меню, а возвращать значение функции используйте для этой настройки значение 0.
$fallback_cb — если меню не существует, вызывается функция wp_page_menu.
$before — задает текст, который выводится перед ссылкой А.
$after — текст после ссылки А, по умолчанию он, как и предыдущий, пустые.
$link_before — выводит фразу перед текстом ссылки, не задано.
$link_after — выводится после текста ссылки, тоже пустое.
$depth — задает количество уровней иерархии для вывода меню, значение по умолчанию 0 выводит все меню целиком.
$walker — какой-то непонятный пользовательский «walker object», наверное больше понадобится продвинутым разработчикам.
$theme_location — локация темы, где будет использовано меню, должна быть активирована через register_nav_menu() для того чтобы пользователь смог ее выбирать. Тоже какая-то не совсем понятная настройка, судя по всему, при работе с виджетами.
Примеры использования функции wp_nav_menu
Самый простой код, приведенный в кодексе:
Хотя, как я говорил выше, лучше всего сразу указывать название меню дабы не возникало разногласий.
Меняем класс для элемента меню UL
Убираем контейнер DIV из меню