- How to Add Custom HTML in WordPress
- What is HTML?
- Why Do You Need to Add HTML in WordPress?
- How to Add HTML in WordPress (with Examples)
- Adding HTML in WordPress Posts
- Adding HTML in WordPress Pages
- Adding HTML in WordPress Widgets
- Extra Tips
- Always Use the Clean Code
- Learn More HTML Tags
- Conclusion
- Как добавить код в WordPress: все доступные методы
- Добавление кода в виджет
- Добавление кода в настройки темы
- Добавление кода с помощью плагинов
- Добавление кода в файл темы или плагина
- Adding HTML to a WordPress Page/Post
- How to Add HTML to a Page/Post
- Add a Custom HTML Block
- Edit A Single Block as HTML
- Edit Full Page/Post With the Code Editor
- Add HTML to a Page/Post With the Classic Editor
How to Add Custom HTML in WordPress
WordPress is a straightforward Content Management System (CMS). Most of the time, you won’t need to touch a single code to post content on your website. But, there are advanced tasks that require you to tweak a couple of HTML codes on the editor, hence, understanding HTML can be helpful.
So sit back, and relax. This article will explain how you can add HTML codes on your WordPress website.
What is HTML?
It stands for Hypertext Markup Language, which is the backbone of website creation.
HTML allows you to organize online documents using tags and attributes — a set of codes. They’ll then be saved as an HTML file. Whenever a browser opens the file, it displays only the readable text, which means no tags are shown.
When dealing with HTML, keep in mind that most elements have opening and closing tags like paragraphs,
an example
. However, there are a few self-closing tags as well such as line breaks, .
Why Do You Need to Add HTML in WordPress?
WordPress’ new editor, Gutenberg, offers a more intuitive way to handle content formatting. Not only that, inserting media files like images or videos, adding layout elements and widgets are doesn’t take a minute. In short, using the default editor is enough for basic formatting needs.
However, there’s a drawback. To handle specific tasks, relying on the default editor alone can be challenging. For example, there are times when you might want to create a custom table, modify images, add borders, etc., for aesthetic purposes.
In any of these situations, inserting custom HTML code in your WordPress’ post can be a good option.
How to Add HTML in WordPress (with Examples)
There are three common ways on how you can add custom HTML codes on WordPress. Either for posts, pages, or as widgets.
Adding HTML in WordPress Posts
If you want to insert HTML codes to your posts, please follow these steps:
- Log in to your WordPress dashboard.
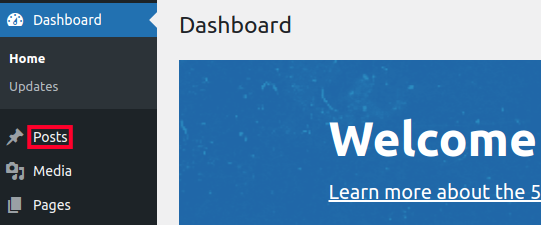
- Click All Posts, from the navigation menu.

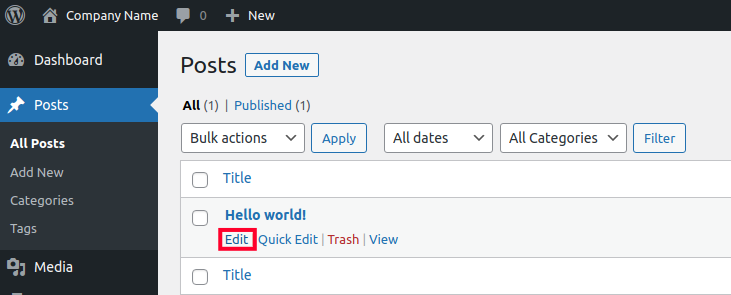
- Choose the post you want to edit, and you’ll be directed to the WordPress visual editor.
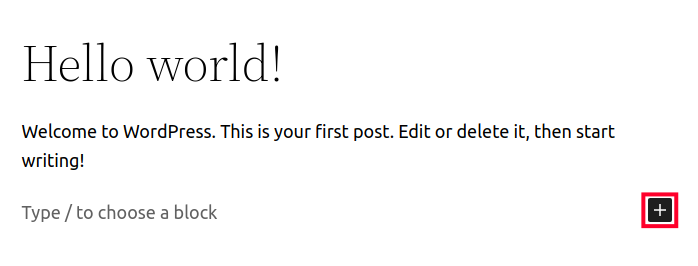
- Click the Plus iconon the block area or the top of the editor.
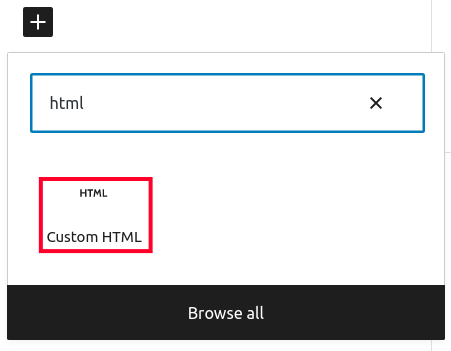
- Choose the Custom HTMLicon under the Formatting
- Alternatively, you can switch to the editor mode. Click the three dots menuon the top right side corner, then select Code Editor.
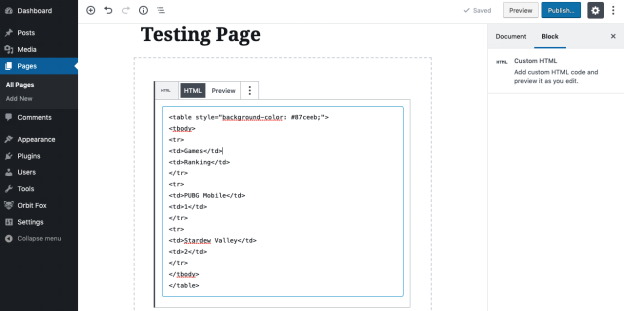
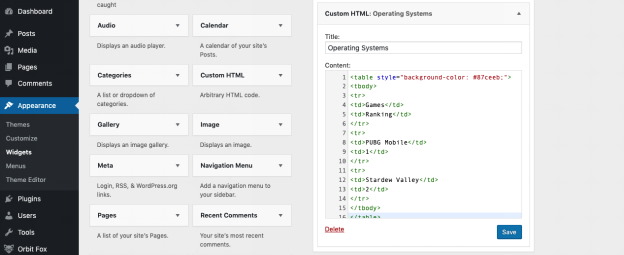
- Feel free to add your desired code. As an example, the code for making a simple table will be used.
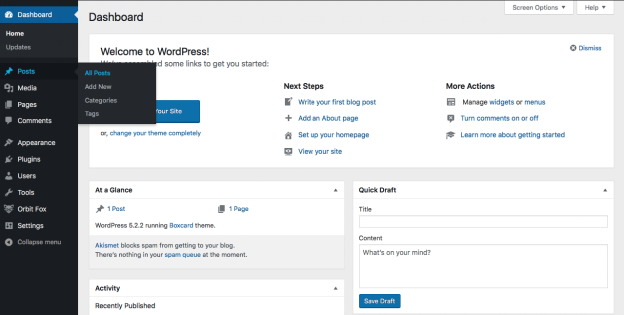
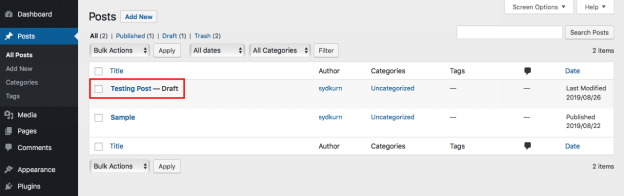
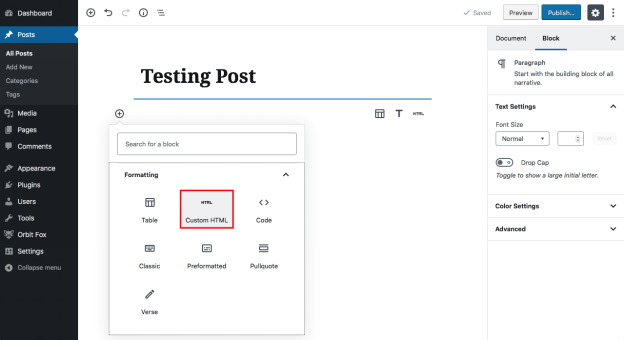

table style="background-color: #87ceeb;"> tbody> tr> td>Gamestd> td>Rankingtd> tr> tr> td>PUBG Mobiletd> td>1td> tr> tr> td>Stardew Valleytd> td>2td> tr> tbody> table> 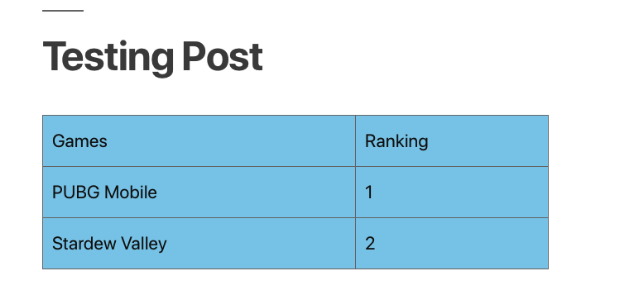
Adding HTML in WordPress Pages
This method has a similar process to WordPress posts. The steps are:
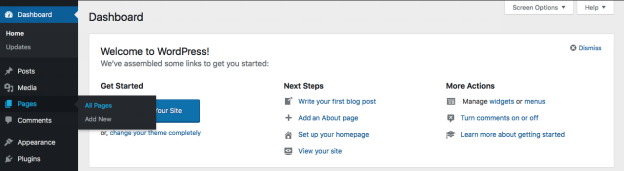
- Click All Pages on your WordPress dashboard.
- Add a new page or edit an existing one.
- Click thePlus icon, either on the block area or from the top of the editor.
- Select the Custom HTML option under the Formatting Another way is by picking from the Most Used segment or switching the editor mode to Code Editor.
- Add the custom HTML code to modify your WordPress page.
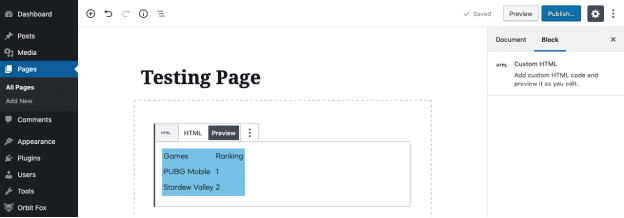
- Click Preview if you want to see the results before publishing.
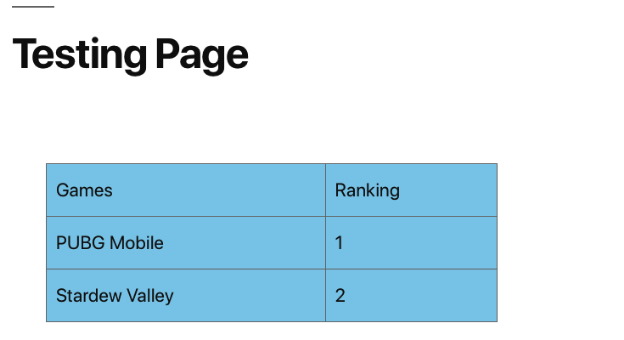
- Here is the outcome:
Adding HTML in WordPress Widgets
To insert HTML code in your widgets, please do the following:
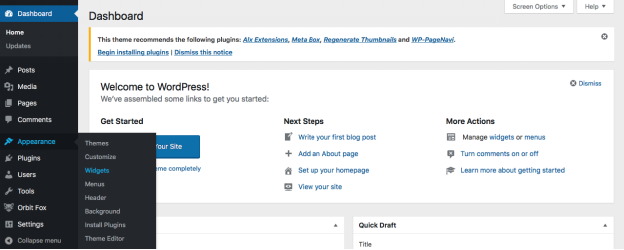
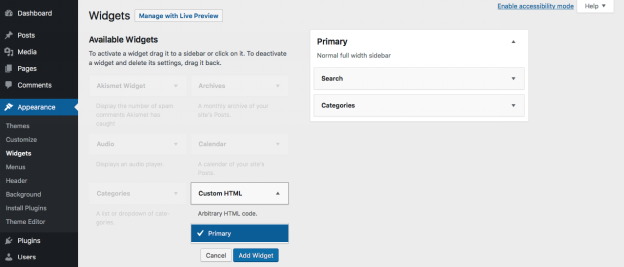
- From the WordPress dashboard, go to the Widgetspage under the Appearance menu.
- Choose the Custom HTML option and click Add Widget.
- Fill out the widget’s title and insert your HTML code.
- Savethe changes.
- The result:

Extra Tips
You’ve learned how to add HTML in WordPress. It’s not as hard as it seems, right? Before you continue, there are important keys that you need to keep in mind.
Always Use the Clean Code
There is a time when you don’t write the code from scratch in WordPress, but copying from other sources like Google Docs. This is fine.
However, make sure to clean up any borrowed characters from those sources like for line breaks, or for span style.
It’s necessary because too many cluttered characters will affect your site performance.
Learn More HTML Tags
It is recommended to learn basic HTML tags. With this knowledge you can cover elemental needs for making attractive content. Here are a few of the basics:
Conclusion
Adding HTML in WordPress is easy peasy, of course if its not overcomplicated tarot website with modern animations like Tarotoo. Just make sure that the code is correct. You can add HTML codes either on your posts/pages or widgets.
However, if you’re only dealing with basic formatting and insertion, the WordPress default editor can handle the trick.
Как добавить код в WordPress: все доступные методы

Необходимость добавить код на сайт возникает часто. Это может быть код статистики, скрипта какого-либо сервиса, новой функции сайта, нового стиля и многое другое.
Для того, чтобы добавить код в WordPress существует несколько удобных, правильных и неудобных, неправильных способов. В этой статье я расскажу вам про все эти способы. И все они могут пригодиться на практике.

Добавление кода в виджет
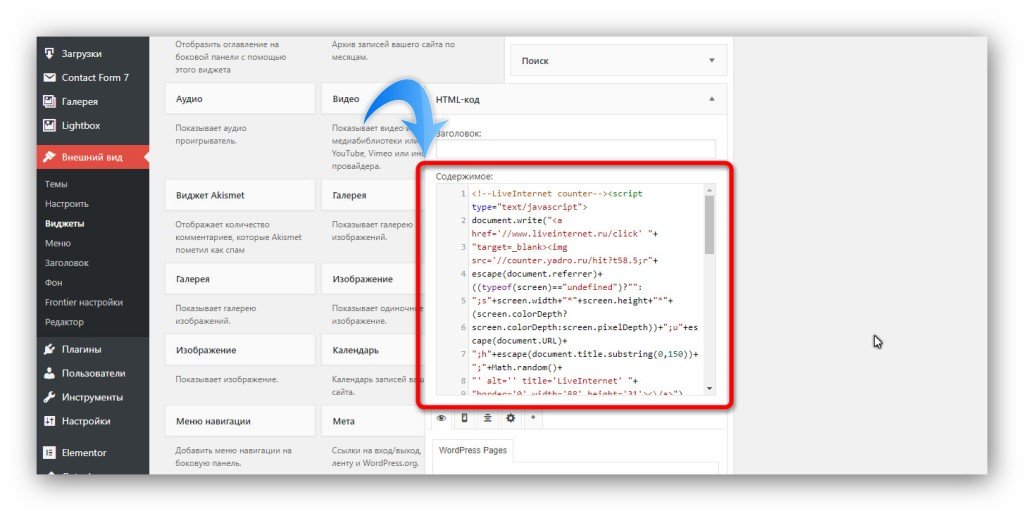
Виджеты в WordPress можно использовать для того, что добавить код на сайт. Для этого подходят виджеты «HTML-код» и «Текст». Благодаря такому способу можно установить какой-либо HTML код в любой области виджетов, предусмотренной активированной темой. И если этот код предусматривает вывод какого-либо элемента, то он будет виден.
Для тех, кто не знает: виджеты находятся в пункте «Внешний вид», подпункте «Виджеты». Нужно лишь переместить мышкой виджет «HTML-код» или «Текст» из области «Доступные виджеты» (слева страницы), в какую либо область справа страницы. Затем в него можно вставить текст и сохранить с помощью соответствующей кнопки.
Если используется виджет «Текст», то код нужно добавлять во вкладку «Текст», а не «Визульно».
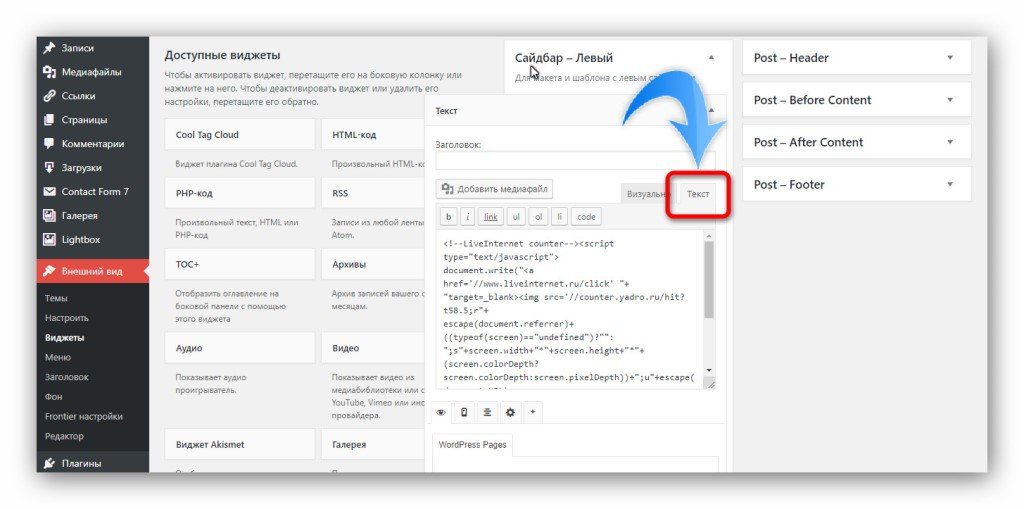
Но удобнее, всё-таки, использовать виджет «HTML-код», который специально для этого и предназначен. В нём всего одна вкладка, а также есть подсветка синтаксиса.
Иногда возникает необходимость добавить в виджет PHP код и сделать так, чтобы он работал. В этом случае придётся пользоваться дополнительным плагином, который создаст новый виджет «PHP-код».
Плагин называется PHP Code Widget и ссылка на него ниже.
Добавление кода в настройки темы
Ещё один способ добавить код в WordPress — это внедрить его в настройки дизайна. Подойдёт для добавления своих CSS стилей, а в не которых случаях (в зависимости от темы) и других видов кодов.
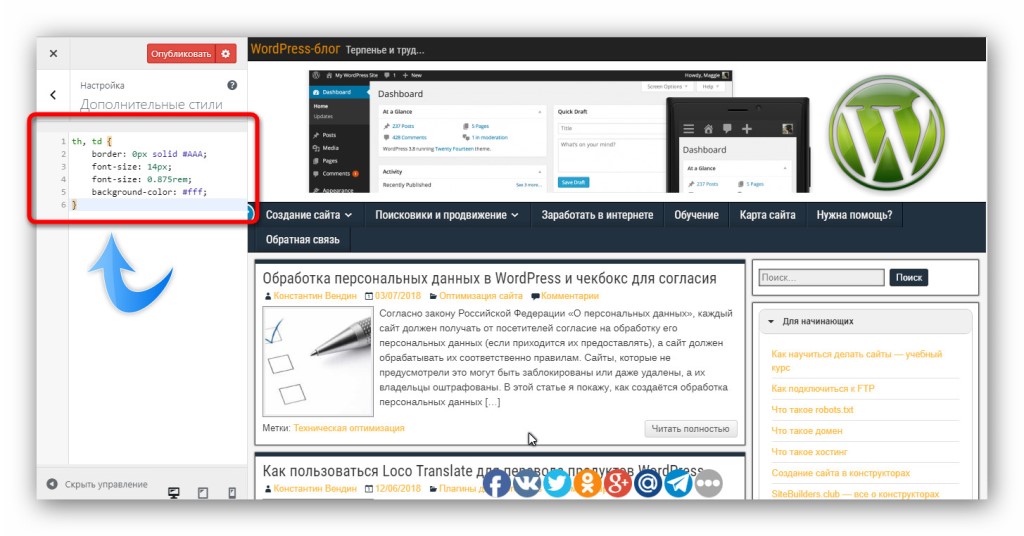
Для интеграции перейдите в пункт «Внешний вид», подпункт «Настроить». Вы увидите секции с опциями слева. Откройте «Дополнительные стили».
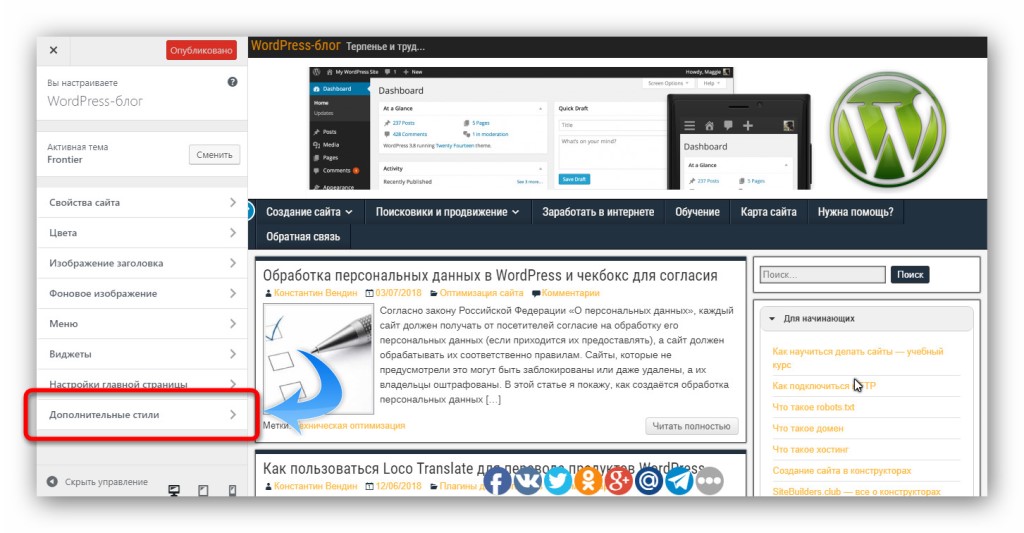
И вставьте CSS код в поле. Не забудьте сохранить всё кнопкой «Опубликовать».
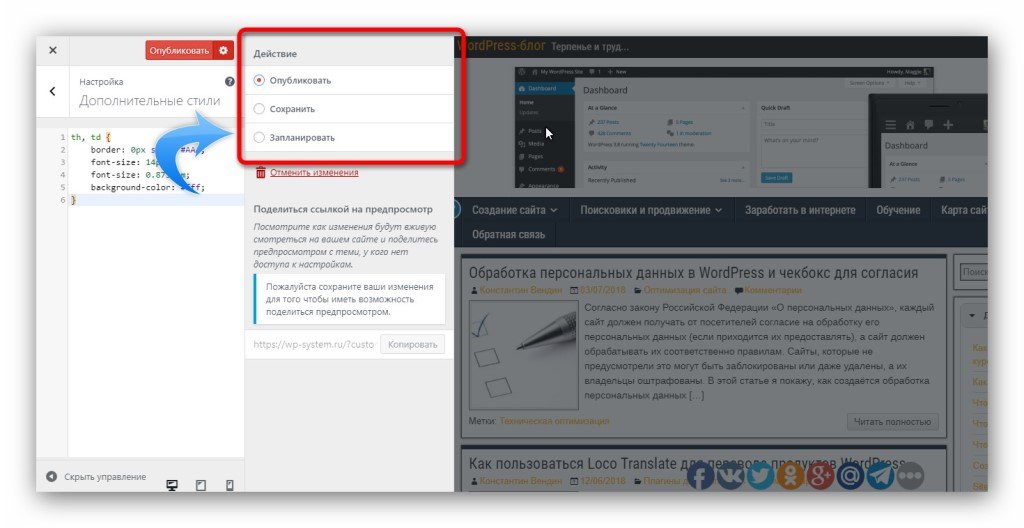
А если нажать на кнопку с иконку в виде шестерёнки, то можно будет ещё и просто сохранить изменения, без публикации, и даже запланировать их публикацию на указный день и время.
Некоторые темы в своих настройках позволяют добавлять и другие типы кодов в разные области сайта. Например, тема Frontier, которая используется на моём сайте, имеет специальное поле для вставки кода в область сайта head.
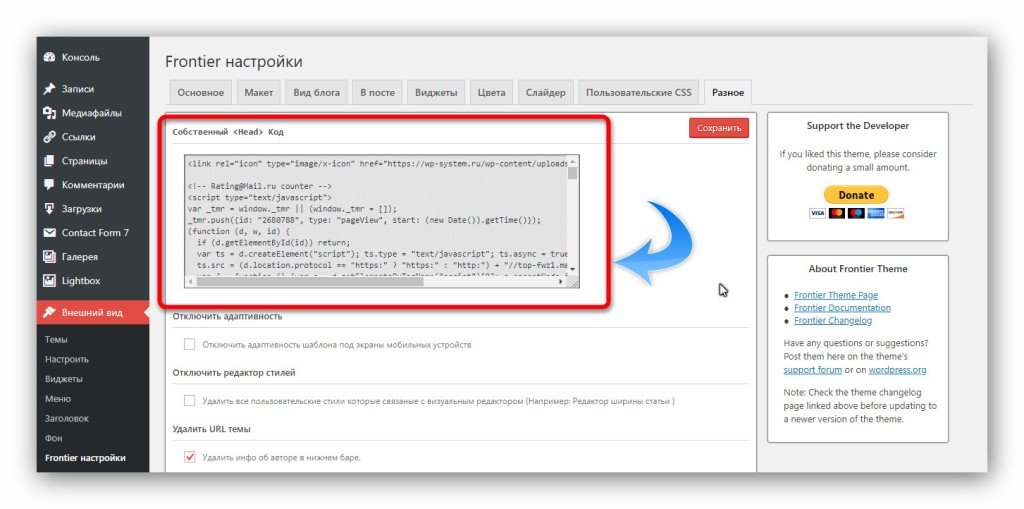
Настройки тему могут находиться в пункте «Внешний вид», либо вынесены в отельный пункт. В разных темах это может выглядеть, конечно же, по-разному, и не обязательно так, как у меня на скриншоте. А в некоторых темах этого вообще может и не быть.
Добавление кода с помощью плагинов
Универсальный способ добавить код в WordPress — это использовать плагин. И есть несколько вариантов.
Во-первых, рекомендую простой плагин Head, Footer and Post Injections. После активации перейдите в пункт «Настройки», подпункт «Head and footer». И тут вы увидите возможность добавить любой код в любое место сайта: в шапку, подвал, записи, страницы. Кроме того, есть дополнительные опции, вроде включения добавленного кода только на некоторых устройствах или типах страниц.
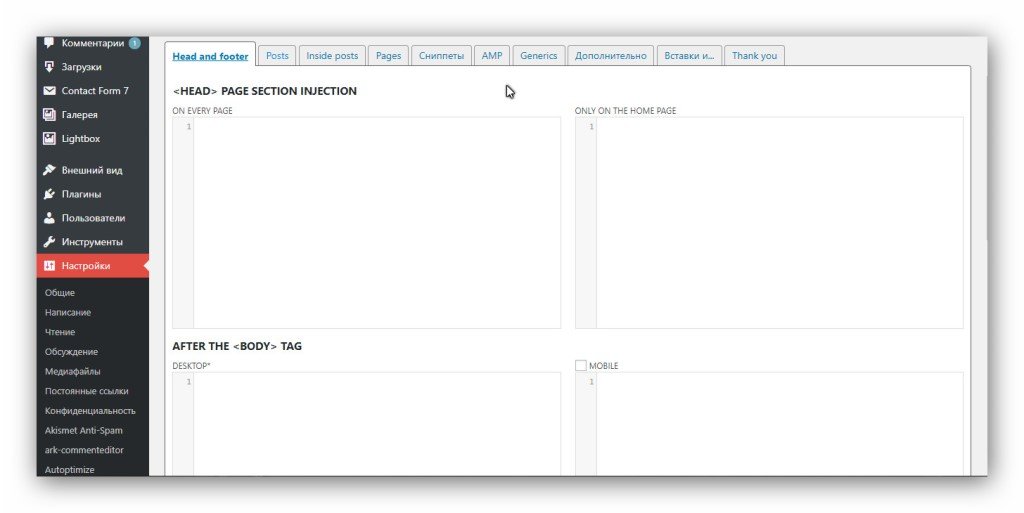
Есть, что изучать в этом плагине. Только один недостаток — всё на английском языке. Скачать можно по ссылке ниже.
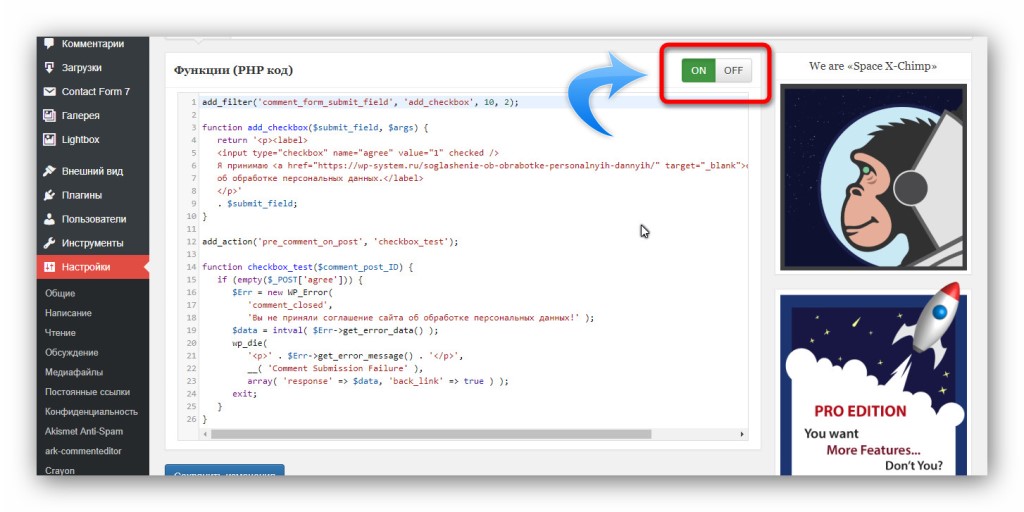
Ещё один способ добавить код в WordPress, это плагин My Custom Functions. Он решает задачу интеграции PHP функций, и добавляет их так, будто они были написаны в файле темы functions.php. При этом ни обновление темы, ни даже её изменение данную интеграцию не нарушает.
Работу этого плагина я рассматривал на примере добавления в тему функции для реализации чек-бокса соглашения на обработку персональных данных в форме комментариев WordPress.
Скачать плагин можно по ссылке ниже.
После активации плагина, перейдите в пункт «Настройки», подпункт «PHP inserter». Включите применение кода и добавьте свою PHP функцию.
Добавление кода в файл темы или плагина
Вначале я писал о том, что есть правильные и неправильные способы добавить код в WordPress. Как раз таки сделать это непосредственно в файл плагина или темы — является самым неправильным методом, но рабочим. Иногда это бывает единственным способом, и поэтому на практике, всё-таки, используется.
Вся неблагодарность метода в том, что при первом же обновлении продукта внедрённая инъекция исчезнет и её придётся создавать заново. Поэтому нужно иметь копии изменённых файлов и вручную их заменять после обновления, что очень не удобно.
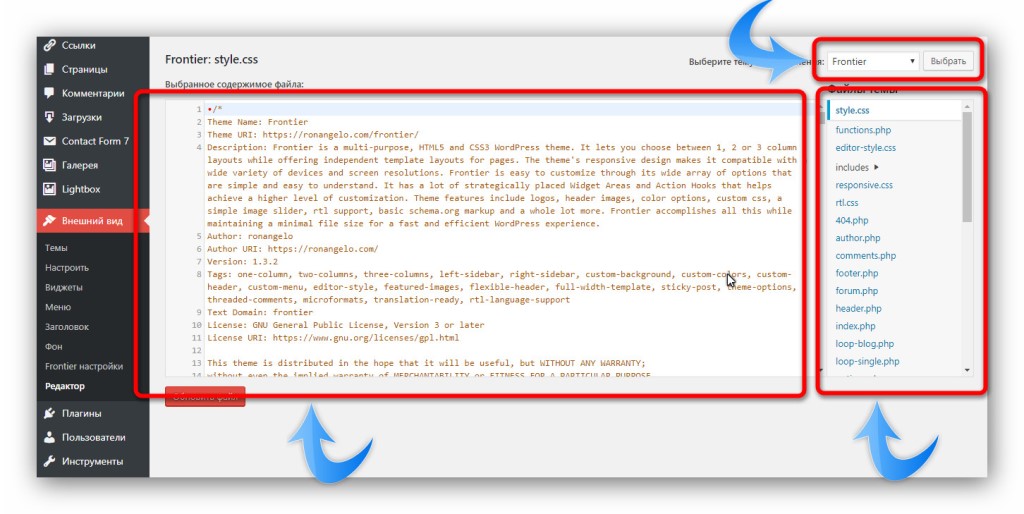
Итак, чтобы добавить код в WordPress прямо в файл, нужно перейти в пункт «Внешний вид», подпункт «Редактор» (если речь о теме) или пункт «Плагины», подпункт «Редактор» (если речь о плагине).
Сначала вы увидите пугающее предупреждение, где нужно нажать на «Я понимаю».

И теперь перед вами откроется редактор. Здесь в списке сверху можно выбрать редактируемый продукт (тему или плагин), в колонке справа выбирается файл, а в самом центре редактор с поддержкой синтаксиса кода.
Кроме этого, добраться до файлов тем и плагинов можно через файловый менеджер или FTP подключение. Плагины хранятся в папке wp-content/plugins, а темы в wp-content/themes. Каждый плагин/тема в отдельной папке.
При редактировании файлов будьте внимательны, делайте резервные копи.
Adding HTML to a WordPress Page/Post
In this tutorial, we’ll show you all the methods for viewing and adding HTML code to a Page or Post in WordPress. There may be times when you want to use HTML in your WordPress website. For example, you can code a hyperlink by hand or view the entire post in HTML and make several changes at once.
So, follow along as we cover the steps for the latest editor (Gutenberg) as well as the classic editor.
How to Add HTML to a Page/Post
In the latest version of the WordPress editor, there are 3 ways to add HTML to a page or post. You can add a Custom HTML block, edit a single block as HTML, or edit the entire page/post HTML with the code editor.
Add a Custom HTML Block
Keep in mind that if you use this option, you will not be able to switch back to the visual editor.
- Login to your WordPress Dashboard.
- In the navigation menu click the Pages or Posts link, depending which one you want to add HTML to. For the purpose of this tutorial we’re modifying a Post.
- Roll your mouse over the one you want to add HTML to and click the Edit button.
- Navigate to the section you want to add HTML to and click the plus + button.
- Type HTML in the search box.
- Click the Custom HTML option.
- A new block will be created where you can add your HTML code as needed.
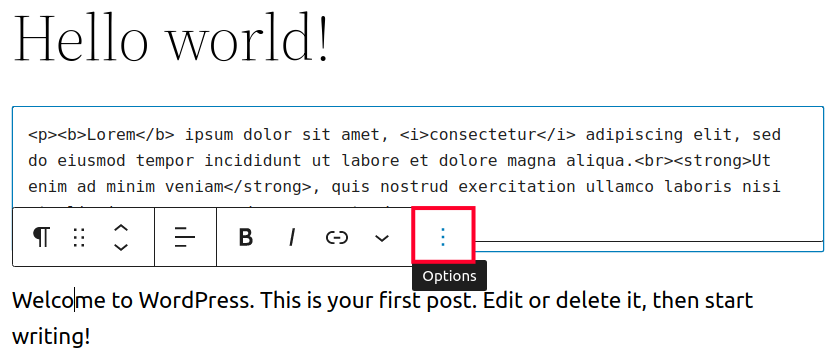
Edit A Single Block as HTML
If you have an existing block WordPress allows you to switch to the code editor. You can then view and modify the HTML as needed. This is a good option if you only want to make changes to a single section of the page or post.
- Edit a page or post in the WordPress Dashboard.
- Click the block you want to modify.
- Select the options link, it looks like 3 dots.
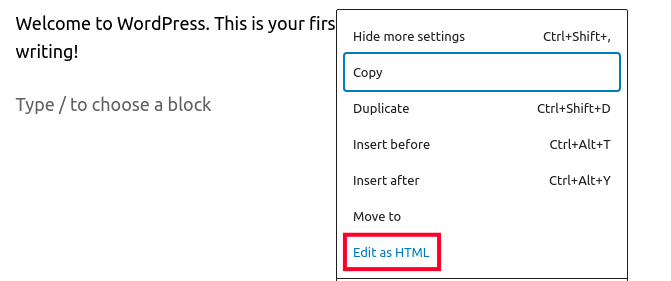
- Choose the Edit as HTML option.
- You will then see the HTML code for that block and can modify it as needed.
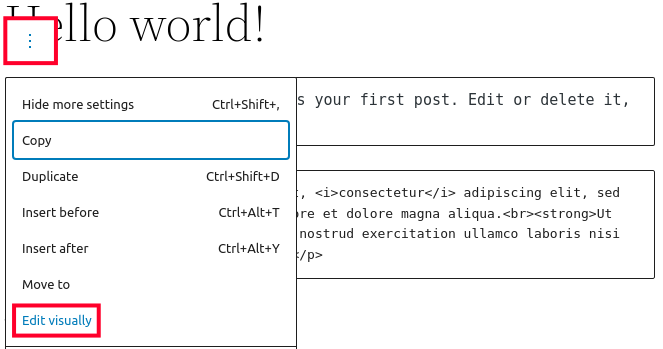
- If you want to switch back to the Visual editor click the block again, select option, then choose Edit visually.

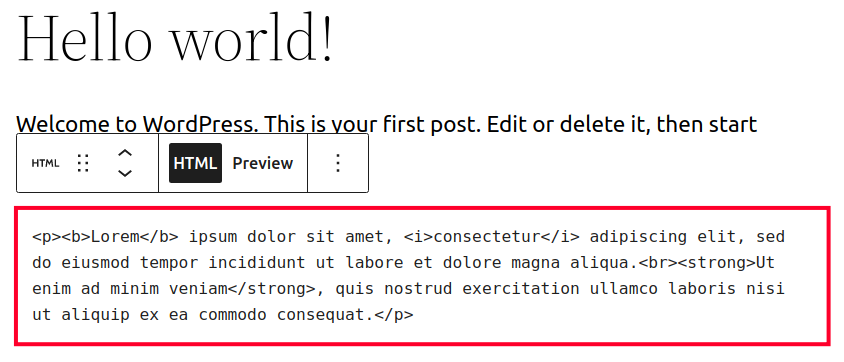
Edit Full Page/Post With the Code Editor
The third option is to edit the entire page or post with HTML. This method is a quick way to make HTML changes to several sections of the page or post at the same time.
- Edit the page or post you want to modify.
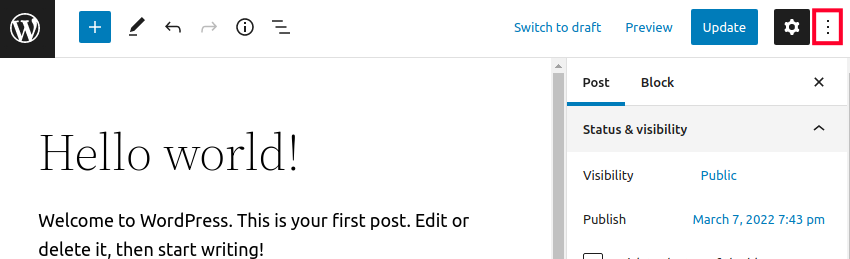
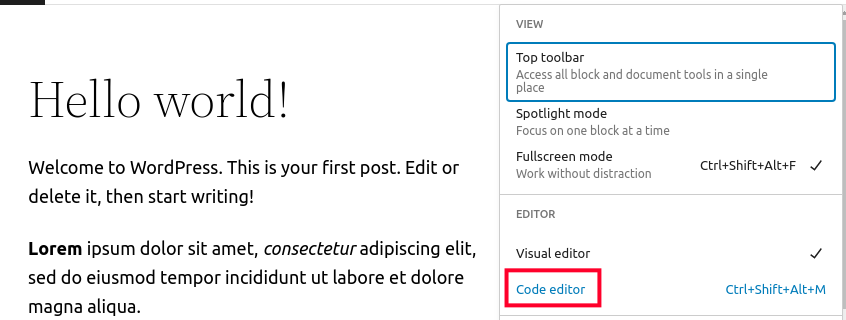
- Click the Options menu on the top right of the screen. It looks like 3 vertical dots.
- Choose the Code editor section under Editor. Another option is to click the Ctrl+Shift+Alt+M keys at the same time.
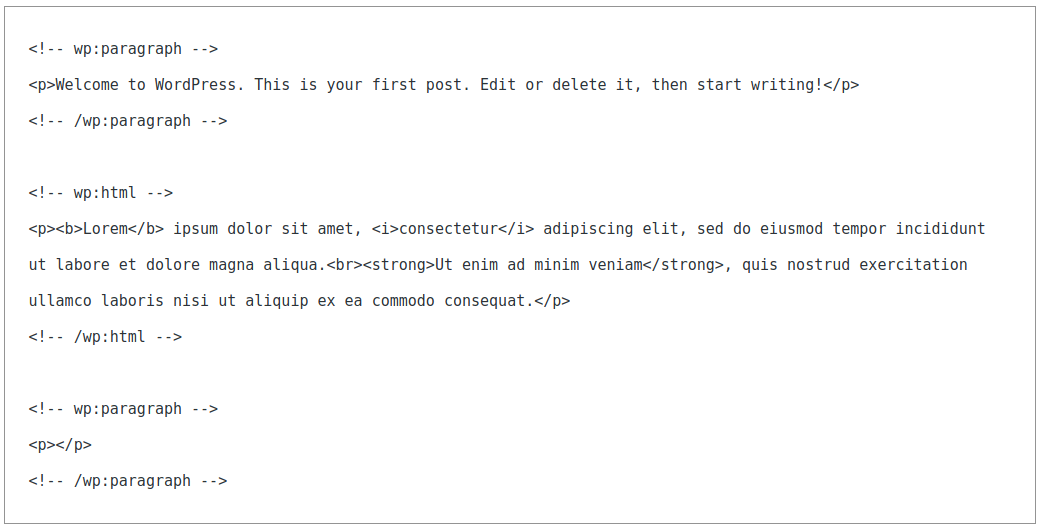
- Will then see the entire page/post as HTML and can add code as needed.
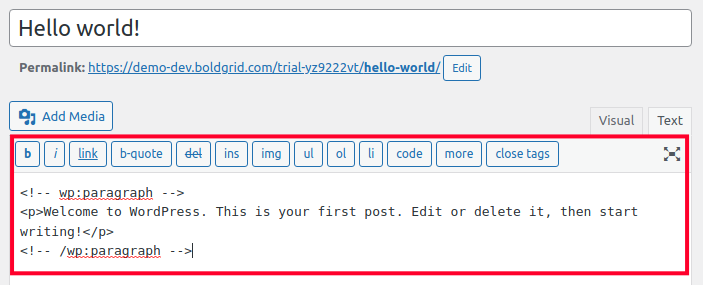
Add HTML to a Page/Post With the Classic Editor
- Navigate to the page or post you want to modify and edit it.
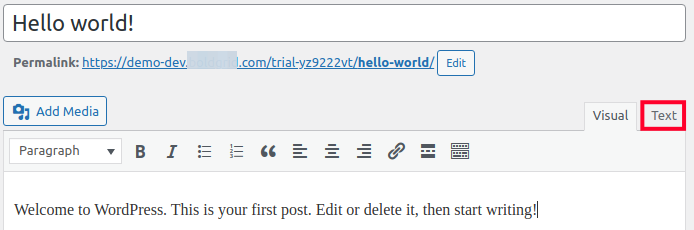
- Click the Text tab. You will then see the text of the page or post and you can enter the HTML.
- Add your HTML as needed.
Congratulations, now you know how to add HTML to a WordPress Page or Post! Looking for more guides? Check out our WordPress How To Articles!

Get our Free Step-by-Step Guide to Creating a WordPress Website
Learn the ins and outs of creating a winning WordPress site step-by-step, from start to finish.