- «Hello World!» for Microsoft Windows
- A Checklist
- Creating Your First Application
- Create a Source File
- Compile the Source File into a .class File
- Run the Program
- Windows running java program
- Learn Latest Tutorials
- Preparation
- Trending Technologies
- B.Tech / MCA
- Javatpoint Services
- Training For College Campus
- How to Run Java Program in Windows 10
- Prerequisites
- How to Run a Java Program in Windows?
- Conclusion
- About the author
- Rafia Zafar
- How to Run Java Program?
- How to Run a Java Program Using Command Prompt and Notepad?
- The javac Command
- The java Command
- Conclusion
«Hello World!» for Microsoft Windows
It’s time to write your first application! The following instructions are for users of Windows Vista, Windows 7, and Windows 8. Instructions for other platforms are in «Hello World!» for Solaris OS, Linux, and Mac OS X and «Hello World!» for the NetBeans IDE.
A Checklist
To write your first program, you’ll need:
- The Java SE Development Kit 8 (JDK 8) You can download the Windows version now. (Make sure you download the JDK, not the JRE.) Consult the installation instructions.
- A text editor In this example, we’ll use Notepad, a simple editor included with the Windows platforms. You can easily adapt these instructions if you use a different text editor.
These two items are all you’ll need to write your first application.
Creating Your First Application
Your first application, HelloWorldApp , will simply display the greeting «Hello world!». To create this program, you will:
- Create a source file A source file contains code, written in the Java programming language, that you and other programmers can understand. You can use any text editor to create and edit source files.
- Compile the source file into a .class file The Java programming language compiler ( javac ) takes your source file and translates its text into instructions that the Java virtual machine can understand. The instructions contained within this file are known as bytecodes.
- Run the program The Java application launcher tool ( java ) uses the Java virtual machine to run your application.
Create a Source File
To create a source file, you have two options:
- You can save the file HelloWorldApp.java on your computer and avoid a lot of typing. Then, you can go straight to Compile the Source File into a .class File.
- Or, you can use the following (longer) instructions.
First, start your editor. You can launch the Notepad editor from the Start menu by selecting Programs > Accessories > Notepad. In a new document, type in the following code:
/** * The HelloWorldApp class implements an application that * simply prints "Hello World!" to standard output. */ class HelloWorldApp < public static void main(String[] args) < System.out.println("Hello World!"); // Display the string. >> Be Careful When You Type
Note: Type all code, commands, and file names exactly as shown. Both the compiler ( javac ) and launcher ( java ) are case-sensitive, so you must capitalize consistently.
HelloWorldApp is not the same as helloworldapp .
Save the code in a file with the name HelloWorldApp.java . To do this in Notepad, first choose the File > Save As . menu item. Then, in the Save As dialog box:
- Using the Save in combo box, specify the folder (directory) where you’ll save your file. In this example, the directory is myapplication on the C drive.
- In the File name text field, type «HelloWorldApp.java» , without the quotation marks.
- From the Save as type combo box, choose Text Documents (*.txt).
- In the Encoding combo box, leave the encoding as ANSI.
When you’re finished, the dialog box should look like this .
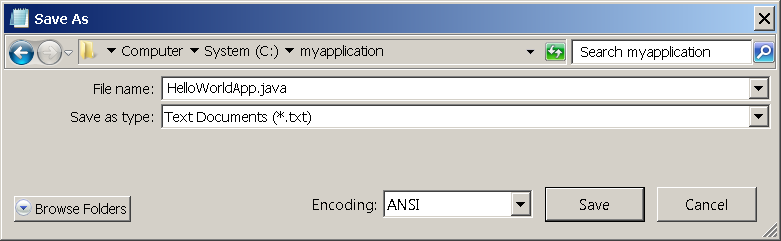
The Save As dialog just before you click Save.
Now click Save, and exit Notepad.
Compile the Source File into a .class File
Bring up a shell, or «command,» window. You can do this from the Start menu by choosing Run. and then entering cmd . The shell window should look similar to the following figure .
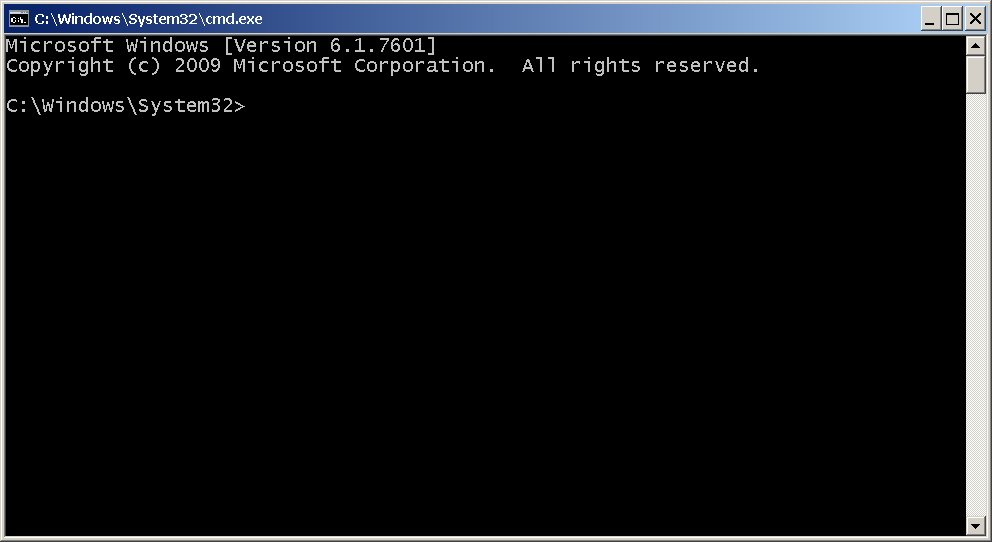
The prompt shows your current directory. When you bring up the prompt, your current directory is usually your home directory for Windows XP (as shown in the preceding figure.
To compile your source file, change your current directory to the directory where your file is located. For example, if your source directory is myapplication on the C drive, type the following command at the prompt and press Enter:
Now the prompt should change to C:\myapplication> .
To change to a directory on a different drive, you must type an extra command: the name of the drive. For example, to change to the myapplication directory on the D drive, you must enter D: , as follows:
C:\>D: D:\>cd myapplication D:\myapplication>
If you enter dir at the prompt, you should see your source file, as follows:
C:\>cd myapplication C:\myapplication>dir Volume in drive C is System Volume Serial Number is F2E8-C8CC Directory of C:\myapplication 2014-04-24 01:34 PM . 2014-04-24 01:34 PM .. 2014-04-24 01:34 PM 267 HelloWorldApp.java 1 File(s) 267 bytes 2 Dir(s) 93,297,991,680 bytes free C:\myapplication>
Now you are ready to compile. At the prompt, type the following command and press Enter.
The compiler has generated a bytecode file, HelloWorldApp.class . At the prompt, type dir to see the new file that was generated as follows:
C:\myapplication>javac HelloWorldApp.java C:\myapplication>dir Volume in drive C is System Volume Serial Number is F2E8-C8CC Directory of C:\myapplication 2014-04-24 02:07 PM . 2014-04-24 02:07 PM .. 2014-04-24 02:07 PM 432 HelloWorldApp.class 2014-04-24 01:34 PM 267 HelloWorldApp.java 2 File(s) 699 bytes 2 Dir(s) 93,298,032,640 bytes free C:\myapplication>
Now that you have a .class file, you can run your program.
If you encounter problems with the instructions in this step, consult the Common Problems (and Their Solutions).
Run the Program
In the same directory, enter the following command at the prompt:
You should see the following on your screen:
C:\myapplication>java -cp . HelloWorldApp Hello World! C:\myapplication>
Congratulations! Your program works!
If you encounter problems with the instructions in this step, consult the Common Problems (and Their Solutions).
Previous page: «Hello World!» for the NetBeans IDE
Next page: «Hello World!» for Solaris OS, Linux, and Mac OS X
Windows running java program
Learn Latest Tutorials


Preparation


Trending Technologies


B.Tech / MCA


Javatpoint Services
JavaTpoint offers too many high quality services. Mail us on h[email protected], to get more information about given services.
- Website Designing
- Website Development
- Java Development
- PHP Development
- WordPress
- Graphic Designing
- Logo
- Digital Marketing
- On Page and Off Page SEO
- PPC
- Content Development
- Corporate Training
- Classroom and Online Training
- Data Entry
Training For College Campus
JavaTpoint offers college campus training on Core Java, Advance Java, .Net, Android, Hadoop, PHP, Web Technology and Python. Please mail your requirement at [email protected].
Duration: 1 week to 2 week
Like/Subscribe us for latest updates or newsletter 


How to Run Java Program in Windows 10
![]()
Java is a multipurpose, popular, and widely used object-oriented programming language. It is primarily used to create web and desktop applications, android applications, and build software. Java is a class-based language that plays with classes and objects.
Many tools are available to run Java programs for development purposes such as net beans, eclipse, dr java, and so on. These tools are beneficial but take up a lot of space. One can simply run java programs in Windows without having these tools. This blog post demonstrates the method to run Java programs on windows.
Prerequisites
To run Java Program in Windows, you are required to install java first and set its path. If your system is not equipped with Java, use the following links:
-
- InstallingJava on Windows will lead you to the installation procedure.
- After that, you need to set the Java_Home environment variable, for the corresponding purpose we have added a link to our article How to set Java home Variable.
How to Run a Java Program in Windows?
As discussed earlier, the Java program can be run using various tools. Here, we will illustrate a method to run Java programs without installing another tool. To do so, follow the below-mentioned steps:
Step 1: Create a Simple Text File
Firstly, open the directory location where you want to create a Java program. We will prefer the “Documents” directory to create a java program. Do right-click on the screen, as a result, the Context menu will display. Move the cursor on “New” and then choose “Text Document” from the displayed options to create a new simple text file:

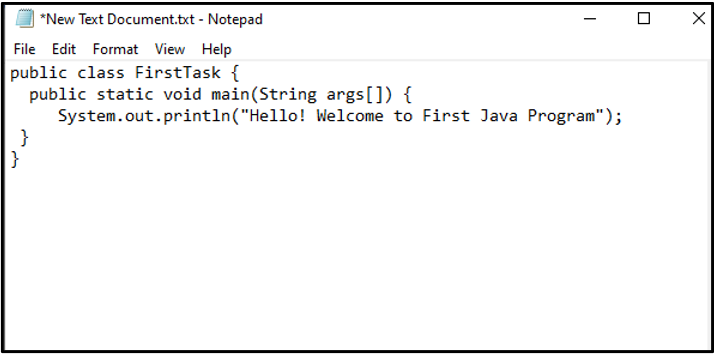
Step 2: Write Java Program
Paste the below-provided code to create a basic level Java program:
public class FirstTask {
public static void main ( String args [ ] ) {
System.out.println ( «Hello! Welcome to First Java Program» ) ;
}
}In the code, the “FirstTask” refers to the class that has the main method. Inside that method, the “println” is utilized to print a string.
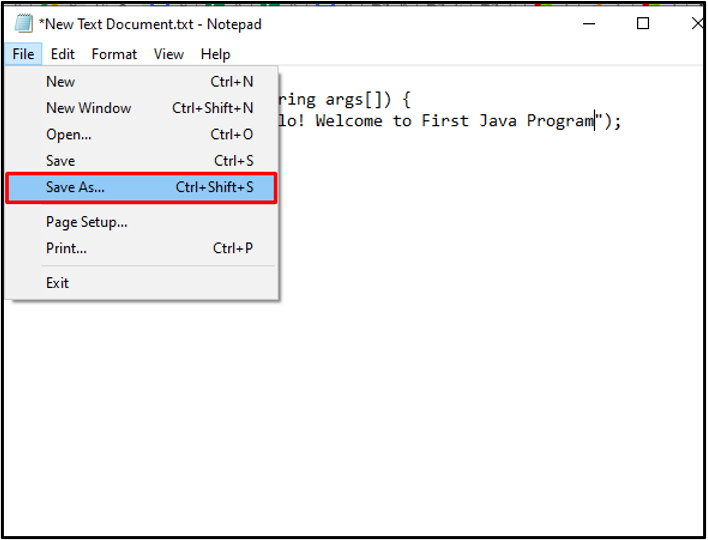
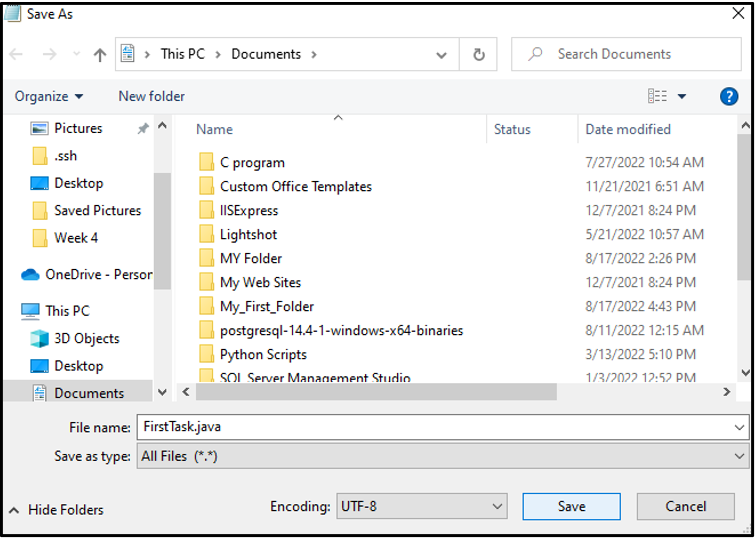
Step 3: Save File as Java Source
Go to the “Files” menu and choose the “Save As” option to save Java Program:
Choose the name for the file as in our case it is “FirstTask” and save the file with “.java” extension:
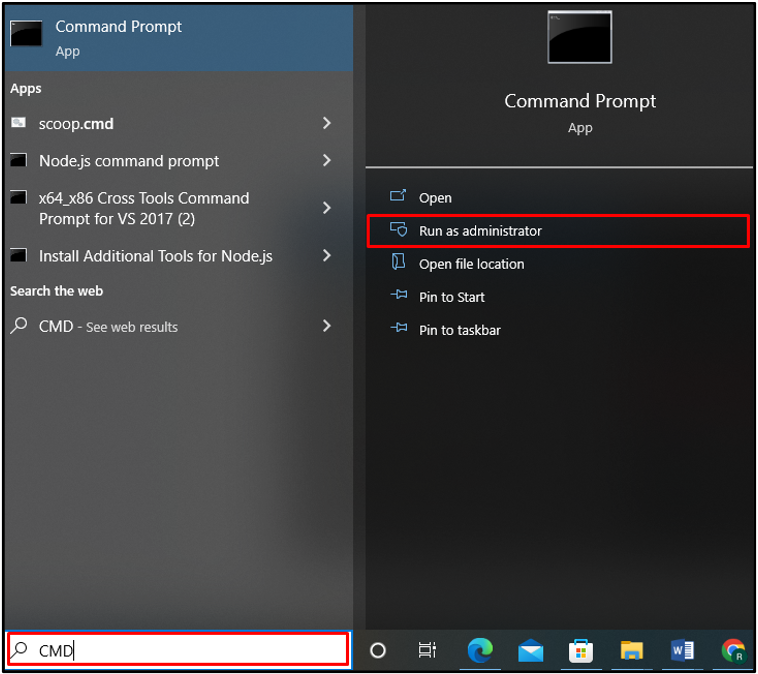
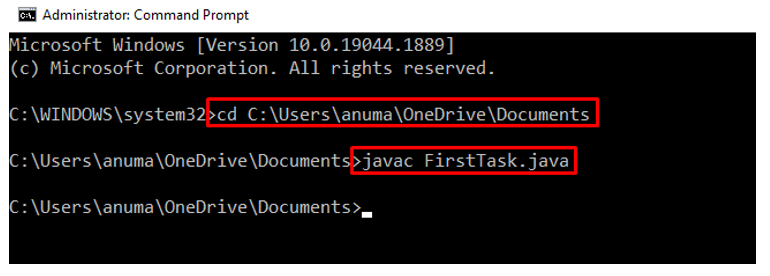
Step 4: Open Windows Command Prompt
In the next step, open the Windows Command Prompt as administrator by searching “CMD” in the “Startup” menu:
Step 5: Run Java Program
Open the directory where the Java program file exists, then, utilize the “javac” command to compile the java program. This action will generate the bytecode file with the same name as of your file:
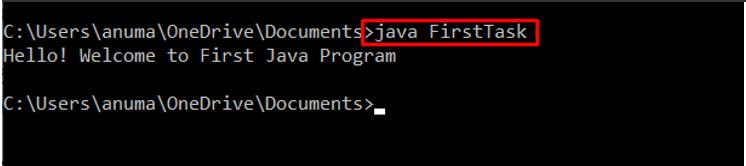
After that, run FirstTask byte coded file to run java program on Windows command prompt using provided command:
The output shows that the string is printed on the command prompt’s window.
Here, you have learned the method to execute a Java program on Windows.
Conclusion
Java is a widely used and well-liked programming language. To run a Java program in the Command Prompt, first compile the program using the “javac” command that creates a bytecode file, then executes the Java program compiled file using the “java” command. In this blog, we have demonstrated the method to run a Java program on Windows without using any tools like NetBeans, Eclipse, etc.
About the author
Rafia Zafar
I am graduated in computer science. I am a junior technical author here and passionate about Programming and learning new technologies. I have worked in JAVA, HTML 5, CSS3, Bootstrap, and PHP.
How to Run Java Program?

At first, check that Java is installed in your system and the path is properly set then we will see how to run the java program. If Java is not installed on the system or path is not defined properly, then we can’t run any Java programs on our system. After the JDK installation, compiling and running the java program is very easy.
A java file is compiled using the javac command which generates a platform-independent bytecode that can be executed in any machine by a Java Virtual Machine (JVM). The bytecode is executed using the java command which executes the bytecode and produces the result.
How to Run a Java Program Using Command Prompt and Notepad?
Here we will be using Notepad and Command Prompt to run the Java programs. Let’s see the process step-by-step:
- Create a new folder.
- Go to the folder, and make the new Java file in that folder.
- Press Alt+D, and just type Notepad there.
- Notepad will open, now paste the java code given below in the Notepad and save it with extension java.
Let’s see the above steps with images:
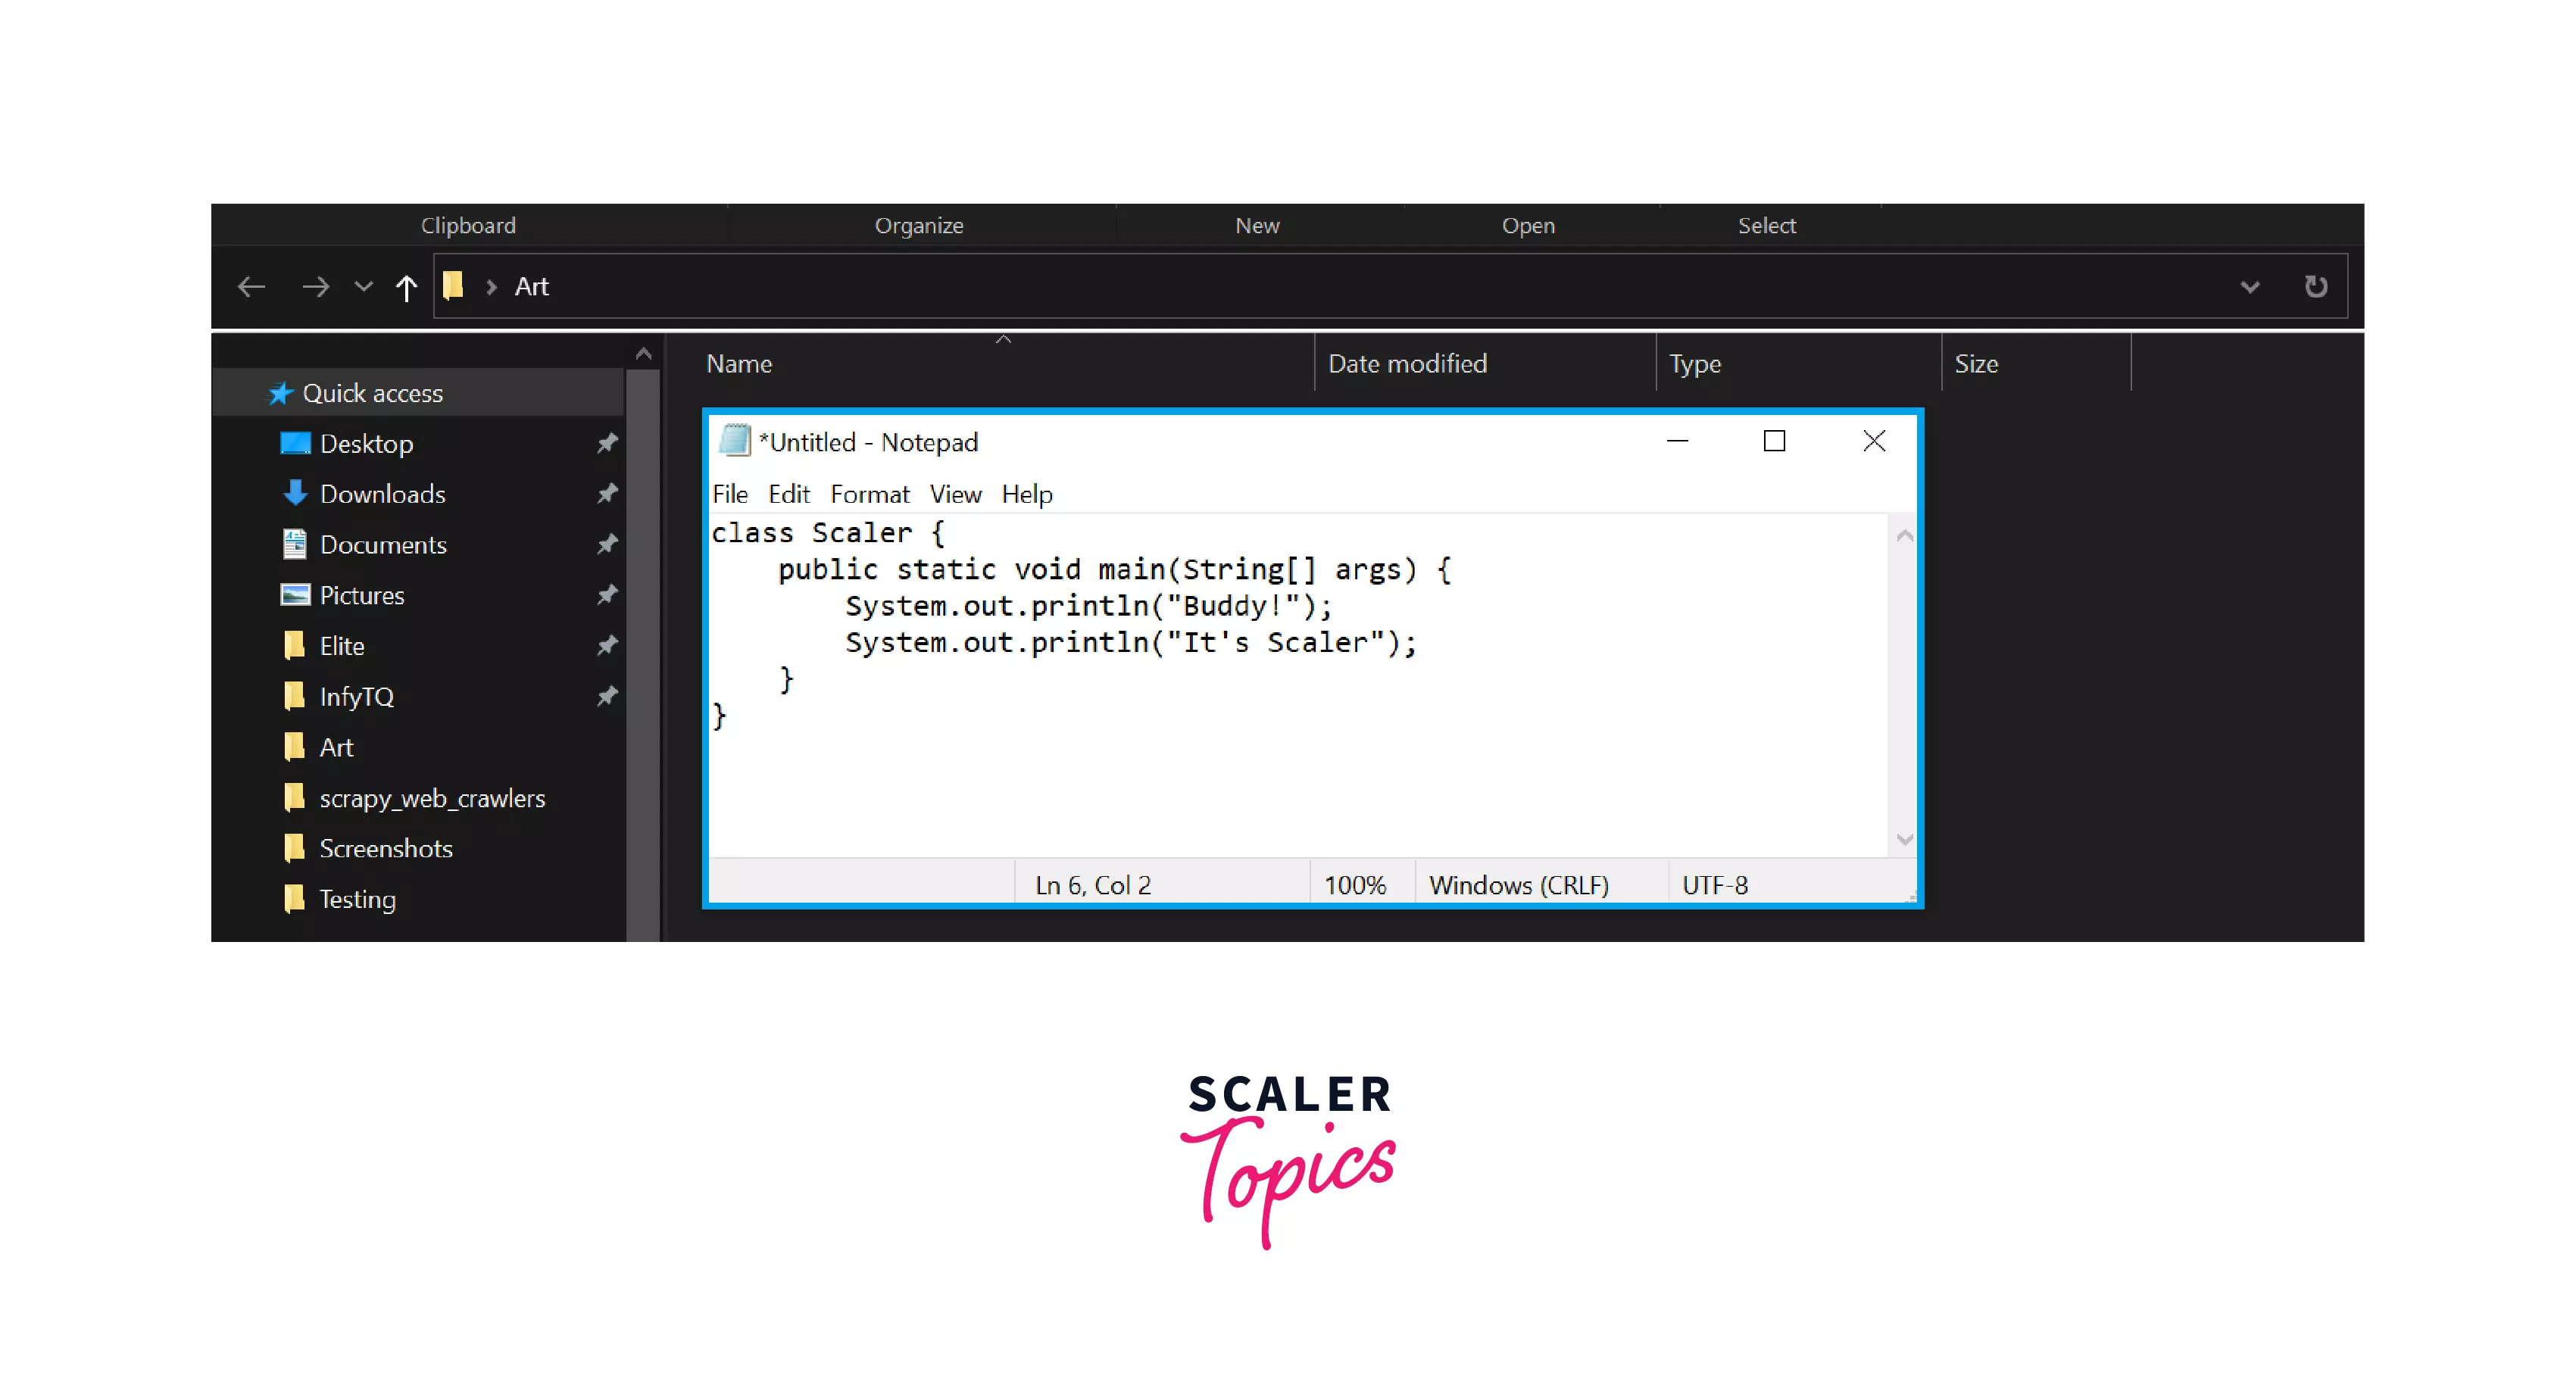
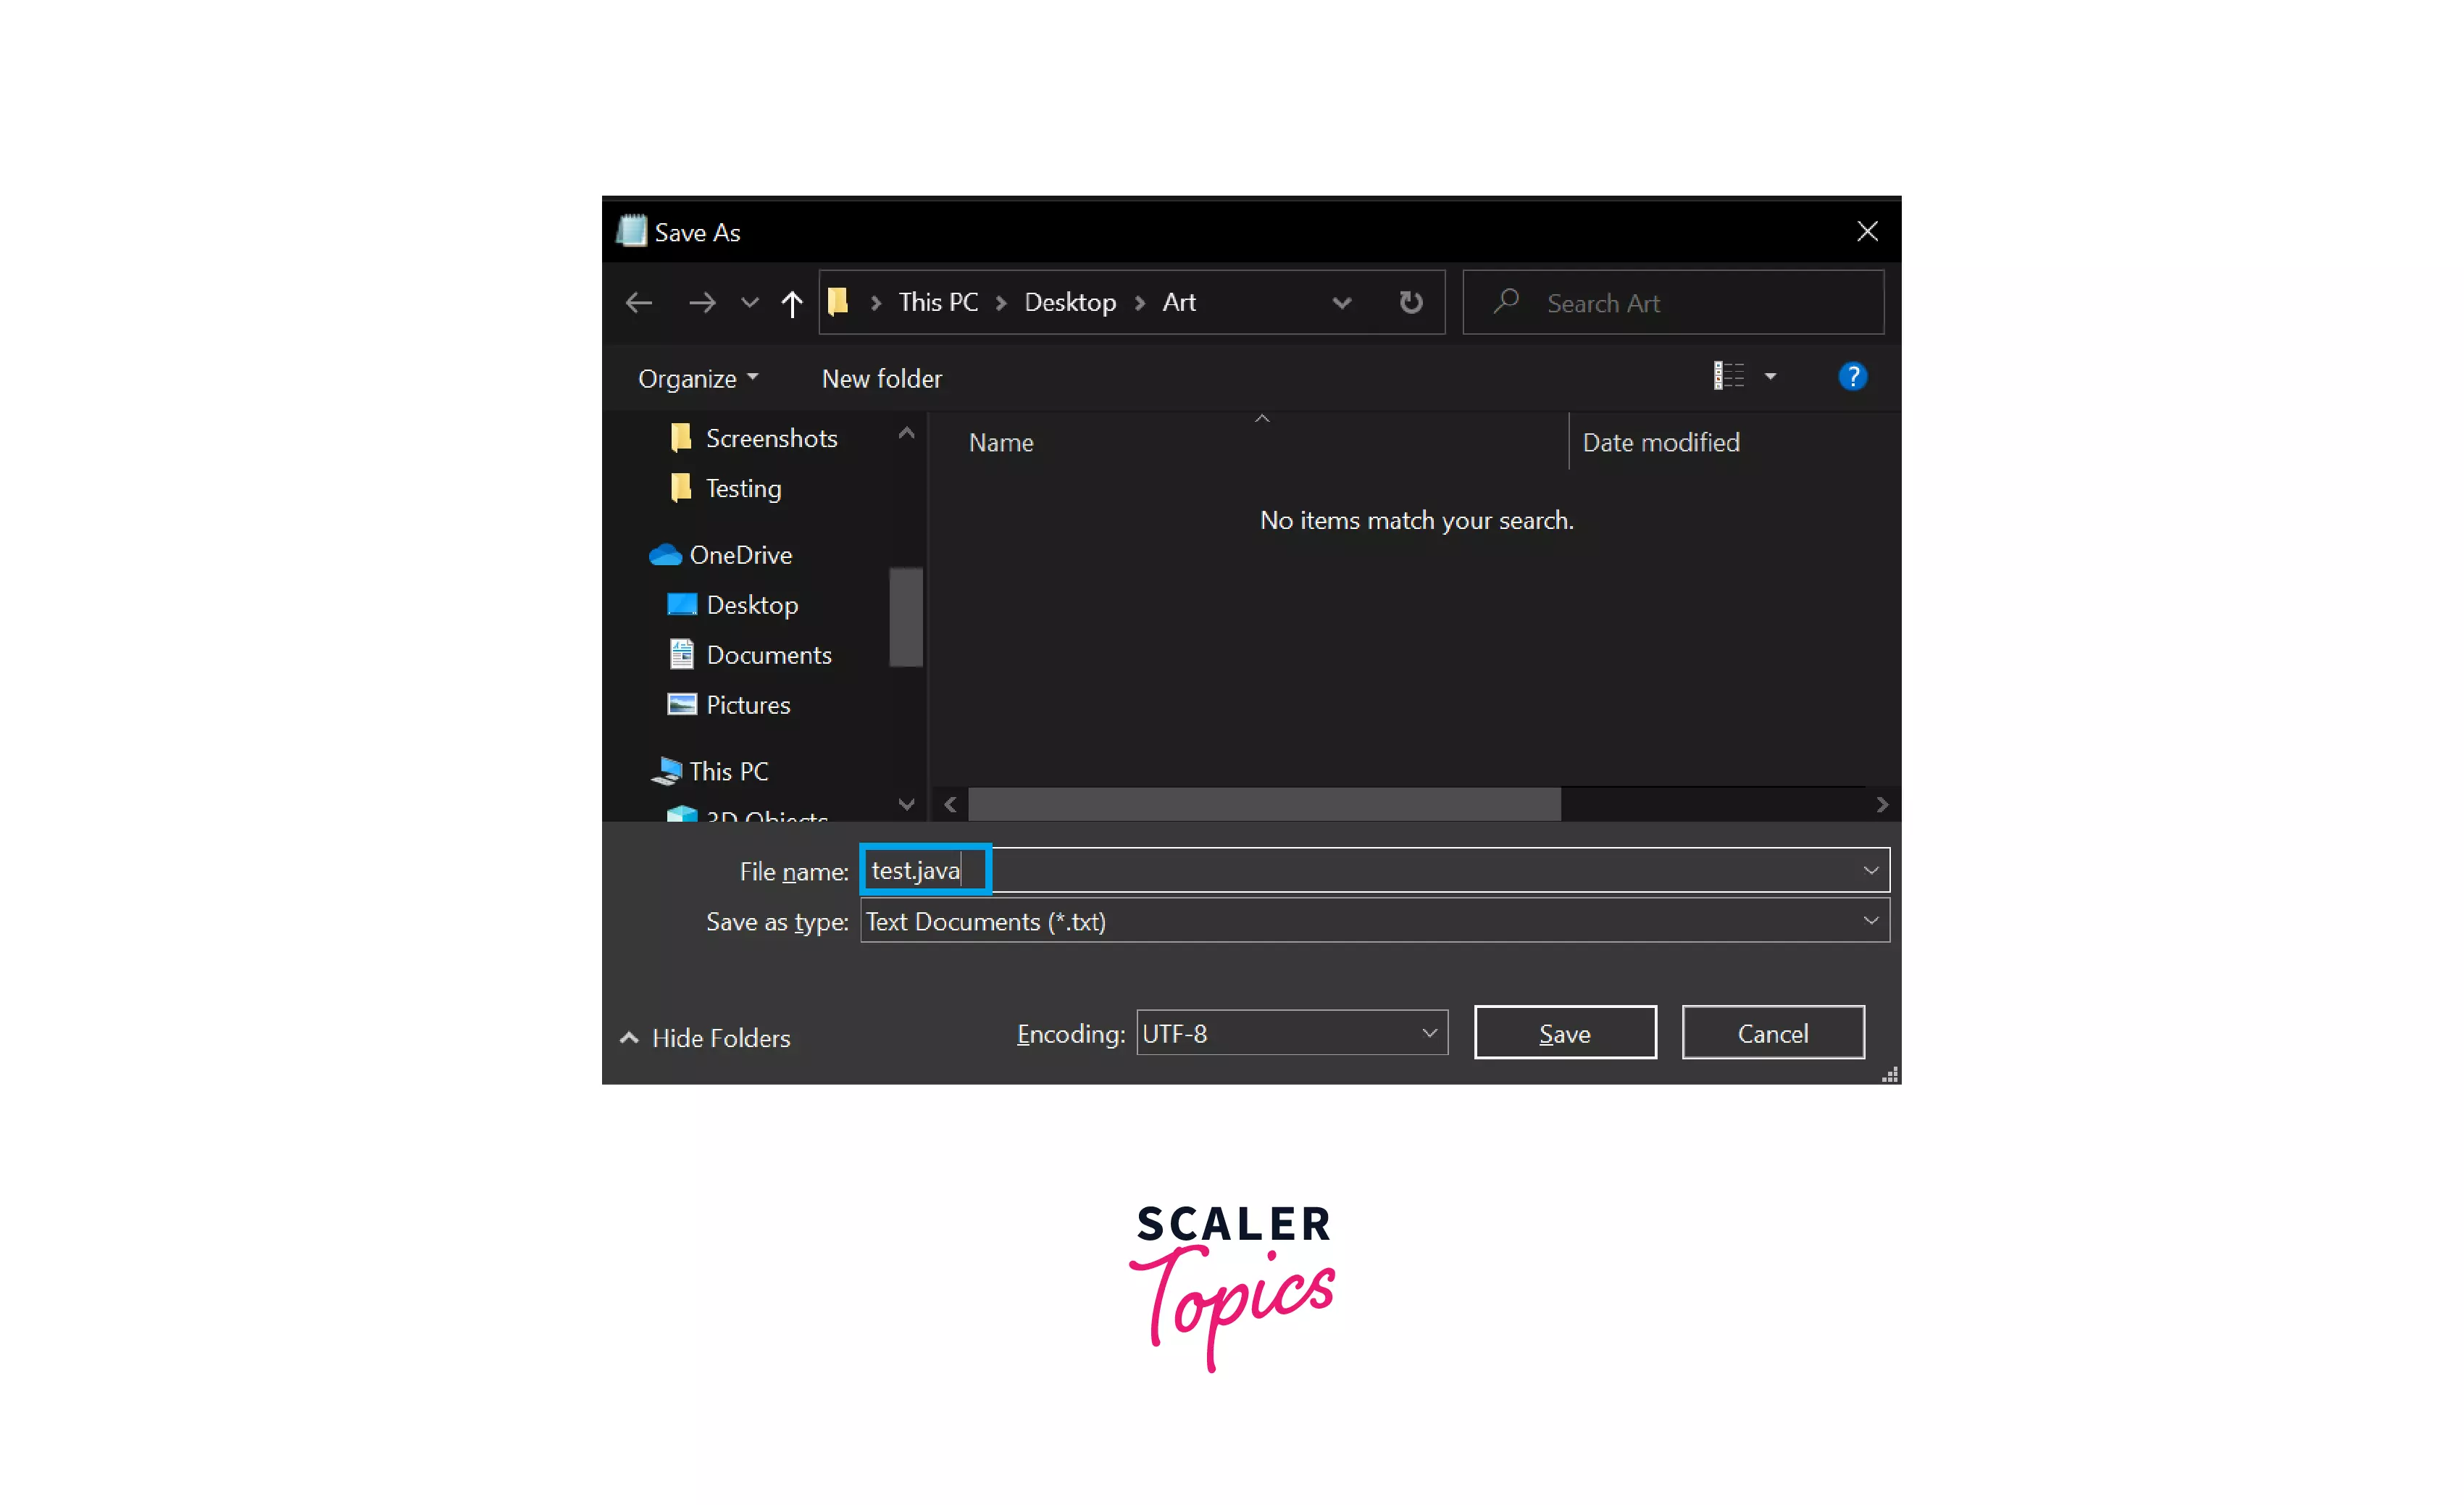
Step 1: I have used the code given below for performing all the below operations. Open the Notepad and copy this code in the notepad and save that file with the extension .java.
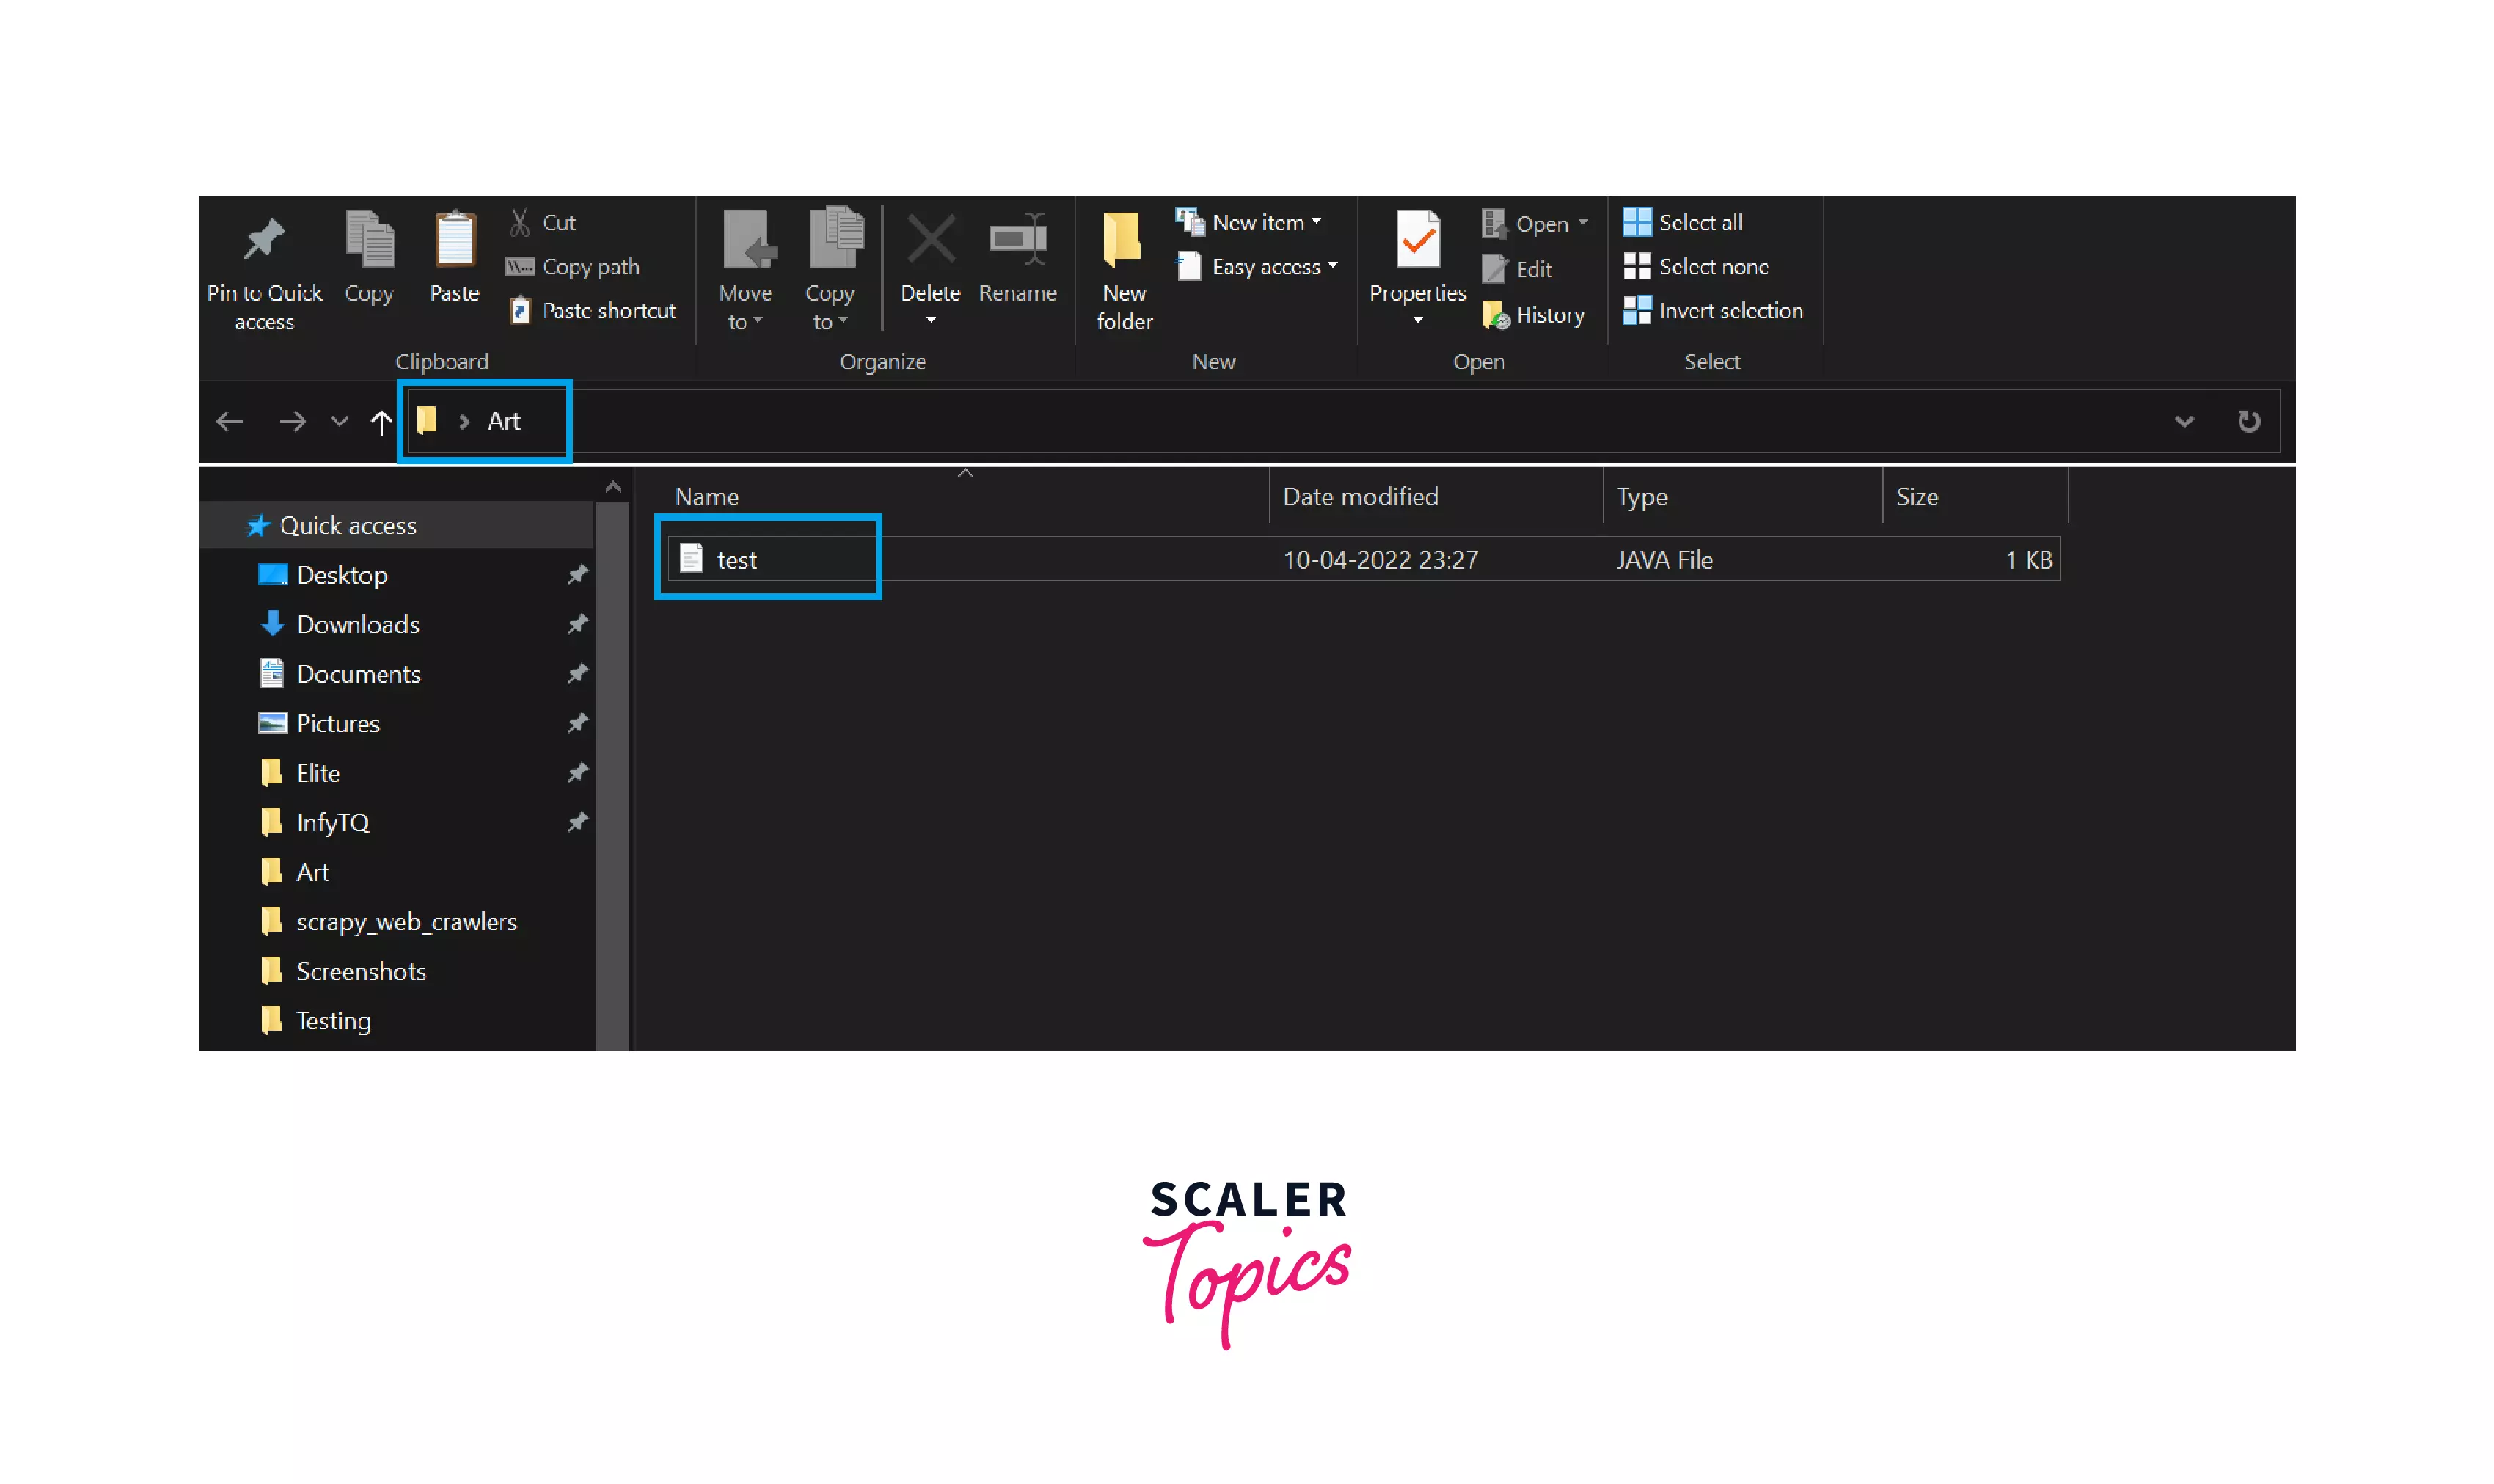
You can see in the below images that, I have written the java code and saved it as test.java. Now the new file will be created with the name test.java.

Step 2: You can see that inside the Art folder, there is a java file with the name test.java.
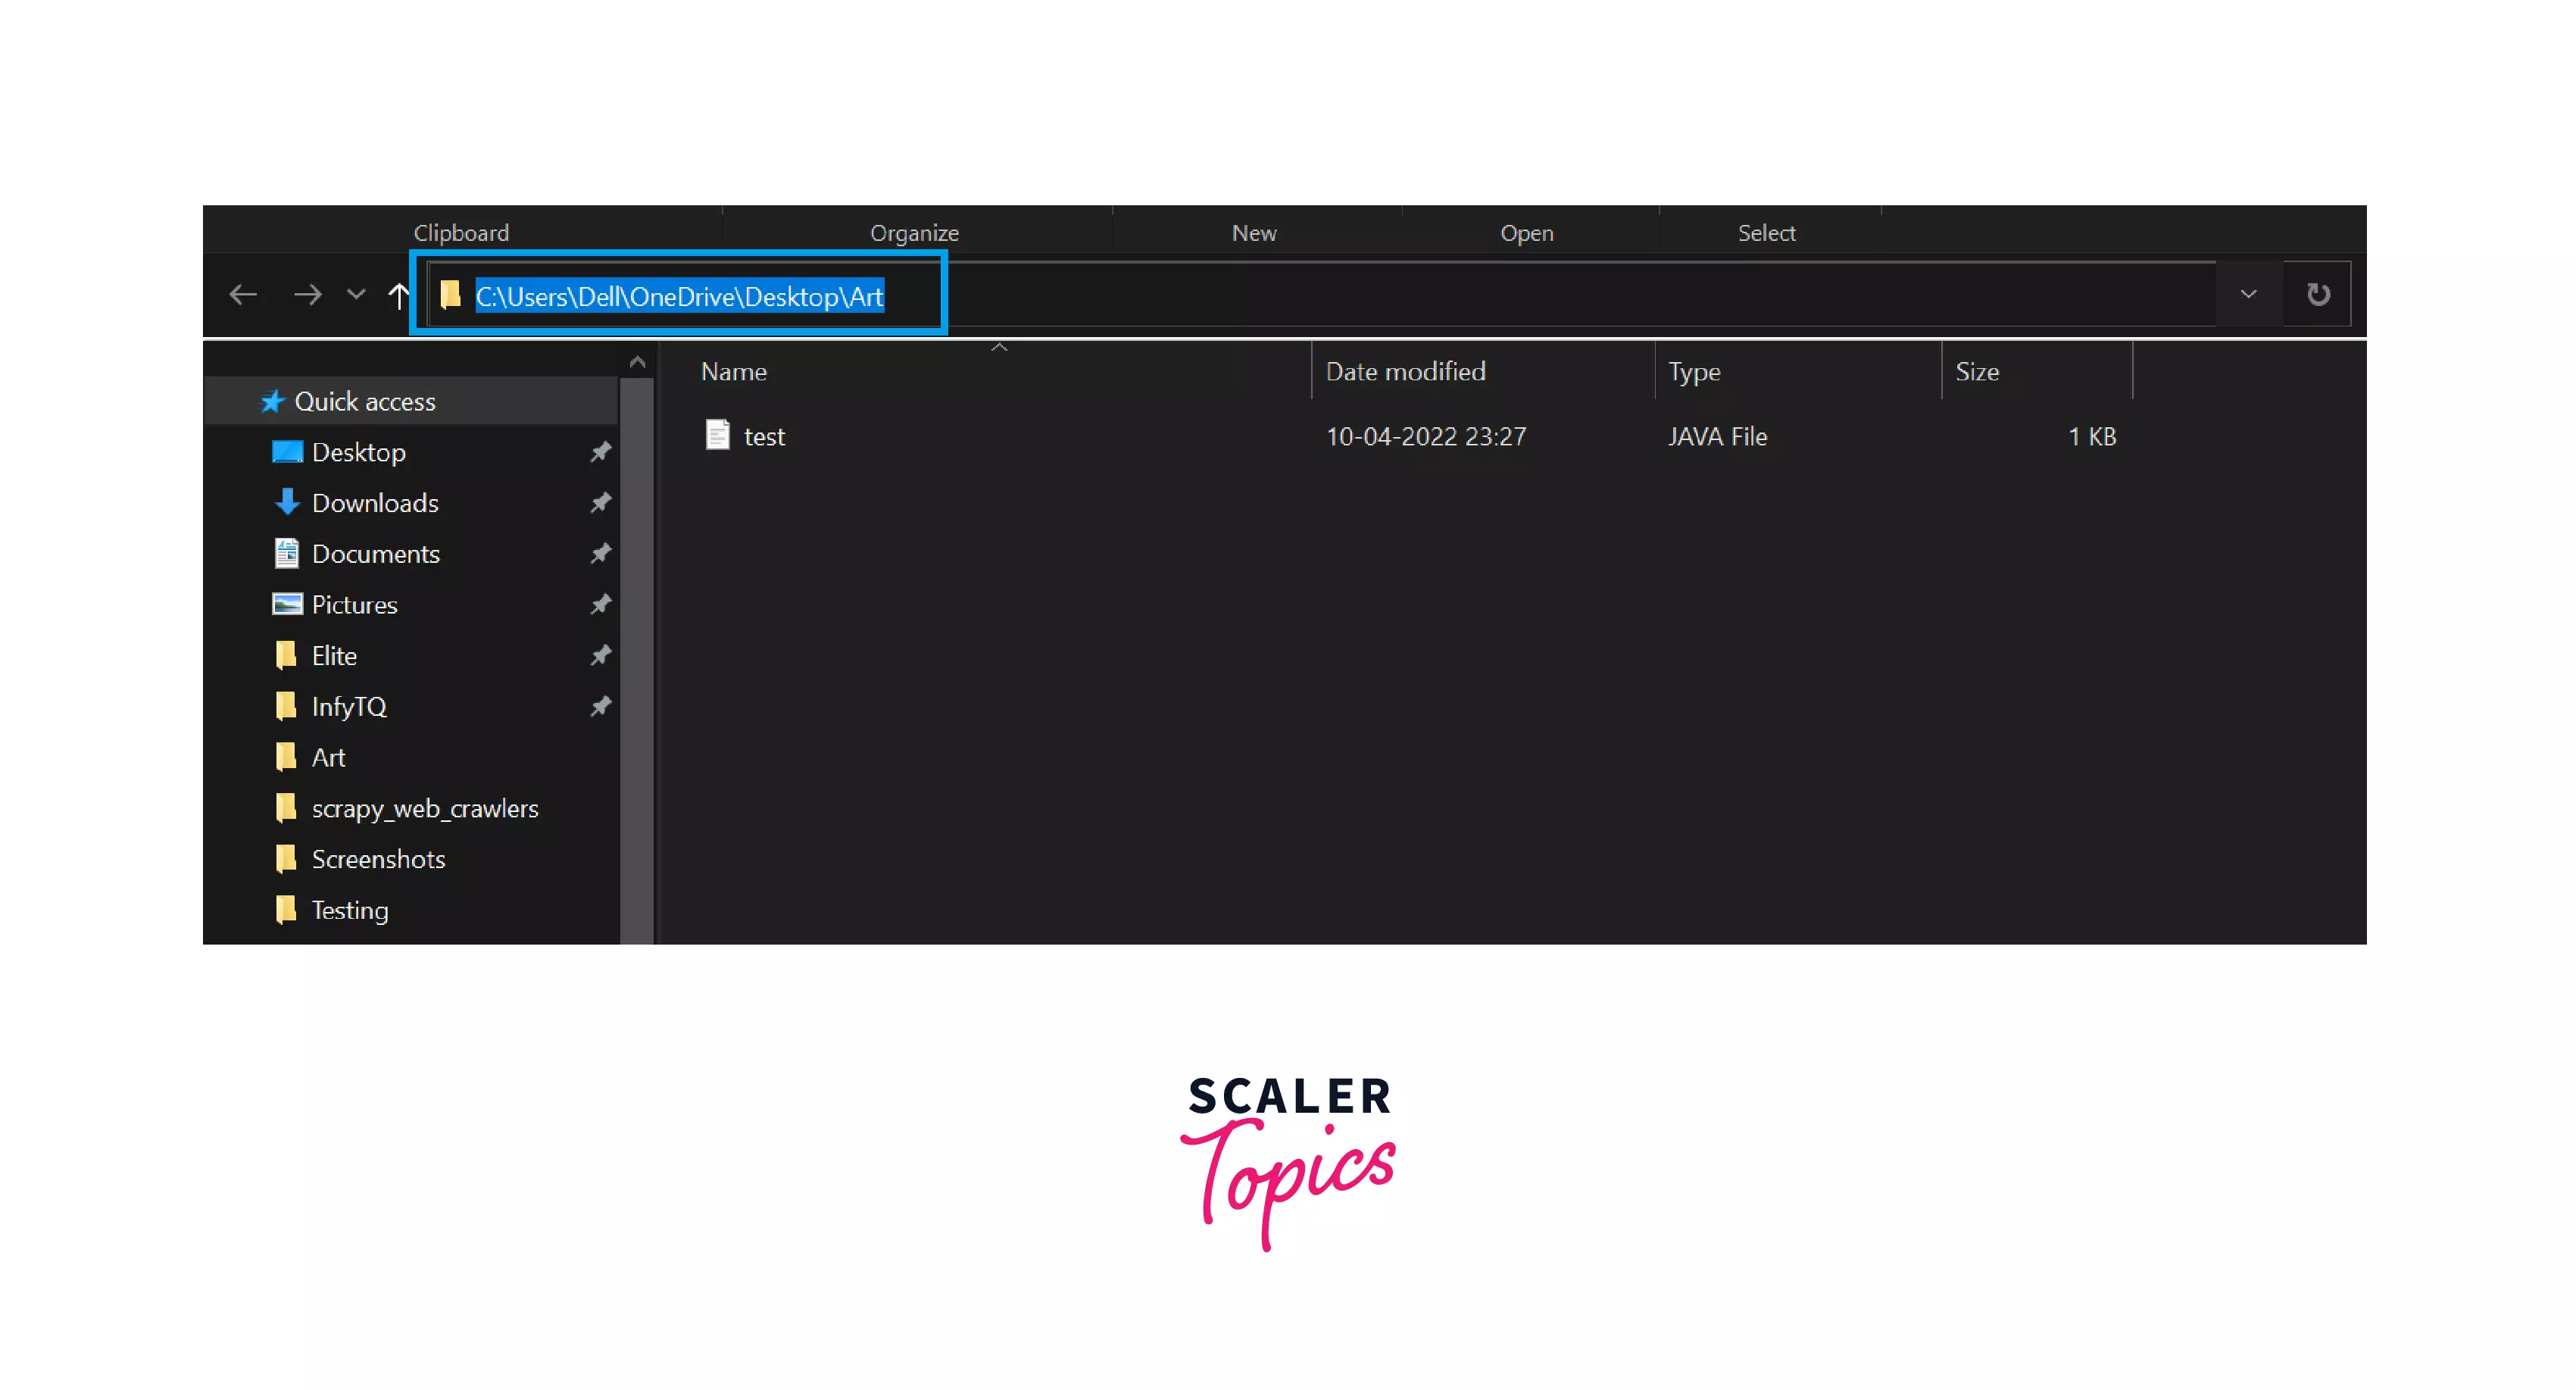
Step 3: Now press Alt+D , and you will get into the above search bar.
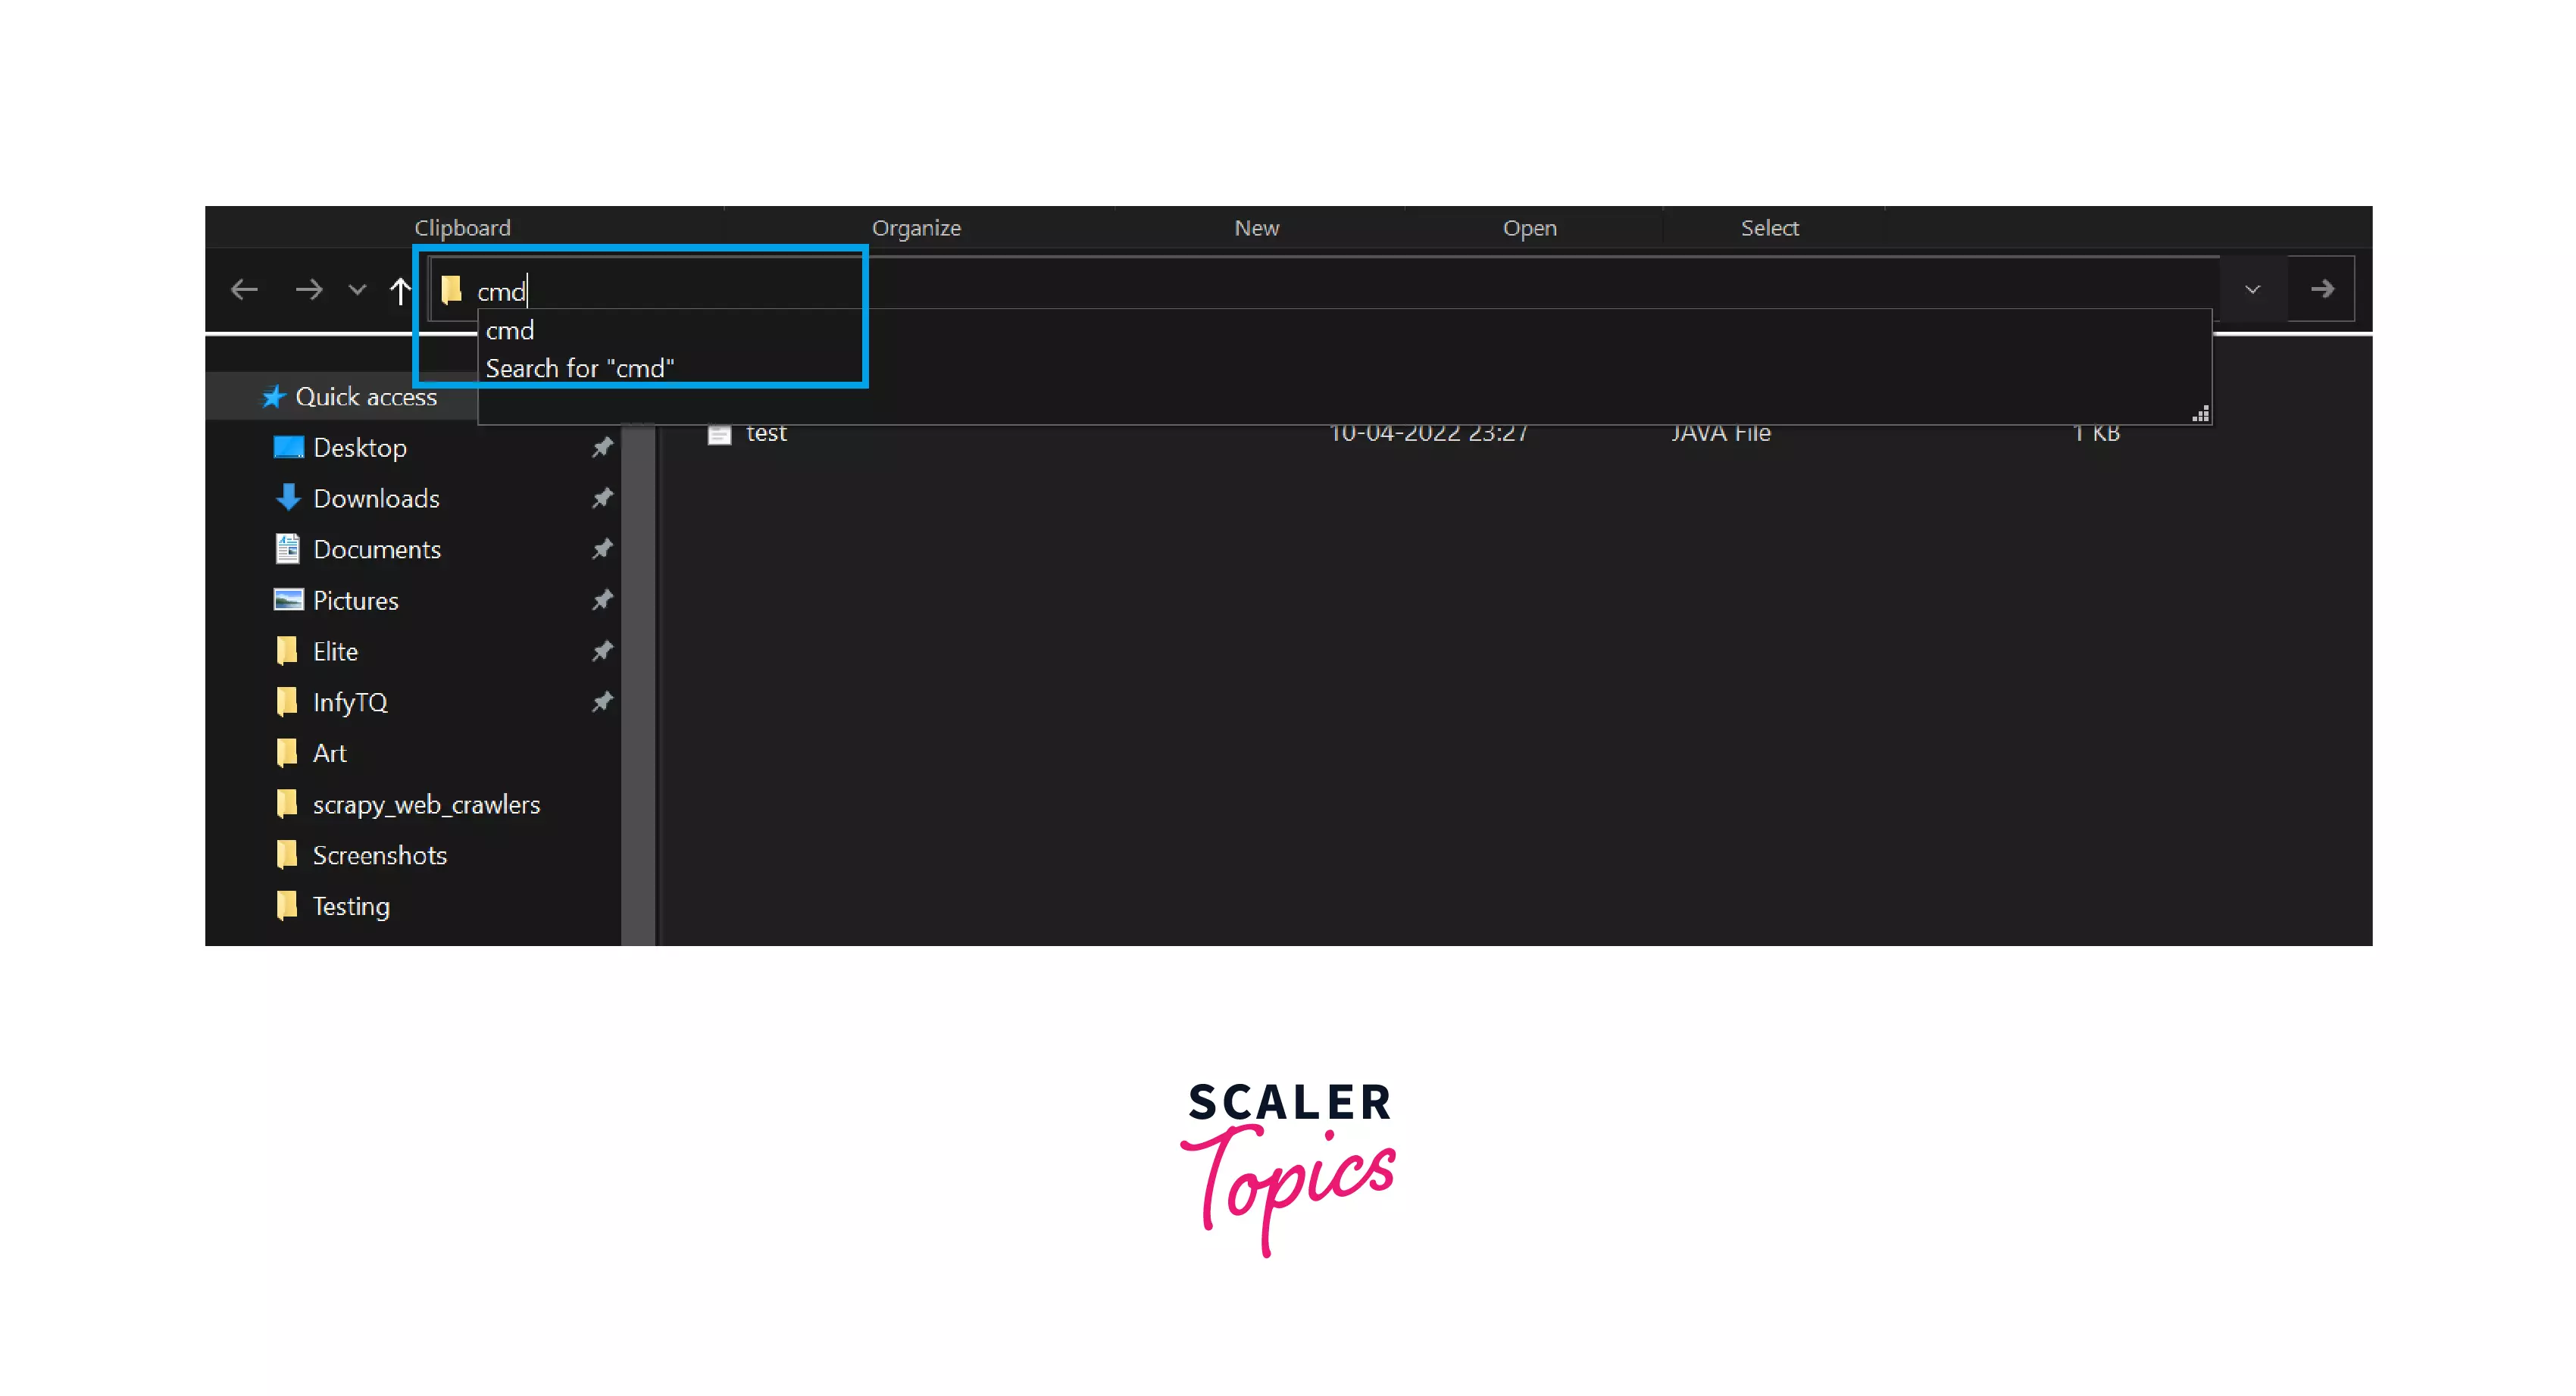
Step 4: Type CMD and press enter key.
Step 5: You can see that the CMD is open. Now type javac test.java , as you can see in the below image.
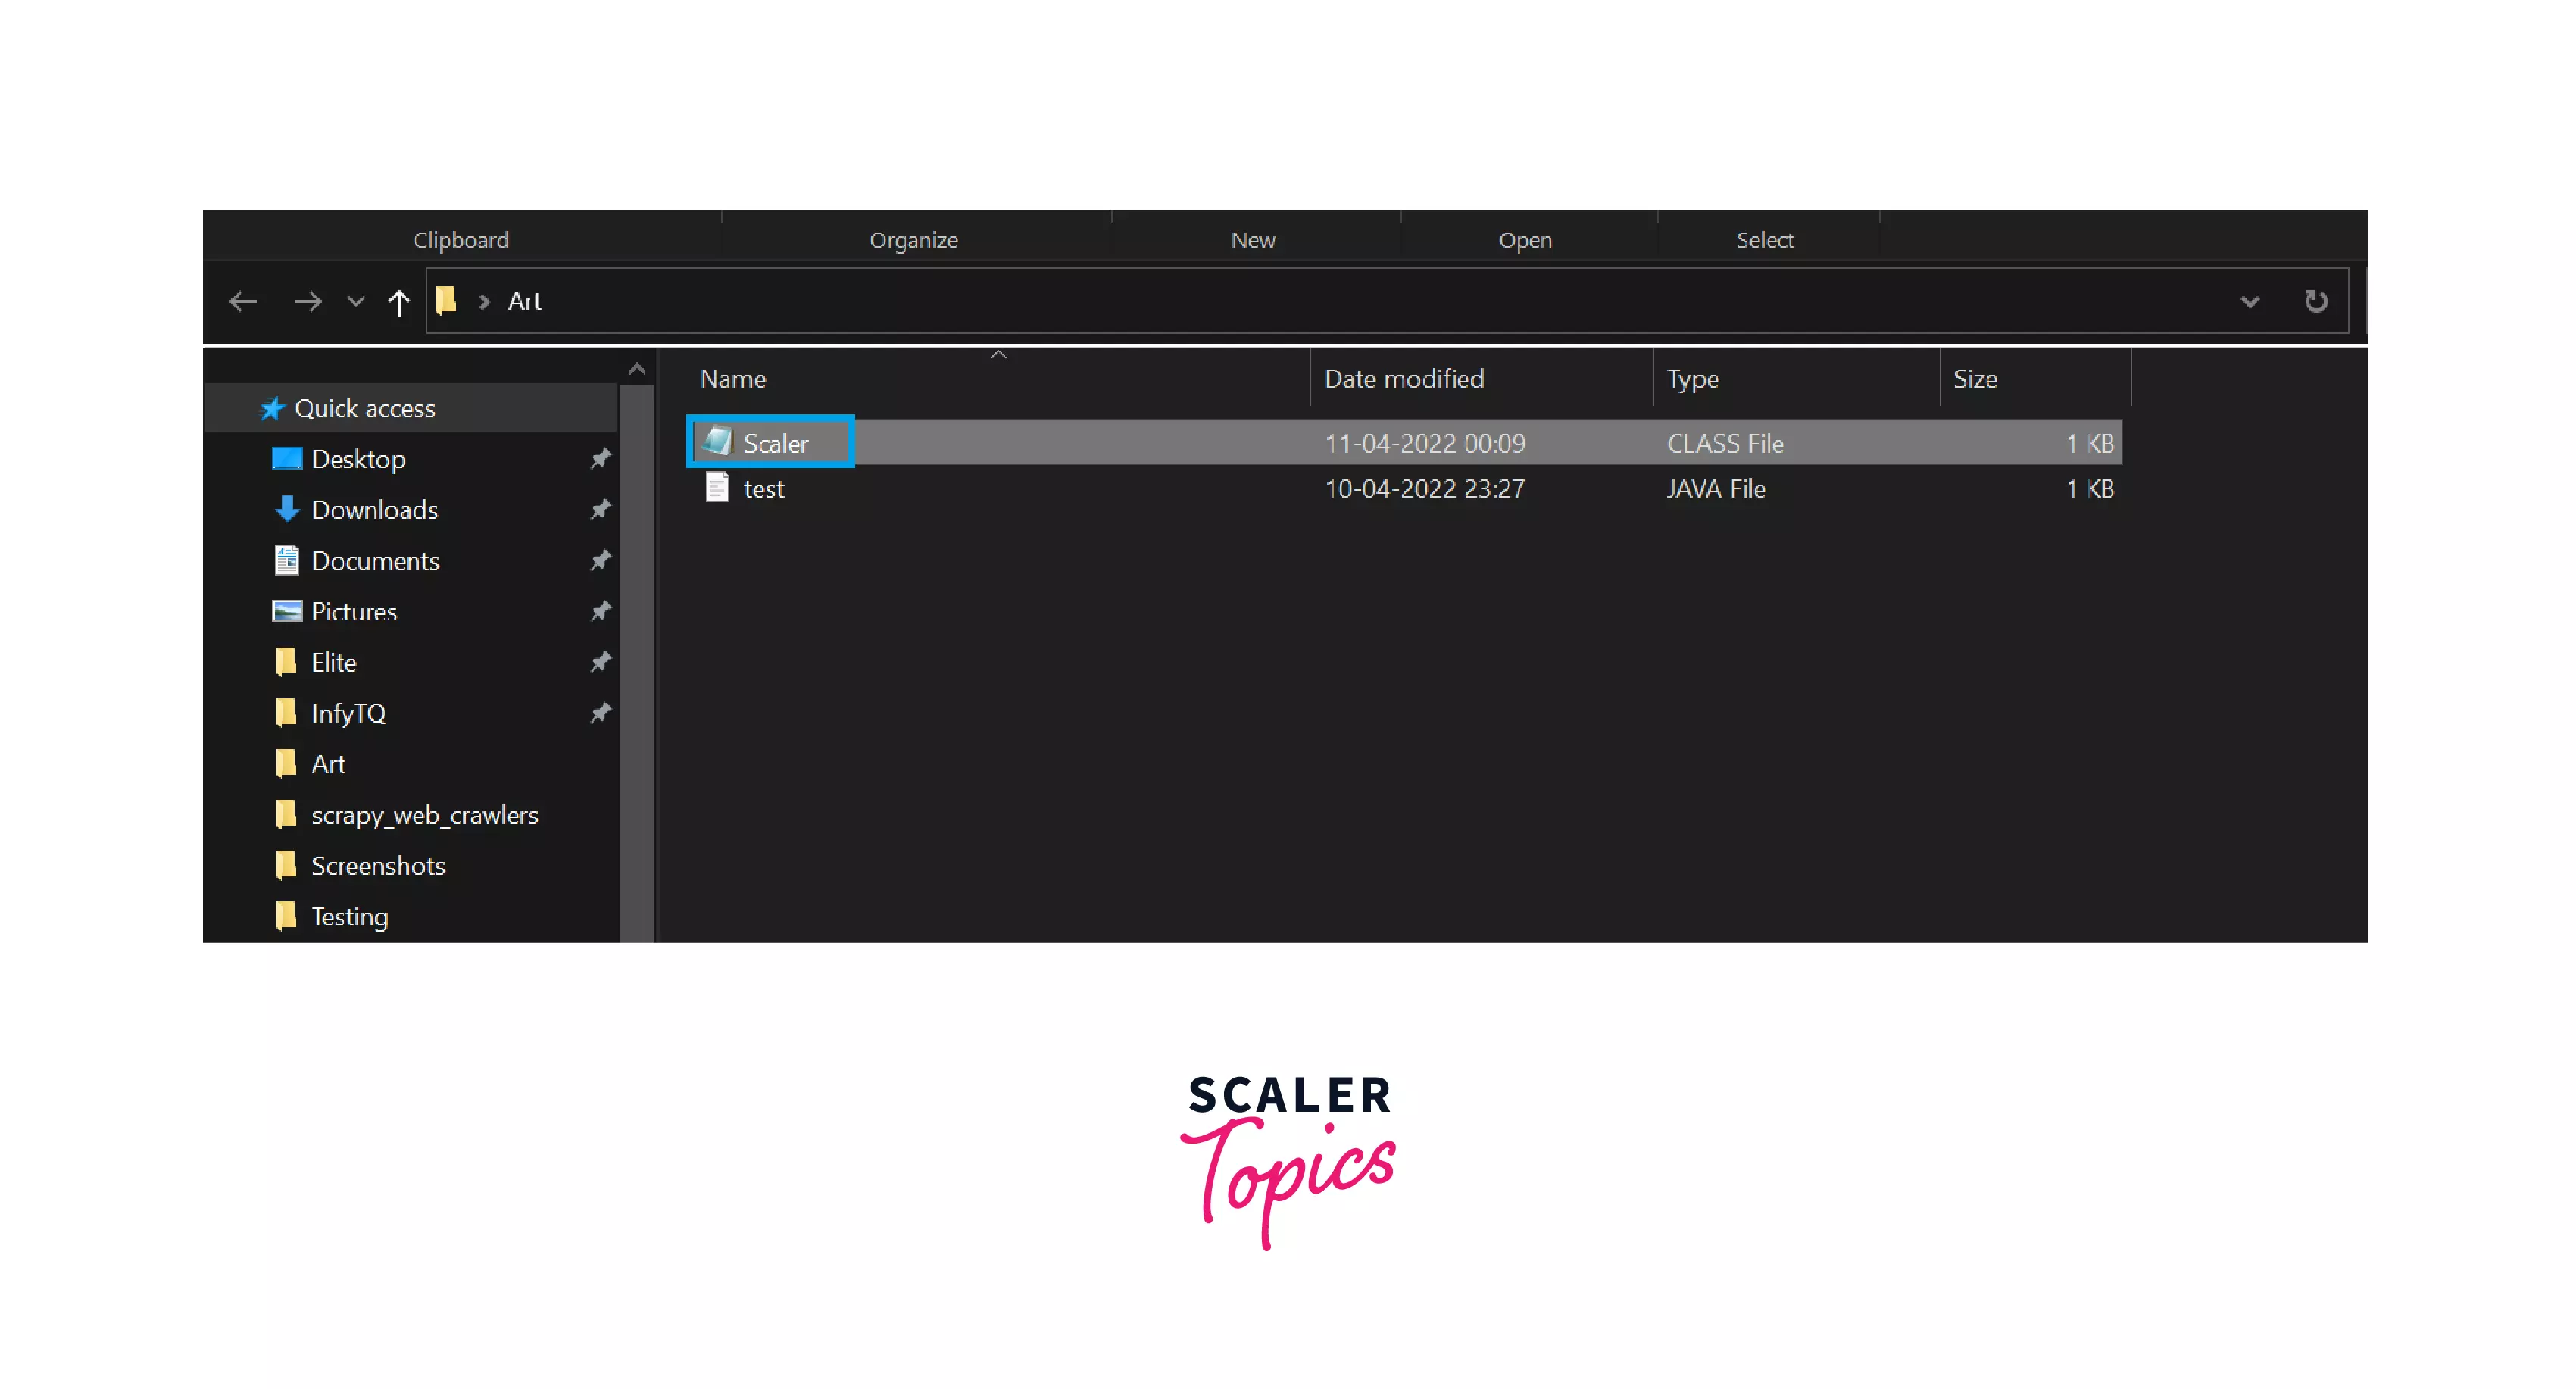
Step 6: You can see that a new file has been created with the .class extension . The name of the file would be the name of the class you have used inside your program. In my case, I have used the Scaler as a class name.
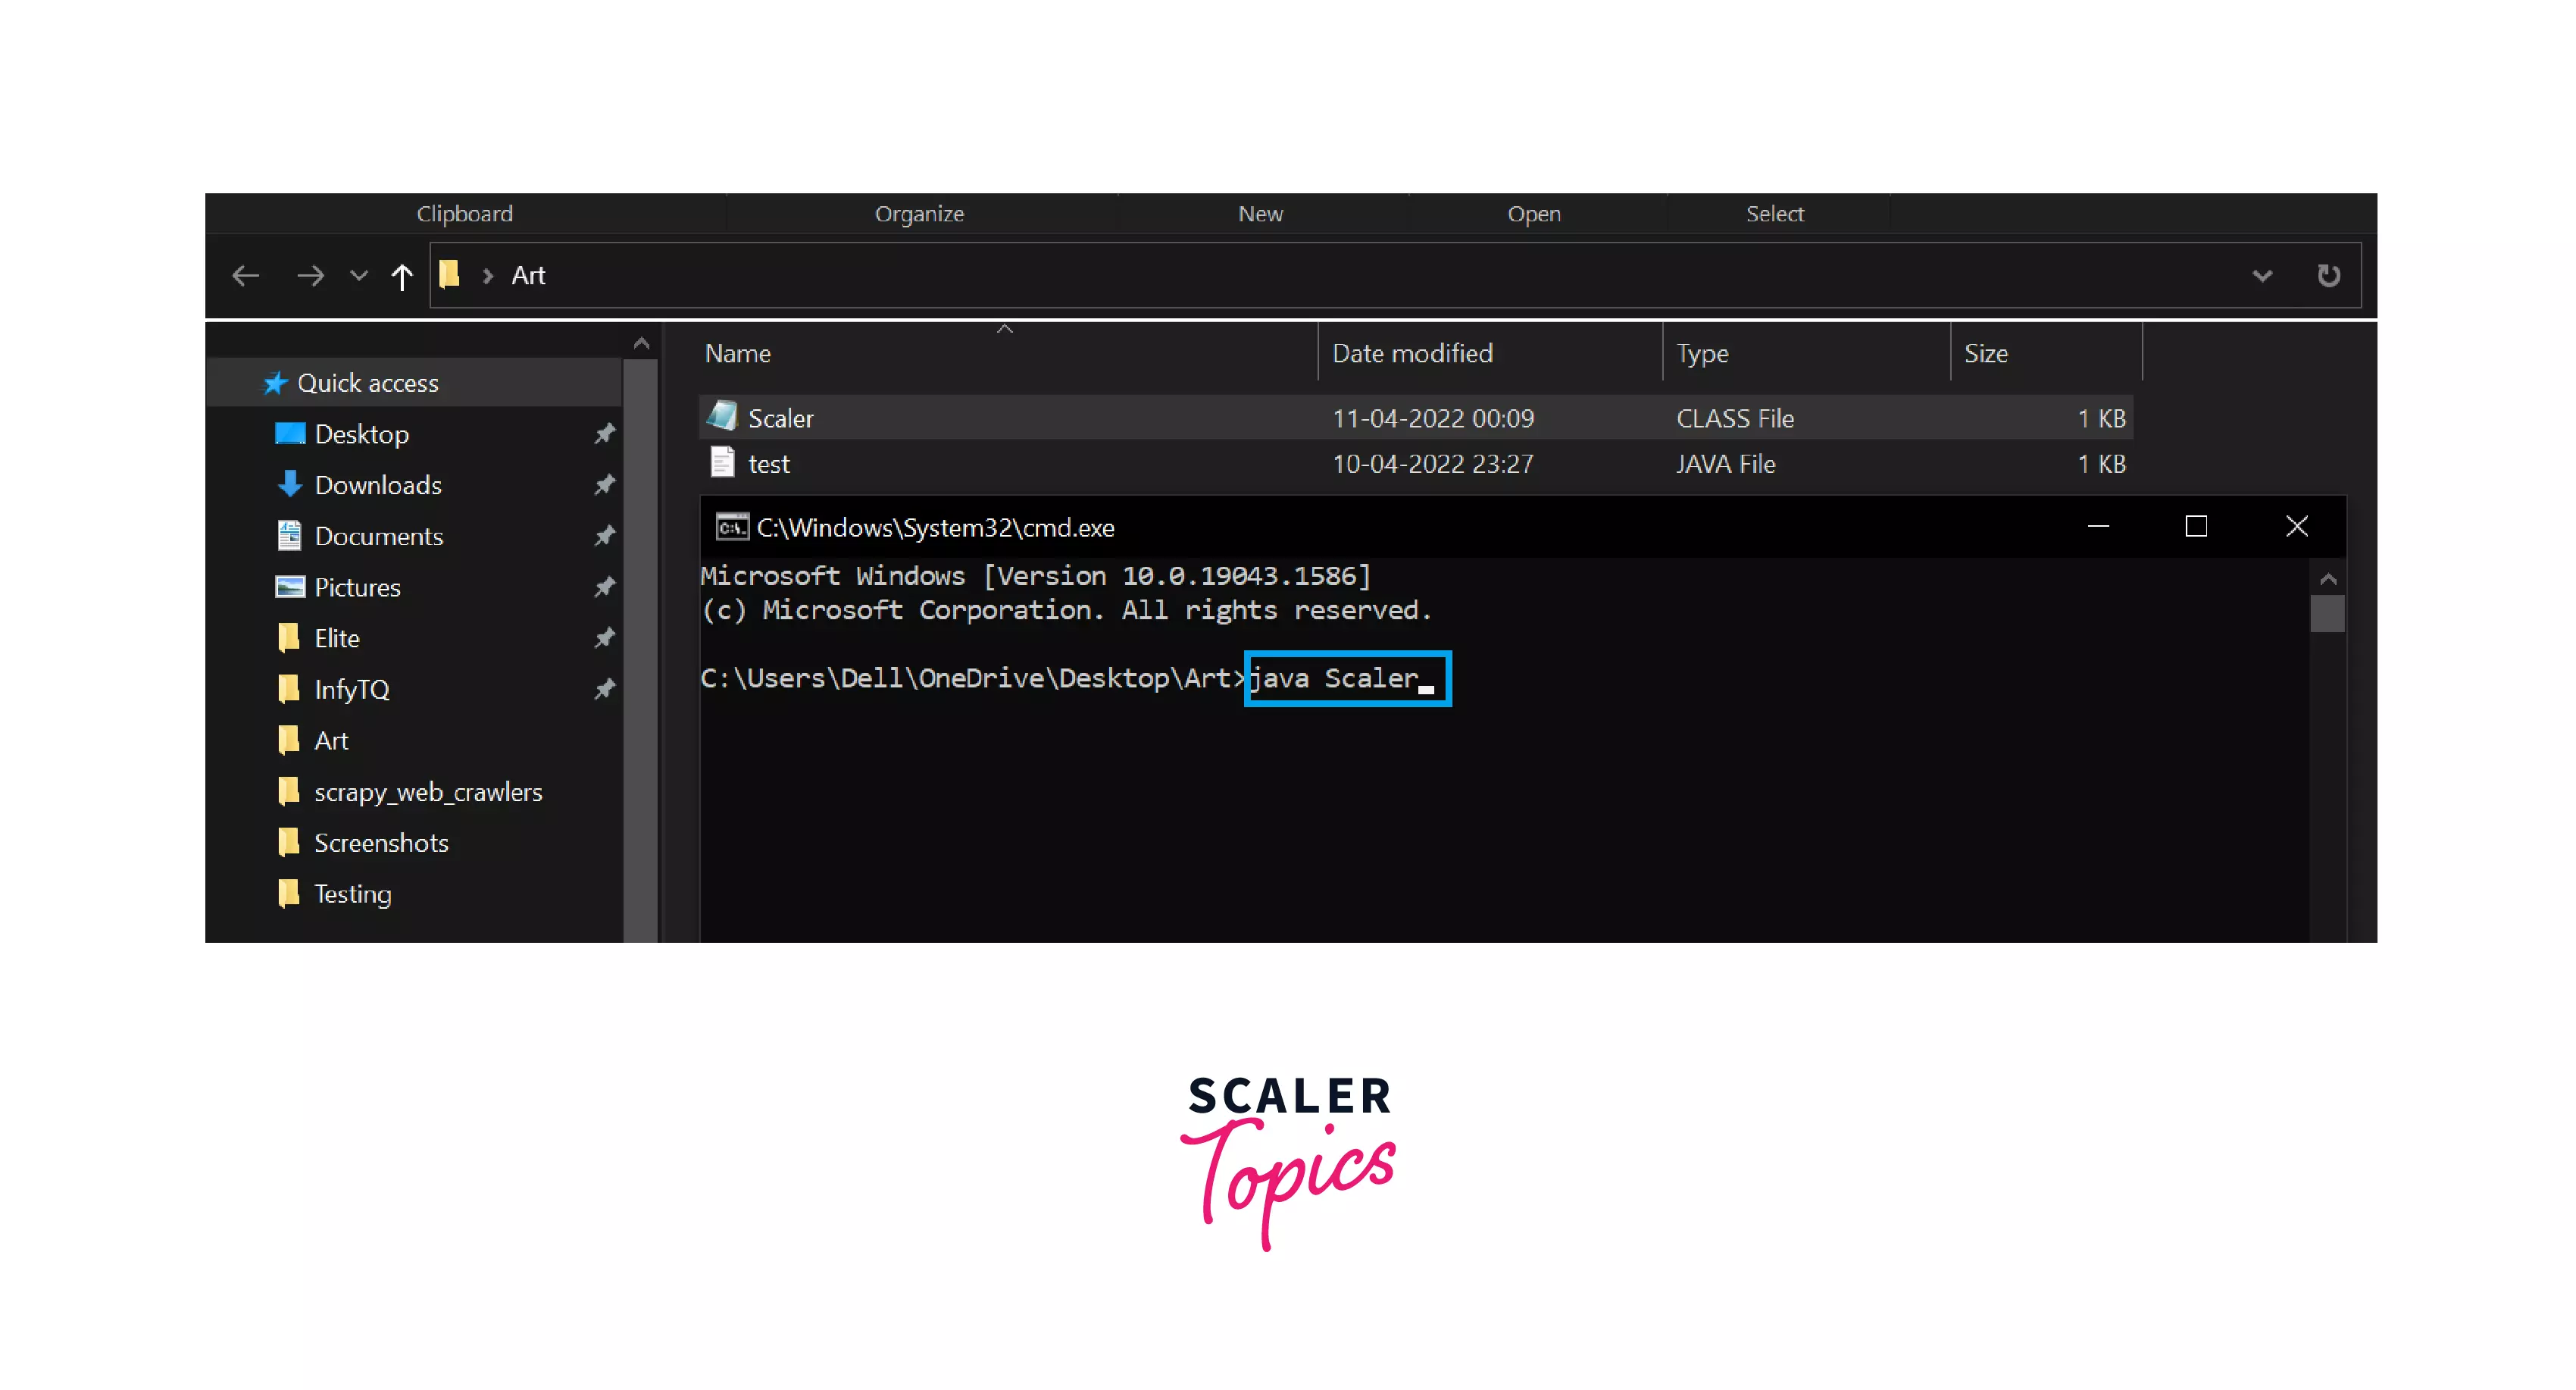
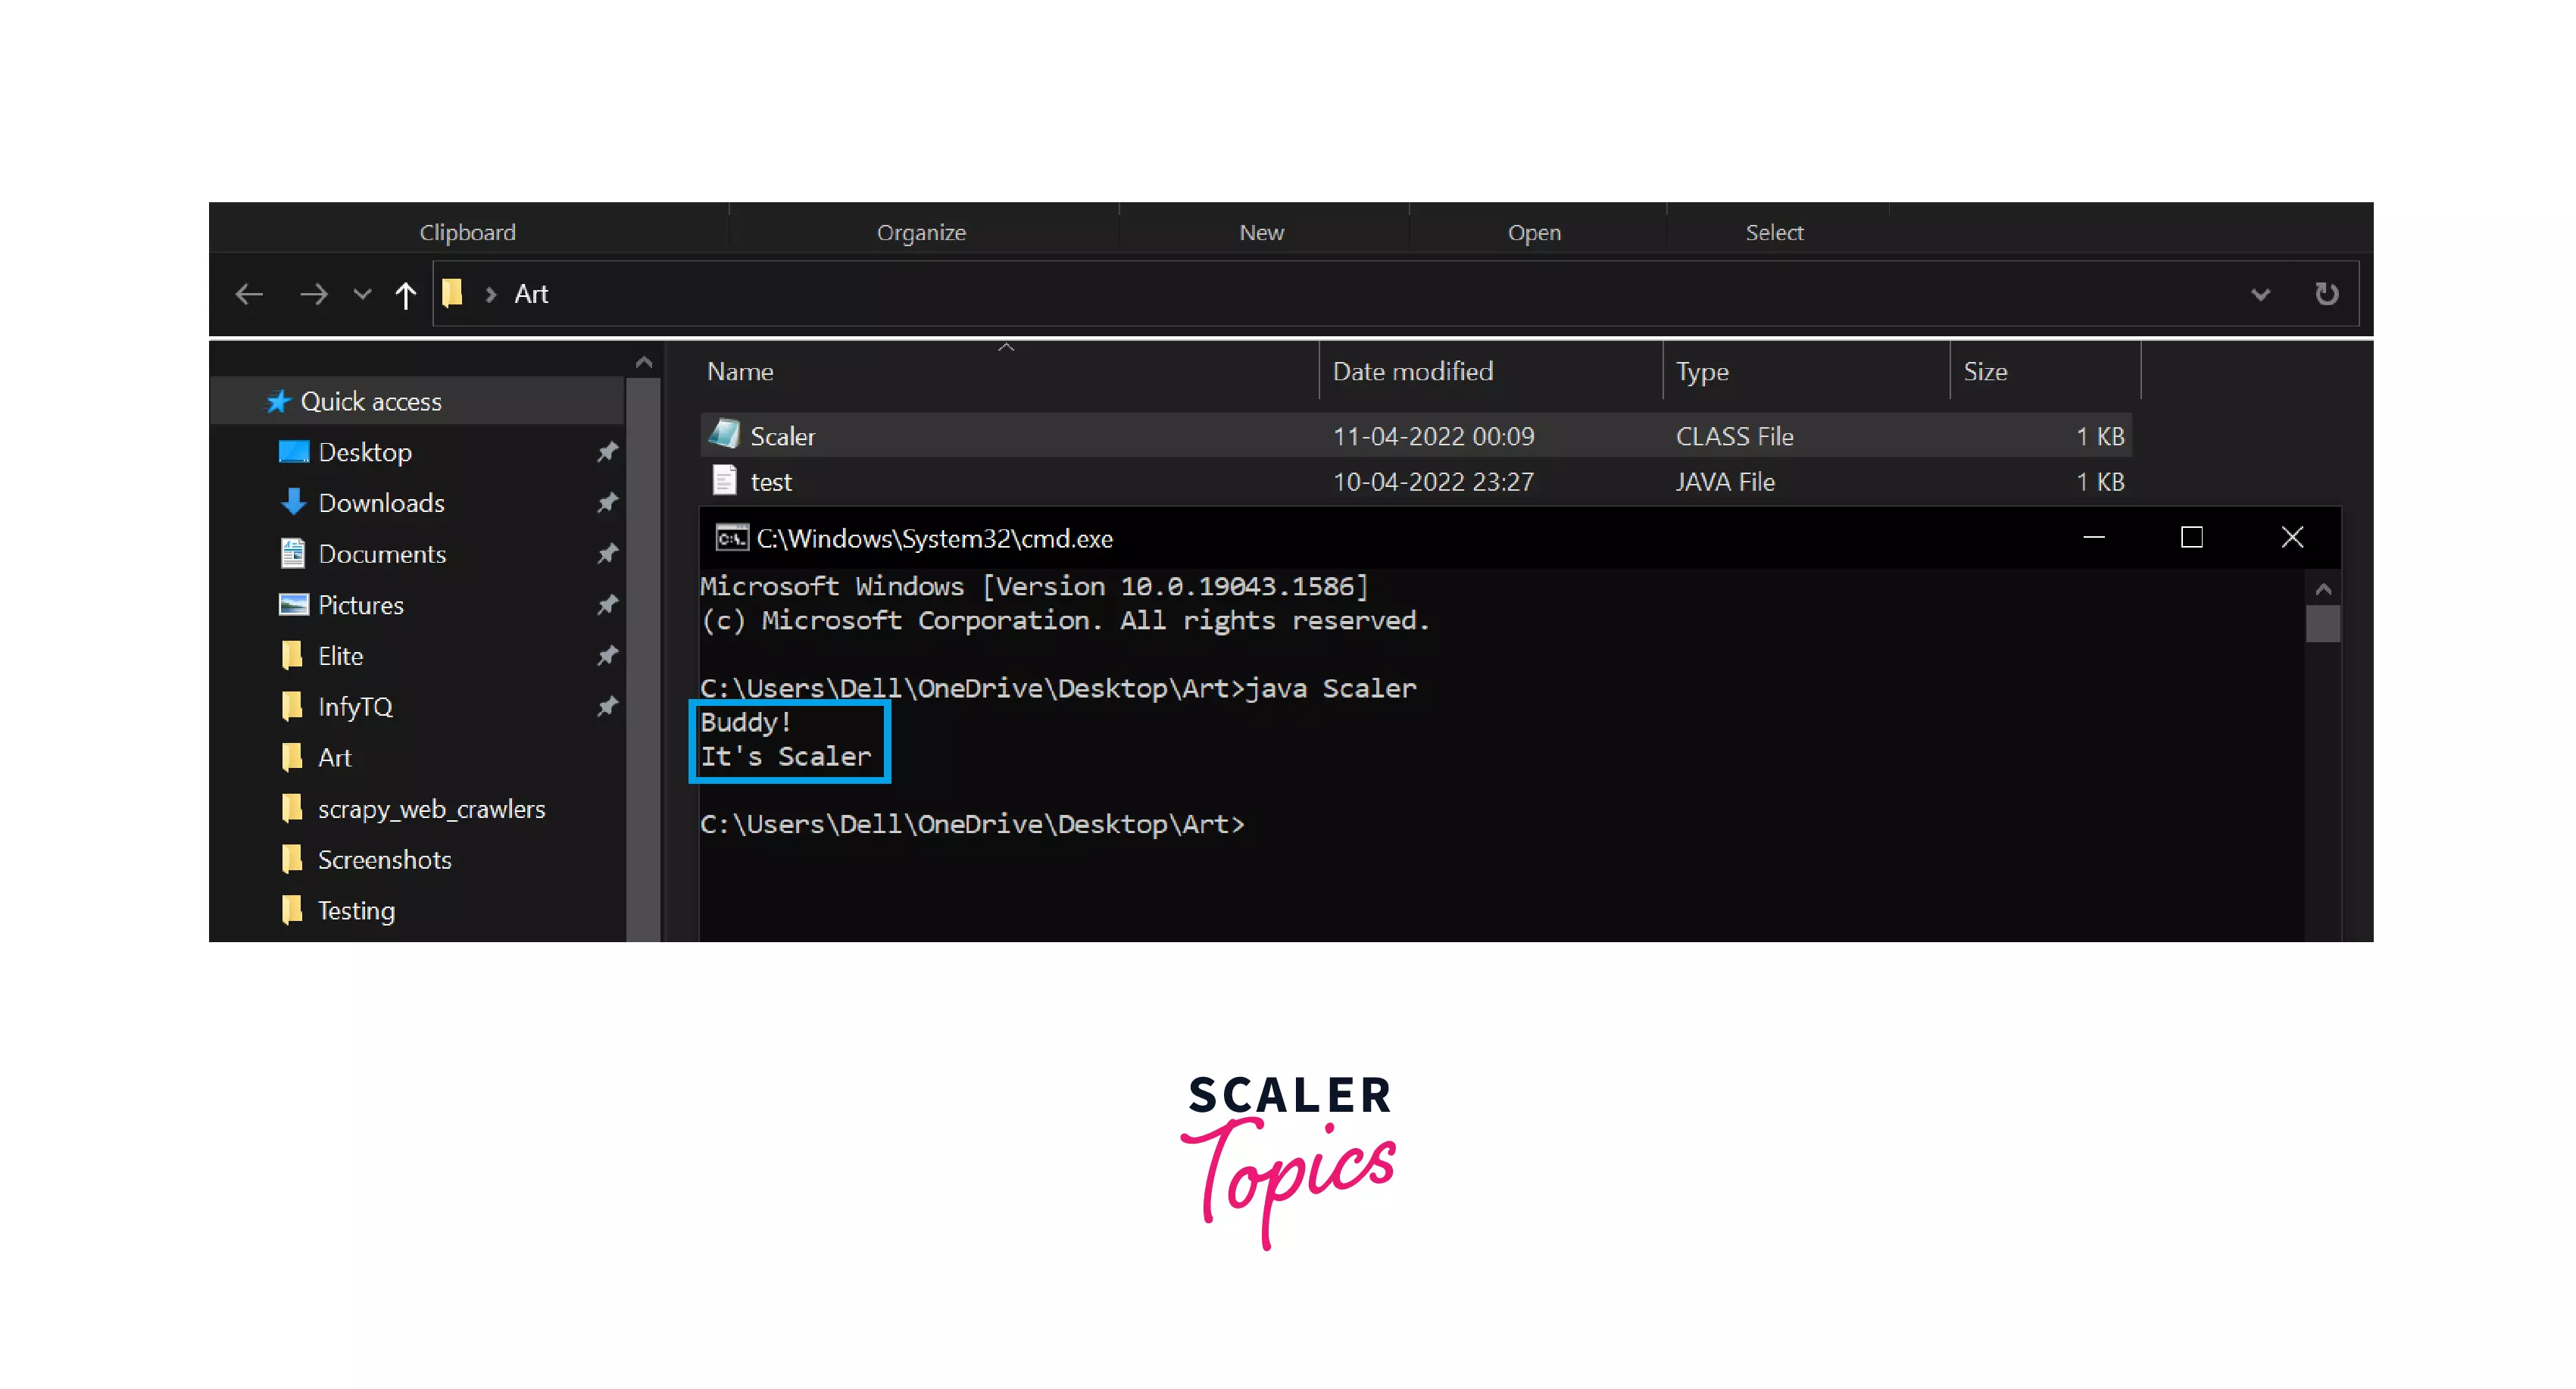
Step 7: Now again, open the cmd and type the command java Scaler as you can see in the below image.
Step 8: At last, you will see that the content of the file has been displayed .
The javac Command
Java programs are compiled using the javac command. It takes .java files as input and generates bytecode.
The java Command
The java command is used to execute Java bytecodes. It takes bytecode as input, executes it, and outputs the result.
Conclusion
- We have seen how to run a Java program using notepad .
- Create the Java file using Notepad and run it using java and javac commands.
- Java programs are compiled using the javac command.
- The java command is used to execute the Java bytecode generated as a result of compilation.