- Saved searches
- Use saved searches to filter your results more quickly
- TJEEPOT/web-design-with-python
- Name already in use
- Sign In Required
- Launching GitHub Desktop
- Launching GitHub Desktop
- Launching Xcode
- Launching Visual Studio Code
- Latest commit
- Git stats
- Files
- readme.md
- Build a Website with Python
- Step #1: Minimal Web Application
- Step #2: Adding HTML
- Step #3: Adding CSS
- Step #4: Adding an Image
- Step #5: Adding JavaScript
- How to build a web UI with Python
- Build your own app with Anvil
- Data Dashboard
- Python Web Development Tutorials
- What you will learn from this section
Saved searches
Use saved searches to filter your results more quickly
You signed in with another tab or window. Reload to refresh your session. You signed out in another tab or window. Reload to refresh your session. You switched accounts on another tab or window. Reload to refresh your session.
TJEEPOT/web-design-with-python
This commit does not belong to any branch on this repository, and may belong to a fork outside of the repository.
Name already in use
A tag already exists with the provided branch name. Many Git commands accept both tag and branch names, so creating this branch may cause unexpected behavior. Are you sure you want to create this branch?
Sign In Required
Please sign in to use Codespaces.
Launching GitHub Desktop
If nothing happens, download GitHub Desktop and try again.
Launching GitHub Desktop
If nothing happens, download GitHub Desktop and try again.
Launching Xcode
If nothing happens, download Xcode and try again.
Launching Visual Studio Code
Your codespace will open once ready.
There was a problem preparing your codespace, please try again.
Latest commit
Git stats
Files
Failed to load latest commit information.
readme.md
This project is designed to show modern simplistic web design with a Python backend. The site is for booking rentals for a property and relies on saving and loading rental dates via a CSV file (a required limitation in the design document). The site also allows for reviews to be posted by people coming to the site, which are also stored in CSV format. A login system allows someone with admin access to remove reviews and accept or delete bookings from their respective pages.
- Server backend development in Python using Flask including loading files, routing to pages and input validation.
- Dividing work equally with a partner and knowing when to ask them for help (and when to help them).
- Implementation of simple JavaScript (including pikaday for calenders)
- Reinforced some CSS3 and HTML5 concepts learned previously such as flexbox, map embedding and CSS image carousel.
Build a Website with Python
![]()
Flask is a web development framework. With Python, there are two modules one can use for web development: Django and Flask. However, Flask is more lightweight and easier to learn. In this tutorial, we’ll be building a very simple website using Python’s Flask module.
To begin with, install flask:
Step #1: Minimal Web Application
The minimal application can be found at https://flask.palletsprojects.com/en/2.0.x/quickstart/#a-minimal-application. This is a web page that displays “Hello World”. The first thing we did was create an instance of Flask() with “__name__” as the argument. The route decorator is used to inform Flask the URL that will activate the function we wrote.
def index ( ) :
return «Hello World»
if «__name__» == «__main__» :
app. run ( debug = True )
Next, in the terminal of PyCharm, type the following (where the name of my Python file is main.py; in your case, replace main.py with your Python’s filename):
Once you run “flask run”, the terminal will chuck out a URL with a port. This URL:PORT is where the web page is loaded. You can always press Control + c to quit. In my case, it says “Running on http://127.0.0.1:5000/ (Press CTRL+C to quit)”. So, open up your web browser, and copy and paste the URL given. In my case, I copied and pasted “http://127.0.0.1:5000/”. Please also note that the previous lines must be run every time you restart PyCharm for it to work:

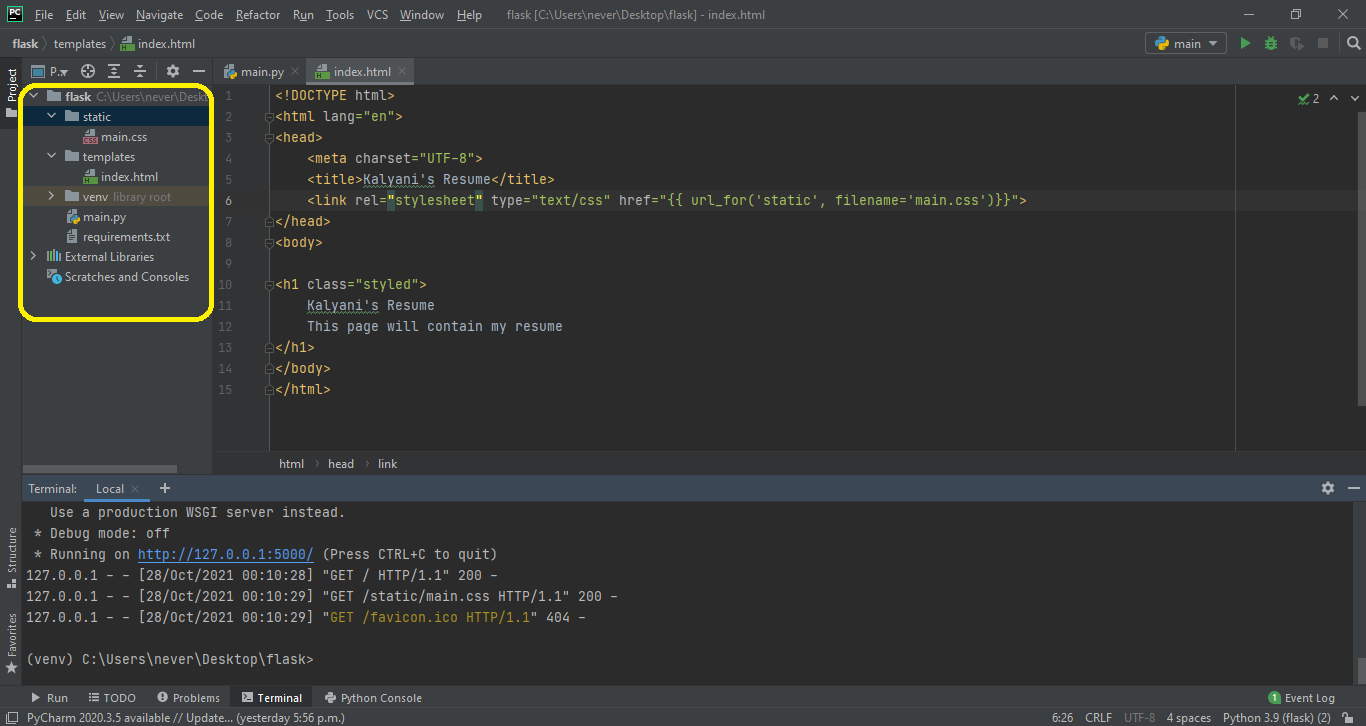
Step #2: Adding HTML
The first thing you’ll need to do is open the folder where the Python script is located and create a folder called “templates”. When I first ran this, I tried putting the name “template” as the folder name, and the whole program crashed and didn’t work. So, it’s imperative that you call the folder “templates”. Within this “templates” folder, create an index.html file with your HTML code. Then, use render_template() and pass “index.html” as the argument. Now, if you run “flask run” in the terminal, your HTML code should be rendered:
My html code (index.html) for the moment is as follows:
And, my Python file code (main.py) is as follows:
from flask import Flask , render_template
def index ( ) :
return render_template ( «index.html» )
if «__name__» == «__main__» :
app. run ( debug = True )
The latter will render a simple HTML page.
Step #3: Adding CSS
Now, I want to add CSS to my HTML. To do this, create a folder called “static” and create a file called “main.css”. Here, the name of the actual CSS file can be anything. I’ve decided to call mine “main.css”. However, the name of the folder must be “static”! In fact, in the “static” folder, one can place anything that is static, such as CSS, JavaScript, and images. So, if you’re going to put images, JavaScript, and CSS, you may wish to create sub-folders.
First, let’s write out the CSS (main.css) I want:
body {
margin : 0 ;
color : #333
font-family : verdana ;
font-size : 20px ;
background-color : rgb ( 201 , 76 , 76 ) ;
}
.styled {
background-color : #92a8d1 ;
font-family : verdana ;
font-size : 20px ;
}
Here, in the index.html, we need to write <link rel=”stylesheet” type=”text/css” href=”>”> in the head of the HTML file. Here, the filename is the name of the CSS file (mine is main.css). If for instance the “main.css” is located with a sub-folder called “css”, then you’d write the following:
After that, you can use the CSS you have created. For instance, I created one called “styled”, and used it in the h1 class.
My index.html file would be as follows:
Kalyani’ s Resume
This page will contain my resume
< / h1 >
< / body >
< / html >
The main Python file – main.py – stays the same.
from flask import Flask , render_template
def index ( ) :
return render_template ( «index.html» )
if «__name__» == «__main__» :
app. run ( debug = True )
Step #4: Adding an Image

Now, let’s add an image to the HTML page we created! For this, we use the “static” folder we created. Within the “static” folder, I created another folder called “images”. Within the images folder, I placed an image. Now, let’s add the image to the HTML code as follows: . In this case, I set the height of the image to 200, but you can change it to whatever you want and add CSS if you want.
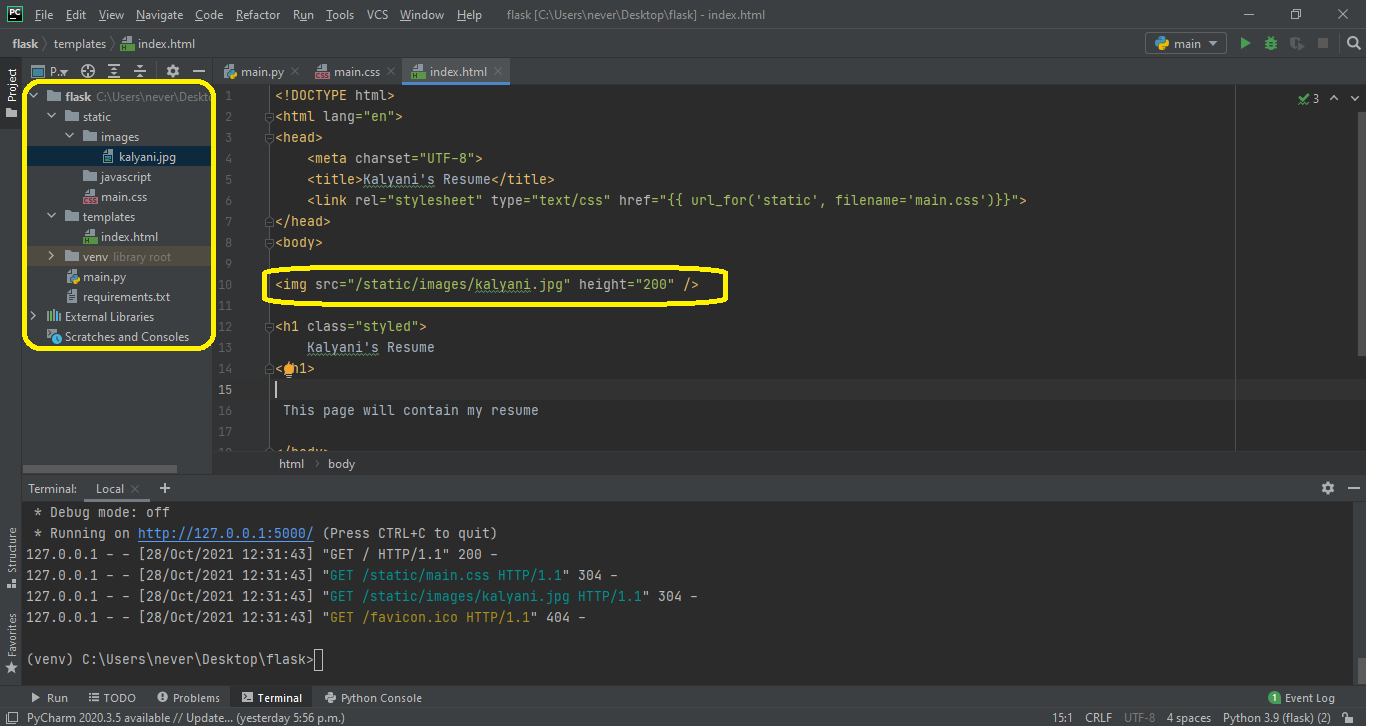
The HTML code would look as follows:
Alternatively, one can also use the following:
In this case, the HTML code would look like this:
[ cc lang = «html» width = «100%» height = «100%» escaped = «true» theme = «blackboard» nowrap = «0» ]
>»>
%3E%3E)
Kalyani’ s Resume
< / h1 >
This page will contain my resume
< / body >
< / html >
Step #5: Adding JavaScript
There are two ways you can add JavaScript. In this first demo, I will create a button. When the button is pressed, it would activate a function called myFunction() which will be JavaScript (found in the tag). For this, set up the button. Then, set up a script tag in the head of the HTML code and within it, define a function. In my case, I’ve defined a function that will add the “whole resume” to a p element upon button click.
You can add it to the index.html file as follows:
function myFunction() document.getElementById(«para»).innerHTML = «WHOLE RESUME»;
>

Kalyani’ s Resume
< / h1 >
This page will contain my resume
< / p >
Click to see Resume < / button >
< / body >
< / html >
However, in most cases, JavaScript files tend to be documents themselves, and not one liners. In such cases, we’d have a .js file that we have to link. In my case, I’d write: . So, much like the image file, we link the js file as follows:
>»>
Kalyani’ s Resume
< / h1 >
This page will contain my resume
< / p >
Click to see Resume < / button >
< / body >
< / html >
Alternatively, you can also use this: . The latter would generate this HTML code:
Kalyani’ s Resume
< / h1 >
This page will contain my resume
< / p >
Click to see Resume < / button >
< / body >
< / html >
How to build a web UI with Python
Anvil lets you build your app’s front-end entirely in Python — no HTML, CSS or Javascript required. You can build your UI by dragging and dropping components in Anvil’s visual designer or by adding components using Python code:
Let’s look at how you can use the Anvil editor to create a user interface by turning this app into a “hello world” app that says hello to your users.
In the middle of the Anvil IDE is the Form Editor which is split into the Design View and the Code View. On the right of the Anvil editor you will find the Toolbox.
You can drag and drop components, like Labels, from the toolbox to build your user interface. This hello world app will also need a TextBox for users to enter their name:
To configure components, you can edit their properties on the right hand side in the Properties Panel. This includes both the information the component displays and its styling:
Every component is a Python object, so you can also set the component’s properties in the Form Editor’s Code View:
All components have events they can raise. For example, when a user of your app clicks a Button component it raises a click event. We can create a Python method in the Code View to be called when this happens. In your Button’s click method, you can call Anvil’s alert function to display an alert that says hello to your users:
When you’ve finished your app, all you have to do is test it and use Anvil’s two-click deployment to publish it online for people to use. Your users can now enter their name and clicking the say hi button displays the alert:
Using the drag and drop designer isn’t your only option for building user interfaces in Anvil. You can also create and add components to your user interface directly in code:
Anvil comes with all the usual UI components — buttons, text boxes, drop-downs, tables, and so on. And if that’s not enough, you can create your own custom components and share them with other applications.
To learn more about creating user interfaces with Anvil, why not get started with our 10 minute Feedback Form Tutorial?
Build your own app with Anvil
If you’re new here, welcome! Anvil is a platform for building full-stack web apps with nothing but Python. No need to wrestle with JS, HTML, CSS, Python, SQL and all their frameworks – just build it all in Python.
Want to build an app of your own? Get started with one of our tutorials:
Data Dashboard
In this tutorial, you will learn to plot data using client-side Python code and deploy it online for others to see.
Python Web Development Tutorials
Python is a beautiful language. It’s easy to learn and fun, and its syntax (the rules) is clear and concise. Python is a popular choice for beginners, yet still powerful enough to back some of the world’s most popular products and applications from companies like NASA, Google, IBM, Cisco, Microsoft, Industrial Light & Magic among others.
One area where Python shines is web development. Python offers many frameworks from which to choose from including bottle.py, Flask, CherryPy, Pyramid, Django and web2py. These frameworks have been used to power some of the world’s most popular sites such as Spotify, Mozilla, Reddit, the Washington Post and Yelp. The tutorials and articles in this section cover techniques used in the development of Python Web applications and focus on how to program real-world solutions to problems that ordinary people actually want to solve.
What you will learn from this section
- Testing, mocking and Test Driven Development
- Integrating back-end code with front-end libraries and frameworks
- How to deploy your Python Web Application
- Containerizing web applications
- Designing and interacting with APIs
- Social Authentication
- Improving your application’s performance through caching
Free Bonus: Click here to get access to a free Django Learning Resources Guide (PDF) that shows you tips and tricks as well as common pitfalls to avoid when building Python + Django web applications.
Free Bonus: Click here to get access to a free Flask + Python video tutorial that shows you how to build Flask web app, step-by-step.