- Tutorial: Node.js for Beginners
- Prerequisites
- Try NodeJS with Visual Studio Code
- Create your first NodeJS web app using Express
- Try using a Node.js module
- Feedback
- Node.js and JavaScript in Visual Studio Code
- Intro to Web Development at Naresuan University
- Why Visual Studio Code?
- Portable setup
- Classroom extensions
- Classroom settings
- Node.js and JavaScript Extension Pack
- Free lesson: Build a Node.js app for Azure Cosmos DB
Tutorial: Node.js for Beginners
If you’re brand new to using Node.js, this guide will help you to get started with some basics.
Prerequisites
If you are a beginner, trying Node.js for the first time, we recommend installing directly on Windows. For more information, see Should I install Node.js on Windows or Windows Subsystem for Linux
Try NodeJS with Visual Studio Code
If you have not yet installed Visual Studio Code, return to the prerequisite section above and follow the installation steps linked for Windows or WSL.
- Open your command line and create a new directory: mkdir HelloNode , then enter the directory: cd HelloNode
- Create a JavaScript file named «app.js» with a variable named «msg» inside: echo var msg > app.js
- Open the directory and your app.js file in VS Code using the command: code .
- Add a simple string variable («Hello World»), then send the contents of the string to your console by entering this in your «app.js» file:
var msg = 'Hello World'; console.log(msg); Notice that when you type console in your ‘app.js’ file, VS Code displays supported options related to the console object for you to choose from using IntelliSense. Try experimenting with Intellisense using other JavaScript objects.
Create your first NodeJS web app using Express
Express is a minimal, flexible, and streamlined Node.js framework that makes it easier to develop a web app that can handle multiple types of requests, like GET, PUT, POST, and DELETE. Express comes with an application generator that will automatically create a file architecture for your app.
To create a project with Express.js:
- Open your command line (Command Prompt, Powershell, or whatever you prefer).
- Create a new project folder: mkdir ExpressProjects and enter that directory: cd ExpressProjects
- Use Express to create a HelloWorld project template: npx express-generator HelloWorld —view=pug
Note We are using the npx command here to execute the Express.js Node package without actually installing it (or by temporarily installing it depending on how you want to think of it). If you try to use the express command or check the version of Express installed using: express —version , you will receive a response that Express cannot be found. If you want to globally install Express to use over and over again, use: npm install -g express-generator . You can view a list of the packages that have been installed by npm using npm list . They’ll be listed by depth (the number of nested directories deep). Packages that you installed will be at depth 0. That package’s dependencies will be at depth 1, further dependencies at depth 2, and so on. To learn more, see Difference between npx and npm? on StackOverflow.
- bin . Contains the executable file that starts your app. It fires up a server (on port 3000 if no alternative is supplied) and sets up basic error handling.
- public . Contains all the publicly accessed files, including JavaScript files, CSS stylesheets, font files, images, and any other assets that people need when they connect to your website.
- routes . Contains all the route handlers for the application. Two files, index.js and users.js , are automatically generated in this folder to serve as examples of how to separate out your application’s route configuration.
- views . Contains the files used by your template engine. Express is configured to look here for a matching view when the render method is called. The default template engine is Jade, but Jade has been deprecated in favor of Pug, so we used the —view flag to change the view (template) engine. You can see the —view flag options, and others, by using express —help .
- app.js . The starting point of your app. It loads everything and begins serving user requests. It’s basically the glue that holds all the parts together.
- package.json . Contains the project description, scripts manager, and app manifest. Its main purpose is to track your app’s dependencies and their respective versions.
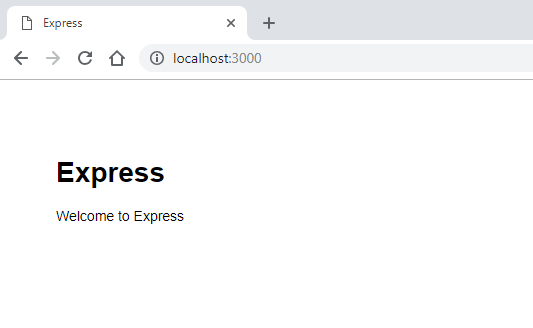
npx cross-env DEBUG=HelloWorld:* npm start Tip The DEBUG=myapp:* part of the command above means you are telling Node.js that you want to turn on logging for debugging purposes. Remember to replace ‘myapp’ with your app name. You can find your app name in the package.json file under the «name» property. Using npx cross-env sets the DEBUG environment variable in any terminal, but you can also set it with your terminal specific way. The npm start command is telling npm to run the scripts in your package.json file.
Try using a Node.js module
Node.js has tools to help you develop server-side web apps, some built in and many more available via npm. These modules can help with many tasks:
| Tool | Used for |
|---|---|
| gm, sharp | Image manipulation, including editing, resizing, compression, and so on, directly in your JavaScript code |
| PDFKit | PDF generation |
| validator.js | String validation |
| imagemin, UglifyJS2 | Minification |
| spritesmith | Sprite sheet generation |
| winston | Logging |
| commander.js | Creating command-line applications |
Let’s use the built-in OS module to get some information about your computer’s operating system:
- In your command line, open the Node.js CLI. You’ll see the > prompt letting you know you’re using Node.js after entering: node
- To identify the operating system you are currently using (which should return a response letting you know that you’re on Windows), enter: os.platform()
- To check your CPU’s architecture, enter: os.arch()
- To view the CPUs available on your system, enter: os.cpus()
- Leave the Node.js CLI by entering .exit or by selecting Ctrl+C twice.
Tip You can use the Node.js OS module to do things like check the platform and return a platform-specific variable: Win32/.bat for Windows development, darwin/.sh for Mac/unix, Linux, SunOS, and so on (for example, var isWin = process.platform === «win32»; ).
Feedback
Submit and view feedback for
Node.js and JavaScript in Visual Studio Code
Visual Studio Code is the most popular free code editor among JavaScript developers around the world according to the State of JS 2020 survey. It is easily customizable and has a rich ecosystem of extensions to help your students learn Node.js and JavaScript.
Below is a case study of a Computer Science educator in Thailand and includes his recommendations for VS Code extensions and settings in the classroom.
Intro to Web Development at Naresuan University
Charles Allen is a lecturer at Naresuan University in Thailand, where he teaches several Computer Science and Business courses. He teaches a project-based Web Development course, where students build a TypeScript app using the Vue.js framework and Firebase platform.
Why Visual Studio Code?
Charles has been using Visual Studio Code to teach for the past four years. In his own words:
«The more realistic the learning environment, the more comprehensive the education. I am not just teaching code; I’m also teaching the tools, tactics, and teamwork my students will need to start building for themselves. VS Code is the first choice of web professionals, so it’s the first choice for my class!»
Portable setup
VS Code is great for Charles because it has a portable mode, which stores all of VS Code’s application data in one location. He prepares a single «image», available on GitHub, containing his favorite extensions, settings, and cached versions of some libraries. This customized folder structure can be quickly copied to every lab machine without needing to run installers, download additional files, or manually configure each machine.
Classroom extensions
The extensions he likes to have installed:
- ESLint — His favorite! Auto-formatting keeps students focused on program logic and linting helps them quickly find, understand, and fix errors in their JavaScript code.
- TabNine — Longer AI-driven code-snippets helps non-native English speakers avoid code-breaking typos and reduces the impact of slow typing.
- REST Client — Share API designs as .http files and simplify manual API testing within VS Code.
- Vetur — Vue.js framework support for syntax highlighting, code completion, and more! This helps students focus on their Vue.js code rather than getting stuck solving syntactical errors.
These extensions are also part of the Node.js and JavaScript Education Extension Pack below!
Classroom settings
And here are his recommended settings, which help his students have consistent formatting of their code to make his life reviewing and grading their work that much easier. You can use his settings by editing the settings file and pasting these in:
// Formatting and linting "editor.formatOnPaste": true, "editor.formatOnSave": true, // hero! "editor.tabCompletion": "on", "editor.tabSize": 2, "eslint.format.enable": true, "eslint.workingDirectories": [ "mode": "auto" >], // important for mono-repo projects "files.autoSave": "onFocusChange", // hero "prettier.endOfLine": "auto", // cross-platform "prettier.semi": false, // align with ESLint Standard "prettier.singleQuote": true, // align with ESLint Standard "prettier.trailingComma": "none", // align with ESLint Standard "tabnine.experimentalAutoImports": true, // Language-Specific "javascript.format.insertSpaceBeforeFunctionParenthesis": false, // align with ESLint Standard "javascript.updateImportsOnFileMove.enabled": "always", "typescript.format.insertSpaceBeforeFunctionParenthesis": false, // align with ESLint Standard "typescript.updateImportsOnFileMove.enabled": "always", "[javascript]": "editor.defaultFormatter": "dbaeumer.vscode-eslint" // preconfig ESLint >, "[typescript]": "editor.defaultFormatter": "dbaeumer.vscode-eslint" // preconfig ESLint >, "[json]": "editor.defaultFormatter": "esbenp.prettier-vscode" >, "[jsonc]": "editor.defaultFormatter": "esbenp.prettier-vscode" >, "[html]": "editor.defaultFormatter": "esbenp.prettier-vscode" >, "[css]": "editor.defaultFormatter": "esbenp.prettier-vscode" >, "[scss]": "editor.defaultFormatter": "esbenp.prettier-vscode" >, "[markdown]": "editor.defaultFormatter": "esbenp.prettier-vscode" >, "[vue]": "editor.defaultFormatter": "octref.vetur" >, "vetur.format.options.tabSize": 2, "vetur.format.options.useTabs": false, "vetur.format.defaultFormatter.html": "prettier", "vetur.format.defaultFormatter.js": "vscode-typescript", // for consistency with TS option "vetur.format.defaultFormatter.ts": "vscode-typescript" > Thank you Charles for sharing your experiences and favorite VS Code settings! If you’re interested in using VS Code for your Node.js web development classes, you can get started with the Node.js and JavaScript Education Extension Pack that contains Charles’ favorite extensions, extensions for real-time collaboration, and more!
Node.js and JavaScript Extension Pack
Unsure which extensions to recommend to your students? You can point your students to the Node.js and JavaScript Education Extension Pack that contains essential and helpful extensions for the classroom. You can download the extension pack from the VS Code Marketplace:
The extension pack contains:
- npm and npm IntelliSense for verifying status of npm packages(installed or not) and auto-completions.
- ESLint and Vetur for basic JavaScript, TypeScript, and Vue.js functionality like auto-completions, linting, error highlighting before compiling.
- Live Share to enable real-time collaboration.
- Remote — SSH to work on remote projects (for example, to access lab machines) through SSH with full VS Code functionality.
- REST Client to run REST Calls within VS Code for quick manual testing.
- Code Runner to run snippets (selected code) and single files of any code with a single click.
- and more!
Free lesson: Build a Node.js app for Azure Cosmos DB
Build a database app to store and query data in Azure Cosmos DB by using Visual Studio Code and Node.js. View full details of the lessons at Build a Node.js app for Azure Cosmos DB.