- How to Edit HTML in WordPress Code Editor (Beginner’s Guide)
- Why Should You Edit HTML in WordPress?
- How to Edit HTML in WordPress Block Editor
- How to Edit HTML in WordPress Classic Editor
- How to Edit HTML in WordPress Widgets
- How to Edit HTML in WordPress Theme Editor
- How to Edit HTML in WordPress Using FTP
- Easy Way to Add Code in WordPress
- Beginning HTML
- What is HTML?
- Add and Edit HTML
- Some HTML Basics
- Format Text With HTML
- Add a Link with HTML
- Insert an Image with HTML
How to Edit HTML in WordPress Code Editor (Beginner’s Guide)
Last updated on May 5th, 2023 by Editorial Staff | Reader Disclosure Disclosure: Our content is reader-supported. This means if you click on some of our links, then we may earn a commission. See how WPBeginner is funded, why it matters, and how you can support us.
Are you looking for an easy way to edit HTML on your WordPress website?
HyperText Markup Language or HTML is a code that tells a web browser how to display the content on your web pages. Editing HTML comes in handy for advanced customization and troubleshooting issues.
In this article, we’ll show you how to edit HTML in the WordPress code editor using different methods.
Why Should You Edit HTML in WordPress?
WordPress offers thousands of themes and plugins to change the appearance of your website and customize different elements without touching a single line of code.
However, plugins and themes have their limitations and might not offer the exact features you’re looking for. As a result, you might be unable to style your website the way you want it to look.
This is where editing HTML is really useful. You can easily perform advanced customization using HTML code. It provides a lot of flexibility and control over how your site will look and function.
In addition, learning how to edit HTML can also help you identify and fix errors on your WordPress website when you don’t have access to the dashboard.
Note: If you don’t want to edit HTML, but still want full customization options, then we recommend using a drag and drop WordPress page builder like SeedProd.
That being said, let’s look at different ways to edit HTML in a WordPress website.
We’ll cover how to edit HTML using the block editor and classic editor, and we’ll also show you an easy way to add code to your site. You can click the links below to jump ahead to your preferred section.
How to Edit HTML in WordPress Block Editor
In the WordPress block editor, there are multiple ways to edit the HTML of your post or page.
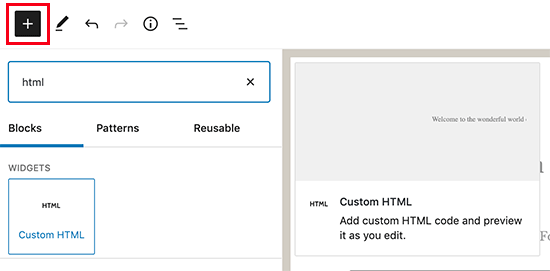
First, you can use a Custom HTML block in your content to add HTML code.
To start, head over to your WordPress dashboard and then add a new post/page or edit an existing article. After that, click the plus (+) sign at the top left corner and add a ‘Custom HTML’ block.
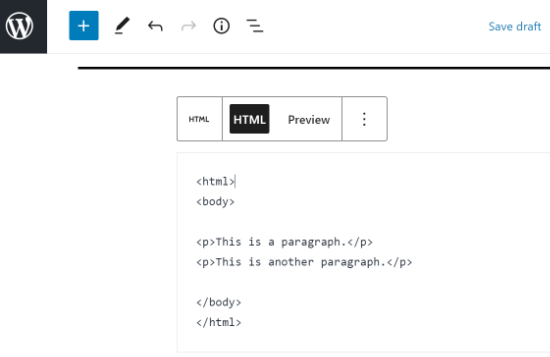
Next, go ahead and enter your custom HTML code in the block. You can also click on the ‘Preview’ option to check if the HTML code is working properly and how your content will look on your live website.
Another way to add or change HTML code in the WordPress block editor is by editing the HTML of a particular block.
To do that, simply select an existing block in your content and then click the three-dot menu. Next, go ahead and click the ‘Edit as HTML’ option.
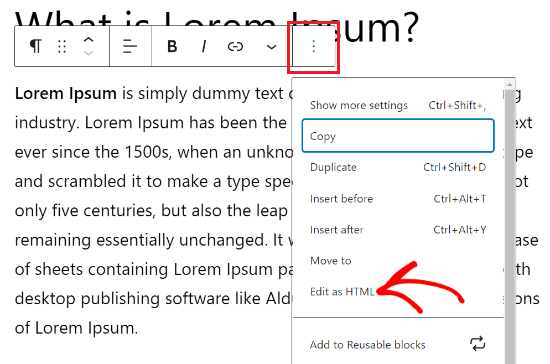
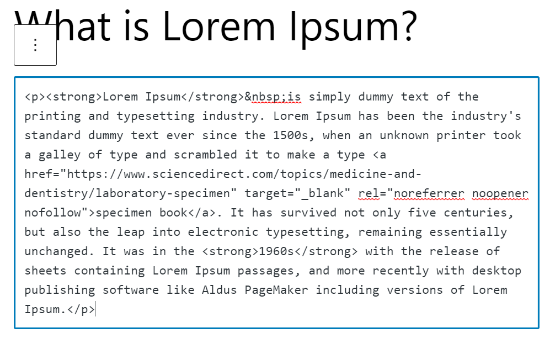
You’ll now see the HTML of an individual block. Go ahead and edit the HTML of your content. For example, you can add a nofollow link, change the style of your text, or add other code.
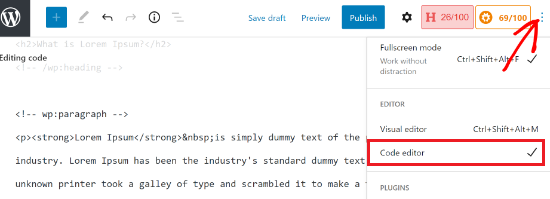
If you want to edit the HTML of your entire post, then you can use the ‘Code Editor’ in the WordPress block editor.
You can access the code editor by clicking the three-dots option in the top right corner. Then select ‘Code Editor’ from the drop-down options.
How to Edit HTML in WordPress Classic Editor
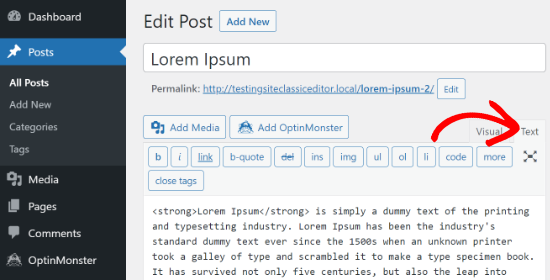
If you’re using the WordPress classic editor, then you can easily edit the HTML in the Text view.
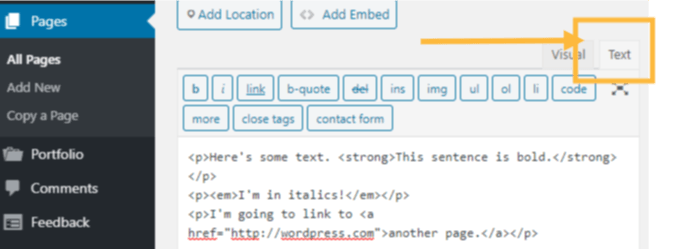
To access the Text view, simply edit a blog post or add a new one. When you’re in the classic editor, click the ‘Text’ tab to see the HTML of your article.
After that, you can edit the HTML of your content. For example, you can bold different words to make them prominent, use the italic style in the text, create lists, add a table of contents, and more.
How to Edit HTML in WordPress Widgets
Did you know that you can add and edit HTML code in your site’s widget area?
In WordPress, using a Custom HTML widget can help you customize your sidebar, footer, and other widget areas. For instance, you can embed contact forms, Google Maps, call to action (CTA) buttons, and other content.
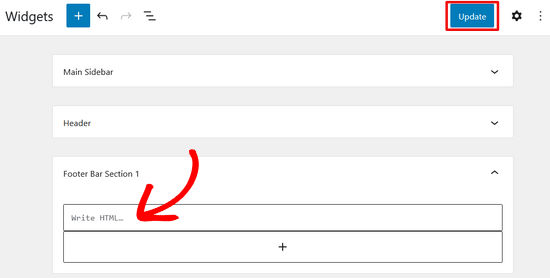
You can start by heading over to your WordPress admin panel and then go to Appearance » Widgets. After that, click on the ‘Plus’ icon in any widget area you want to add HTML code to.
The available widget areas will depend on the WordPress theme you’re using. For example, you may be able to add it to your footer, header, or other areas.

Next, search for the Custom HMTL widget in the widget block menu and click on it to automatically add it to the widget area.
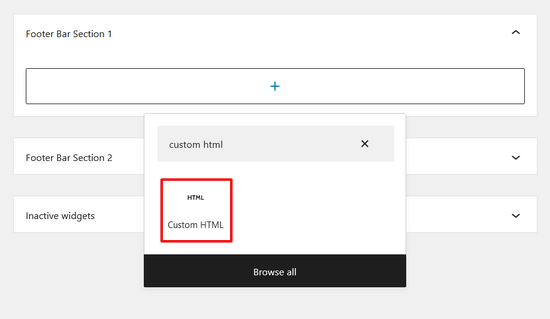
After that, you can click on your Custom HTML widget and enter the HTML code. When you’re finished, don’t forget to click the ‘Update’ button in the top-right corner of the screen.
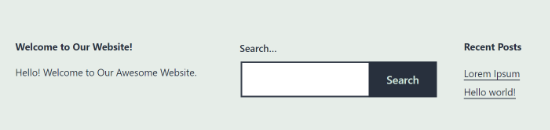
You can now visit your website to see the Custom HTML widget in action.
How to Edit HTML in WordPress Theme Editor
Another way to edit the HTML of your website is through the WordPress Theme Editor (Code Editor).
However, we don’t recommend that you directly edit the code in the Theme Editor. The slightest mistake when entering code can break your website and block you from accessing the WordPress dashboard.
Also, if you update your theme, then all your changes would be lost.
That said, if you are considering editing HTML using the Theme editor, then it’s a good idea to backup your website before making any changes.
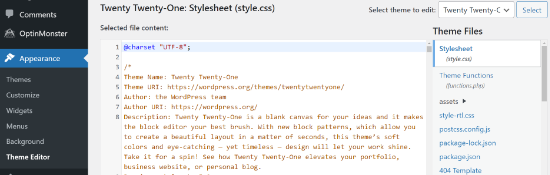
Next, head over to Appearance » Theme Editor from your WordPress dashboard. You’ll now see a warning message about directly editing theme files.
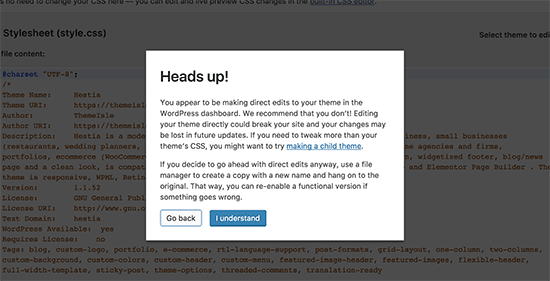
Once you click the ‘I Understand’ button, you’ll see your theme files and code. From here, you can choose which file you’d like to edit and make your changes.
How to Edit HTML in WordPress Using FTP
Another alternative method to editing HTML in the WordPress theme files is by using FTP also known as file transfer protocol service.
This is a standard feature that comes with all WordPress hosting accounts.
The benefit of using FTP instead of the code editor is that you can easily fix issues using the FTP client. This way, you won’t be locked out of your WordPress dashboard if something breaks when editing HTML.
To start, you’ll first need to select an FTP software. We’ll be using FileZilla in this tutorial, as it’s a free and user-friendly FTP client for Windows, Mac, and Linux.
After selecting your FTP client, you’ll now need to log in to your site’s FTP server. You can find the login details in your hosting provider’s control panel dashboard.
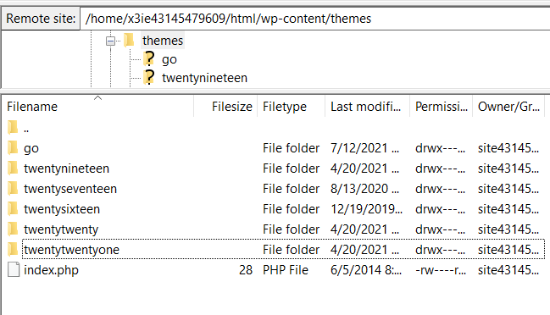
Once you’re logged in, you will see different folders and files of your website under the ‘Remote site’ column. Go ahead and navigate to your theme files by going to wp-content » theme.
You’ll now see different themes on your website. Go ahead and select the theme that you want to edit.
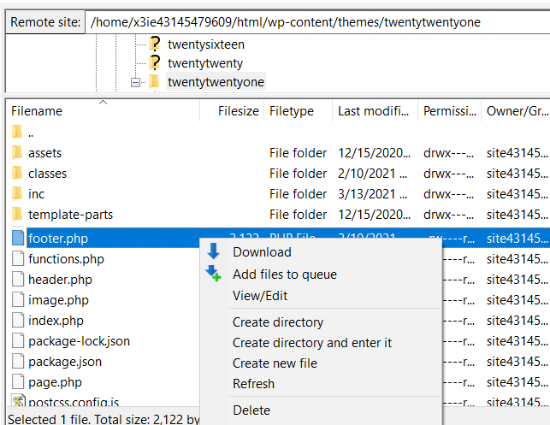
Next, you can right-click on a theme file to edit the HTML. For example, if you want to make changes in the footer, then right-click the footer.php file.
Many FTP clients allow you to view and edit the file and automatically upload them once you’ve made the changes. In FileZilla, you can do this by clicking the ‘View/Edit’ option.
However, we suggest that you download the file that you want to edit to your desktop before making any changes.
After editing the HTML, you can replace the original file. For more details, we recommend following our guide on how to use FTP to upload files in WordPress.
Easy Way to Add Code in WordPress
The easiest way to add code in WordPress is by using WPCode, the best code snippets plugin on the market.
The team at WPBeginner designed this plugin so that even complete beginners can add custom code to their site in minutes. Plus, there’s a lite version of the plugin that’s 100% free to use.
It helps organize your code since it’s stored in one place. Plus, it prevents errors that can be caused when manually editing code.
Another benefit is that you don’t have to worry about your code being erased if you decide to update or change your theme.
The first thing you’ll need to do is install and activate the free WPCode plugin on your website. For more details, you can follow our detailed tutorial on how to install a WordPress plugin.
Once the plugin is active, you can head over to Code Snippets » Header & Footer from your admin panel.
Next, you can add the HTML code to your website in the header, body, and footer boxes.
For example, let’s say you want to display an alert bar on your website. You can simply enter the HTML code in the ‘Body’ box and click the ‘Save Changes’ button.

Besides that, you can add a Google Analytics tracking code and the Facebook pixel in the header or add a Pinterest button in the footer of your website using the plugin.
With WPCode, it’s easy to decide where the code outputs as well. For example, you can automatically display some HTML code at the beginning or end of every post.
For more details, you can see our guide on how to add header and footer code in WordPress.
We hope that this article helped you learn how to edit HTML in the WordPress code editor. You may also want to look at our guide on how much it really costs to build a WordPress website, or see the most important reasons you should use WordPress for your website.
If you liked this article, then please subscribe to our YouTube Channel for WordPress video tutorials. You can also find us on Twitter and Facebook.
Beginning HTML
A basic understanding of HTML can help you get more out of your WordPress.com site. This article explains how.
What is HTML?
HTML, or Hypertext Markup Language, is the main language used to create web pages. With HTML you can use special tags like to add links and to add images.
Add and Edit HTML
In the WordPress Editor
The easiest way to add HTML to a page or post is to insert a Custom HTML block. With this block, you can add HTML and edit it in your content.
Alternatively, almost all of the blocks have the option to edit them as HTML:
- Click on a specific block in your editor.
- Click on the ellipses (three dots) at the top of the block.
- Select Edit as HTML.
- To switch back to the visual editor for the block, click the ellipses again, and click Edit visually.

A third option for accessing HTML is to view the entire page or post in the Code Editor. The Code Editor will load the entire page or post’s HTML. Access it with these steps:
- Edit a page or post.
- In the top right of the editor, click on the ellipses (three dots) menu.
- Select Code Editor.
- To switch back to the Visual Editor, click the ellipses again, and click the Visual Editor option.

In a Widget
You can add a Custom HTML block to any widget area your theme supports.
In the Classic Editor
In the classic editor, click on the Text tab above the editing area (next to the Visual tab):
Some HTML Basics
In the HTML editor, everything is text — a link is text, a quote is text, even an image is text. But there are two kinds of text here. Some of the text is the actual content of the post you wrote, and some is the HTML code.
It’s easy to tell the two apart: HTML code always starts and ends with angled brackets, < and >. Anything inside a pair of angled brackets is an HTML tag. Tags are predefined HTML commands that specify how your post will look and behave. Here’s an example:
This is a Heading
This is a paragraph.
This is linked textFor example, to italicize a word, we use the tag, which is short for emphasis.
To open a new tag, type the tag you want to use just before the text you wish to change in some way: . When you want to end that effect, you insert a closing tag, which is the same tag but with a slash: .
Most HTML tags are supported on WordPress.com, but some tags require a plugin-enabled plan. Learn more.
Format Text With HTML
It’s possible to use HTML to make text bold, italic, underlined , or struck through. Here are examples of how to make these changes to your text:
To make text bold:
bold text hereAdd a Link with HTML

Here is what that anchor tag will look like on your site:
Of course, you can also use the built-in WordPress editor to easily insert links. This does the exact same thing, only it creates the anchor tag for you.
Insert an Image with HTML
Image tags are used to embed images. While using the Media Library is the recommended way of inserting images into your posts, you can also use HTML. Here is an example of embedding an image using the tag:

Here is that same tag at work:
Say you have a post that’s full of images, and you want to move one from the top of the post to the bottom of the post, but you don’t want to cut it and reinsert it.
Was this guide helpful for you?