div > Note that you have added the class as an attribute to the tag by adding the class attribute and class name to each opening tag. Save the file and reload it in your browser. You should receive something like this:
You can put text inside a container by inserting text in between the opening and closing tags. Try adding text inside each of the elements in your index.html file:
div class = " div-1" > div > div class = " div-2" > div > div class = " div-3" > div > Save the file and reload it in your browser. You should now have text displayed in each of your containers:
You can add additional HTML elements to your text inside the elements. For example, try adding the HTML heading tags ( to ) to your text inside the tags in your index.html file:
div class = " div-1" > h2 > h2 > div > div class = " div-2" > h3 > h3 > div > div class = " div-3" > h4 > h4 > div > Save the file and reload it in your browser. The text inside the containers should now be styled according to the default properties of the to tags:
Note that the elements have also adjusted their positions slightly. This repositioning is caused by the default margin properties of the through elements. You’ll learn more about margins in the next tutorial on the CSS Box Model, but for now it is fine to ignore them
To style text inside the containers, you can specify text property values in the rulesets for your classes. Try adding the properties and values to your rulesets in your styles.css file as highlighted in the in the following code snippet:
.div-1 background-color : blue ; height : 50 px ; width : 50 px ; font-size : 10 px ; color : white ; > .div-2 background-color : red ; height : 100 px ; width : 100 px ; font-size : 20 px ; color : yellow ; > .div-3 background-color : yellow ; height : 200 px ; width : 200 px ; font-size : 30 px ; color : blue ; > Save your styles.css file and reload the index.html file in your browser. The text inside the containers should now be styled according to the CSS rules in your styles.css file:
: The Content Division element The HTML element is the generic container for flow content. It has no effect on the content or layout until styled in some way using CSS (e.g. styling is directly applied to it, or some kind of layout model like Flexbox is applied to its parent element).
Try it As a «pure» container, the element does not inherently represent anything. Instead, it’s used to group content so it can be easily styled using the class or id attributes, marking a section of a document as being written in a different language (using the lang attribute), and so on.
Attributes This element includes the global attributes.
Note: The align attribute is obsolete; do not use it anymore. Instead, you should use CSS properties or techniques such as CSS Grid or CSS Flexbox to align and position elements on the page.
Usage notes Accessibility concerns The element has an implicit role of generic , and not none. This may affect certain ARIA combination declarations that expect a direct descendant element with a certain role to function properly.
Examples A simple example div > p > < p> , < table> . You name it! p > div > Result A styled example This example creates a shadowed box by applying a style to the using CSS. Note the use of the class attribute on the to apply the style named «shadowbox» to the element.
HTML div class = " shadowbox" > p > p > div > CSS .shadowbox width : 15em; border : 1px solid #333; box-shadow : 8px 8px 5px #444; padding : 8px 12px; background-image : linear-gradient ( 180deg, #fff, #ddd 40%, #ccc) ; > Result Technical summary Content categories Flow content, palpable content. Permitted content Flow content. Tag omission None, both the starting and ending tag are mandatory. Permitted parents Any element that accepts flow content. Implicit ARIA role No corresponding role Permitted ARIA roles Any DOM interface HTMLDivElement
Specifications Browser compatibility BCD tables only load in the browser
See also Found a content problem with this page? This page was last modified on Jul 17, 2023 by MDN contributors.
Your blueprint for a better internet.
MDN Support Our communities Developers Visit Mozilla Corporation’s not-for-profit parent, the Mozilla Foundation.
Источник
How to Use Div Tag in HTML to Divide the page?
In HTML,
tag is the most important tag and is utilized in most of the documents. The
tag is considered as the container for other HTML tags. Therefore, it can be used to apply multiple HTML tags on a desired part of the document.
The tag can also be used to divide an HTML page into multiple sections. This write-up aims to guide you how div tags can be used to divide the page. The following outcomes are expected:
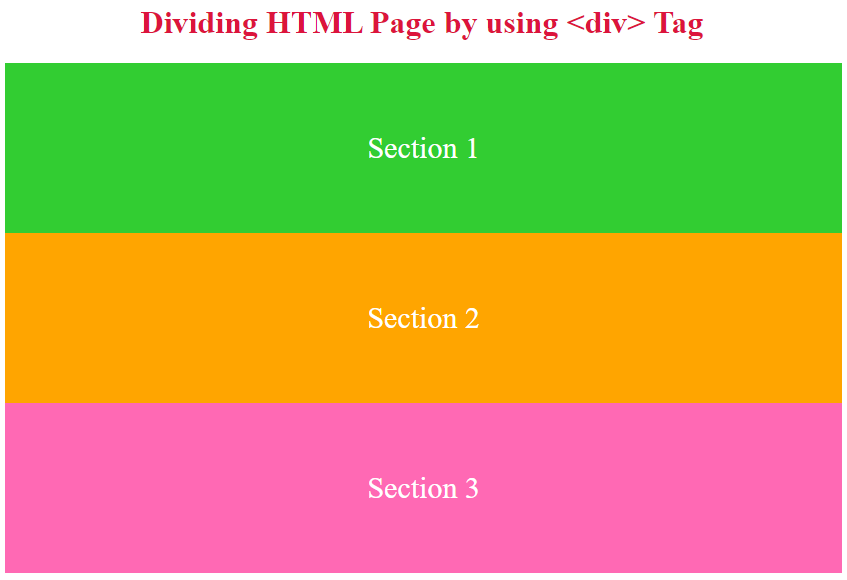
How do we Use Div Tag to Divide HTML Page in Horizontal Sections? In HTML, a tag act as a section for the data in the HTML page. To divide a page into sections, you need to write the required HTML tags inside the tag. Let’s see the practical example below to understand the division of HTML pages by tag.
In this code, we have used three tags. These tags are associated with the three CSS classes. The CSS code used in the above HTML code is provided below:
div
In the CSS part, we have targeted all three tags to format the content of all the divs. To give different colors to each div, three classes “one ”, “two ”, and “three ” are created.
Output
The output shows that a web page is divided into three sections using HTML tag.
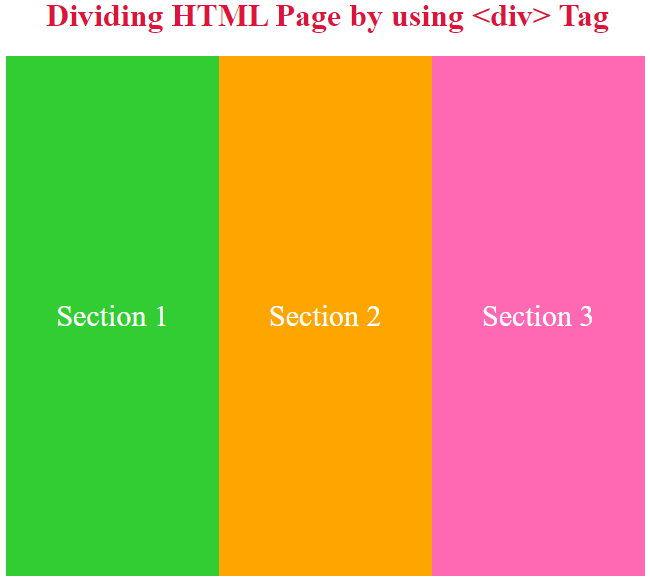
How do we use Div Tag to Divide HTML Page in Vertical Sections? In HTML, we can use tag to divide a web page into vertical sections. Let’s see the practical example below to understand the vertical division of an HTML page by using tag.
In this code, we have created three sections using tag. For better presentation, we have applied the following CSS on the div tags:
div
In the CSS part we target all the divs and used different properties to give the height, width, padding and background font size to the div content. It is observed that the vertical sections are created with the help of float property of CSS and its value is set to left .
Output
The output shows that a web page is divided into three sections using HTML tag.
Conclusion In HTML, we can divide a whole webpage into sections by using tag along with the CSS. By default, a tag divides a webpage into horizontal sections. However, you can use the float property of CSS to make the vertical sections of the webpage. By following this guide, you can apply tag to divide the HTML page.
Источник