- User registration tutorial
- 1. Setup the application
- Create project folder structure
- 2. Create a MySQL database
- 2. Create classes for user registration tutorial
- Create Database.php class
- Code explanation
- The connect() method
- Create User.php class
- Set photo method
- Validate method for user registration tutorial
- Getter methods for class properties
- Image upload class
- Create HTML form for user registration tutorial
- Create header.php file
- Add a style.css file
- Create footer.php file
- Create index.php file
- Register
- Running the application
- Summary:
- Learning Resources:
User registration tutorial
Now a days, modern web applications need user registration features. In this user registration tutorial with php and MySQL, you will learn how to save user data into database.
Following tasks are performed in this tutorial.
- Setup the application
Create application folder
Install composer
Setup application
Create project folder structure - Create a MySQL database
- Create a HTML form for user registration
- Create User, Database classes to perform database operations
- Create an Image Upload class to upload user profile photos
- Create a script to insert data to the database
- Running the application
PHP, MySQL and phpMyAdmin should be installed on your system. Visit XAMPP or WAMP, and install it. After installation, start Apache and MySQL services.
1. Setup the application
Open the www or htdocs folder in WAMP or XAMPP. Create a folder named php-mysql-registration-tutorial.
Open command line, and go to the application folder, type the command:
cd php-mysql-registration-tutorial
Visit composer website, download and install. Follow the instructions. Open command line, type the command.
Select default options in the wizard. It will generate a composer.json. Replace the code below.
Install required dependencies.
This will install PSR-4 autoload package. Note the “App\\”: “src/” line in composer.json .
App is “Namespace” and src is the folder, where User, Database and Uploader classes are saved. Composer generates a Vendor folder and composer.lock file.
Create project folder structure
Open the project directory and create these folders.
- Create src folder
- Create inc folder
- Create assets folder, inside inc folder
- Create a css folder inside inc folder
- Create files folder inside assets folder. This folder is used to store profile pictures of users.
User registration form:
After setting up the folder structure, let’s create database and HTML form.
2. Create a MySQL database
Open PhpMyAdmin and create a database named dbuser.
User table will have following fields:
- Id
- First name
- Last name
- Password
- Date of Birth
- Country
- Profile Photo of user
Create a table tbl_user, running the CREATE TABLE command in SQL tab of phpMyAdmin.
CREATE TABLE `tbl_user` ( `id` int(11) NOT NULL AUTO_INCREMENT, `first_name` varchar(255) DEFAULT NULL, `last_name` varchar(250) DEFAULT NULL, `email` varchar(150) DEFAULT NULL, `password` varchar(128) DEFAULT NULL, `dob` date DEFAULT NULL, `country` varchar(255) DEFAULT NULL, `photo` varchar(300) DEFAULT NULL, `createdAt` datetime DEFAULT CURRENT_TIMESTAMP, PRIMARY KEY (`id`) );
2. Create classes for user registration tutorial
Let’s add classes in this user registration tutorial. Open the project folder in IDE like Visual Studio Code.
Create Database.php class
Create a file Database.php in src folder, and open it in the editor and add the code.
host = 'localhost'; $this->user = 'root'; $this->password = ''; $this->database = 'dbuser'; $this->dbconn = null; > /** Connect to database */ public function connect() < try < $this->dbconn = new PDO('mysql:host='.$this->host.';dbname='.$this->database.'', $this->user, $this->password) or die("Cannot connect to MySQL."); // set the PDO error mode to exception $this->dbconn->setAttribute(PDO::ATTR_ERRMODE, PDO::ERRMODE_EXCEPTION); return $this->dbconn; > catch(PDOException $e) < echo "Database connection failed: " . $e->getMessage(); die(); > > /** Insert user data into database */ public function insert($data) < $this->dbconn = $this->connect(); $password = sha1($data->getPassword()); $stmt = $this->dbconn->prepare("INSERT INTO tbl_user(first_name, last_name, email, password, dob, country, photo) VALUES (:first_name, :last_name, :email, :password, :dob, :country, :photo)"); $stmt->bindParam(':first_name', $data->getFirstName()); $stmt->bindParam(':last_name', $data->getLastName()); $stmt->bindParam(':email', $data->getEmail()); $stmt->bindParam(':password', $password); $stmt->bindParam(':dob', $data->getDob()); $stmt->bindParam(':country', $data->getCountry()); $stmt->bindParam(':photo', $data->getPhoto()); // insert a row if($stmt->execute()) < $result =1; >$this->dbconn = null; return true; > /** chek if email is unique or not */ public function checkUniquEmail($email) < $this->dbconn = $this->connect(); $query = $this->dbconn->prepare( "SELECT `email` FROM `tbl_user` WHERE `email` = :email" ); $query->bindValue(':email', $email ); $query->execute(); if($query->rowCount() > 0) < # If rows are found for query return true; >else < return false; >$this->dbconn = null; > > Code explanation
In Database.php, first line is namespace App; .
Using namespaces, related functions, interfaces and classes can be grouped.
use PDO; statement means, PHP’s PDO extension is used to access the database. The PDO or PHP Data Objects is a lightweight layer to access and perform CRUD tasks on database.
Database class is created and, class properties like $host, $user, $password, $database and $dbconn are added. $dbconn is the connection object.
Constructor method is defined. This method gets called, when class object is instantiated. In constructor, the database host, user, password and database name are initialized.
class Database < private $host; private $user; private $password; private $database; private $dbconn; function __construct() < $this->host = 'localhost'; $this->user = 'root'; $this->password = ''; $this->database = 'dbuser'; $this->dbconn = null; > .
The connect() method
Add a connect() method to connect to database. Inside a try < . >catch < . >statement, new PDO method is called.
Host, dbname, user and password parameters are passed.
public function connect() < try < $this->dbconn = new PDO('mysql:host='.$this->host.'dbname='.$this->database.'', $this->user, $this->password) or die("Cannot connect to MySQL."); // set the PDO error mode to exception $this->dbconn->setAttribute(PDO::ATTR_ERRMODE, PDO::ERRMODE_EXCEPTION); return $this->dbconn; > catch(PDOException $e) < echo "Database connection failed: " . $e->getMessage(); die(); > > If connection is successful, connection object is assigned to $this->dbconn otherwise an exception is thrown.
Insert method is created and it accepts $data object as parameter that contains user ‘s information.
The connect method is called to connect to database. In next line, getPassword() method is called from User class to get user entered password. Password is encrypted using sha1 encryption method.
The database connection’s prepare method is called. This method prepares a statement for execution and returns statement object.
Inside the prepare statement MySQL insert statement is used to add records to tbl_user. Placeholders are used to avoid SQL injection attacks.
The placeholder values are bind using statement object’s bindParam method like $stmt->bindParam(‘:first_name’, $data->getFirstName()); .
/** Insert user data into database */ public function insert($data) < $this->connect(); $password = sha1($data->getPassword()); $stmt = $this->dbconn->prepare("INSERT INTO tbl_user(first_name, last_name, email, password, dob, country, photo) VALUES (:first_name, :last_name, :email, :password, :dob, :country, :photo)"); $stmt->bindParam(':first_name', $data->getFirstName()); $stmt->bindParam(':last_name', $data->getLastName()); $stmt->bindParam(':email', $data->getEmail()); $stmt->bindParam(':password', $password); $stmt->bindParam(':dob', $data->getDob()); $stmt->bindParam(':country', $data->getCountry()); $stmt->bindParam(':photo', $data->getPhoto()); // insert a row if($stmt->execute()) < $result = true;; >$this->dbconn = null; return $result; > To insert data to the database, statement object’s execute method is called.
Check unique email method
This method validates if user entered email on signup form is unique or another user has already registered with the same email address.
/** chek if email is unique or not */ public function checkUniquEmail($email) < $this->connect(); $query = $this->dbconn->prepare( "SELECT `email` FROM `tbl_user` WHERE `email` = :email" ); $query->bindValue(':email', $email ); $query->execute(); if($query->rowCount() > 0) < # If rows are found for query return true; >else < return false; >$this->dbconn = null; > Create User.php class
Add a file User.php in src folder and open in editor.
Namespace is defined first, and DB class is included from App namespace.
User class is create and inside class private properties like $first_name, $last_name etc. are declared.
The class constructor accepts $user array and assigns to first_name, last_name and other properties.
Set photo method
public function setPhoto($photo) < $this->photo = $photo; >
The setPhoto method is used to set the image name uploaded by the user.
Validate method for user registration tutorial
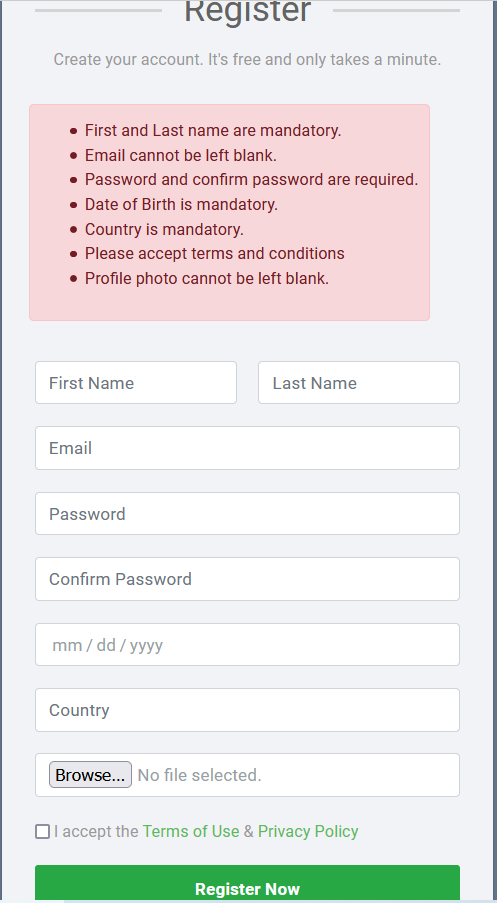
Data is validated before saving to database. Following validations are preformed
- First and last name are mandatory
- Email is mandatory and is valid
- Password and confirm password are mandatory and are minimum 6 characters in length
- Date of birth is mandatory
- Country is mandatory
- User accepts the term and conditions
Getter methods for class properties
To access class private properties, getter methods are created, like getFirstName() . This method will return first name of user.
public function getFirstName() < return $this->first_name; >
Image upload class
To upload user profile image, uplaoder class is created. Beside other methods, there is a method uplaod_file. Uploaded file is moved to directory using move_uplaoded_file method.
function upload_file()< $uploadTo = "uploads/"; $allowFileType = array('jpg','png','jpeg','gif','pdf','doc'); $fileName = $_FILES['file']['name']; $tempPath=$_FILES["file"]["tmp_name"]; $basename = basename($fileName); $originalPath = $uploadTo.$basename; $fileType = pathinfo($originalPath, PATHINFO_EXTENSION); if(!empty($fileName))< if(in_array($fileType, $allowFileType))< // Upload file to server if(move_uploaded_file($tempPath,$originalPath))< return $fileName." was uploaded successfully"; >else < $error = 'File Not uploaded ! try again'; >>else < return $fileType." file type not allowed"; >>else < return "Please Select a file"; >> In upload class there are methods to validate uploaded image, assign a unique name to the file and other utility methods.
Create HTML form for user registration tutorial
let’s create HTML form to get data from user.
Create header.php file
Open inc folder, add a file header.php.
In header.php file, the CSS and JavaScript files are included.
Add a style.css file
Open css folder inside inc folder in assets folder. Add file style.css .
body < color: #fff; background: #63738a; font-family: 'Roboto', sans-serif; >.form-control < height: 40px; box-shadow: none; color: #969fa4; >.form-control:focus < border-color: #5cb85c; >.form-control, .btn < border-radius: 3px; >.signup-form < width: 450px; margin: 0 auto; padding: 30px 0; font-size: 15px; >.signup-form h2 < color: #636363; margin: 0 0 15px; position: relative; text-align: center; >.signup-form h2:before, .signup-form h2:after < content: ""; height: 2px; width: 30%; background: #d4d4d4; position: absolute; top: 50%; z-index: 2; >.signup-form h2:before < left: 0; >.signup-form h2:after < right: 0; >.signup-form .hint-text < color: #999; margin-bottom: 30px; text-align: center; >.signup-form form < color: #999; border-radius: 3px; margin-bottom: 15px; background: #f2f3f7; box-shadow: 0px 2px 2px rgba(0, 0, 0, 0.3); padding: 30px; >.signup-form .form-group < margin-bottom: 20px; >.signup-form input[type=»checkbox»] < margin-top: 3px; >.signup-form .btn < font-size: 16px; font-weight: bold; min-width: 140px; outline: none !important; >.signup-form .row div:first-child < padding-right: 10px; >.signup-form .row div:last-child < padding-left: 10px; >.signup-form a < color: #fff; text-decoration: underline; >.signup-form a:hover < text-decoration: none; >.signup-form form a < color: #5cb85c; text-decoration: none; >.signup-form form a:hover
Create footer.php file
In inc folder, add a file footer.php and add code.
Create index.php file
Open project folder. Create a file index.php. This file includes use statements. Namespaces are used to include the User and Uploader classes.
Next, we check that if the form is submitted by user by using if(isset($_POST[‘submit’])) < … >.
The user entered values are assigned to an array. The User class object is created and assigned to $userObj;
Errors are returned to $error variable after validate() method is called.
If there is no error then an Uploader file object is created. Destination directory, extensions and image sizes are set.
$uploader->uploadFile(‘photo’) method is used to upload the file to destination directory. After uploading the file, the $uploader->getUploadName() method is used to get the uploaded file name.
After getting the upload file name, it is set to user object with setPhoto method.
After data validation and uploading the profile photo to the server, insert method is called. User data is inserted and flag is set to true.
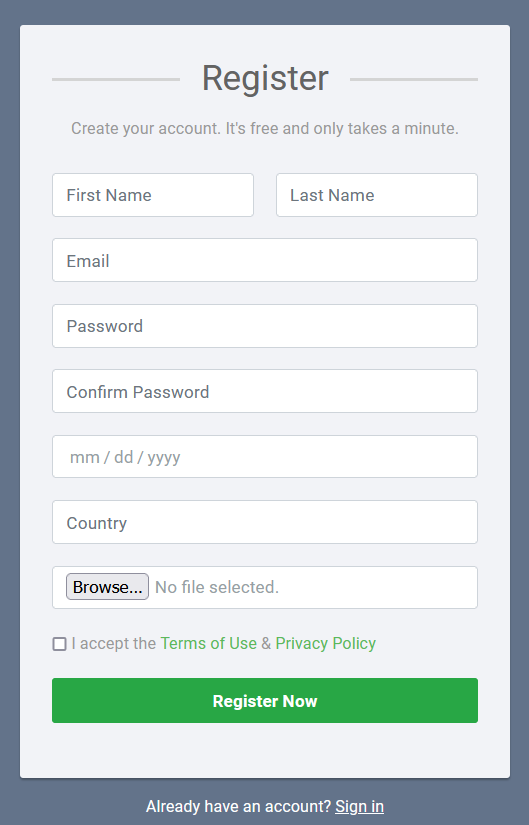
Let’s add a form with following fields:
- First name
- Last name
- Password
- Date of Birth
- Country
- Terms & Conditions checkbox
div >Register
Create your account. It is free and only takes a minute.
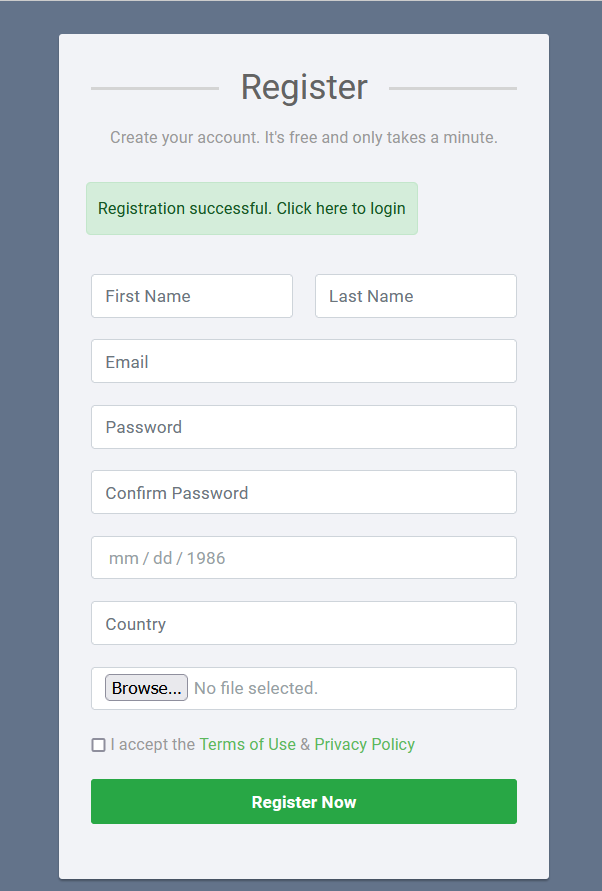
Registration successful. Click here to login?> type="text" name="first_name" placeholder="First Name" >?> type="text" name="last_name" placeholder="Last Name" >?> name="email" placeholder="Email" >?> name="password" placeholder="Password" >?> name="conf_password" placeholder="Confirm Password" >?> name="dob" placeholder="Date of Birth" >?> name="country" placeholder="Country" >Already have an account? Sign inAfter form is created, include footer.php.
Running the application
In order to run the application, make sure Apache and MySQL services are running. Open the browser, type the URL in address bar
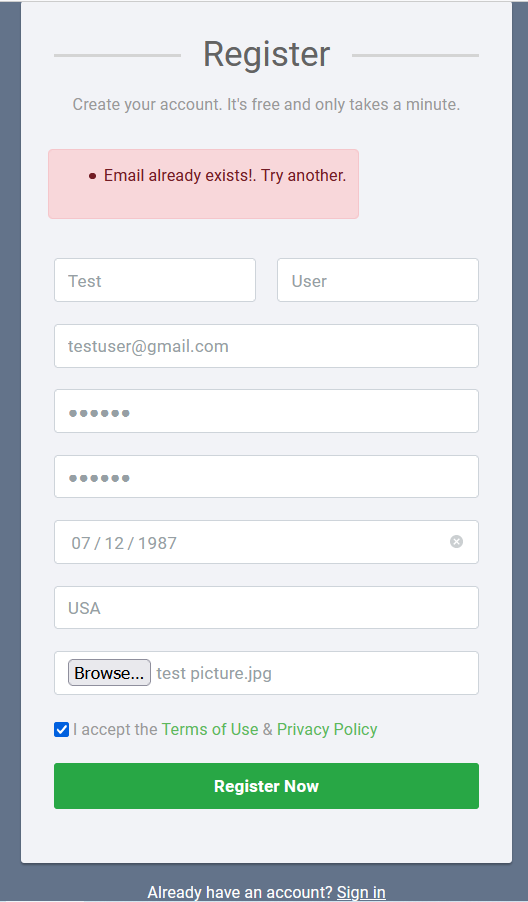
http://localhost/php-mysql-registration-tutorial/After filling in all the data, click Register Now button.
Summary:
To summarize, In this user registration tutorial, you have learnt to create a MySQL database and table. Then, created an HTML form with php classes and inserted user data to the database.
You can find the source code of the tutorial on our GitHub Repository. Clone or download the project in htdocs or www root folder and run in browser.
If you liked this tutorial, subscribe to our newsletter and follow us on Twitter, or like our Facebook page.
Learning Resources:
Here are some best resources to learn PHP & MySQL


