- Быстрый старт Python, Быстрый старт Python
- Цели
- Предпосылки
- Настройте свою среду
- Включить API
- Настройка экрана согласия OAuth
- Авторизация учетных данных для настольного приложения
- Установите клиентскую библиотеку Google.
- Настроить образец
- Запустите образец
- Следующие шаги
- How to Upload File to Google Drive using Python Script?
- Steps for Uploading files on Google Drive using Python
- Table of Contents
- Pre-Requisites
- Step 1: Import the libraries
- Step 2: OAuth made easy
- Step 3 : Upload files to your Google Drive
- Step 4: List out files from Google Drive
- Step 5: Download the files from Google Drive
- Step 6: Create the Text files in Google Drive
- Step 7: Read the content of the text file directly from Google Drive
- MarquinSmith
- Setting up Authorisation
- Run Some Code
Быстрый старт Python, Быстрый старт Python
Оптимизируйте свои подборки Сохраняйте и классифицируйте контент в соответствии со своими настройками.
В кратких руководствах объясняется, как настроить и запустить приложение, которое вызывает API Google Workspace.
В кратких руководствах по Google Workspace используются клиентские библиотеки API для обработки некоторых деталей процесса аутентификации и авторизации. Мы рекомендуем вам использовать клиентские библиотеки для ваших собственных приложений. В этом кратком руководстве используется упрощенный подход к проверке подлинности, подходящий для среды тестирования. Для рабочей среды мы рекомендуем изучить аутентификацию и авторизацию, прежде чем выбирать учетные данные для доступа , подходящие для вашего приложения.
Создайте приложение командной строки Python, которое отправляет запросы к API Google Диска.
Цели
- Настройте свою среду.
- Установите клиентскую библиотеку.
- Настройте образец.
- Запустите образец.
Предпосылки
Для запуска этого краткого руководства необходимы следующие предварительные условия:
Настройте свою среду
Для завершения этого краткого руководства настройте свою среду.
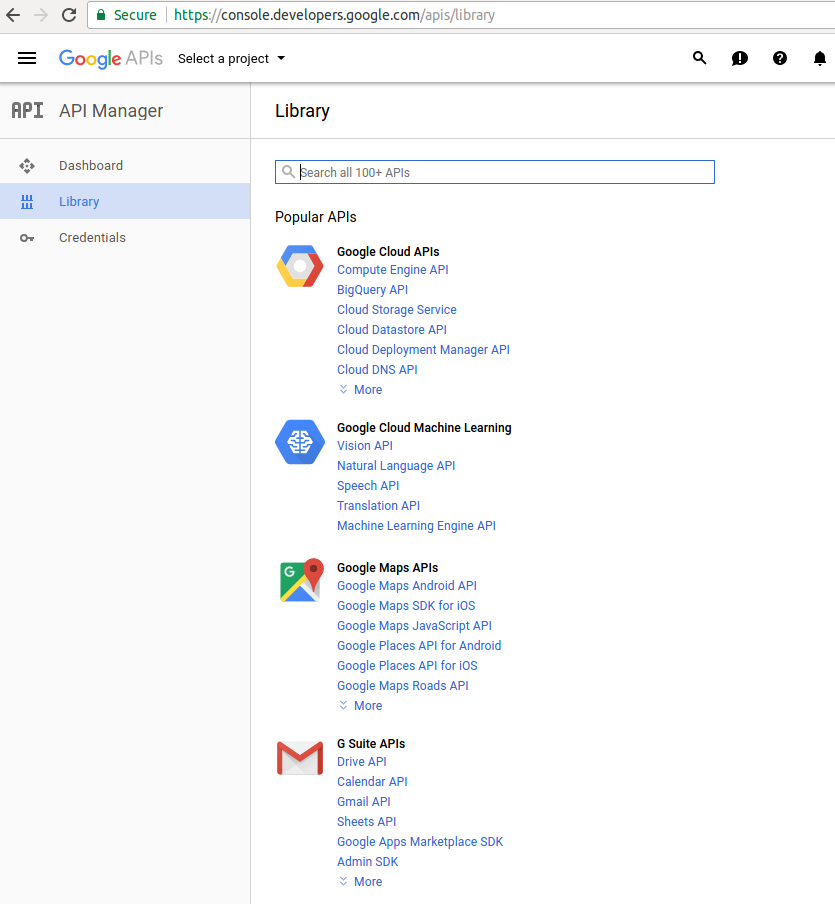
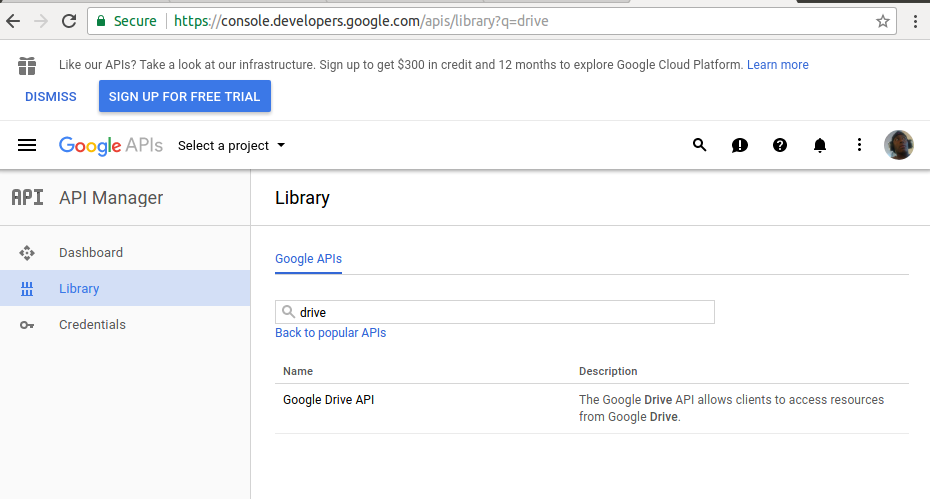
Включить API
Настройка экрана согласия OAuth
Если вы используете новый проект Google Cloud для выполнения этого краткого руководства, настройте экран согласия OAuth и добавьте себя в качестве тестового пользователя. Если вы уже выполнили этот шаг для своего облачного проекта, перейдите к следующему разделу.
- В консоли Google Cloud выберите menu >API и службы >Экран согласия OAuth . Перейти к экрану согласия OAuth
- Выберите тип пользователя для своего приложения, затем нажмите «Создать» .
- Заполните регистрационную форму приложения, затем нажмите «Сохранить и продолжить» .
- На данный момент вы можете пропустить добавление областей и нажать «Сохранить и продолжить» . В будущем, когда вы будете создавать приложение для использования за пределами вашей организации Google Workspace, вы должны будете добавить и проверить области авторизации, необходимые вашему приложению.
- Если вы выбрали Внешний для типа пользователя, добавьте тестовых пользователей:
- В разделе «Проверить пользователей» нажмите «Добавить пользователей» .
- Введите свой адрес электронной почты и любых других авторизованных тестовых пользователей, затем нажмите «Сохранить и продолжить» .
Авторизация учетных данных для настольного приложения
- В консоли Google Cloud выберите menu >API и службы >Учетные данные . Перейти к учетным данным
- Нажмите «Создать учетные данные» >«Идентификатор клиента OAuth» .
- Нажмите Тип приложения >Приложение для ПК .
- В поле Имя введите имя учетных данных. Это имя отображается только в консоли Google Cloud.
- Щелкните Создать . Появится экран создания клиента OAuth, показывающий ваш новый идентификатор клиента и секрет клиента.
- Нажмите ОК . Вновь созданные учетные данные отображаются в разделе идентификаторов клиентов OAuth 2.0.
- Сохраните загруженный файл JSON под credentials.json и переместите файл в свой рабочий каталог.
Установите клиентскую библиотеку Google.
pip install --upgrade google-api-python-client google-auth-httplib2 google-auth-oauthlibНастроить образец
- В рабочем каталоге создайте файл с именем quickstart.py .
- Включите следующий код в quickstart.py :
from __future__ import print_function import os.path from google.auth.transport.requests import Request from google.oauth2.credentials import Credentials from google_auth_oauthlib.flow import InstalledAppFlow from googleapiclient.discovery import build from googleapiclient.errors import HttpError # If modifying these scopes, delete the file token.json. SCOPES = ['https://www.googleapis.com/auth/drive.metadata.readonly'] def main(): """Shows basic usage of the Drive v3 API. Prints the names and ids of the first 10 files the user has access to. """ creds = None # The file token.json stores the user's access and refresh tokens, and is # created automatically when the authorization flow completes for the first # time. if os.path.exists('token.json'): creds = Credentials.from_authorized_user_file('token.json', SCOPES) # If there are no (valid) credentials available, let the user log in. if not creds or not creds.valid: if creds and creds.expired and creds.refresh_token: creds.refresh(Request()) else: flow = InstalledAppFlow.from_client_secrets_file( 'credentials.json', SCOPES) creds = flow.run_local_server(port=0) # Save the credentials for the next run with open('token.json', 'w') as token: token.write(creds.to_json()) try: service = build('drive', 'v3', credentials=creds) # Call the Drive v3 API results = service.files().list( pageSize=10, fields="nextPageToken, files(id, name)").execute() items = results.get('files', []) if not items: print('No files found.') return print('Files:') for item in items: print(u' ()'.format(item['name'], item['id'])) except HttpError as error: # TODO(developer) - Handle errors from drive API. print(f'An error occurred: ') if __name__ == '__main__': main()Запустите образец
- Если вы еще не вошли в свою учетную запись Google, вам будет предложено выполнить вход. Если вы вошли в несколько учетных записей, выберите одну учетную запись для авторизации.
- Нажмите Принять .
Информация об авторизации хранится в файловой системе, поэтому при следующем запуске примера кода авторизация не запрашивается.
Вы успешно создали свое первое приложение Python, которое отправляет запросы к API Google Диска.
Следующие шаги
Если не указано иное, контент на этой странице предоставляется по лицензии Creative Commons «С указанием авторства 4.0», а примеры кода – по лицензии Apache 2.0. Подробнее об этом написано в правилах сайта. Java – это зарегистрированный товарный знак корпорации Oracle и ее аффилированных лиц.
Последнее обновление: 2023-07-12 UTC.
How to Upload File to Google Drive using Python Script?
When working on big data projects, extracting data from Google drive into orchestration workflows to initially store the data in data lakes followed by a series of operations like data validation, cleansing, and transformation is widely used to gather business insights from the data. In this Python Sample Code, we are going to upload files to google drive using python and use them in data flow orchestration processes.
Steps for Uploading files on Google Drive using Python
Table of Contents
Pre-Requisites
- Install the pydrive python module as follows: pip install pydrive
- The below codes can be run in Jupyter notebook or any python console
Get Closer To Your Dream of Becoming a Data Scientist with 70+ Solved End-to-End ML Projects
Step 1: Import the libraries
from pydrive.auth import GoogleAuth from pydrive.drive import GoogleDrive
Step 2: OAuth made easy
Follow the steps to Get Authentication for Google Service API in the below link: Get Authentication for Google Service API
Download client_secrets.json from Google API Console and OAuth2.0 is done in two lines. You can customize the behavior of OAuth2 in one settings file settings.yaml
gauth = GoogleAuth() drive = GoogleDrive(gauth)
Above steps together as follows :
from pydrive.auth import GoogleAuth from pydrive.drive import GoogleDrive gauth = GoogleAuth() drive = GoogleDrive(gauth)
Step 3 : Upload files to your Google Drive
upload_file_list = [‘1.jpg’, ‘2.jpg’] for upload_file in upload_file_list: gfile = drive.CreateFile(]>) # Read file and set it as the content of this instance. gfile.SetContentFile(upload_file) gfile.Upload() # Upload the file.

- The above code uploads my two local files 1.jpg and 2.jpg to my Google Drive folder test/. To do that, the pydrive library will create two files in Google Drive and then read and upload the two files to the corresponding folder.
- Note that we need to provide the id of the corresponding Google Drive folder. In this example, the test folder’s ID is 1pzschX3uMbxU0lB5WZ6IlEEeAUE8MZ-t. You can get the Google Drive folder ID from the browser.
- For example: when we open the test folder in my Google Drive, the browser shows the address as https://drive.google.com/drive/folders/1cIMiqUDUNldxO6Nl-KVuS9SV-cWi9WLi. Then the corresponding ID for the test folder is the part after the last \ symbol, which is 1cIMiqUDUNldxO6Nl-KVuS9SV-cWi9WLi.
Step 4: List out files from Google Drive
We can also list all files from the specific folder in google drive as follows :
file_list = drive.ListFile(‘ in parents and trashed=false».format(‘1cIMiqUDUNldxO6Nl-KVuS9SV-cWi9WLi’)>).GetList() for file in file_list: print(‘title: %s, id: %s’ % (file[‘title’], file[‘id’]))
Step 5: Download the files from Google Drive
We can also download the files from Google Drive as follows. Note — after listing the files only we can download the file.
for i, file in enumerate(sorted(file_list, key = lambda x: x[‘title’]), start=1): print(‘Downloading <> file from GDrive (<>/<>)’.format(file[‘title’], i, len(file_list))) file.GetContentFile(file[‘title’])
The output of the above code:
In the above snapshot files are downloaded from the specific folder, Note here files will download where the code will be executed.
Step 6: Create the Text files in Google Drive
We can also write files directly to Google Drive using the following code:
# Create a GoogleDriveFile instance with title ‘test.txt’. file1 = drive.CreateFile(],’title’: ‘test.txt’>) # Set content of the file from the given string. file1.SetContentString(‘Hello World!’) file1.Upload()
The output of the above code: test.txt file is created in google drive.
Explore More Data Science and Machine Learning Projects for Practice. Fast-Track Your Career Transition with ProjectPro
Step 7: Read the content of the text file directly from Google Drive
Also, we can read the file directly from Google Drive using the below code :
file2 = drive.CreateFile() file2.GetContentString(‘test.txt’)
The output of the above code:
In the above snapshot reading the content of the file as «Hello world»
MarquinSmith
This guide will walkthrough the set up for being able to load csv and excel files to Google Drive with python.
Uploading files to Google Drive is a useful to have as you can upload much larger data sets than can be loaded into Google Sheets (Check out this tutorial for how to upload data to Google Sheets with python).
As usual with python there is a package that takes cares of most of the legwork. We will be using the PyDrive package to upload files to Google Drive.
The PyDrive package has documentation to get set up using the tool. This is what I followed below, only with more screenshots.
Setting up Authorisation
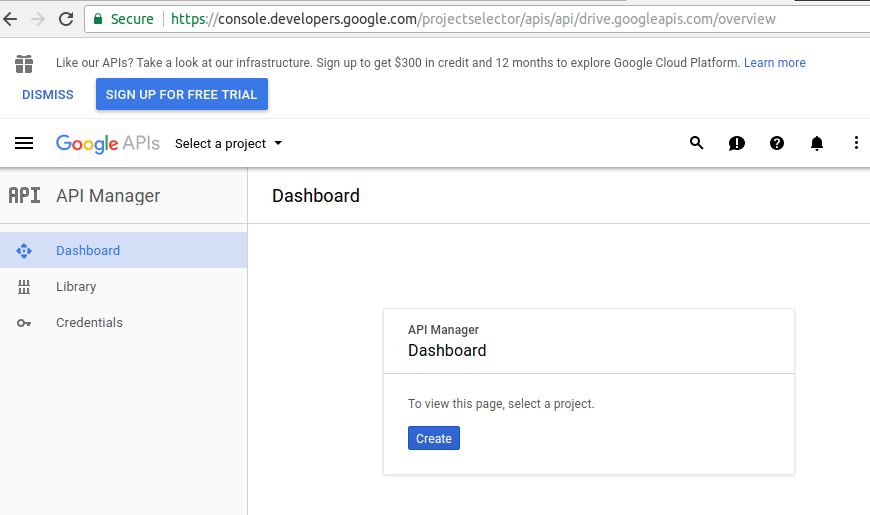
Go to the Google API console and select Drive API
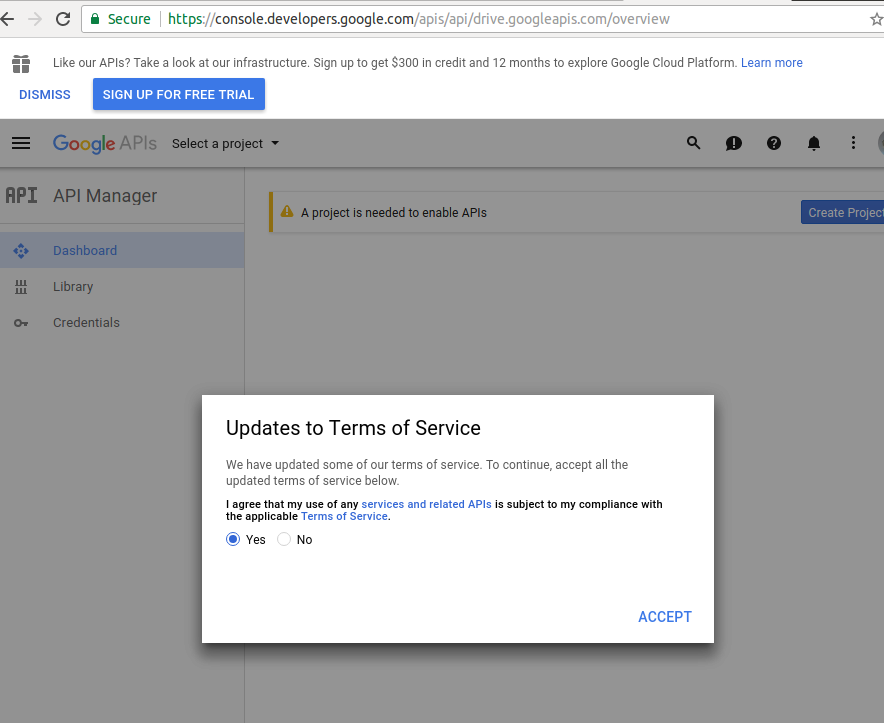
If this is the first time using the Google API console we may need to accept some terms and conditions
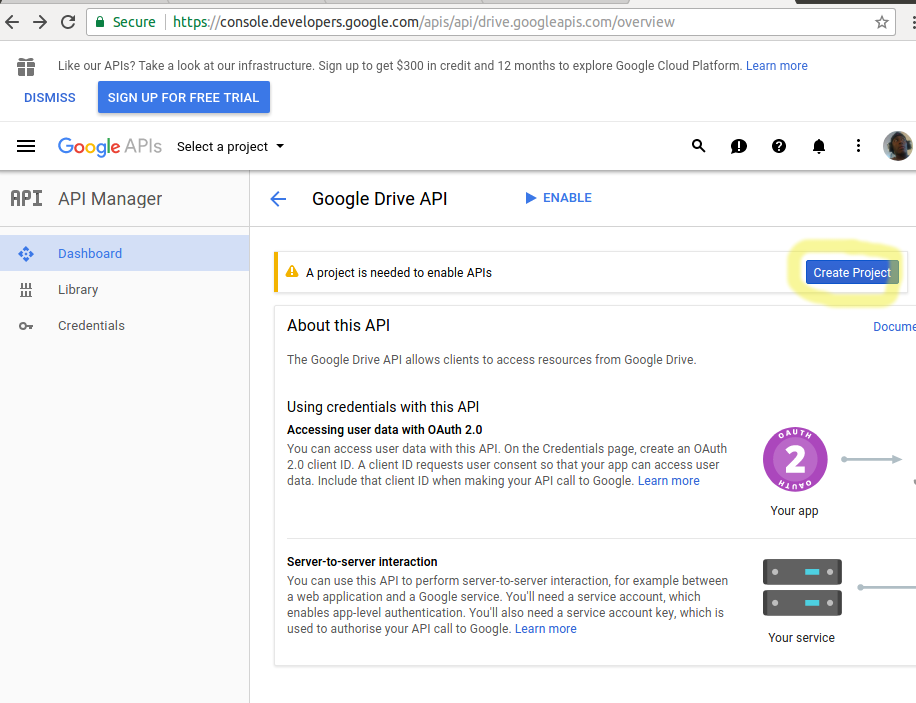
To enable the Google Drive API we need to first create a project.
Give the project a name and click “Create”
This will make the project and take us back to the main Google Drive API screen where we can now enable this functionality.
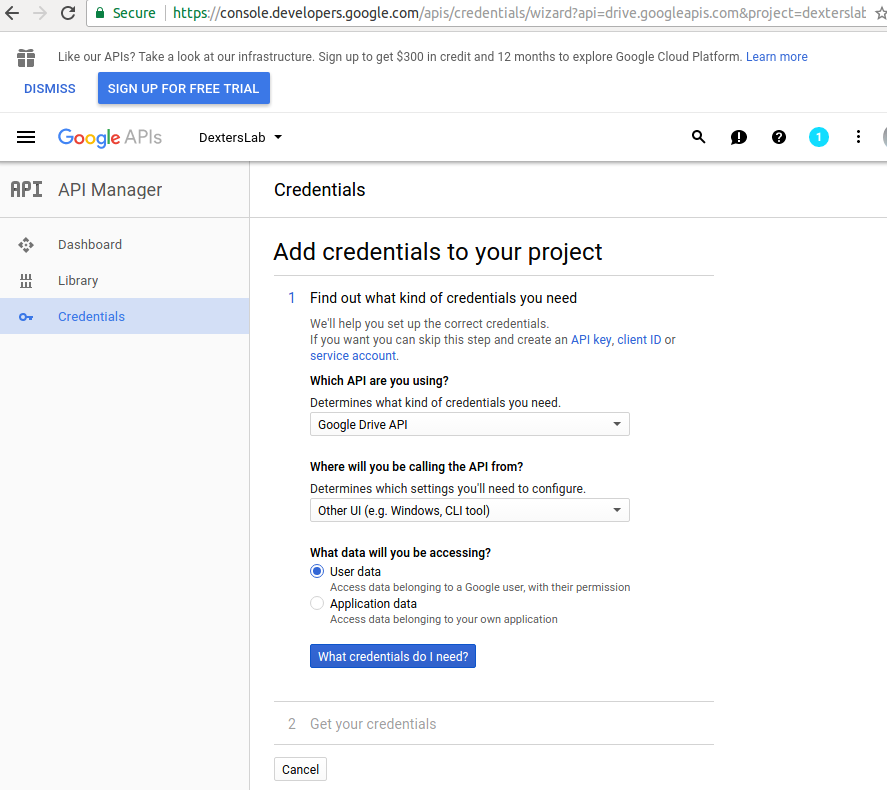
Now we need to navigate to the credentials area to download some credentials we can use.
Select “Other UI (e.g. Windows, CLI tool)” in the first drop down and “User data” in the radio buttons options. Then click “What credentials do I need”?
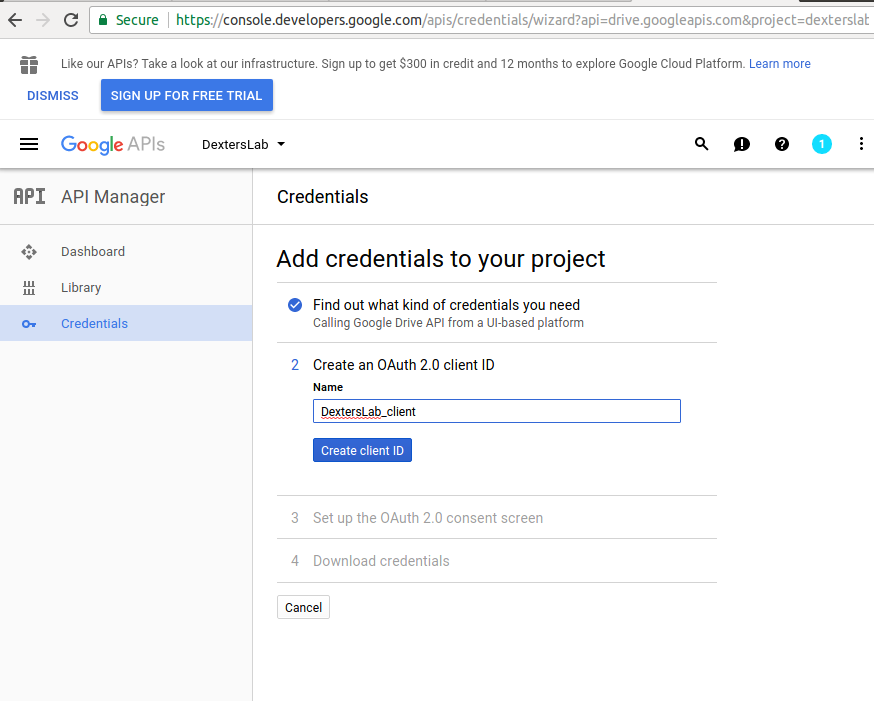
We should now be at a screen where we are setting up client details for an “OAuth 2.0 client ID“.
Name the client and click “Create client ID”
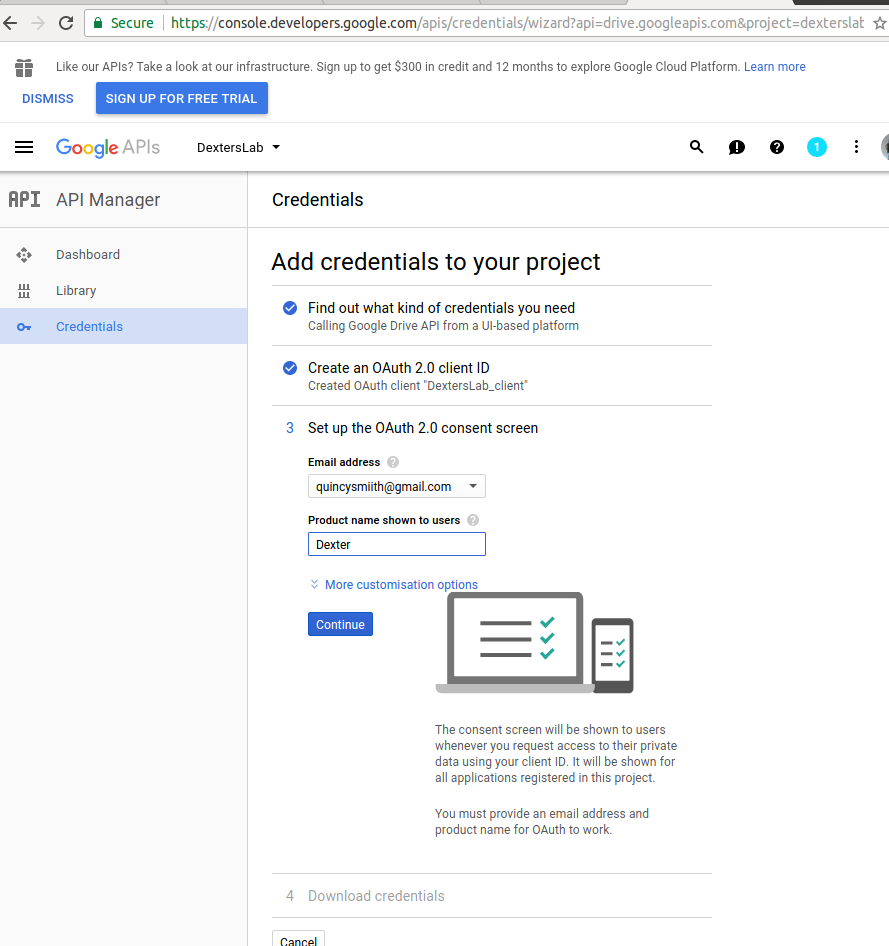
Give the product a name and click “Continue”
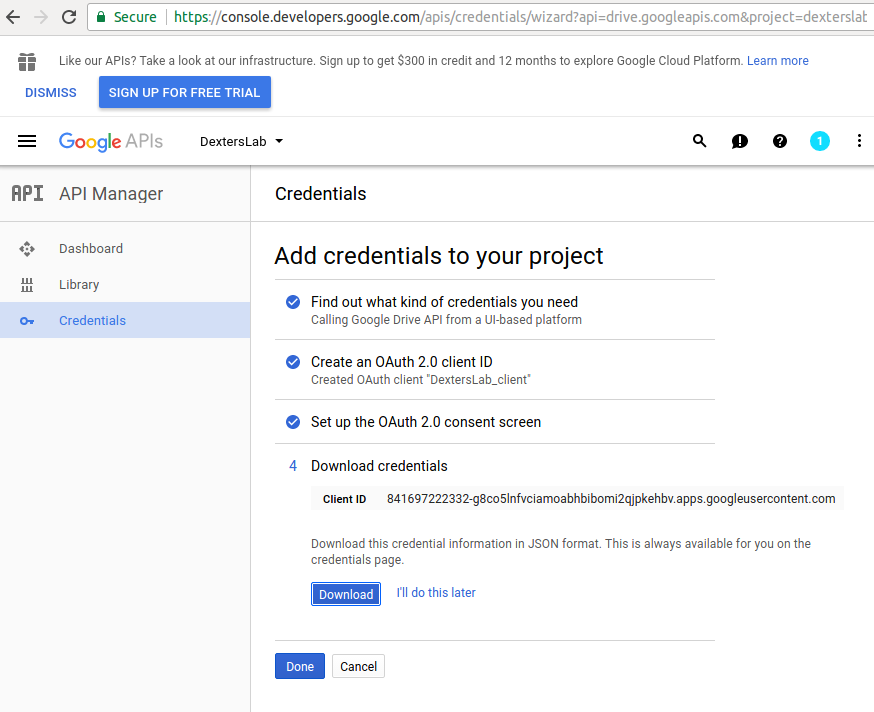
Click “Download” to download the credentials then hit “Done”
We now have a client_id.json file on our computer. This needs to be renamed to “client_secrets.json and placed in your working directory.
Run Some Code
Run the following code in a python interpreter
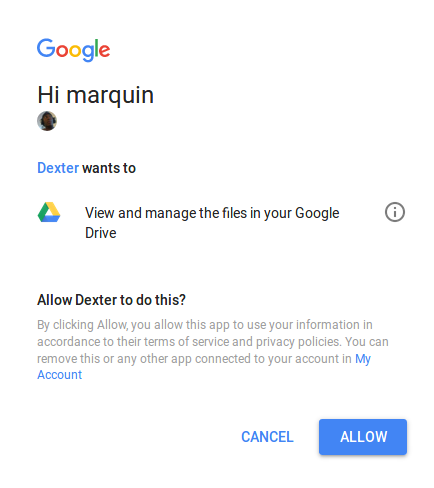
from pydrive.auth import GoogleAuth gauth = GoogleAuth() gauth.LocalWebserverAuth() drive = GoogleDrive(gauth) file1 = drive.CreateFile() # Create GoogleDriveFile instance with title 'Hello.txt'. file1.SetContentString('Hello World!') # Set content of the file from given string. file1.Upload()This will open a new tab in your browser asking you to allow the project we just made in the Google API console. Click “allow”.
Then this code snippet will upload a text file into your Google drive called Hello.txt, with “Hello world” inside. What we really want however is to upload large csv files that are stored on local drives.
This snippet (following allowing the project access) will upload a local csv file called “something.csv” into a Google Drive account.
file1 = drive.CreateFile() file1.SetContentFile("something.csv") file1.Upload()Congratulations, you made it to the end! If you followed along you now have the ability to upload text and csv files to Google drive. Another tool in the tool belt to tame any data that might come your way.