- How to upgrade Java on Ubuntu?
- 7 Answers 7
- How to Check and Update Java Version on Ubuntu 22.04?
- How to check Java version on Ubuntu 22.04
- How to Update Java version on Ubuntu 22.04
- Conclusion
- About the author
- Anees Asghar
- Install the Java Runtime Environment
- What you’ll learn
- What you’ll need
- 2. Installing OpenJDK JRE
- 3. Installing Oracle HotSpot JRE
- Downloading the Oracle HotSpot JRE binaries
- Installing
- Post-installation steps
- Need further assistance?
- How to Upgrade Java on Ubuntu?
- Method 1: Using Apt Package Manager to Upgrade Java on Ubuntu
- Install the Latest Version (Upgraded)
- Verify the Upgraded Java Version
- Method 2: Using the .deb File to Upgrade Java (Manually)
- Conclusion
How to upgrade Java on Ubuntu?
I installed Ubuntu on my computer, and now my Java version is not updated. I have Java, so I don’t need to install — just update the current version. Can someone please tell me the command I have to use to get the current version? I have tried: apt-get update and apt-get upgrade .
7 Answers 7
Note: WebUpd8 team’s PPA has been discontinued with effective from April 16, 2019. Thus this PPA doesn’t have any Java files. More information can be found on PPA’s page on Launchpad. Hence this method no longer works and exists because of historical reasons.
sudo add-apt-repository ppa:webupd8team/java sudo apt-get update sudo apt-get install oracle-java7-installer sudo apt-get install oracle-java8-installer If you ABSOLUTELY need to have the latest update of java you must manualy install from official source, follow this tuto : http://www.cyberciti.biz/faq/howto-installing-oracle-java7-on-ubuntu-linux/
But I advise you to wait as ppa update
I tried this one but it will not install the newest version. I have checked it out on java-website. I have now version 7 update 65 and I want version 7 update 67.
root@ubuntu:/home/kenneth# sudo apt-get install oracle-java7-installer Reading package lists. Done Building dependency tree Reading state information. Done oracle-java7-installer is already the newest version. 0 to upgrade, 0 to newly install, 0 to remove and 0 not to upgrade.
Found something useful here..
Installing Java with apt-get is easy. First, update the package index:
Check if Java is not already installed:
sudo apt-get install default-jre sudo apt-get install default-jdk This worked great for me in March 2016. my system is always fairly up-to-date so just the last two commands (the install s) did it for up
Note: WebUpd8 team’s PPA has been discontinued with effective from April 16, 2019. Thus this PPA doesn’t have any Java files. More information can be found on PPA’s page on Launchpad. Hence this method no longer works and exists because of historical reasons.
The newest OpenJDK Java packaged for trusty (14.04) right now is 7u55. You can check your Java version with java -version from the command line in Terminal.
If you want a newer one your best options will be to:
- wait for an update from Ubuntu, OR
- install the Oracle distribution of Java which currently is at 7u65:
sudo add-apt-repository ppa:webupd8team/java sudo apt-get update sudo apt-get install oracle-java7-installer How to Check and Update Java Version on Ubuntu 22.04?
![]()
Java is a general-purpose client-side programming language that serves several functionalities like android application development, game development, web applications development, and many other software products. To build any application, first, we have to install Java on our computer systems. However, some applications are not capable to run on java’s outdated version. So, it’s essential to know which Java version is installed on our operating system and if our machine is running an outdated version of java, then how to update it.
This post will explain how to check and upgrade the Java version on Ubuntu 22.04. So, let’s begin!
How to check Java version on Ubuntu 22.04
Open the terminal on your ubuntu 22.04 operating system and type the below-mentioned command to check which Java version is installed on your machine:
Once you typed the above-given command on the terminal, it will produce the following outcome:
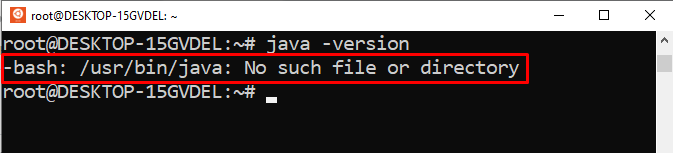
The above snippet shows that Java is not installed on our machine. Now, let’s move one step further to learn how to install/upgrade the Java version on Ubuntu 22.04.
How to Update Java version on Ubuntu 22.04
To update the java version or to install the latest java version, firstly you have to upgrade the apt repository. To do so, type the below-given command on the terminal:
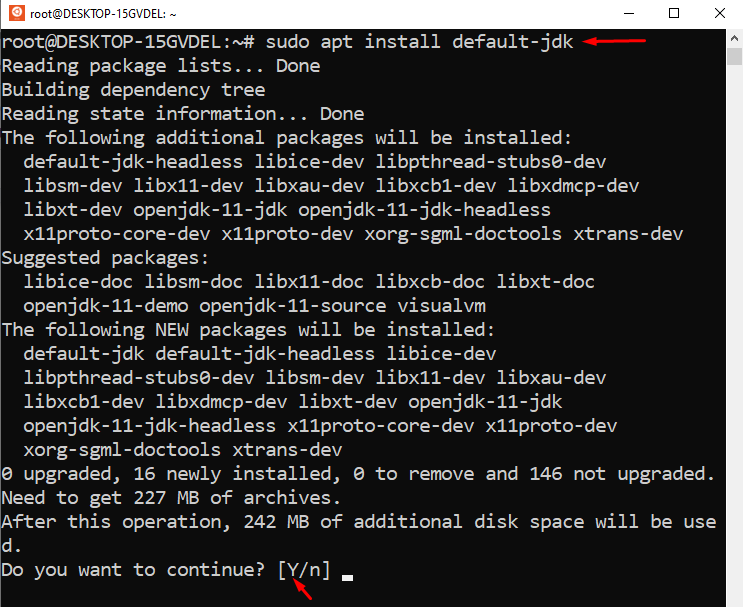
Next, run the below-enlisted command to install the default Java Runtime Environment(JRE) on your operating system:
When you execute the above-given command, it will work like this:
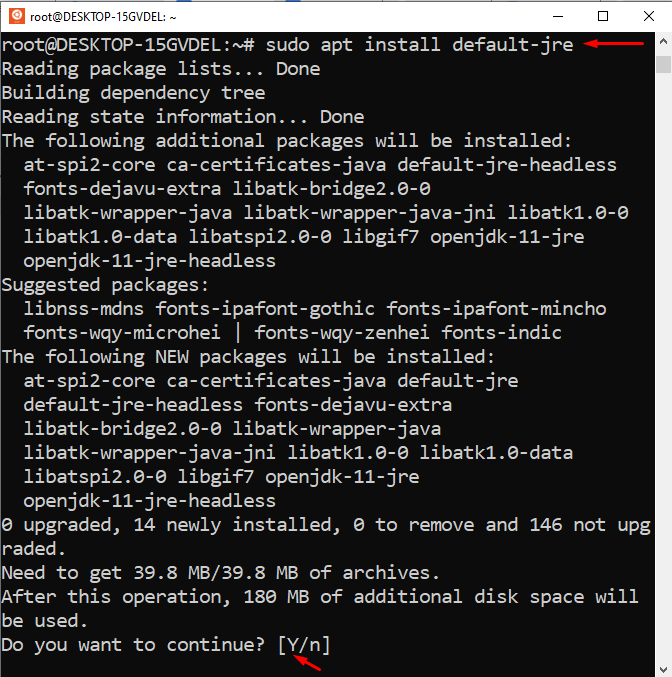
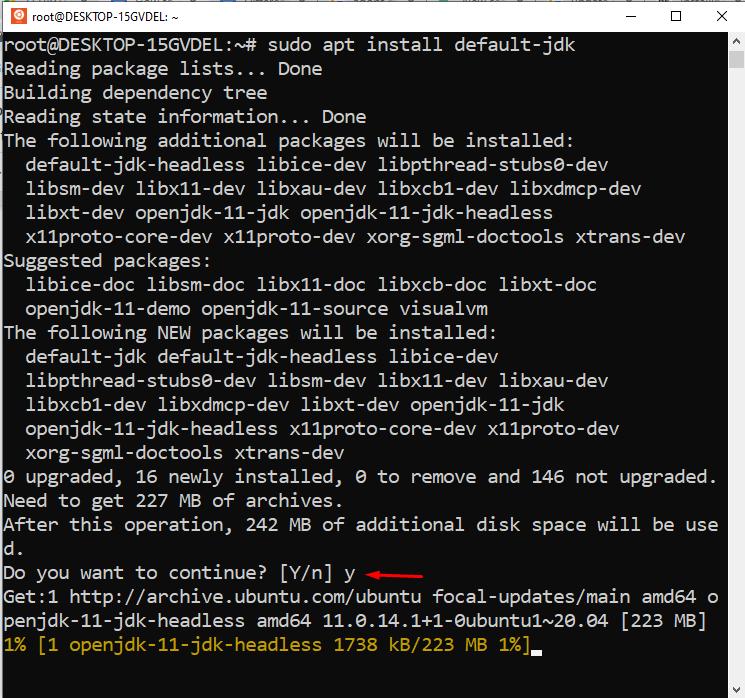
Type “Y” to continue the installation process:
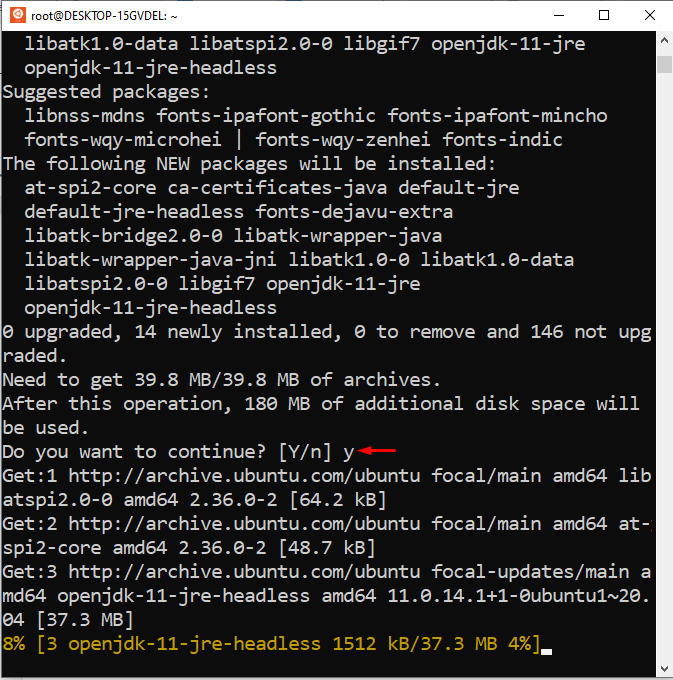
The whole installation process will take a few minutes to install JRE on your system. You can verify the JRE’s installation by typing the following command:
If JRE is successfully installed on your Ubuntu 22.04, then you will witness the result something like this:
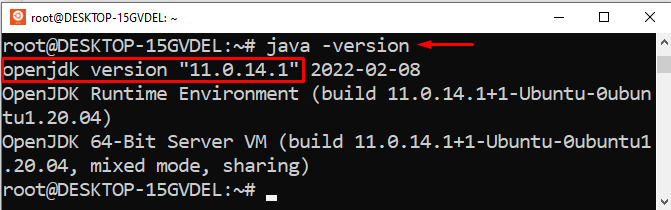
Congratulations! You have successfully installed the latest and updated version of Java on Ubuntu 22.04.
As the JRE’s installation is done, now you can run almost every java software on your machine. However, some java-oriented software may require the Java Development Kit(JDK) to compile/run some particular tasks. In such cases, you can install the JDK by typing the below-given command:
The above-given command will work something like this:
Type “Y” to continue the JDK’s installation process:
Type the below-given command on the terminal of ubuntu 22.04 to verify whether the updated JDK is installed on your machine or not:
You will witness the below-given output:

Congrats! You are running an updated Java version on your ubuntu 22.04.
Conclusion
Open the terminal and type “sudo apt install default-jre” to install JRE, and type “sudo apt install default-jdk” to install JDK on ubuntu 22.04. To check or verify the java version type “java -version” on the terminal of Ubuntu 22.04. This write-up provided a step-by-step guide on how to check, update, and verify the java version on ubuntu 22.04.
About the author
Anees Asghar
I am a self-motivated IT professional having more than one year of industry experience in technical writing. I am passionate about writing on the topics related to web development.
Install the Java Runtime Environment
The Java Runtime Environment (JRE) is required to run Java programs. Nowadays there are many JRE packages available from a variety of projects and companies, but the two most popular on Ubuntu are OpenJDK and Oracle HotSpot. Using one package over the other should not create any functional difference in most applications; however, some prefer OpenJDK over Oracle HotSpot as the former does not contain closed-source components, has a much clearer licensing and support policy, and is maintained as part of the Ubuntu archive, with easier installation and upgrades.
In this guide, we’ll be going through the installation of both JRE packages. Of course, you generally only need to pick the one that best suits your needs and preferences.
What you’ll learn
What you’ll need
That’s all you need. If you have that, let’s proceed to the next step!
2. Installing OpenJDK JRE
With new versions of Java released every 6 months, there are multiple versions available for use. Nowadays, Java 11 is the current Long Term Support (LTS) version, but Java 8 is still widely used. Moreover, the non LTS versions of Java are bringing a steady stream of innovation into the language, and also see some adoption.
Ubuntu offers the default-jre package, which is regularly updated to ship the latest version of the current OpenJDK JRE in Long Term Support (LTS). The default-jre is an excellent choice for most situations, thanks to the outstanding track of backwards compatibility of the Java Virtual Machine.
(Alternatively, you may opt to use a specific Java version, using for example the openjdk-11-jre package; as updates are released for that version of the Java Virtual Machine, that packages will be updated, allowing you to stick to the latest and greatest update of one specific version of the Java language.)
To install the OpenJDK JRE, we run:
sudo apt install default-jre We can check if OpenJDK JRE was properly installed by running:
It should output the following:
openjdk version "11.0.11" 2021-04-20 OpenJDK Runtime Environment (build 11.0.11+9-Ubuntu-0ubuntu2) OpenJDK 64-Bit Server VM (build 11.0.11+9-Ubuntu-0ubuntu2, mixed mode) (Although the output may change in the future as new Java versions are promoted to LTS status, or the current LTS version receives updates.)
In the next step we’ll install Oracle HotSpot JRE.
3. Installing Oracle HotSpot JRE
Downloading the Oracle HotSpot JRE binaries
Download JRE binaries in .tar.gz (tarball) by heading over to their website. An Oracle account is needed to download the Oracle HotSpot JRE.
Oracle does not currently offer JRE packages for Java 11 or above from their website so, for this tutorial, we will use the Oracle HotSpot JRE version to be 8u291 (Java 8, update 291).
Installing
Create a directory to install JRE in with:
Move the JRE binaries into the directory:
sudo mv jre-8u291-linux-x64.tar.gz /usr/local/java Go into the install directory:
sudo tar zxvf jre-8u291-linux-x64.tar.gz Post-installation steps
To save space, delete the tarball by running:
sudo rm jre-8u291-linux-x64.tar.gz Let the system know where JRE is installed:
sudo update-alternatives --install "/usr/bin/java" "java" "/usr/local/java/jre1.8.0_291/bin/java" 1 After that’s done, check the installation by running:
It should output the following:
java version "1.8.0_291" Java(TM) SE Runtime Environment (build 1.8.0_291-b10) Java HotSpot(TM) 64-Bit Server VM (build 25.291-b10, mixed mode) Need further assistance?
How to Upgrade Java on Ubuntu?
Java is a high-level, object-oriented programming language that is widely used for developing desktop, mobile, and web applications. Java, like other applications, offers updated versions regularly. If your system or any programs are Java-dependent, then it is necessary to keep the Java version updated to get the latest features and support.
This post will address the possible methods to upgrade Java on Ubuntu:
Method 1: Using Apt Package Manager to Upgrade Java on Ubuntu
The most common method is to use the “APT” package manager, which allows users to easily upgrade to the latest version of Java by running a few commands in the terminal.
Step 1: Check the Existing Java Version
To check the installed java version in the operating system, run the “java” command with the “version” option:

The output shows that currently, the “1.8.0_352” version of Java is installed in the system.
Step 2: Update the Package Manager
To update the package manager’s list, use the “apt” command with the “update” utility in the following command:

The output shows that the package manager has been updated.
Install the Latest Version (Upgraded)
To install the latest version of OpenJDK, use the “APT” package manager by specifying the “openjdk-19-jdk” command:
$ sudo apt install openjdk-19-jdk
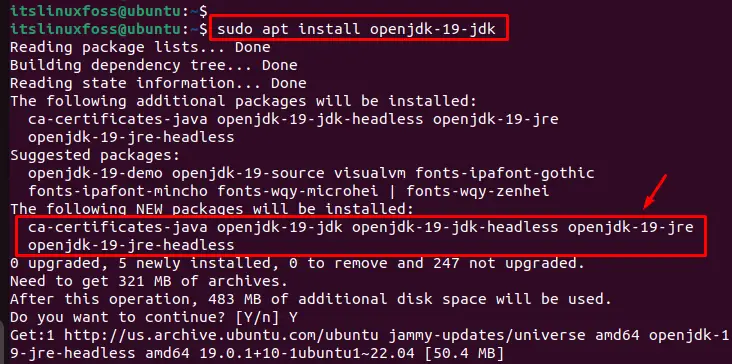
The output shows that the latest version of Java 19 along with dependent files have been installed in the system.
Note: Users can also utilize the “sudo apt upgrade” command to upgrade all installed packages, including Java, in the current system. In addition, Java 19 is the extended version of the Java 17 LTS version.
Verify the Upgraded Java Version
To verify the installed version of Java, specify the “java” command with the “version” option as below:

This command displays the “19.0.1” version of Java that is upgraded on the system.
Method 2: Using the .deb File to Upgrade Java (Manually)
To upgrade Java manually, download the latest version of Oracle JDK from the Official Website and install it on the Ubuntu system. Follow these steps to do this:
Step 1: Download the Latest JDK Version
Go to the Oracle JDK download page and download the upgraded version of the .deb file for Linux:
$ sudo wget https://download.oracle.com/java/19/latest/jdk-19_linux-x64_bin.deb
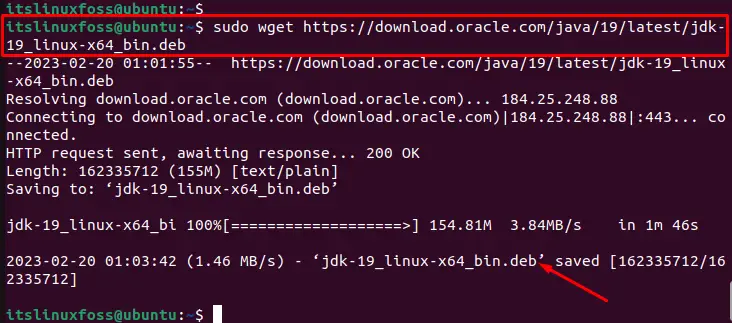
The output shows that the latest version of the .deb file has been downloaded in the system.
Note: Go to the Official Website to have the latest available “.deb” version of Java.
Step 2: Install the Latest Version of OpenJDK
To upgrade Java on Ubuntu, use the .deb package file to install the most recent version of OpenJDK:
$ sudo apt install ./jdk-19_linux-x64_bin.deb
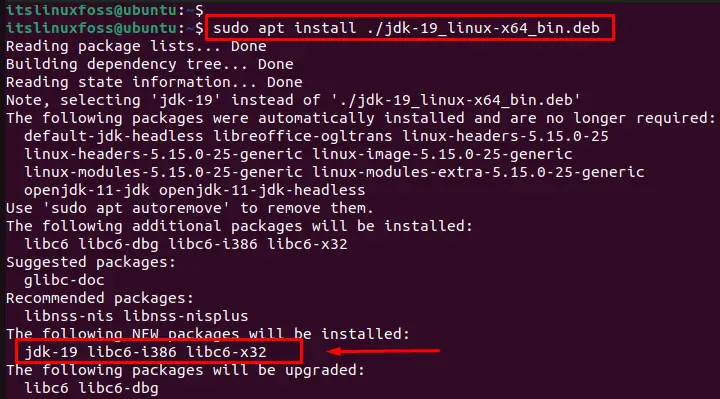
In this way, all dependencies with the latest version of java are installed in the system.
Step 3: Verify Upgraded Version of Java
To verify the upgraded version of Java, utilize the “version” option with the “java” command:

It displays the “19.0.1” version of Java that is currently installed on the system.
Conclusion
To upgrade Java on Ubuntu, use the “$ sudo apt install openjdk-19-jdk” command or download the latest version of Java from the Oracle Website and install it manually on the system. After the upgrade, execute the “java -version” to confirm the installed version of Java.
This article has explained all possible methods to upgrade Java on Ubuntu.