Turtle Fill
Filling is a big part of drawing and Python’s turtle has very handy Python methods that can be used to fill shapes and patterns with different colors.
In this tutorial we’re going to show you how to use .fillcolor() , .begin_fill() and .end_fill() methods.
How to fill turtle drawings with color?
Filling a drawing in turtle is pretty simple.
You just need to place your drawing between begin_fill and end_fill commands.
- A typical fill operation in turtle can be like this:
- Define a filling color using turtle.fillcolor()
- Start the filling operation with this command: turtle.begin_fill()
- Perform your turtle drawing in the middle
- End the filling operation with this command: turtle.end_fill()
If you’ve done it right turtle will fill the drawing with your choice of color once the drawing ends.
.fillcolor()
Filling a drawing in turtle is pretty simple.
You just need to place your drawing between begin_fill() and end_fill() commands.
- A typical fill operation in turtle can be like this:
- Define a filling color using turtle.fillcolor()
- End the filling operation with this command: turtle.end_fill()
If you’ve done it right turtle will fill the drawing with your choice of color once the drawing ends.
.begin_fill()
- It also makes sense to include a turtle.fillcolor() object before the turtle.begin_fill() object.
- Define a filling color using turtle.fillcolor()
- End the filling operation with this command: turtle.end_fill()
If you’ve done it right turtle will fill the drawing with your choice of color once the drawing ends.
.end_fill()
Filling a drawing in turtle is pretty simple.
- A typical fill operation in turtle can be like this:
- Define a filling color using turtle.fillcolor()
- End the filling operation with this command: turtle.end_fill()
If you’ve done it right turtle will fill the drawing with your choice of color once the drawing ends.
Example 1: Filling A Star
- Don’t forget to pass the new size in tuples: img.resize((x, y))
- Also. don’t forget that you will have to assign the new image with new size to a new variable or you can also reassign it to the same variable and overwrite it.
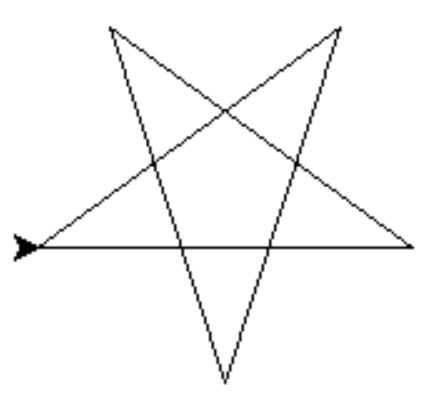
Shortly, a pentagon star can be drawn with 5 lines. Making a turn with 144 degrees of external angle each time will result in a star. So, we need:
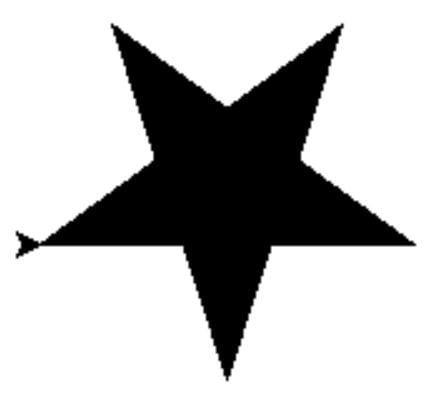
import turtle turtle.begin_fill() for i in range(5): turtle.forward(150) turtle.left(144) turtle.end_fill() turtle.exitonclick()Now let’s apply begin_fill() using turtle, so that our star is filled with a color.

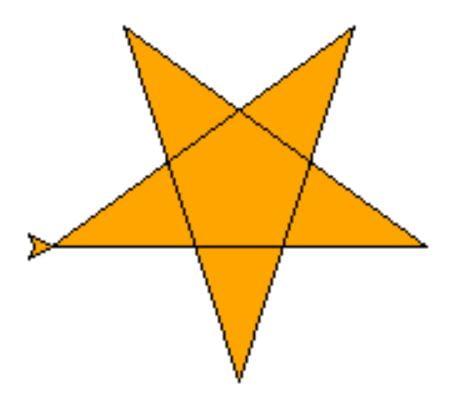
And another example, this time using .fillcolor() to pass a filling color value to turtle.
import turtle turtle.fillcolor("orange") turtle.begin_fill() for i in range(5): turtle.forward(150) turtle.left(144) turtle.end_fill() turtle.exitonclick()Example 2: Filling Triangles
- We will adjust the angle to 120 (This is the external angle of an equilateral triangle since all three internal angles are 60 degrees.)
- We also need range(3) only so that it makes 3 iterations since a triangle has 3 sides.
import turtle turtle.fillcolor("pink") turtle.begin_fill() for i in range(3): turtle.forward(150) turtle.left(120) turtle.end_fill() turtle.exitonclick()Example 3: Blurring an image
Great. Drawing and filling shapes with turtle is so much fun!
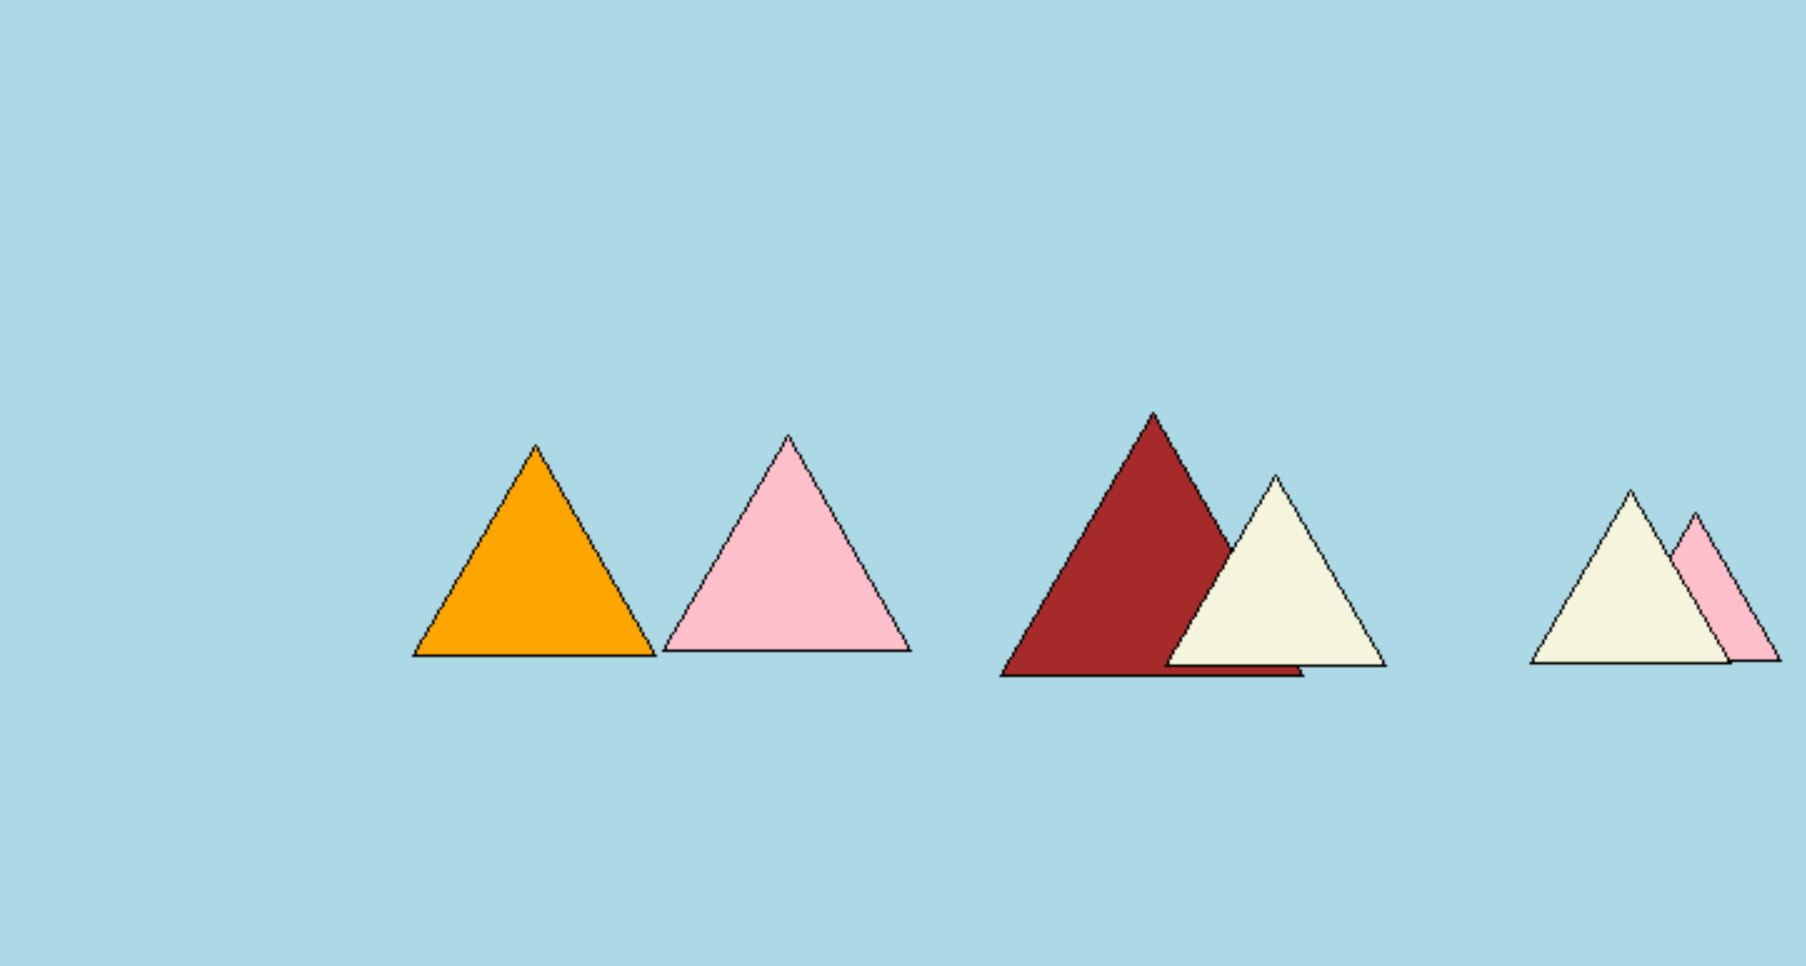
Let’s try something a little more advanced. We can spread a few of these triangles around the horizon using random library making them look like colorful tents.
You can also make them look like mountains by choosing more earthy colors.
- turtle.speed(0) to speed up the drawing.
- turtle.bgcolor(«lightblue») to create a pleasant background
- For loop to draw triangles.
- A user defined function to put the first for loop (triangle maker) in it.
- We’ll call it with different random values to create different sizes of triangles.
- Here we will also use: random.randint() method to randomize tent positions around an imaginary horizon.
- We will use a list of predefined colors and random.randint() again to fill each tent with different colors.
It’s not that complicated but I wanted to explain as much as possible in case this Python tutorial is being used to teach an audience.
Let’s see the code and turtle drawing.
import turtle import random turtle.bgcolor("lightblue") turtle.speed(0) turtle.hideturtle() def triangle_maker(i,j): lst=["red","green","orange", "yellow","pink","brown","green"] turtle.color("black") turtle.fillcolor(lst[random.randint(0,6)]) turtle.begin_fill() for iter in range(3): turtle.forward(i) turtle.left(j) turtle.end_fill() def tents(): for i in range(1): triangle_maker(random.randint(65,125),120) for i in range(6): turtle.penup() turtle.setpos(random.randint(-300, 300), random.randint(-20, 0)) turtle.pendown() tents() turtle.exitonclick()An important note: About python.color() position here. It matters if you place python.color() before begin_fill() or after begin_fill().
If you place it after begin_fill(), fillcolor() will be ignored (or supressed) and fill color will be the turtle drawing color and there won’t be any edge color.
So feel free to experiment with it, as long as you know that it matters if turtle.color() comes before or begin_fill() comes before you should be good.
Here is an example created with the code above just by changing swapping the .color, begin_fill positions as below.
#Only to demonstrate top three lines, #which are swapped from previous Python code. turtle.fillcolor(lst[random.randint(0,6)]) turtle.begin_fill() turtle.color("black") for iter in range(3): turtle.forward(i) turtle.left(j) turtle.end_fill()turtle — Turtle graphics
Turtle graphics is a popular way for introducing programming to kids. It was part of the original Logo programming language developed by Wally Feurzeig, Seymour Papert and Cynthia Solomon in 1967.
Imagine a robotic turtle starting at (0, 0) in the x-y plane. After an import turtle , give it the command turtle.forward(15) , and it moves (on-screen!) 15 pixels in the direction it is facing, drawing a line as it moves. Give it the command turtle.right(25) , and it rotates in-place 25 degrees clockwise.
Turtle can draw intricate shapes using programs that repeat simple moves.
from turtle import * color('red', 'yellow') begin_fill() while True: forward(200) left(170) if abs(pos()) 1: break end_fill() done()
By combining together these and similar commands, intricate shapes and pictures can easily be drawn.
The turtle module is an extended reimplementation of the same-named module from the Python standard distribution up to version Python 2.5.
It tries to keep the merits of the old turtle module and to be (nearly) 100% compatible with it. This means in the first place to enable the learning programmer to use all the commands, classes and methods interactively when using the module from within IDLE run with the -n switch.
The turtle module provides turtle graphics primitives, in both object-oriented and procedure-oriented ways. Because it uses tkinter for the underlying graphics, it needs a version of Python installed with Tk support.
The object-oriented interface uses essentially two+two classes:
- The TurtleScreen class defines graphics windows as a playground for the drawing turtles. Its constructor needs a tkinter.Canvas or a ScrolledCanvas as argument. It should be used when turtle is used as part of some application. The function Screen() returns a singleton object of a TurtleScreen subclass. This function should be used when turtle is used as a standalone tool for doing graphics. As a singleton object, inheriting from its class is not possible. All methods of TurtleScreen/Screen also exist as functions, i.e. as part of the procedure-oriented interface.
- RawTurtle (alias: RawPen ) defines Turtle objects which draw on a TurtleScreen . Its constructor needs a Canvas, ScrolledCanvas or TurtleScreen as argument, so the RawTurtle objects know where to draw. Derived from RawTurtle is the subclass Turtle (alias: Pen ), which draws on “the” Screen instance which is automatically created, if not already present. All methods of RawTurtle/Turtle also exist as functions, i.e. part of the procedure-oriented interface.
The procedural interface provides functions which are derived from the methods of the classes Screen and Turtle . They have the same names as the corresponding methods. A screen object is automatically created whenever a function derived from a Screen method is called. An (unnamed) turtle object is automatically created whenever any of the functions derived from a Turtle method is called.
To use multiple turtles on a screen one has to use the object-oriented interface.
In the following documentation the argument list for functions is given. Methods, of course, have the additional first argument self which is omitted here.