- Цветные CSS-кнопки ссылки
- HTML:
- CSS:
- Пример
- Результат
- Использование CSS стилей
- Пример
- Результат
- Атрибуты
- Как добавить стиль к тегу ?
- Распространенные свойства для изменения визуальной насыщенности/выделения/размера текста внутри тега :
- Цвет текста внутри тега :
- Стили форматирования текста для тега :
- Другие свойства для тега :
- How to Change Button Color on Click in CSS
- What is “:active” in CSS?
- How to Change Button Color on Click in CSS?
- HTML
- CSS
- HTML
- Conclusion
- About the author
- Sharqa Hameed
Цветные CSS-кнопки ссылки
Пример реализации простых кнопок ссылок с градиентной заливкой зеленым, красным и синим цветами, а также закругленными краями. Проработаны стили «баттонов» при наведении курсора.

Все комментарии в CSS разделены на следующие три части:
- Default style — стиль кнопки по умолчанию.
- Buttons — простые HTML кнопки-ссылки.
- Buttons with a gradient — кнопки с градиентом.
HTML:
Зеленая кнопка
Красная кнопка
Голубая кнопка
Цветовое оформление, стили:
Собственно сами исходники стилевой разметки представлены чуть далее. А вот скачать готовый пример можно вот здесь:
P.S. Работает только в Mozilla Firefox и Google Chrome.
CSS:
/* Default style:*/ .site-button < border-radius:4px; color:#FFF !important; display:inline-block; font-size:16px; font-weight:bold; line-height:16px; margin:0; padding:6px 10px; vertical-align:middle; white-space:nowrap; text-decoration:none; >/* Buttons:*/ .blue < background-color:#1FBBE7; border:1px solid #14A3DF; >.green < background-color:#7DD060; border:1px solid #399A2C; >.red < background-color:#E62525; border:1px solid #9C1818; >.blue:hover < background-color:#0098D2; text-decoration:none; >.green:hover < background-color:#277D12; text-decoration:none; >.red:hover < background-color:#C42020; text-decoration:none; >/* Buttons with a gradient:*/ .blue.cssgradients < background:-webkit-gradient( linear, left bottom, left top, color-stop(0.06, #14a4df), color-stop(0.77, #2bd4f0) ); background:-moz-linear-gradient( center bottom, #14a4df 6%, #2bd4f0 77% ); >.blue.cssgradients < background:-webkit-gradient( linear, left bottom, left top, color-stop(0.06, rgb(178,226,249)), color-stop(0.77, rgb(221,242,253)) ); background:-moz-linear-gradient( center bottom, rgb(178,226,249) 6%, rgb(221,242,253) 77% ); >.blue.cssgradients:hover < background:-webkit-gradient( linear, left bottom, left top, color-stop(0.06, #0070c1), color-stop(0.77, #00bce2) ); background:-moz-linear-gradient( center bottom, #0070c1 6%, #00bce2 77% ); >.green.cssgradients < background:-webkit-gradient( linear, left bottom, left top, color-stop(0.06, #399a2c), color-stop(0.77, #7dd060) ); background:-moz-linear-gradient( center bottom, #399a2c 6%, #7dd060 77% ); >.green.cssgradients:hover < background:-webkit-gradient( linear, left bottom, left top, color-stop(0.06, #194f0b), color-stop(0.77, #35ab19) ); background:-moz-linear-gradient( center bottom, #194f0b 6%, #35ab19 77% ); >.red.cssgradients < background:-webkit-gradient( linear, left bottom, left top, color-stop(0.06, #9c1818), color-stop(0.77, #e62525) ); background:-moz-linear-gradient( center bottom, #9c1818 6%, #e62525 77% ); >.red.cssgradients:hover
HTML тег
Содержимое тега пишется между открывающим тегами.
Пример
html> html> head> title>Заголовок документа title> head> body> h1>Вот наша кнопка.. h1> button type="button">Нажать button> body> html>Результат

Использование CSS стилей
К тегу можно применять CSS стили для изменения внешнего вида кнопки, ее размера, цвета, шрифта текста и т.д.
Пример
html> html> head> title>Заголовок документа title> head> body> Обычная кнопка button type="button">Добавить в корзину button> hr /> Кнопка с красным текстом button type="button" style="color: red;">b>Книга HTML b> button> hr /> Кнопка с увеличенным размером шрифта button type="button" style="font: bold 14px Arial;">Загрузить книгу button>br /> body> html>Результат

Атрибуты
У тега
| Атрибут | Значение | Описание |
|---|---|---|
| autofocus | autofocus | Указывает браузеру, что кнопка должна получить фокус после загрузки страницы. |
| disabled | disabled | Деактивирует кнопку. (Используется в случае, когда кнопка должна стать активной после выполнения какого-либо действия.) |
| form | form_id | Указывает форму, к которой относится кнопка. Если кнопка относится к нескольким формам, то их идентификаторы (form_id) должны быть разделены пробелами. |
| formaction | URL | Задаёт адрес, куда будут пересылаться данные формы при нажатии на кнопку. (Используется только для кнопок с атрибутом type=»submit»). |
| formenctype | application/x-www-form- urlencoded multipart/form-data text/plain | Определяет способ кодирования данных формы перед отправкой на сервер. (Используется только для кнопок с атрибутом type=»submit»). все символы кодируются перед отправкой (значение по умолчанию). символы не кодируются пробелы заменяются знаком «+», но символы не кодируются. |
| formmethod | Указывает метод HTTP запроса, который будет использован при отправке данных формы. (Используется только для кнопок с атрибутом type=»submit») | |
| get | Передает данные формы в адресной строке («имя=значение»), которые добавляются к URL страницы после вопросительного знака и разделяются между собой амперсандом (&). (http://example.ru/doc/?name=Ivan&password=vanya) | |
| post | Браузер устанавливает связь с сервером и посылает данные для обработки. | |
| formnovalidate | formnovalidate | Отменяет проверку данных формы на корректность. (Используется только для кнопок с атрибутом type=»submit»). |
| formtarget | Указывает, где показывать ответ после отправки формы. (Используется только для кнопок с атрибутом type=»submit»). | |
| blank | открывает ответ в новом окне. | |
| self | открывает ответ в текущем окне. | |
| parent | открывает ответ в родительском фрейме. | |
| top | открывает ответ во всю ширину окна. | |
| name | name | Определяет имя кнопки. |
| type | Определяет тип кнопки. | |
| button | обычная кнопка | |
| reset | кнопка, которая очищает форму от введенных данных | |
| submit | кнопка для отправки данных формы | |
| value | text | Устанавливает значение кнопки. |
Как добавить стиль к тегу ?
Распространенные свойства для изменения визуальной насыщенности/выделения/размера текста внутри тега :
- CSS свойство font-style задает стиль шрифта: normal | italic | oblique | initial | inherit
- CSS свойство font-family создает приоритетный список названий семейства шрифтов и/или общее имя шрифтов для выбранных элементов.
- CSS свойство font-size задает размер щрифта.
- CSS свойство font-weight устанавливает насыщенность шрифта.
- CSS свойство text-transform задает регистр текста (заглавные или строчные буквы).
- CSS свойство text-decoration устанавливает оформление текста. Оно является сокращенным свойством для text-decoration-line, text-decoration-color, text-decoration-style.
Цвет текста внутри тега :
Стили форматирования текста для тега :
- CSS свойство text-indent указывает размер отступа первой строки в текстовом блоке.
- CSS свойство text-overflow указывает, как будет отображаться пользователю строчный текст, выходящий за границы блока.
- CSS свойство white-space указывает, как будут отображены пробелы внутри элемента.
- CSS свойство word-break указывает перенос строки.
Другие свойства для тега :
- CSS свойство text-shadow добавляет тень к тексту.
- CSS свойство text-align-last выравнивает последнюю строку текста.
- CSS свойство line-height устанавливает межстрочный интервал.
- CSS свойство letter-spacing устанавливает расстояние между буквами/символами в тексте.
- CSS свойство word-spacing устанавливает расстояние между словами в тексте.
How to Change Button Color on Click in CSS
![]()
Button is a clickable element used to perform a specific action. Using CSS, you can set different styles of buttons one of them is to change the color of a button on click. The color of a button can be set using the CSS “:active” pseudo-class.
This blog will teach you the procedure related to changing the button color on click. For this, firstly, learn about the :active pseudo-class.
What is “:active” in CSS?
Changing button color on click in CSS is possible with the help of the “:active” pseudo-class. In HTML, it indicates an element that is being activated when the user clicks on it. Moreover, when using a mouse, the activation starts when the mouse key is pressed.
“a” refers to the HTML element on which the :active class will be applied.
Let’s head towards an example to understand the stated concept.
How to Change Button Color on Click in CSS?
To change the color of a button on click, first, create a button in an HTML file and assign the class name “btn”.
HTML
Next, in CSS, set the color of the button. To do so, we will use “.btn” to access the button and set the color of the button as “rgb(0, 255, 213)”.
CSS
background-color : rgb ( 0 , 255 , 213 ) ;
After that, apply :active pseudo-class on the button as “.btn:active” and set the color of the button that will show in its active state as “rgb(123, 180, 17)”:
background-color : rgb ( 123 , 180 , 17 ) ;
This will show the following outcome:
Now, let’s add the heading with tag and button class name “button”, inside the tag.
HTML
Next, we will move to CSS and style the button and apply :active on it. To do so, we will set the border style as “none” and give padding as “15px”. After that, set the color of the button text as “rgb(50, 0, 54)” and its background as “rgb(177, 110, 149)”, and its radius as “15px”:
background-color : rgb ( 177 , 110 , 149 ) ;
This will show the following outcome:
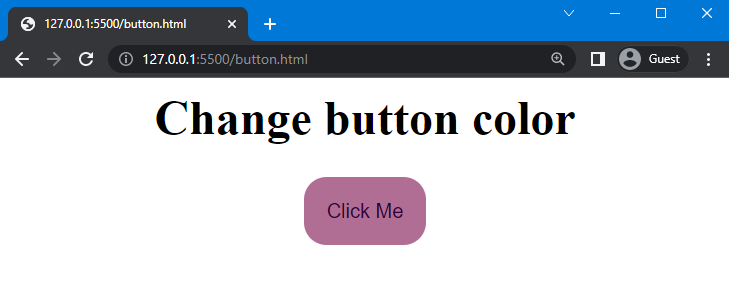
After that, we will apply :active pseudo-class on the button as “.button:active” and set the color of a button as “rgb(200, 255, 0)”:
background-color : rgb ( 200 , 255 , 0 ) ;
Once you implement all of the above code, go to the HTML file and execute it to check out the result:
From the output, it can be observed when the button is clicked its color is changed according to the specified RGB color code.
Conclusion
To change the button color on click in CSS, the “:active” pseudo-class can be used. More specifically, it can represent the button element when it gets activated. Using this class, you can set different button colors when the mouse clicks on it. This article explained the procedure for changing button color on click in CSS.
About the author
Sharqa Hameed
I am a Linux enthusiast, I love to read Every Linux blog on the internet. I hold masters degree in computer science and am passionate about learning and teaching.