- Tkinter python модальное окно
- tkinter.messagebox — Tkinter message prompts
- How to create a modal dialog in tkinter?
- Example
- Output
- Tkinter Dialogs
- tkinter.simpledialog — Standard Tkinter input dialogs
- tkinter.filedialog — File selection dialogs
- Native Load/Save Dialogs
- tkinter.commondialog — Dialog window templates
Tkinter python модальное окно
На этом шаге мы рассмотрим процесс создания таких окон .
Модальное вторичное окно , в отличие от обычного, при открытии блокирует все остальные окна приложения, в результате чего пользователь теряет доступ к ним. Остальные окна становятся доступными только после закрытия модального окна. Такие окна обычно применяются в качестве диалоговых окон для запроса каких-либо данных, необходимых для дальнейшей работы приложения.
К сожалению, библиотека Tkinter не предоставляет никаких инструментов для вывода модальных окон. Однако мы можем превратить обычное вторичное окно в модальное, вызвав у его контейнера или у него самого метод grab_set() (см. 11 шаг). Этот метод задает для контейнера или окна режим перехвата событий, в результате чего остальные окна перестают реагировать на действия пользователя. Как только окно, для которого был установлен перехват событий, закрывается и удаляется из памяти, перехват событий перестает работать, и остальные окна приложения становятся доступными для пользователя.
Есть еще один неприятный момент, связанный с реализацией модальных окон. Если после запуска приложения и вывода модального вторичного окна мы посмотрим на панель задач Windows , то увидим, что там присутствуют оба окна: и главное, и вторичное. Но присутствие модального окна на панели задач говорит о плохом стиле программирования. Чтобы скрыть вторичное окно, следует вызвать у него метод transient() (см. 21 шаг), передав ему ссылку на главное окно. Этот метод, в частности, отменит представление вторичного окна на панели задач.
Вот фрагмент кода контейнера, который превратит окно, в котором выведен, в модальное:
class Secondary(tkinter.ttk.Frame): def __init__(self, master=None): . . . . . self.master.transient(parent) self.grab_set()
В качестве примера давайте модифицируем приложение из предыдущего шага таким образом, чтобы выводимое им вторичное окно стало модальным. Текст ниже показывает исправленный код класса контейнера вторичного окна.
import tkinter import tkinter.ttk # Объявляем класс контейнера для вторичного окна class Secondary(tkinter.ttk.Frame): # Конструктор этого класса поддерживает дополнительный параметр # parent, с которым передается ссылка на главное окно. Она # понадобится нам, чтобы вывести занесенное значение в главном окне def __init__(self, master=None, parent=None): super().__init__(master) # Сохраним ссылку на главное окно в атрибуте self.parent = parent self.pack() self.create_widgets() self.master.title("Вторичное окно") self.master.transient(parent) self.grab_set() def create_widgets(self): self.varValue = tkinter.StringVar() self.varValue.set("Значение") entValue = tkinter.ttk.Entry(self, textvariable=self.varValue) entValue.pack() btnOK = tkinter.ttk.Button(self, text="OK", command=self.ok) btnOK.pack(side="left") btnCancel = tkinter.ttk.Button(self, text="Отмена", command=self.master.destroy) btnCancel.pack(side="right") def ok(self): self.parent.lblValue["text"] = self.varValue.get() self.master.destroy() def show_value(self): self.parent.lblValue["text"] = self.varValue.get() class Application(tkinter.ttk.Frame): def __init__(self, master=None): super().__init__(master) self.pack() self.create_widgets() self.master.title("Модальное вторичное окно") self.master.resizable(False, False) def create_widgets(self): btnShowWindow = tkinter.ttk.Button(self, text="Вывести окно", command=self.show_window) btnShowWindow.pack() # Опция width компонента Label задает ширину надписи # в символах текста self.lblValue = tkinter.ttk.Label(self, text="", width=50) self.lblValue.pack() def show_window(self): # Выводим вторичное окно, не забыв указать в параметре parent # конструктора ссыпку на главное окно Secondary(master=tkinter.Toplevel(), parent=self) root = tkinter.Tk() app = Application(master=root) root.mainloop()
Результат работы приложения приведен на рисунке 1.
Рис.1. Результат работы приложения
На следующем шаге мы рассмотрим управление жизненным циклом приложения .
tkinter.messagebox — Tkinter message prompts
The tkinter.messagebox module provides a template base class as well as a variety of convenience methods for commonly used configurations. The message boxes are modal and will return a subset of (True, False, OK, None, Yes, No) based on the user’s selection. Common message box styles and layouts include but are not limited to:

class tkinter.messagebox. Message ( master = None , ** options ) 
Create a default information message box.
Information message box
tkinter.messagebox. showinfo ( title = None , message = None , ** options ) 
Warning message boxes
tkinter.messagebox. showwarning ( title = None , message = None , ** options ) ¶ tkinter.messagebox. showerror ( title = None , message = None , ** options ) 
Question message boxes
tkinter.messagebox. askquestion ( title = None , message = None , ** options ) ¶ tkinter.messagebox. askokcancel ( title = None , message = None , ** options ) ¶ tkinter.messagebox. askretrycancel ( title = None , message = None , ** options ) ¶ tkinter.messagebox. askyesno ( title = None , message = None , ** options ) ¶ tkinter.messagebox. askyesnocancel ( title = None , message = None , ** options ) 
How to create a modal dialog in tkinter?
Dialog Boxes are a very essential component of any application. It is generally used to interact with the user and the application interface. We can create dialog boxes for any tkinter application using the Toplevel window and other widgets. The toplevel window pops up the stuff above all the other windows. Thus, we can add more stuff on the toplevel window for building dialog boxes.
Example
In this example, we have created a modal dialog which has two parts,
- Initialization of the Toplevel window.
- Function Definition for Popup Dialog Event.
- Adding widgets in the Toplevel window.
- Function Definition for Dialog options.
# Import required libraries from tkinter import * from tkinter import ttk # Create an instance of tkinter frame win = Tk() # Set the window size win.geometry("700x350") style = ttk.Style() style.theme_use('clam') # Define a function to implement choice function def choice(option): pop.destroy() if option == "yes": label.config(text="Hello, How are You?") else: label.config(text="You have selected No") win.destroy() def click_fun(): global pop pop = Toplevel(win) pop.title("Confirmation") pop.geometry("300x150") pop.config(bg="white") # Create a Label Text label = Label(pop, text="Would You like to Proceed?", font=('Aerial', 12)) label.pack(pady=20) # Add a Frame frame = Frame(pop, bg="gray71") frame.pack(pady=10) # Add Button for making selection button1 = Button(frame, text="Yes", command=lambda: choice("yes"), bg="blue", fg="white") button1.grid(row=0, column=1) button2 = Button(frame, text="No", command=lambda: choice("no"), bg="blue", fg="white") button2.grid(row=0, column=2) # Create a Label widget label = Label(win, text="", font=('Aerial', 14)) label.pack(pady=40) # Create a Tkinter button ttk.Button(win, text="Click Here", command=click_fun).pack() win.mainloop() Output
When we run the above code, it will display a window with a Button to open the modal dialog box.
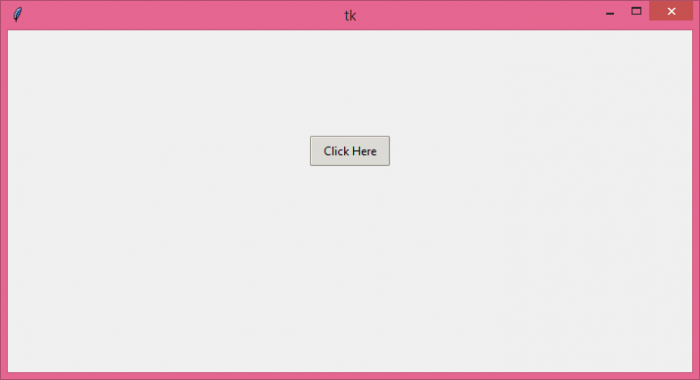
Clicking the Button will open the Modal Dialog Box.
Tkinter Dialogs
tkinter.simpledialog — Standard Tkinter input dialogs
The tkinter.simpledialog module contains convenience classes and functions for creating simple modal dialogs to get a value from the user.
tkinter.simpledialog. askfloat ( title , prompt , ** kw ) ¶ tkinter.simpledialog. askinteger ( title , prompt , ** kw ) ¶ tkinter.simpledialog. askstring ( title , prompt , ** kw ) 
The above three functions provide dialogs that prompt the user to enter a value of the desired type.
class tkinter.simpledialog. Dialog ( parent , title = None ) 
The base class for custom dialogs.
body ( master ) 
Override to construct the dialog’s interface and return the widget that should have initial focus.
buttonbox ( ) 
Default behaviour adds OK and Cancel buttons. Override for custom button layouts.
tkinter.filedialog — File selection dialogs
The tkinter.filedialog module provides classes and factory functions for creating file/directory selection windows.
Native Load/Save Dialogs
The following classes and functions provide file dialog windows that combine a native look-and-feel with configuration options to customize behaviour. The following keyword arguments are applicable to the classes and functions listed below:
Static factory functions
The below functions when called create a modal, native look-and-feel dialog, wait for the user’s selection, then return the selected value(s) or None to the caller.
tkinter.filedialog. askopenfile ( mode = ‘r’ , ** options ) ¶ tkinter.filedialog. askopenfiles ( mode = ‘r’ , ** options ) 
The above two functions create an Open dialog and return the opened file object(s) in read-only mode.
tkinter.filedialog. asksaveasfile ( mode = ‘w’ , ** options ) 
Create a SaveAs dialog and return a file object opened in write-only mode.
tkinter.filedialog. askopenfilename ( ** options ) ¶ tkinter.filedialog. askopenfilenames ( ** options ) 
The above two functions create an Open dialog and return the selected filename(s) that correspond to existing file(s).
tkinter.filedialog. asksaveasfilename ( ** options ) 
Create a SaveAs dialog and return the selected filename.
tkinter.filedialog. askdirectory ( ** options ) 
class tkinter.filedialog. Open ( master = None , ** options ) ¶ class tkinter.filedialog. SaveAs ( master = None , ** options ) 
The above two classes provide native dialog windows for saving and loading files.
Convenience classes
The below classes are used for creating file/directory windows from scratch. These do not emulate the native look-and-feel of the platform.
class tkinter.filedialog. Directory ( master = None , ** options ) 
Create a dialog prompting the user to select a directory.
The FileDialog class should be subclassed for custom event handling and behaviour.
Create a basic file selection dialog.
cancel_command ( event = None ) 
Trigger the termination of the dialog window.
Event handler for double-click event on directory.
Event handler for click event on directory.
Event handler for double-click event on file.
Event handler for single-click event on file.
filter_command ( event = None ) 
Filter the files by directory.
Retrieve the file filter currently in use.
Retrieve the currently selected item.
go ( dir_or_file = os.curdir , pattern = ‘*’ , default = » , key = None ) 
Render dialog and start event loop.
Exit dialog returning current selection.
Exit dialog returning filename, if any.
Update the current file selection to file.
class tkinter.filedialog. LoadFileDialog ( master , title = None ) 
A subclass of FileDialog that creates a dialog window for selecting an existing file.
Test that a file is provided and that the selection indicates an already existing file.
class tkinter.filedialog. SaveFileDialog ( master , title = None ) 
A subclass of FileDialog that creates a dialog window for selecting a destination file.
Test whether or not the selection points to a valid file that is not a directory. Confirmation is required if an already existing file is selected.
tkinter.commondialog — Dialog window templates
The tkinter.commondialog module provides the Dialog class that is the base class for dialogs defined in other supporting modules.
class tkinter.commondialog. Dialog ( master = None , ** options ) ¶ show ( color = None , ** options ) 