How to Embed
HTML Code
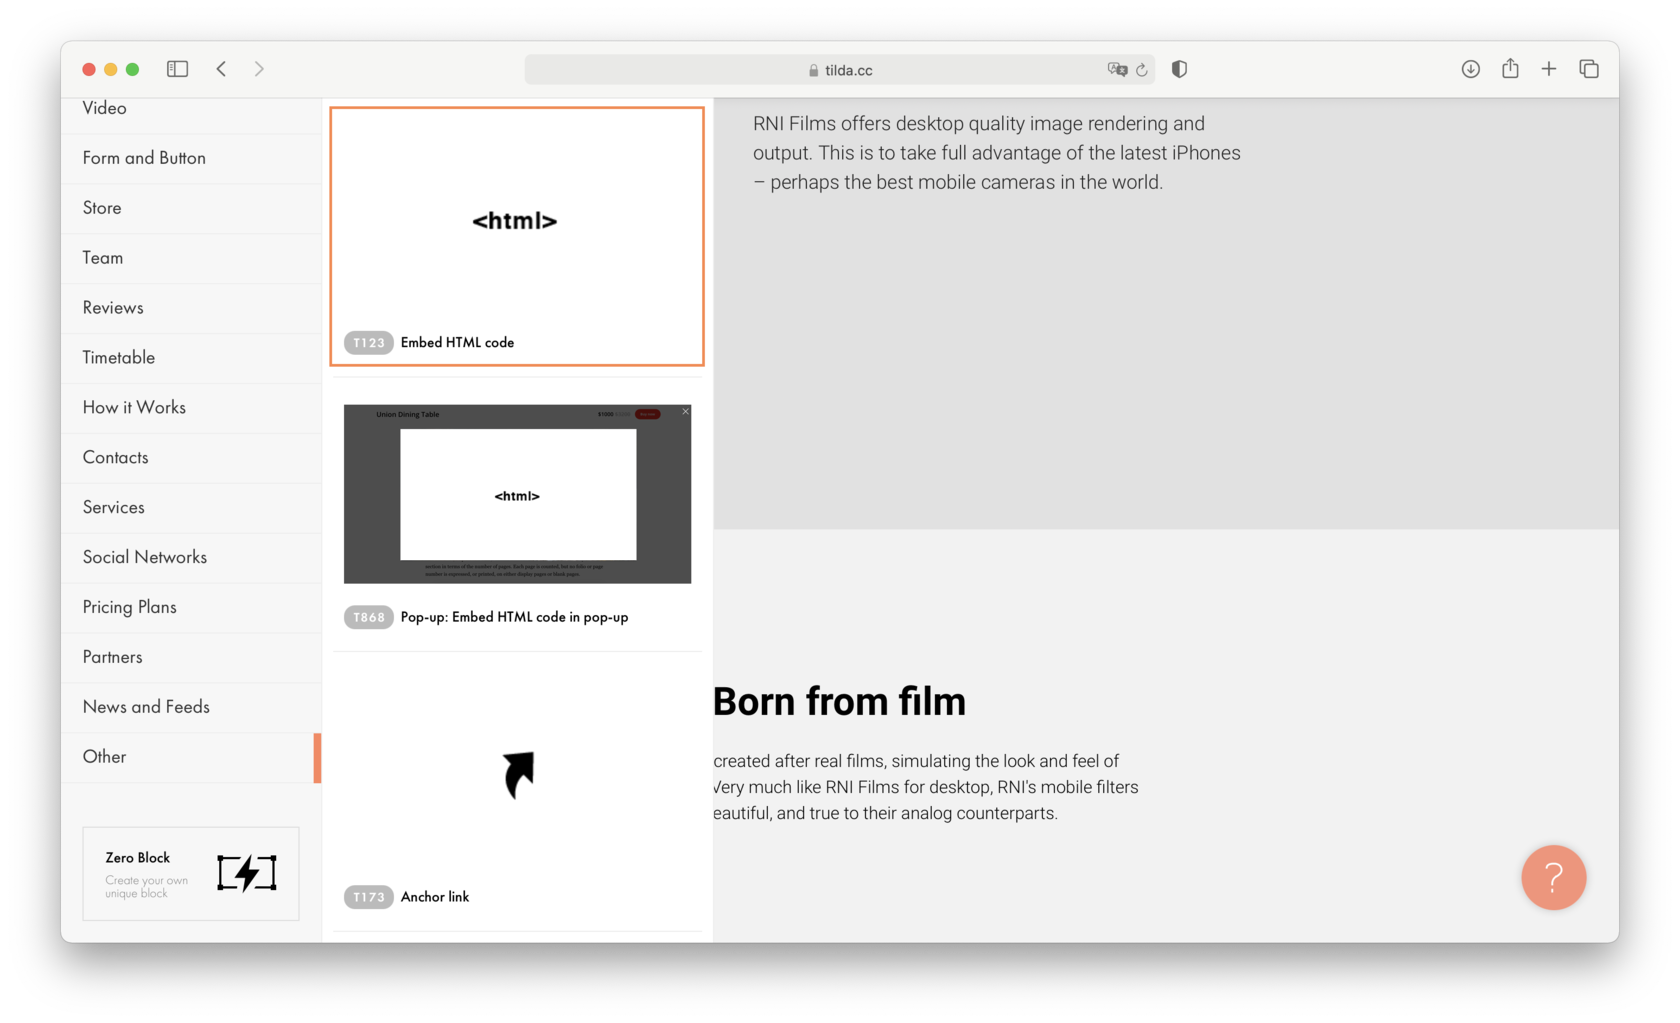
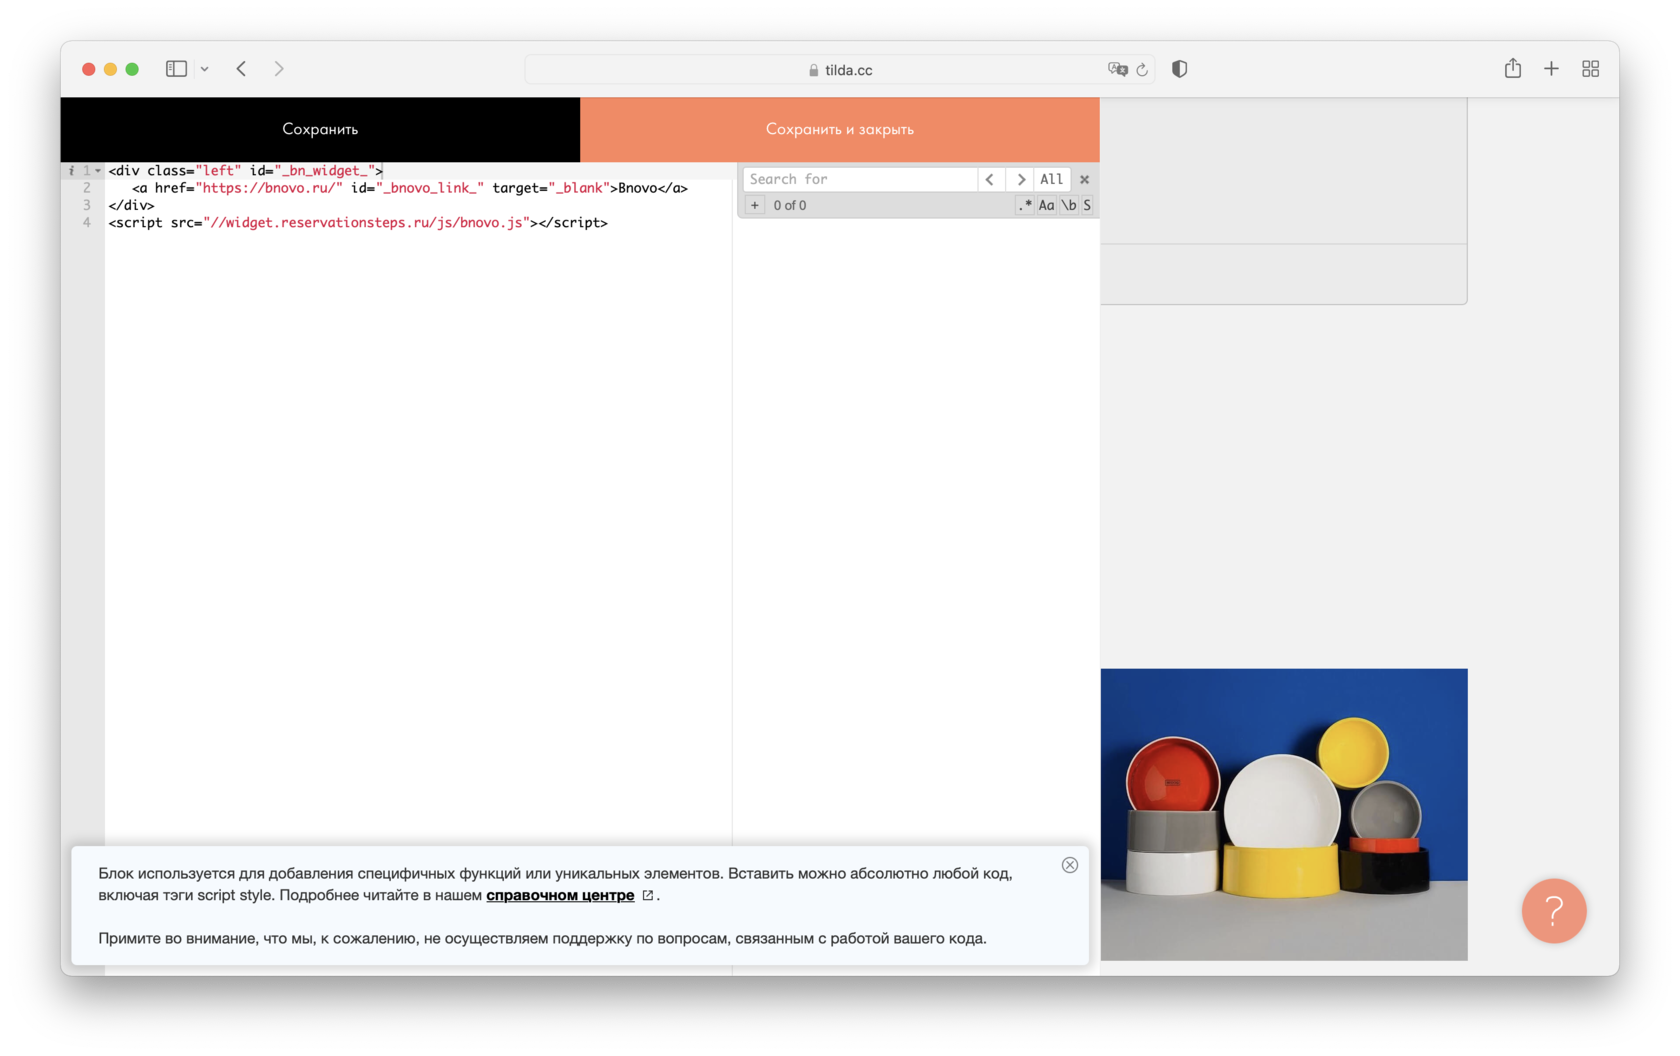
For adding a specific feature, use a T123 block («Embed HTML Code»). It works for any code, including script and style tags.
You can add HTML code to the page body (inside the
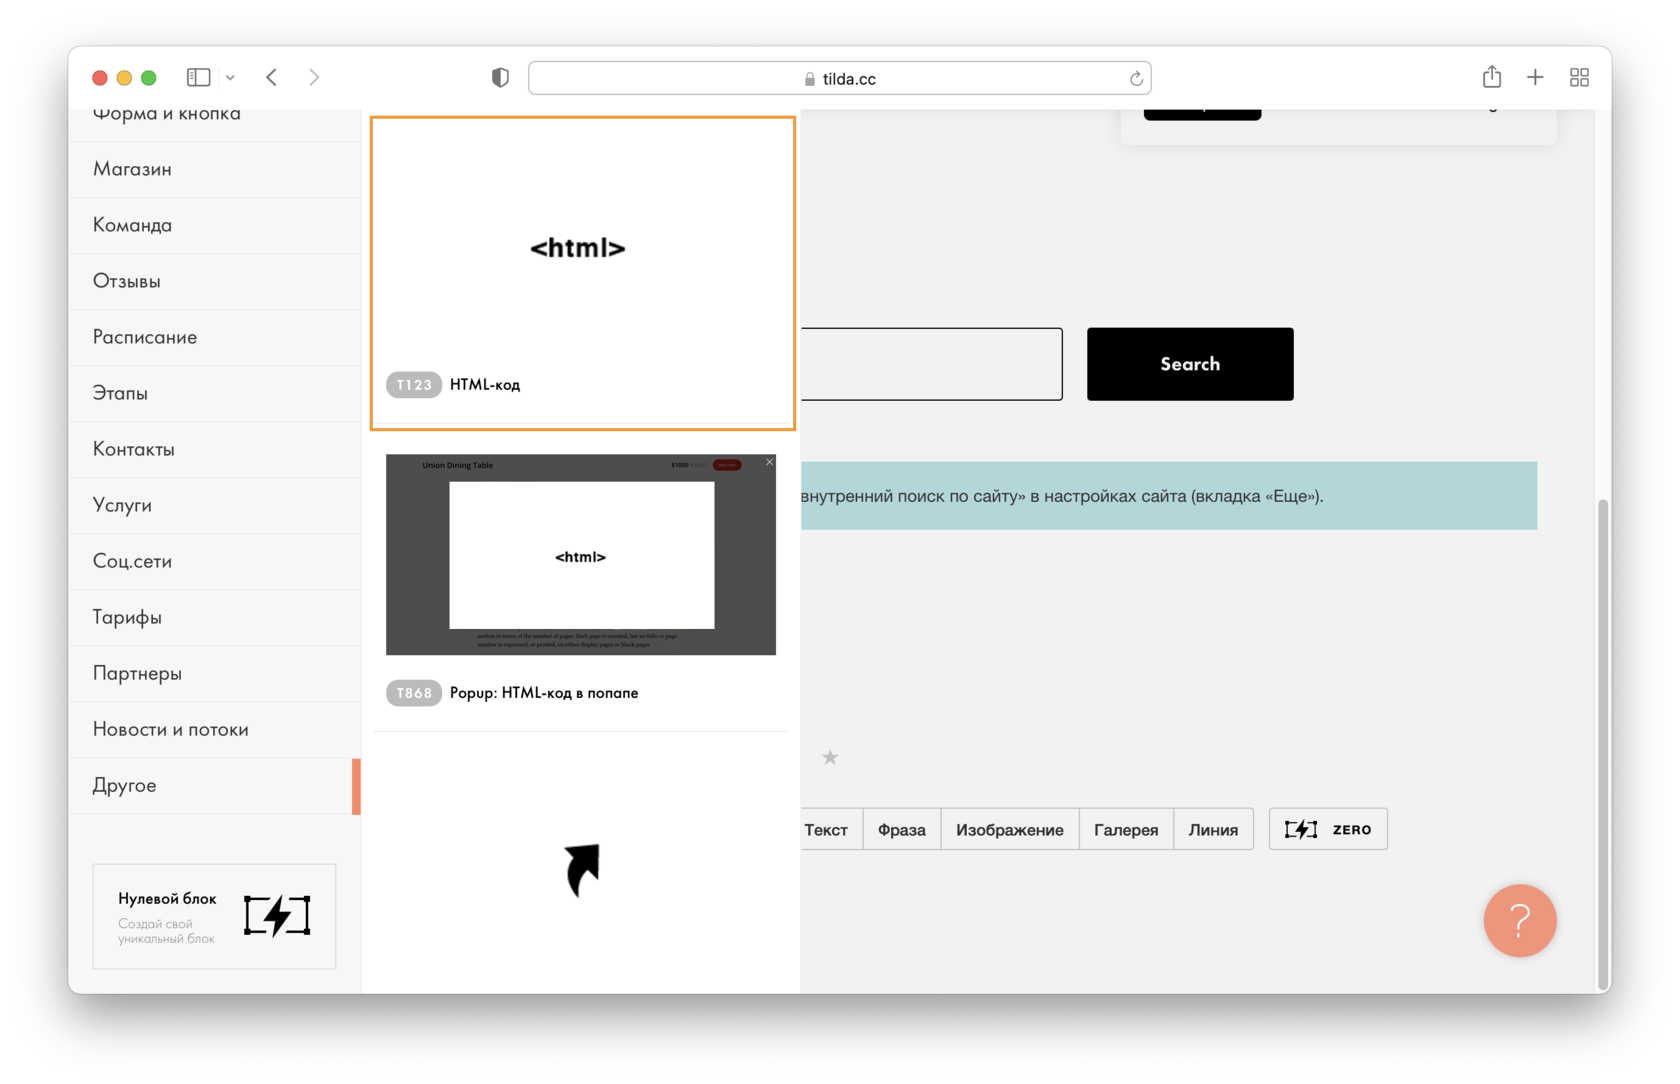
tag) or to the head section of the website or page.To add the block to the page, go to the Block Library → Other → T123 («Embed HTML Code»).
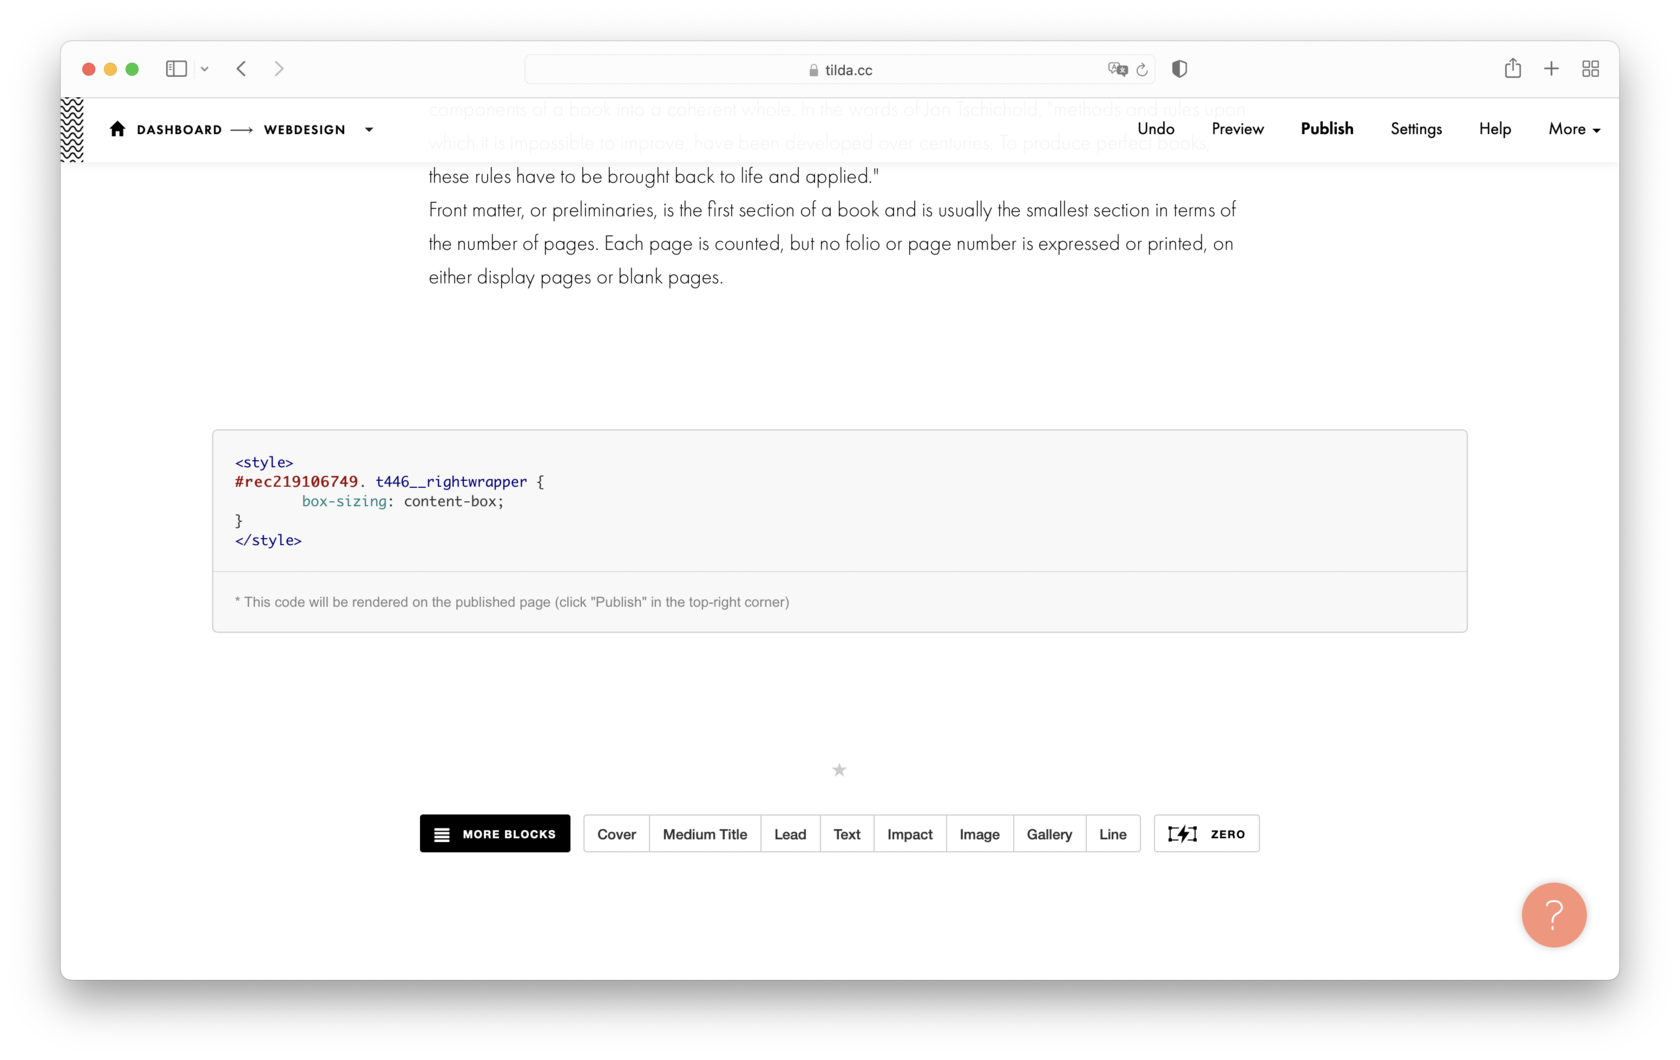
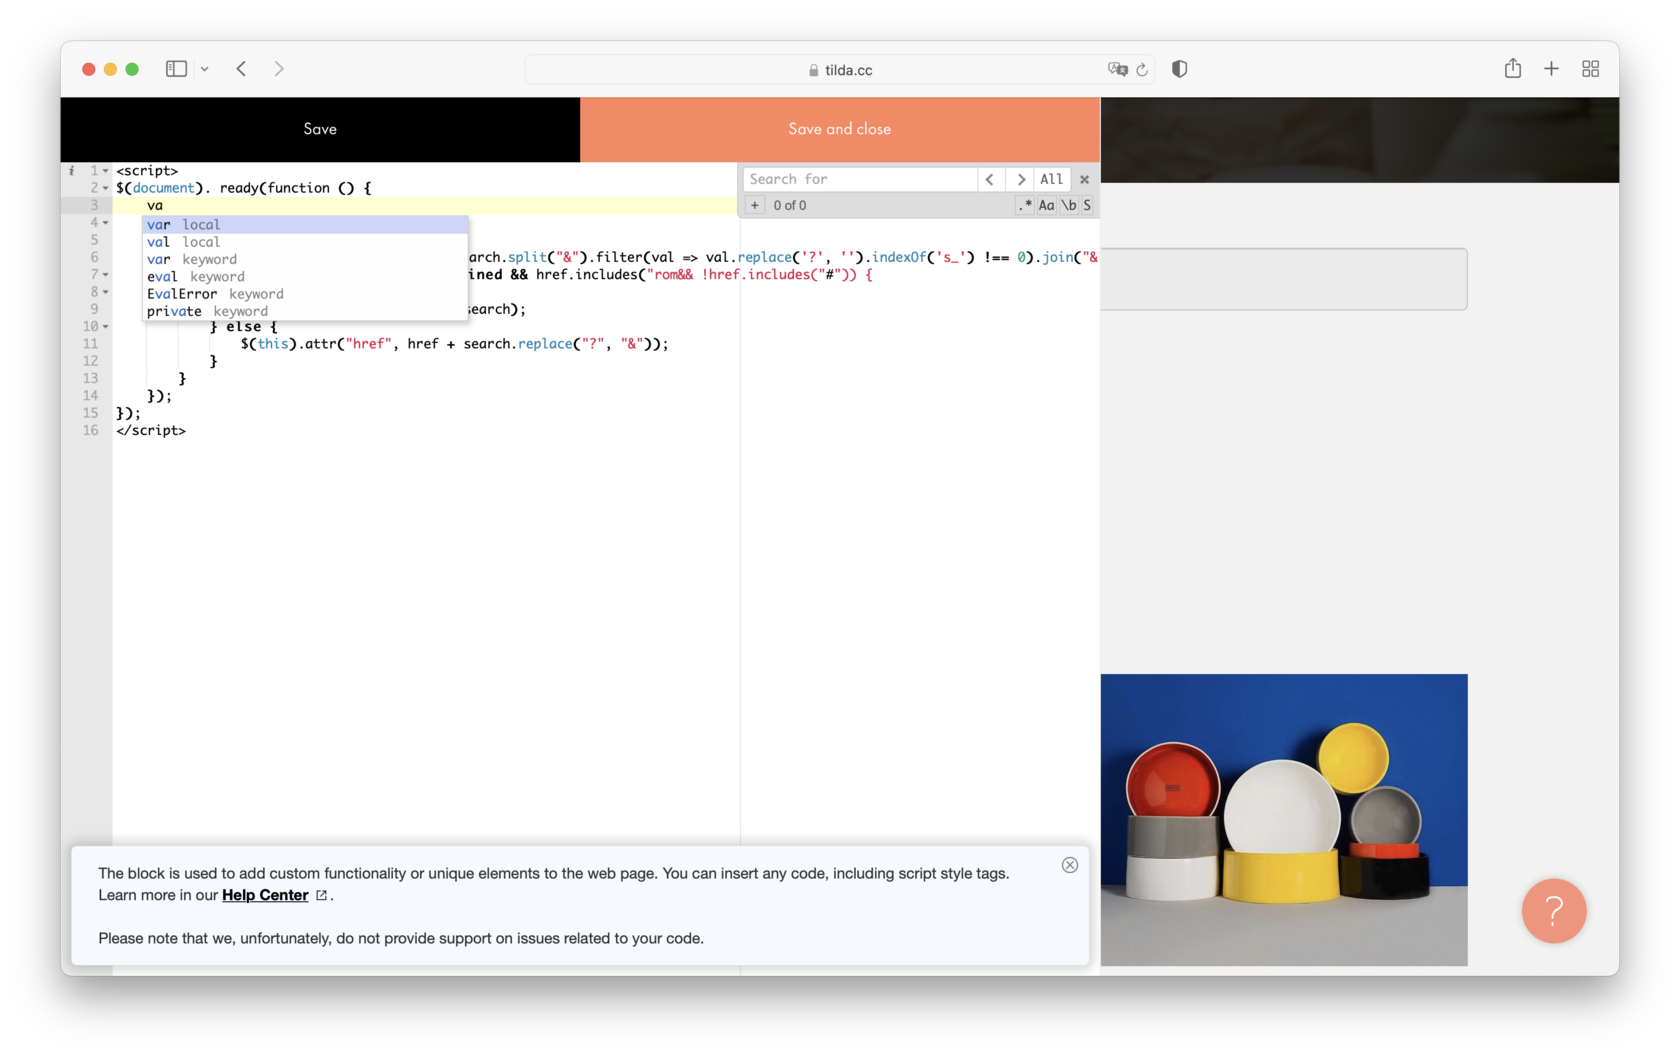
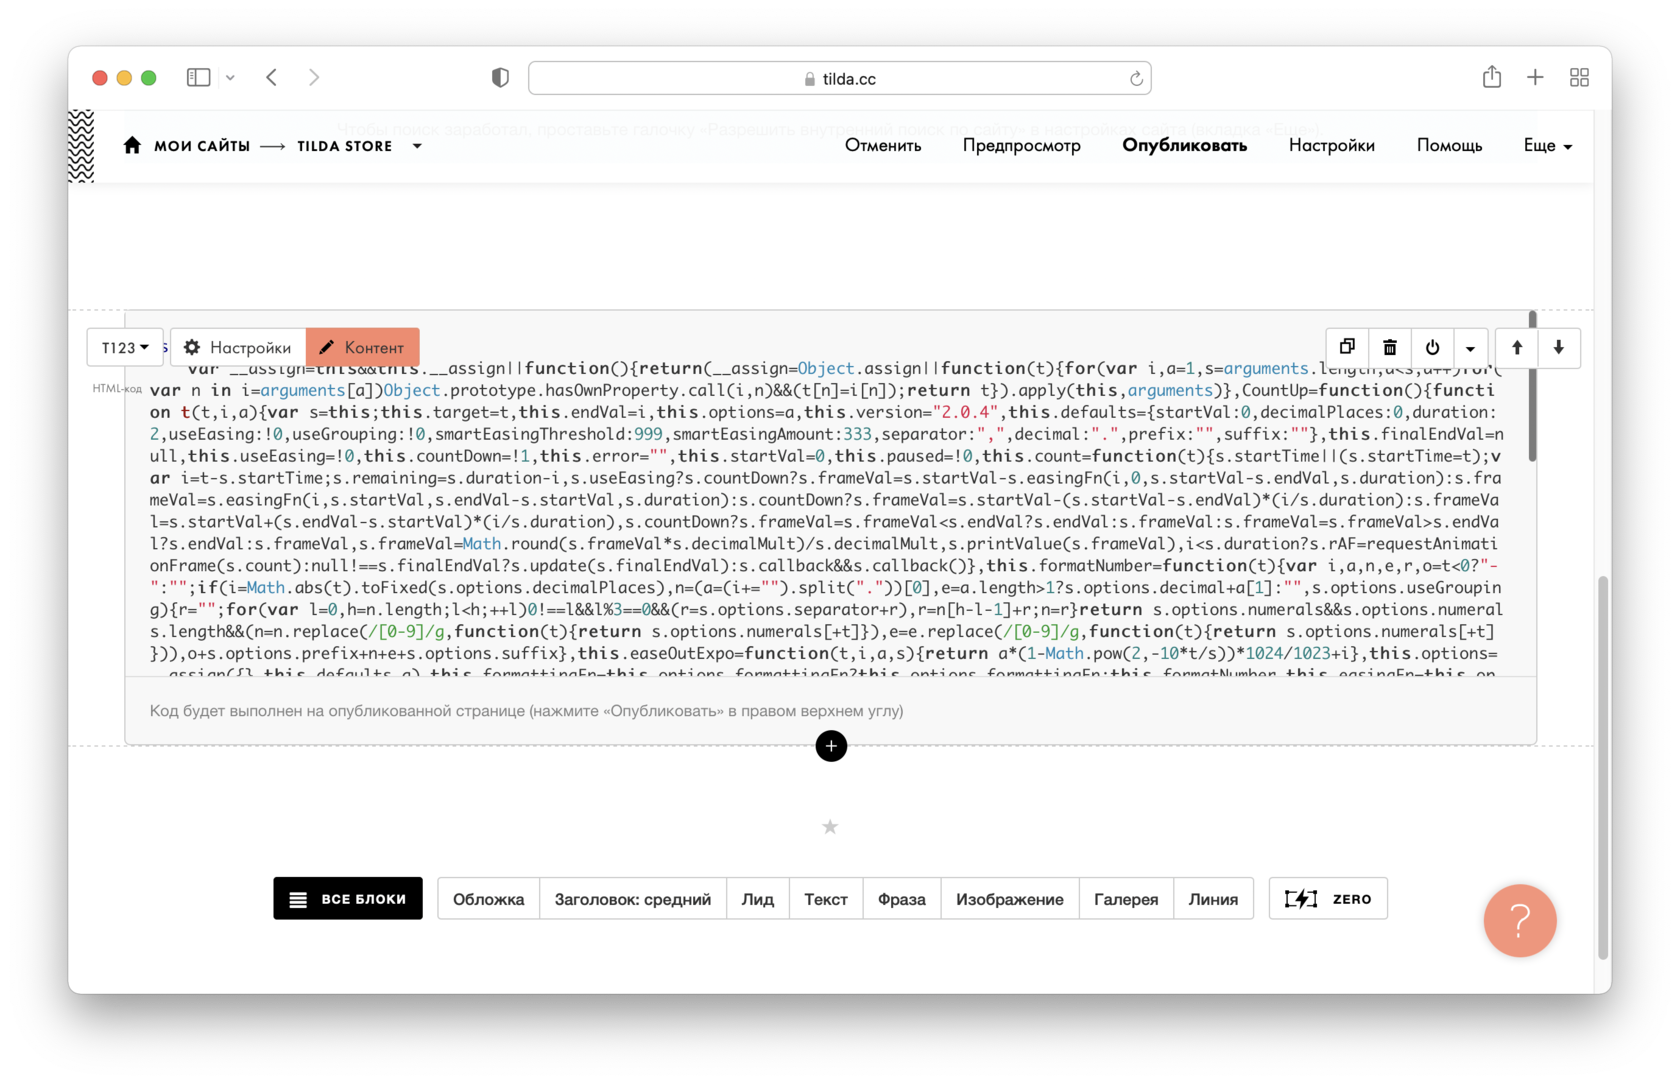
In editing and preview modes, the code will appear as text only. To make it operational, publish the page.
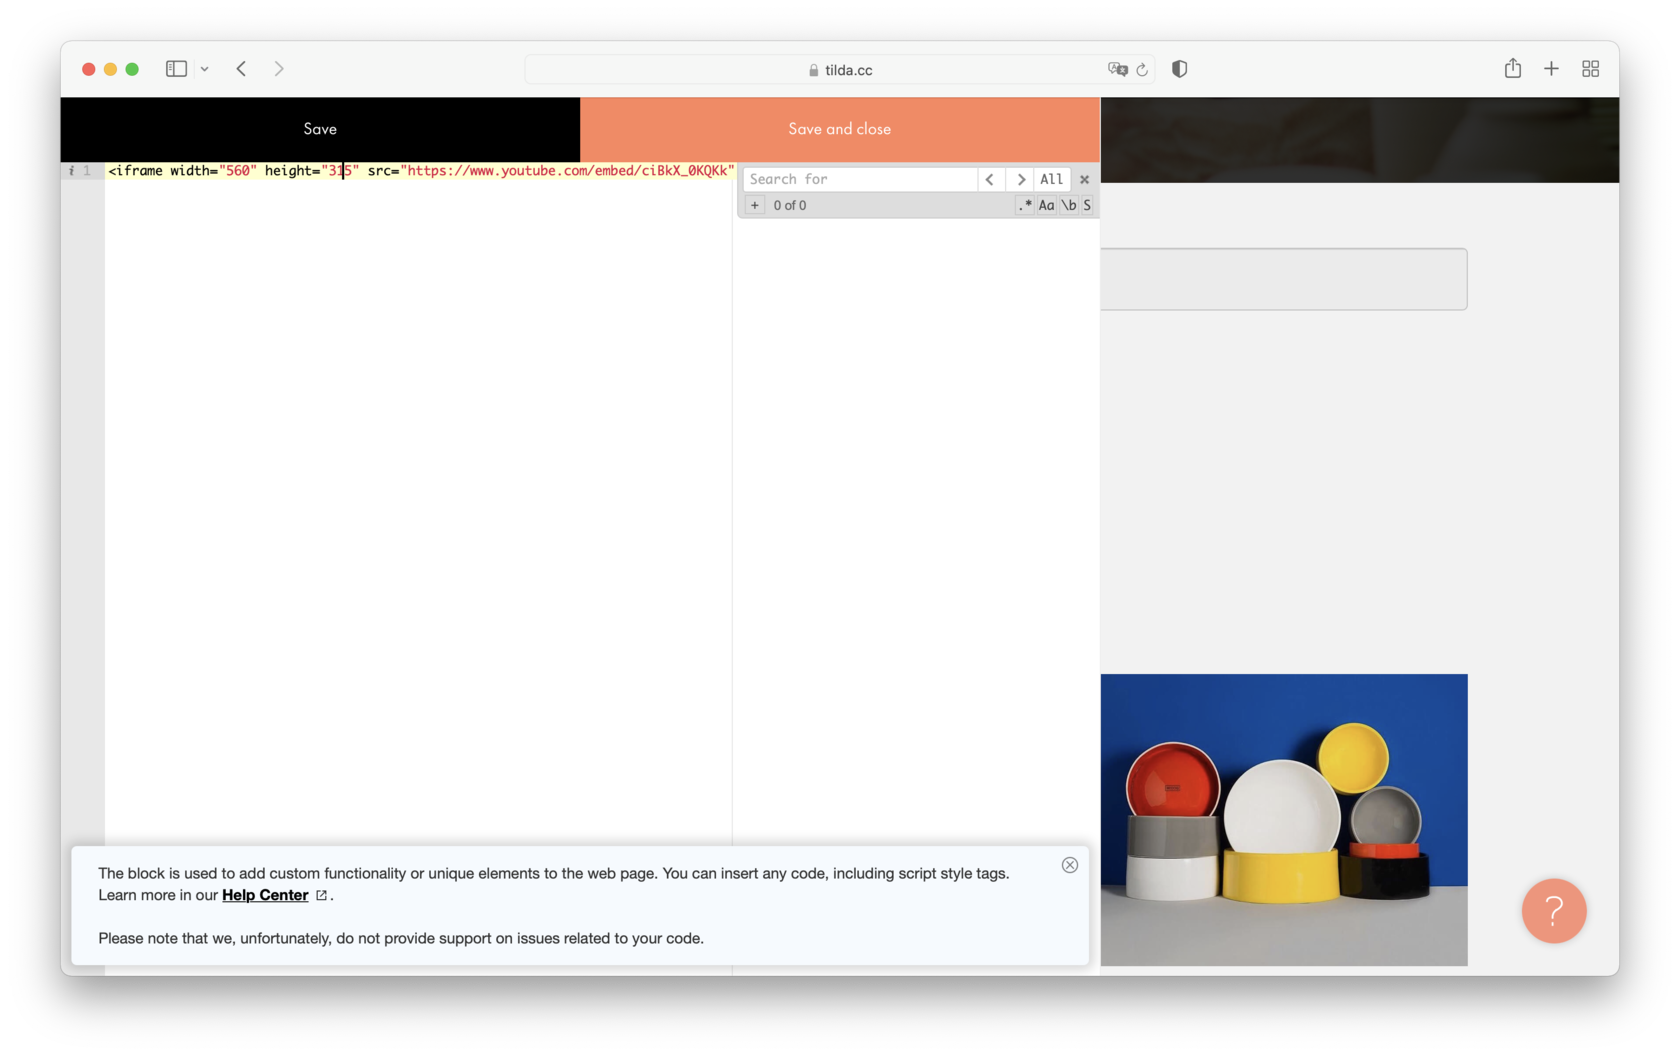
You can use your code or ready-made code from various services.
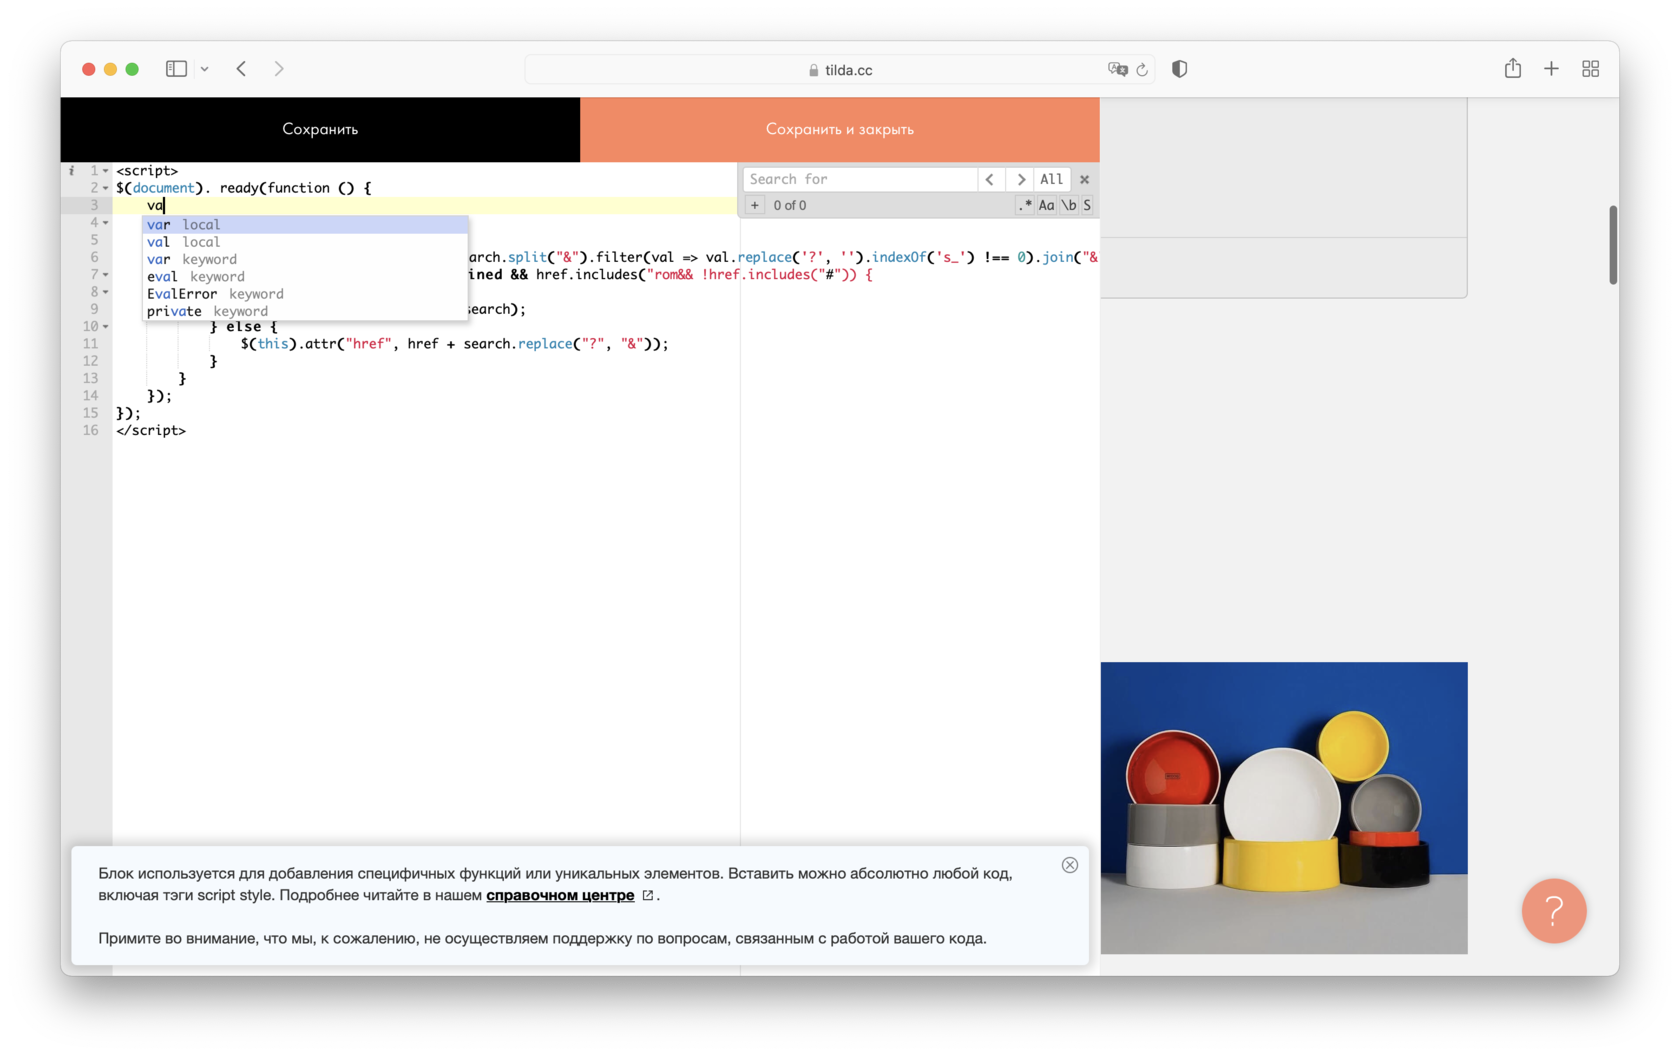
The block supports HTML, JavaScript (inside the tag), and CSS (inside the tag). Unfortunately, you can’t insert your PHP code into the page, but you can add it to your server and send data to it using the Webhook service.
How to insert HTML code in the head section of the website or page
To insert code in the head of all website pages, go to the Site Settings → More → HTML code for the head section.
To insert code in the head of a particular page, go to the Page Settings → Additional → HTML code for the head section.
Вставка HTML кода
Если вам нужна какая-то специфичная функция, используйте блок T123 «HTML-код». Через него добавляется абсолютно любой код, включая теги script и style.
HTML код можно добавлять на страницу (внутрь тега
), либо в head сайта или страницы.Чтобы добавить блок на страницу, откройте Библиотеку блоков → Другое и добавьте блок T123.
HTML-код также возможно вставить как отдельный элемент в Zero Block. Принципы работы блока T123 и элемента HTML в Zero не имеют существенных отличий.
В режиме редактирования (и предпросмотра) код выводится просто текстом. Чтобы код заработал, страницу нужно опубликовать.
Вы можете использовать готовый код, который предлагают различные сервисы, либо, если вам нужен уникальный элемент, заказать код у программистов.
В блоке поддерживается HTML, JavaScript (нужно использовать тэг ) и CSS (нужно использовать тег ). Свой код PHP вставить на страницу не получится, но его можно добавить на свой сервер и отправлять на него данные с помощью приемщика Webhook.
T123: список горячих клавиш
- Ctrl+F для Windows
- ⌘+F для MacOS
- Ctrl+Space для Windows
- Ctrl+Space или ⌘+Shift+Space для MacOS
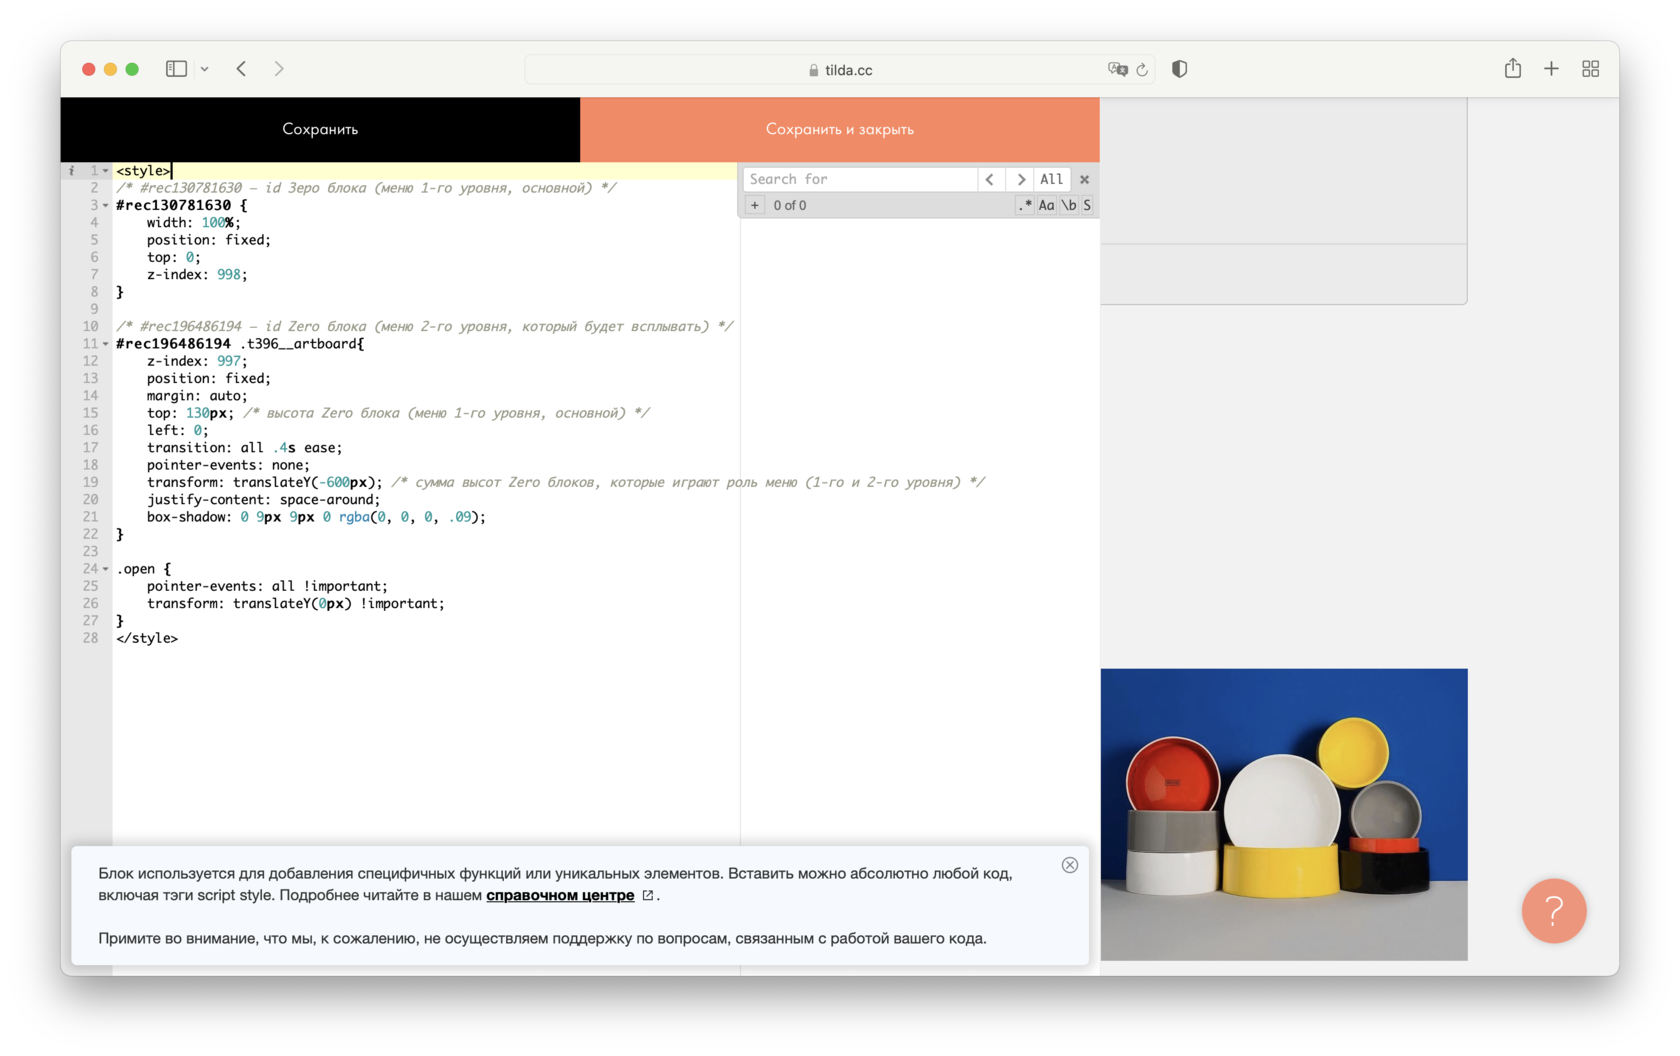
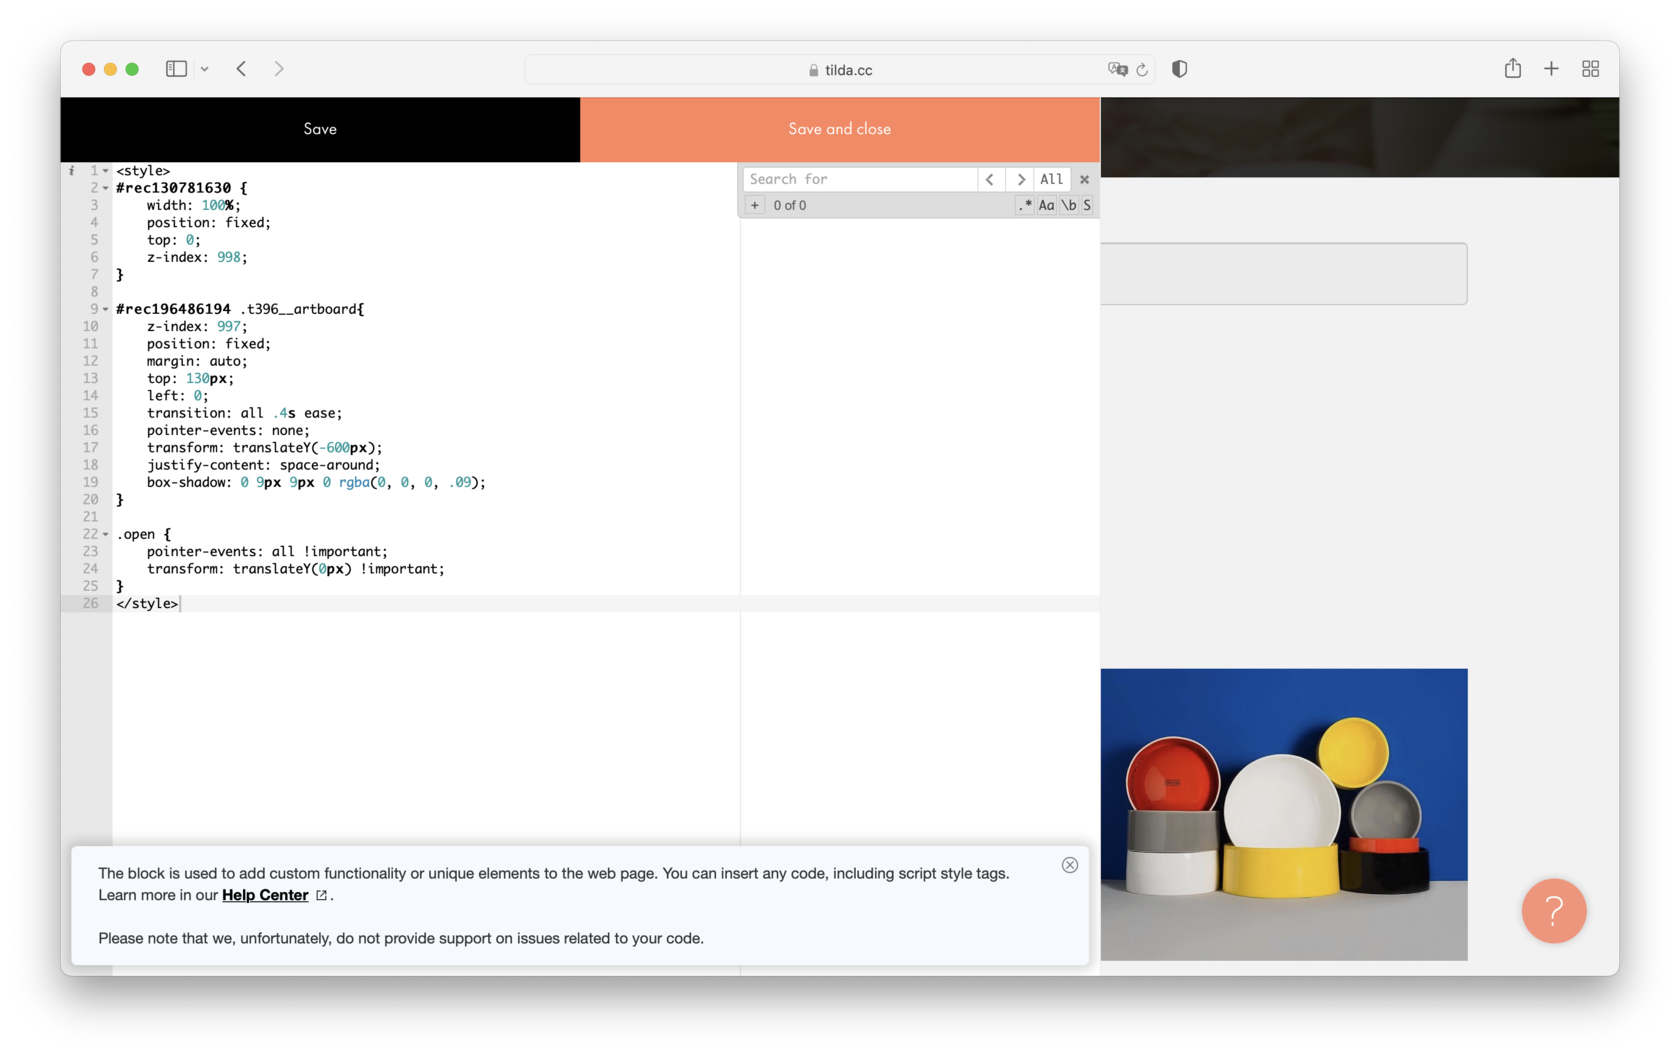
Чтобы избежать влияния на внешний вид и работоспособность интерфейса Тильды, рекомендуется не использовать теги и универсальные классы в качестве селекторов для кастомных стилей. Также не рекомендуется использовать селектор «*». Вместо этого стоит использовать уникальные классы или ID, которые не будут конфликтовать с уже существующими стилями на странице Тильды. Таким образом, вы сможете применять кастомные стили к вашим элементам без влияния на другие элементы на странице редактора блоков.
Как добавить HTML-код в head сайта или страницы
Чтобы добавить код перед закрывающим тегом head, нужно зайти: «Настройки сайта» → «Еще» → «HTML-код для вставки внутрь head».
Чтобы добавить код в head на отдельной странице, нужно зайти: «Настройки страницы» → «Дополнительно» → «HTML-код для вставки внутрь head».
Zero Block: How to Create a Custom Block
Zero Block is a built-in professional editor that enables you to realize any idea by creating custom-designed blocks according to your own preferences. It is similar to popular graphic design editors but on Tilda.
How to set up an element animation that runs when you click or hover over another element
How you can automatically import a layout from Figma into Zero Block
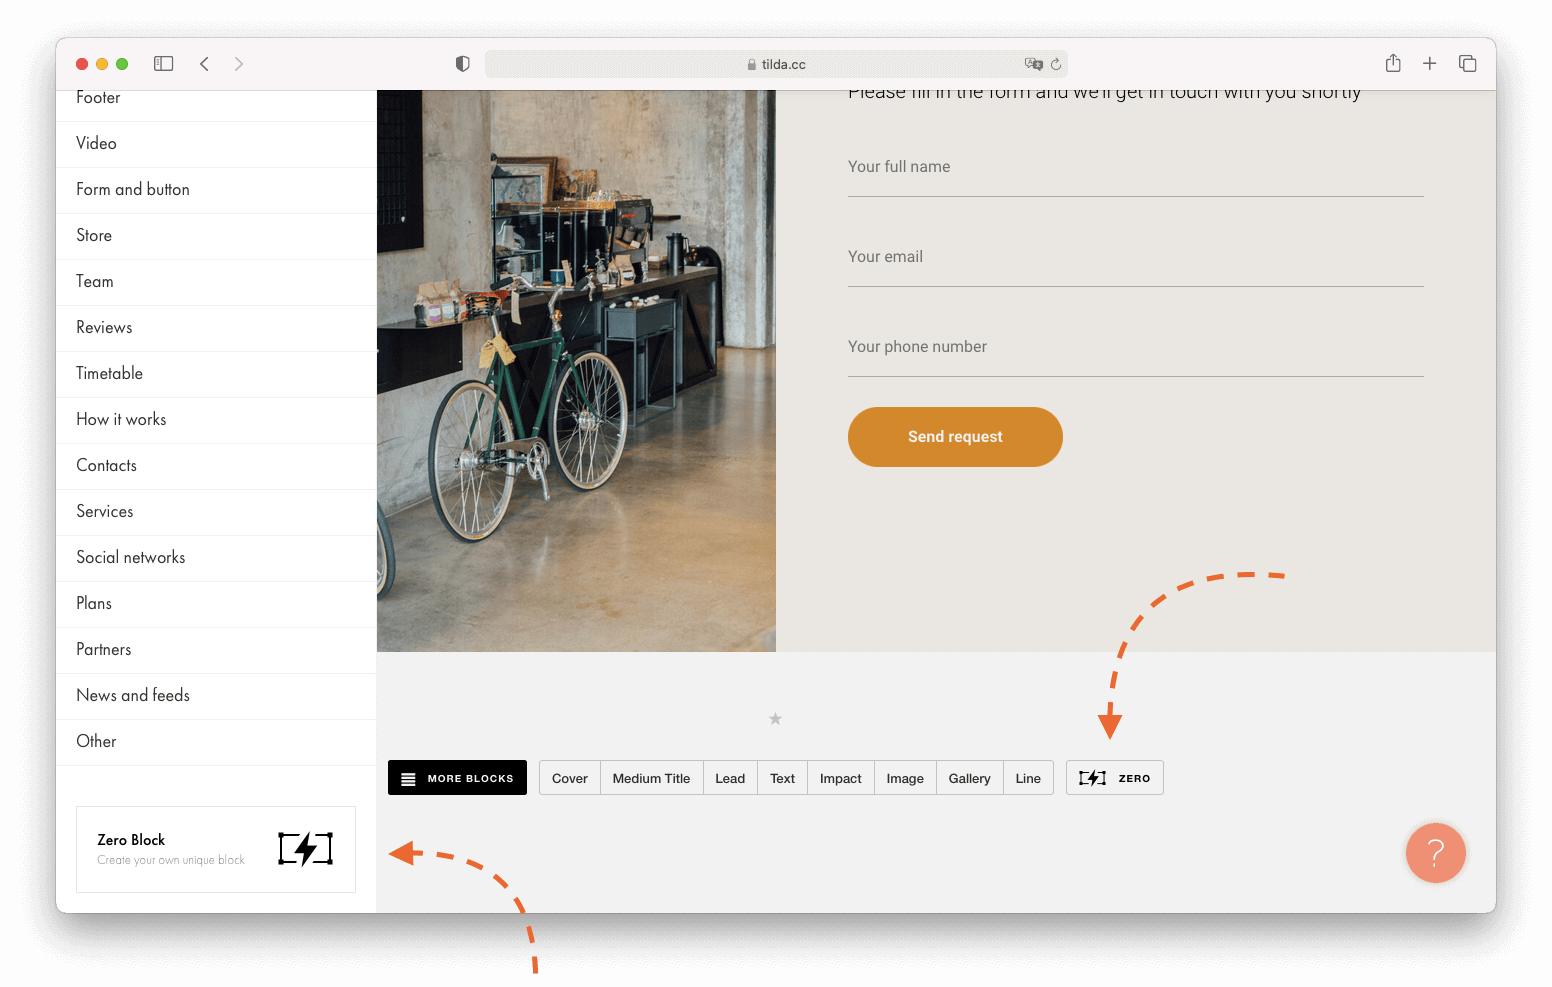
To add a Zero Block to the page, click on Zero at the very bottom of the page. You can also find it at the bottom of the Block Library, right below the «Other» category.
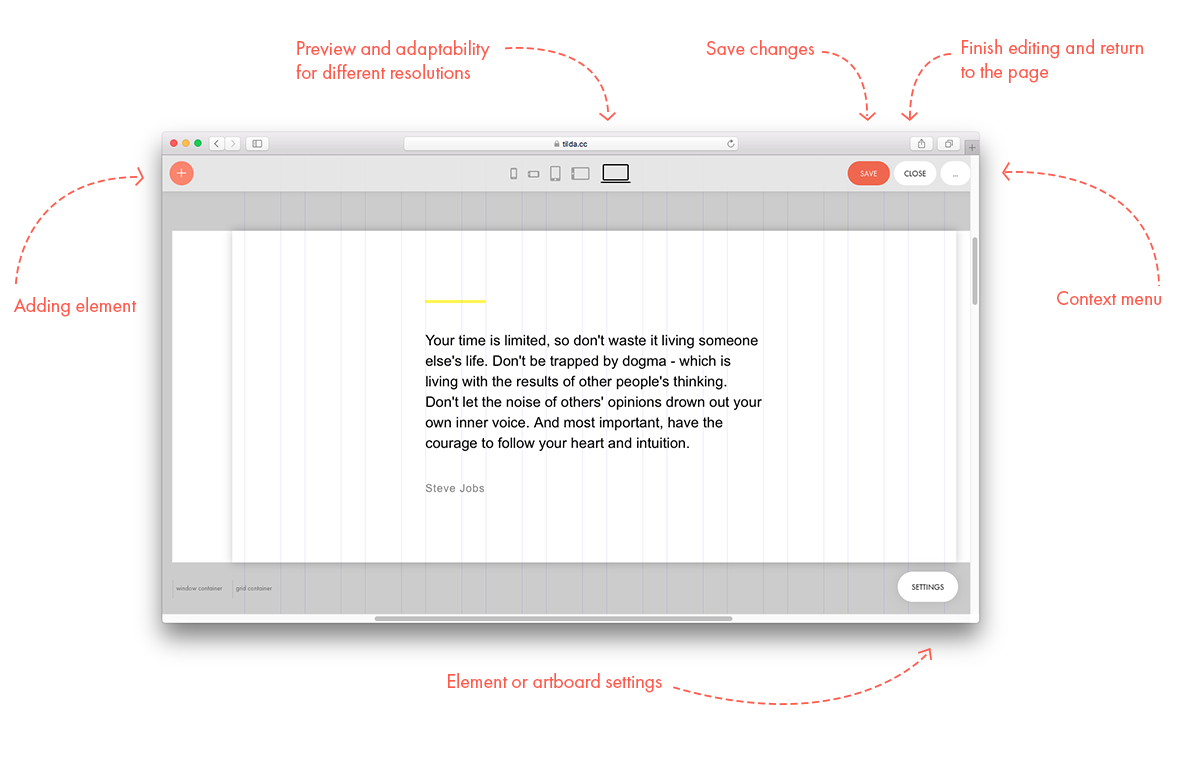
A Zero Block keeps all regular block features—it can be copied, removed, deleted, and hidden. It has settings, but instead of a «Content» button, it has a «Block Editor» button. Click it if you want to edit the block, and the Block Editor will open.

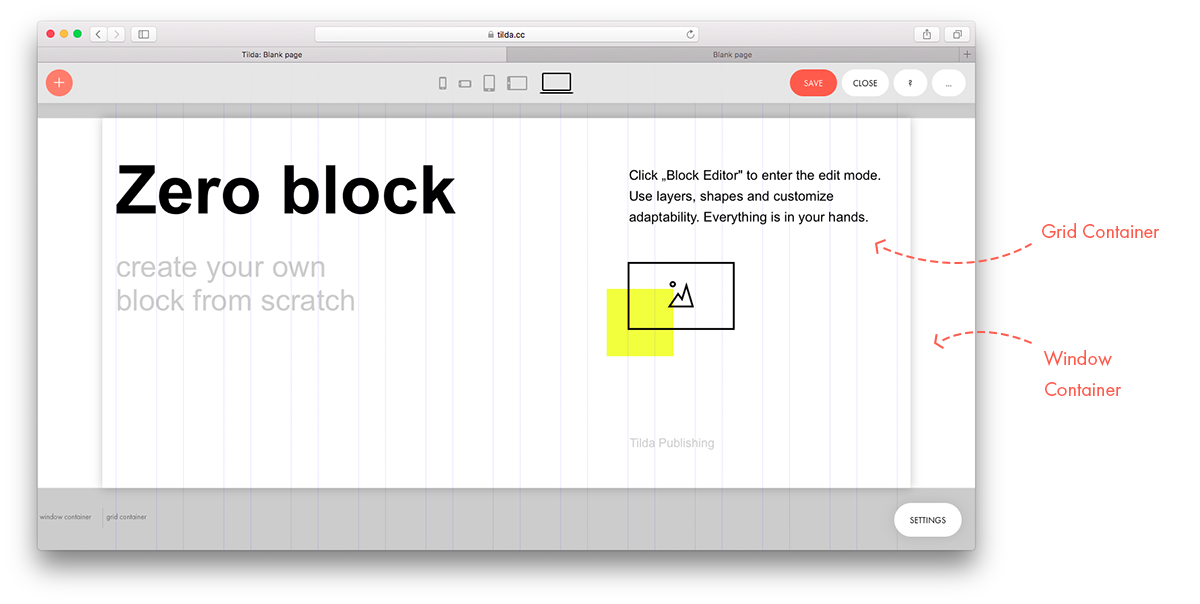
A Zero Block has two workspaces, or containers: the Grid Container and Window Container, which indicate a browser screen’s boundaries.
The Grid Container supports the same grid as Tilda— 12 columns (1200 px). If you align objects to the grid and locate elements inside the Grid Container, they will always remain within the boundaries of 12 columns regardless of the screen size.
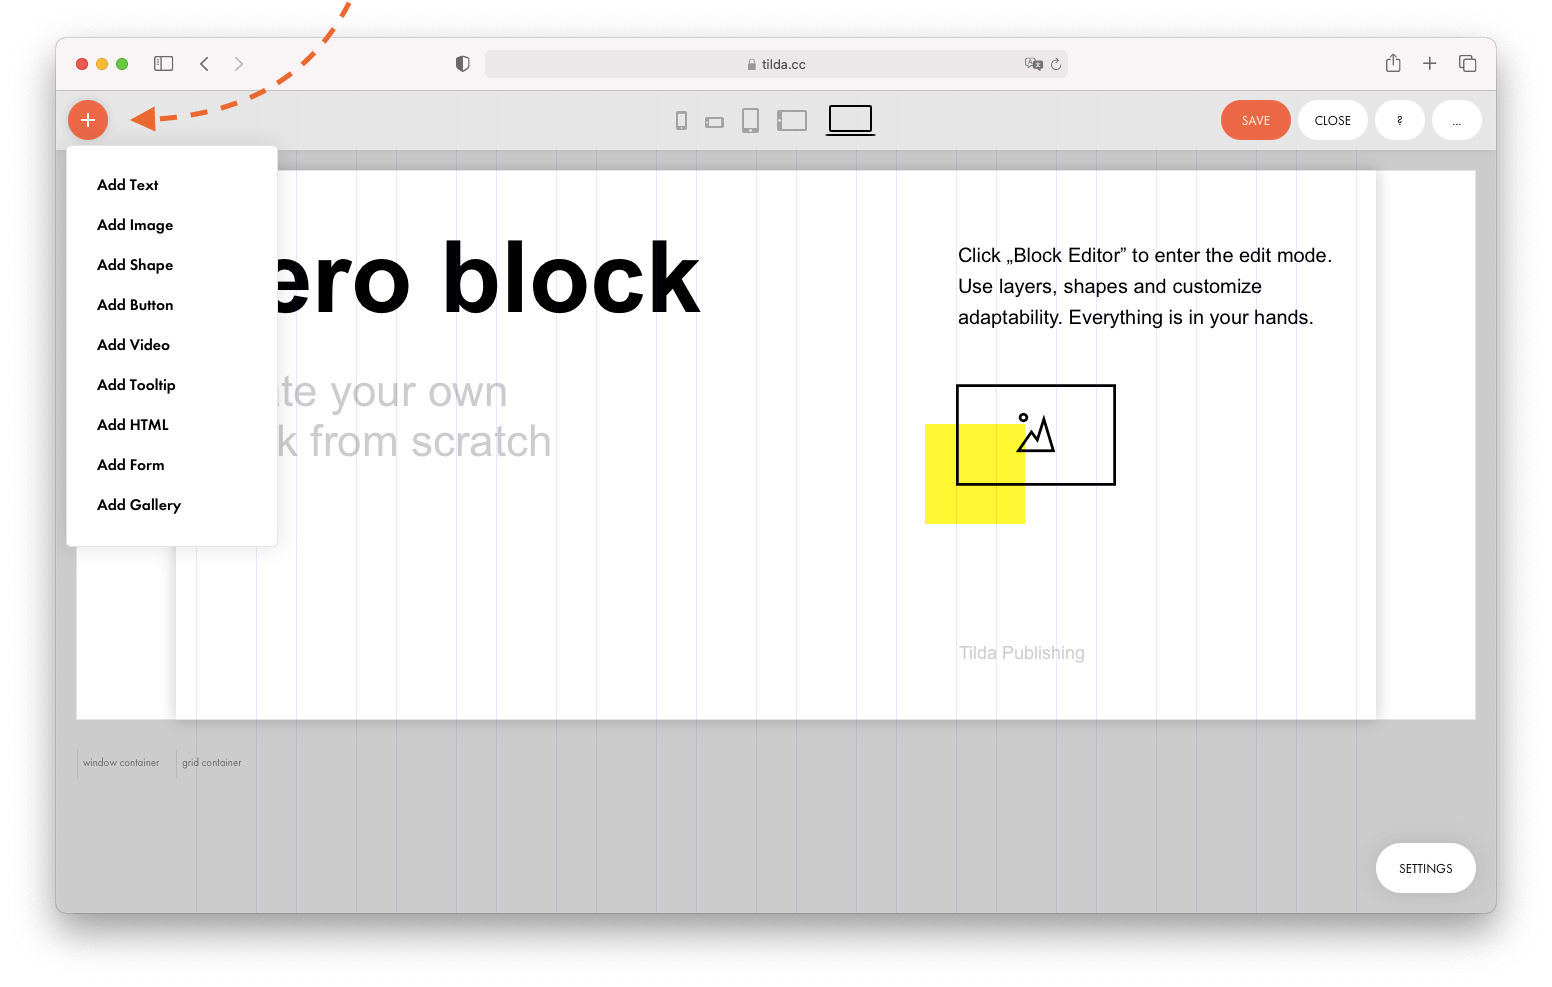
Click the plus button in the top left corner of the Block Editor to add an element to the page. You can add a text, image, shape, button, video, tooltip, HTML, form, or gallery.
A Zero Block supports all basic mouse manipulations: elements can be moved, resized, copied (by holding down the Alt key), and multiple elements can be selected.
You can resize an image element without changing its proportions.
The height of the text elements changes automatically depending on the text volume.
The sizes of buttons and shapes can be changed in all directions.
For operations with multiple elements, press Cmd+A to select all elements, or select multiple elements with the mouse while holding down the Shift key.
When several elements are selected, they can be aligned horizontally or vertically to each other or to the container.
Editing block elements using a keyboard considerably speeds up the work process, which is why we recommend using hotkeys.
Change screen type
Hide grid
Hide settings
Hide managing elements
Undo the last action
Save
Copy
Paste
Move
Delete
Change opacity
Lock the element
Change font size
Change line spacing
Change letter spacing
Select all
Layers: Hide/Show
Guides: Add Horizontal
Guides: Add Vertical
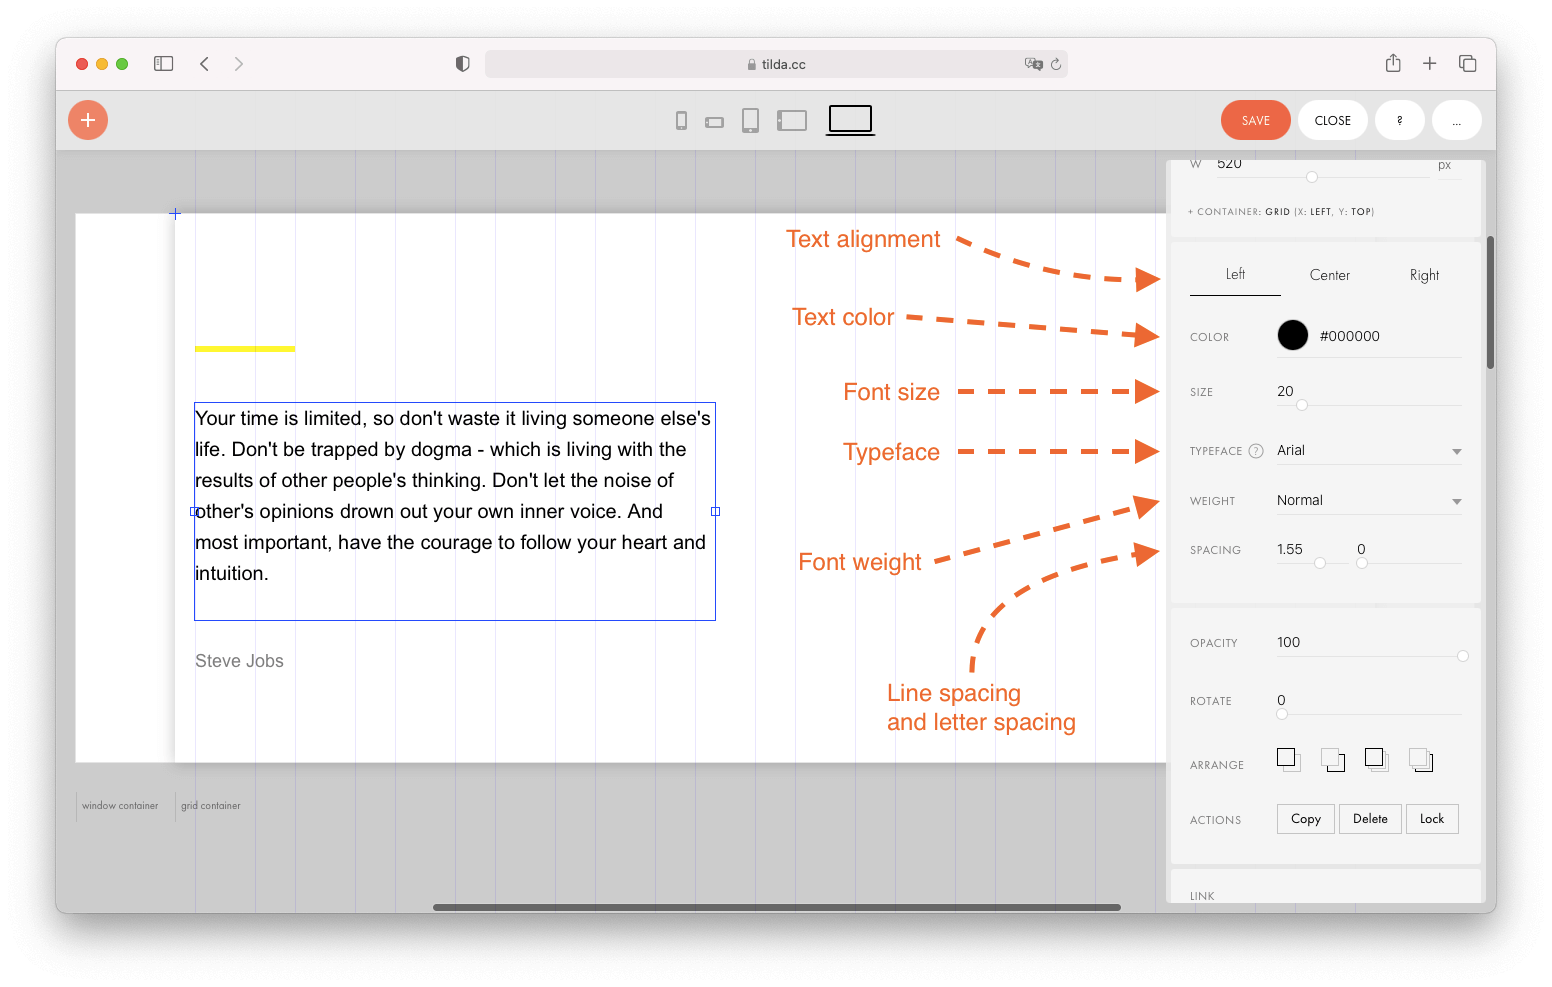
You can access the full settings of any element by clicking on Settings in the bottom right corner of the screen.
Use the upper button row to align an element vertically or horizontally to the container quickly.
You can see the element’s coordinates below. They can be given in pixels or percent. Below we are reviewing this feature in detail.
The origin is indicated with a blue cross.
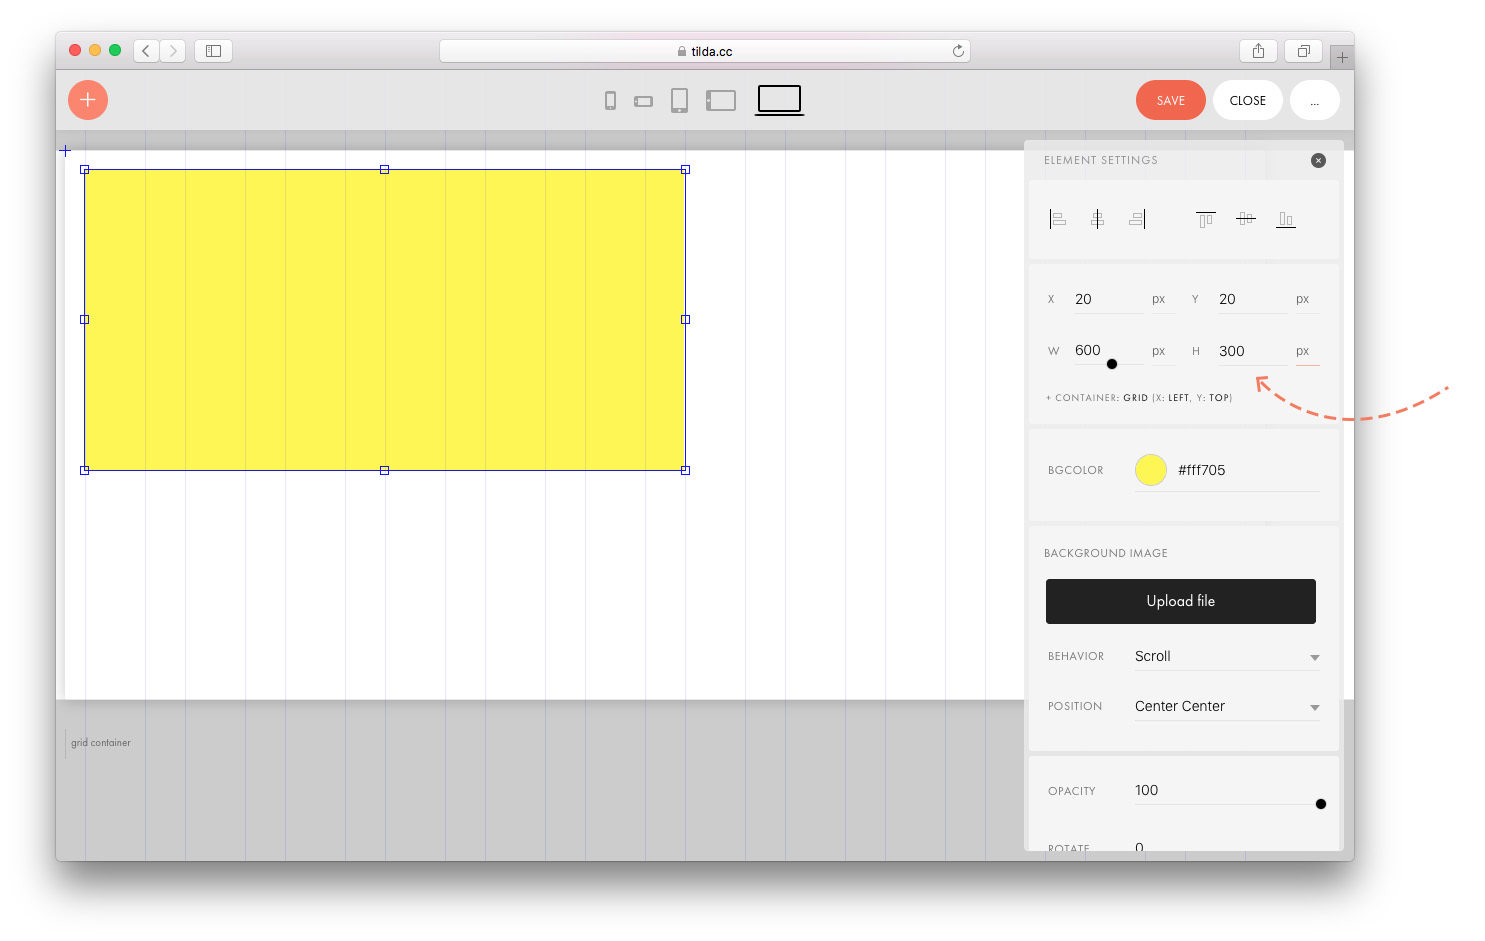
You can also view the element’s parameters: width and height, measured in pixels.

You can change the line spacing by pressing Cmd+up/down arrow keys.
You can change the letter spacing by pressing Cmd+left/right arrow keys.

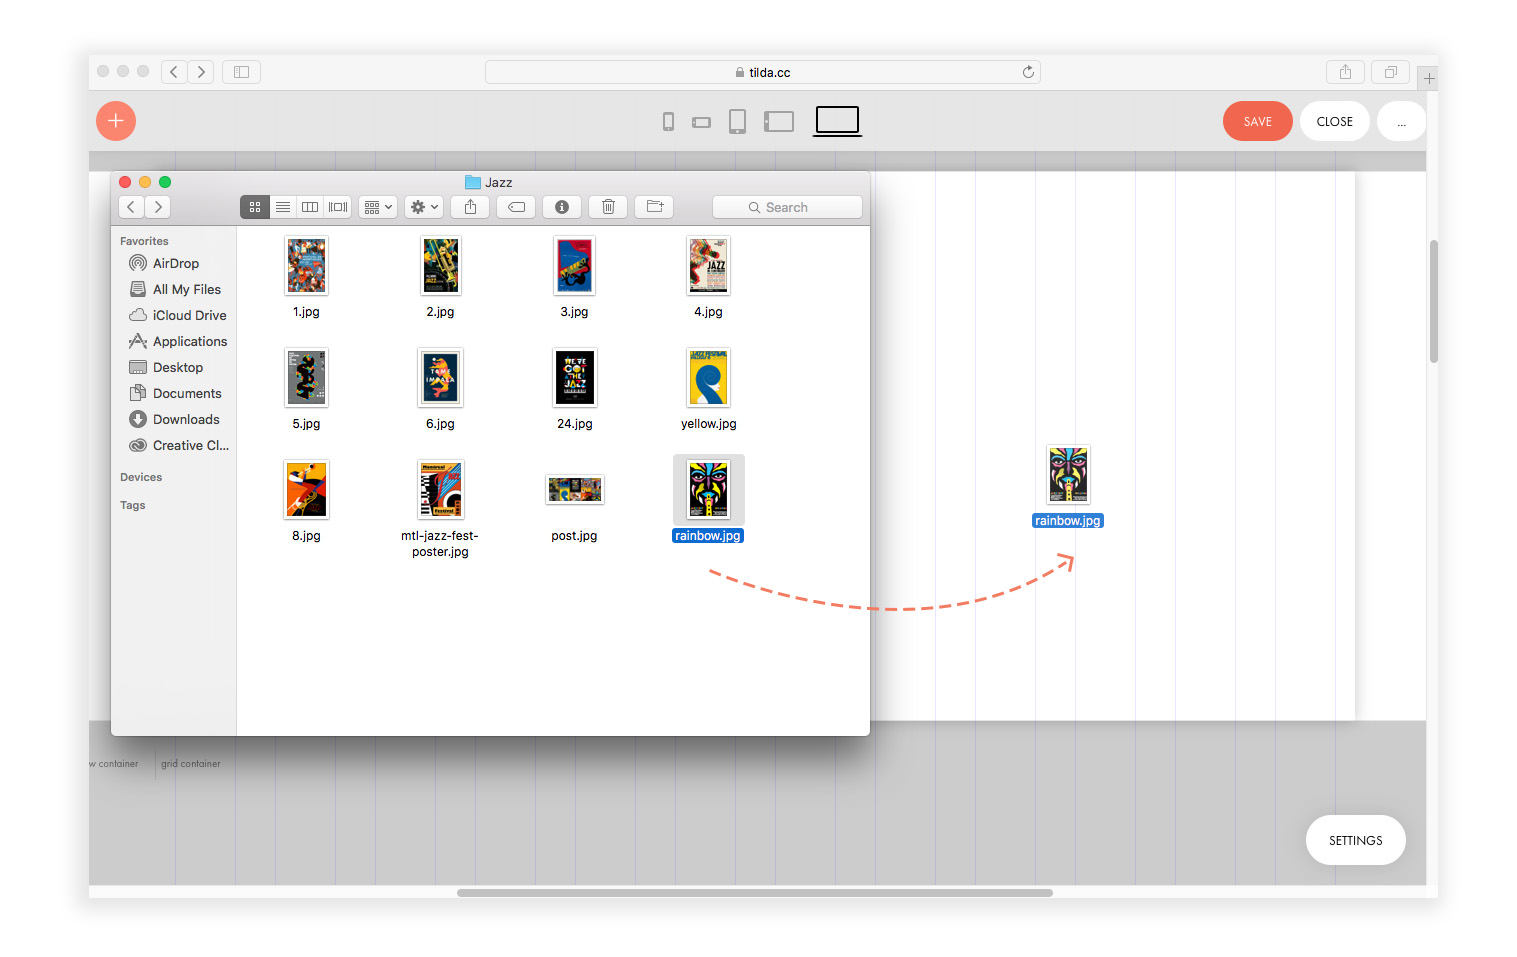
When you upload an image, it takes the size of the frame in which it is uploaded. Click on Original size in the Settings panel of the element to reset the image to its original size.
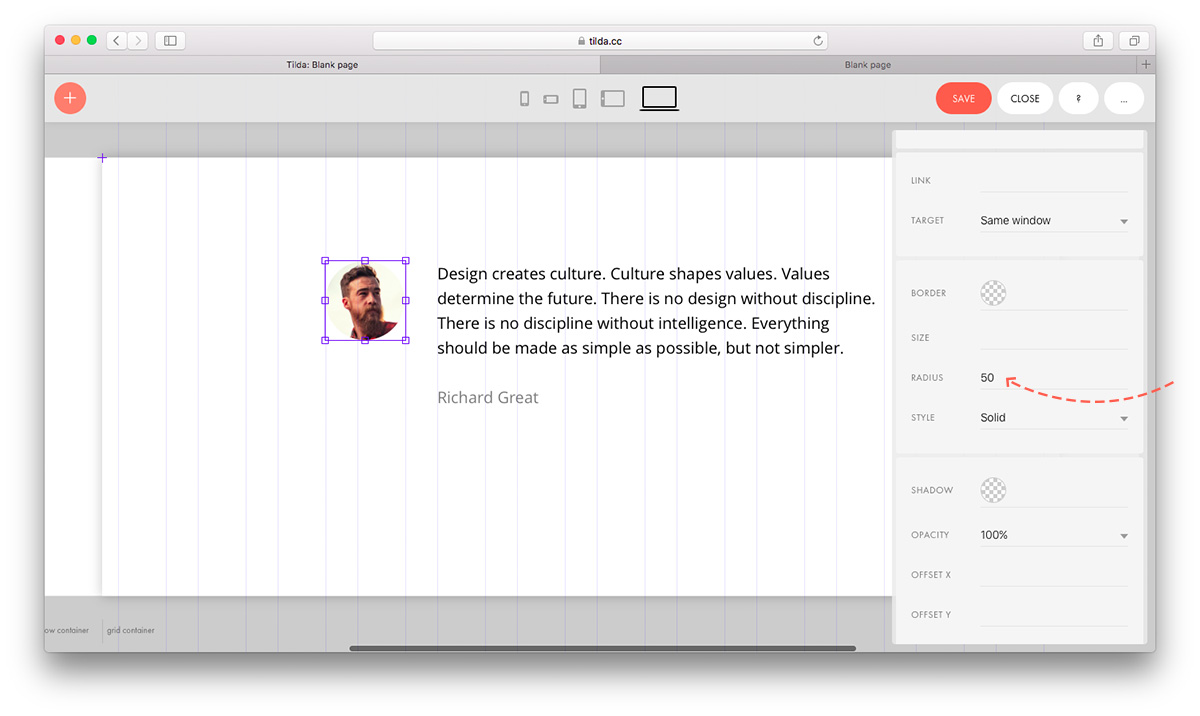
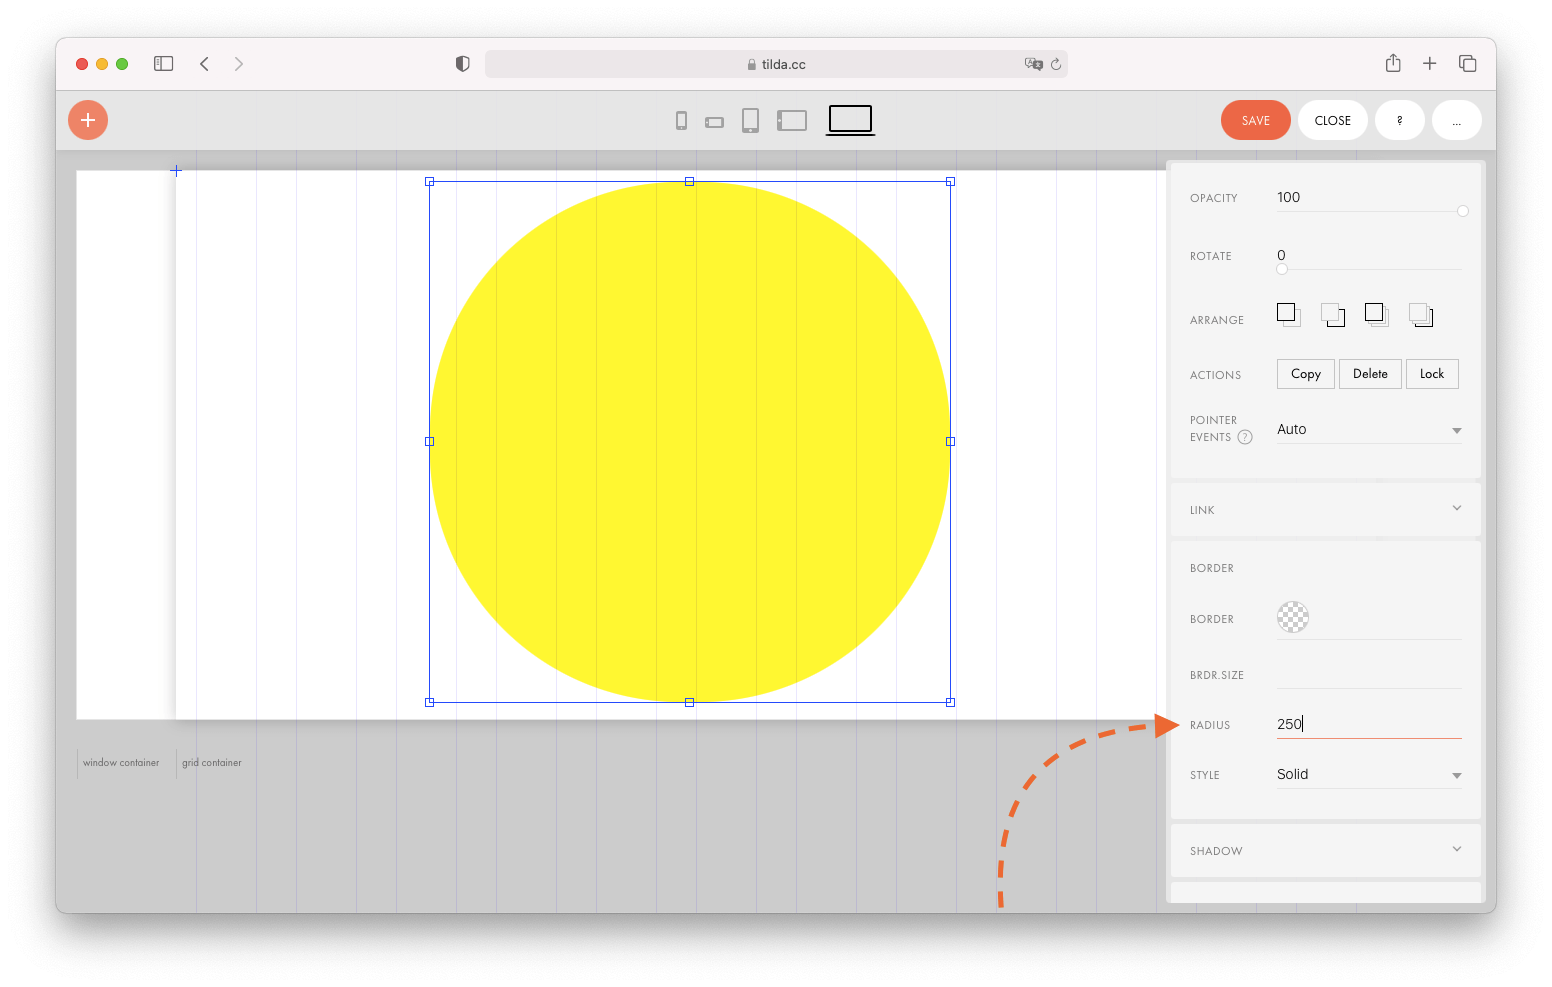
If you want to crop the image in a circle shape, set the rounding radius.
To make an even circle, the original image should be of a square shape, and the rounding radius should be equal to half of the side. For example, if the image’s size is 100×100 px, set a radius equal to 50.
You can add a shadow to the image. To do this, select the shadow color, opacity, x and y offset, degree of blurring and spreading in the Settings panel of the element.
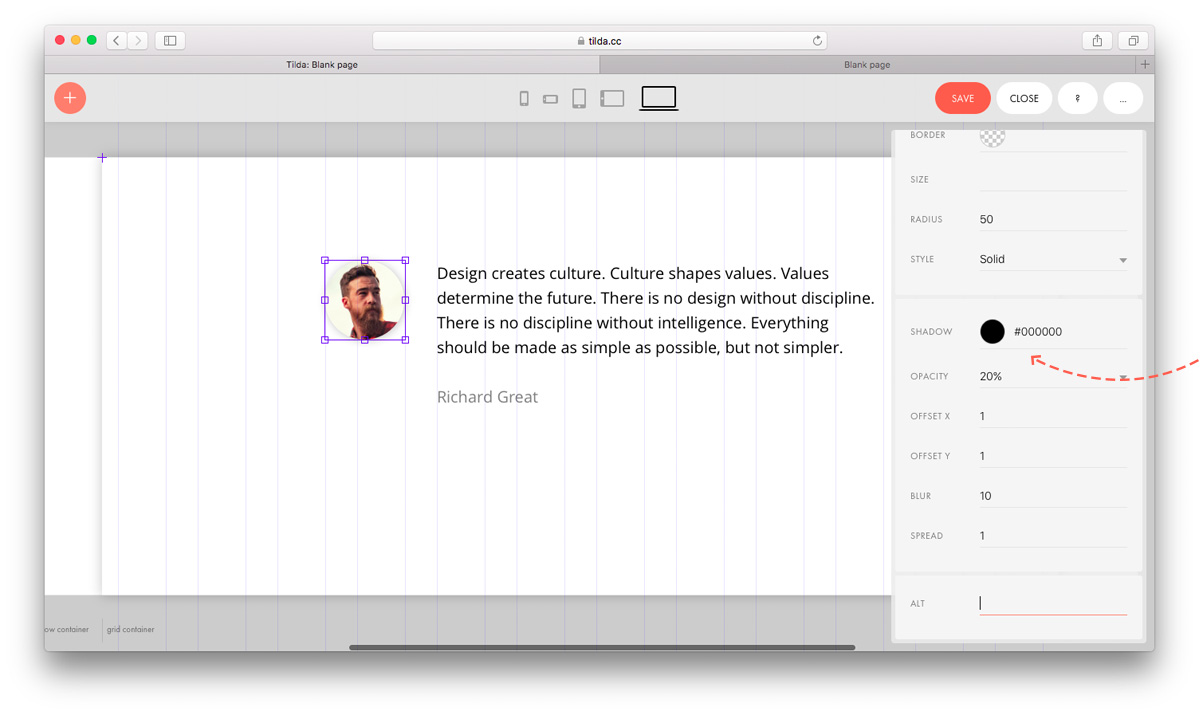
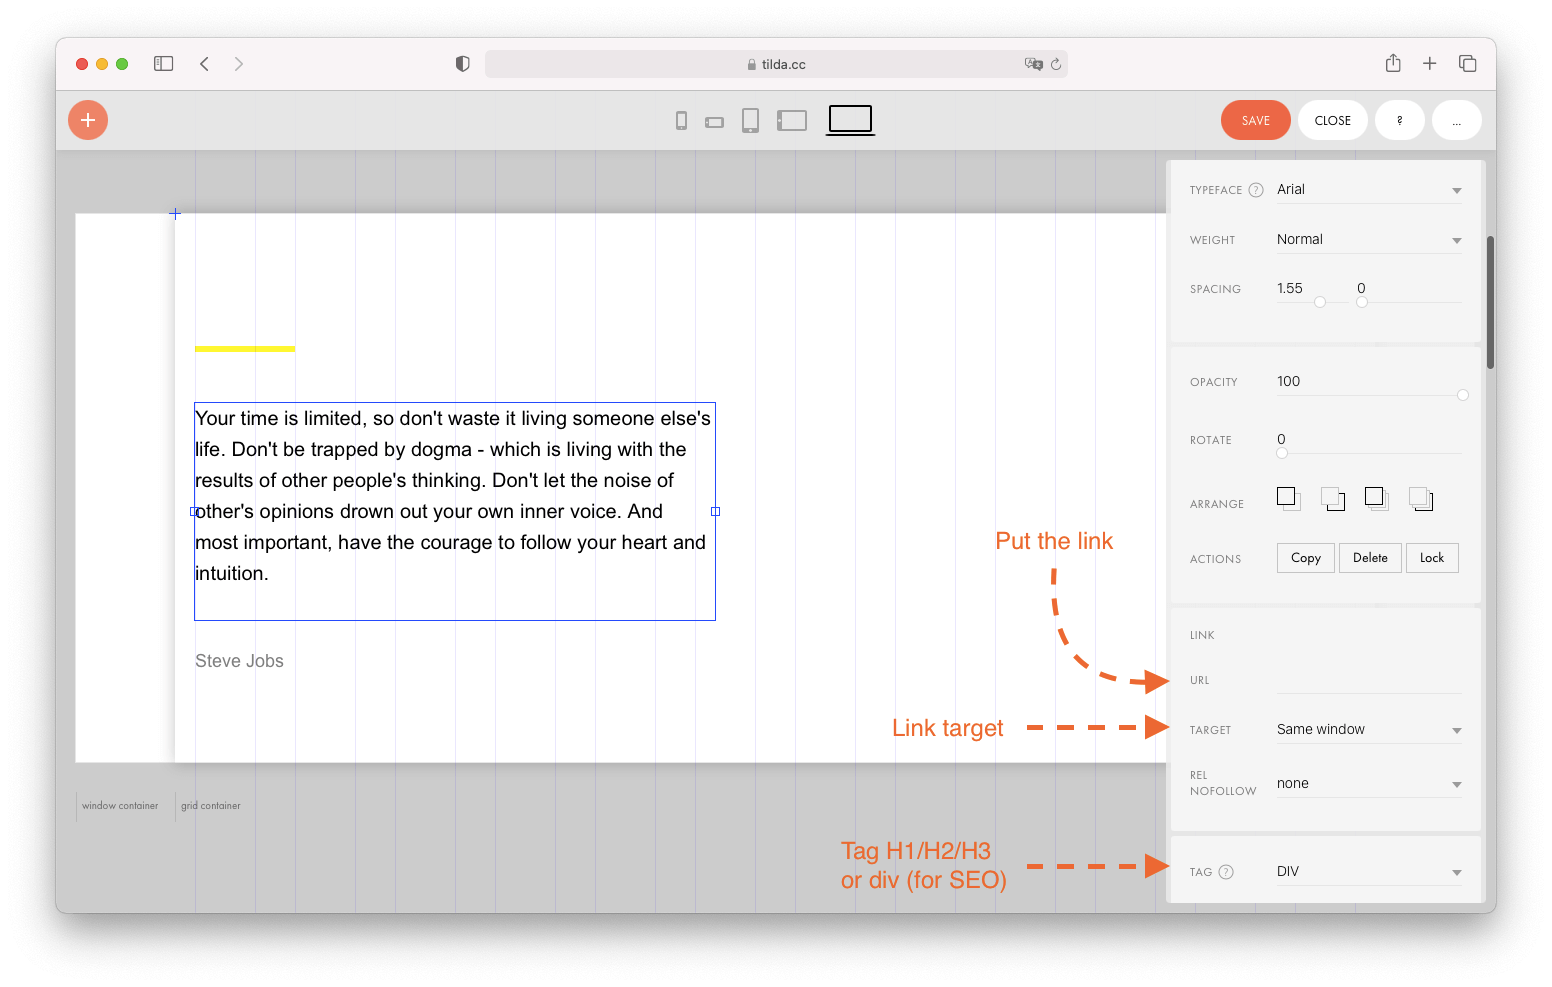
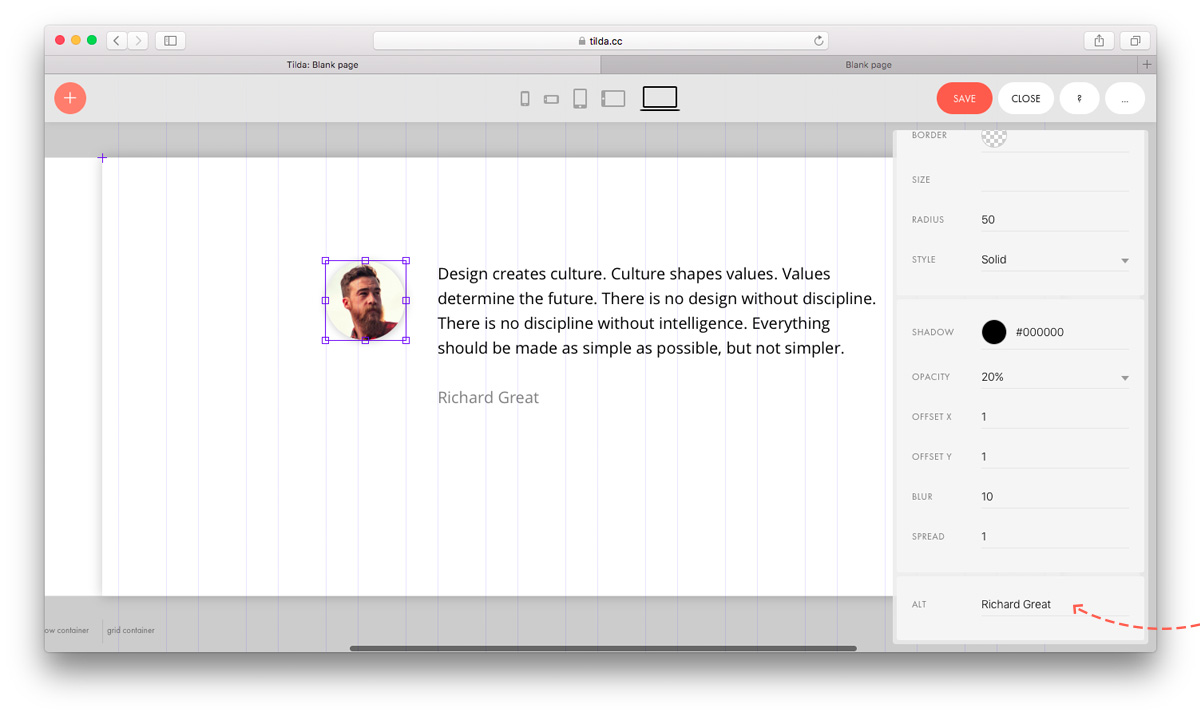
Each image can have an alternative text (alt tag). Search engines interpret the alternative text as keywords and use them to index the page, so make sure that the alternative text is relevant to your website’s content in general and reflects the content of the image.
Any image can be turned into a link so that when the user clicks on it, they will be taken to another page. Go to the Settings panel of the element and specify the link and whether it should be opened in the same window or a new one.
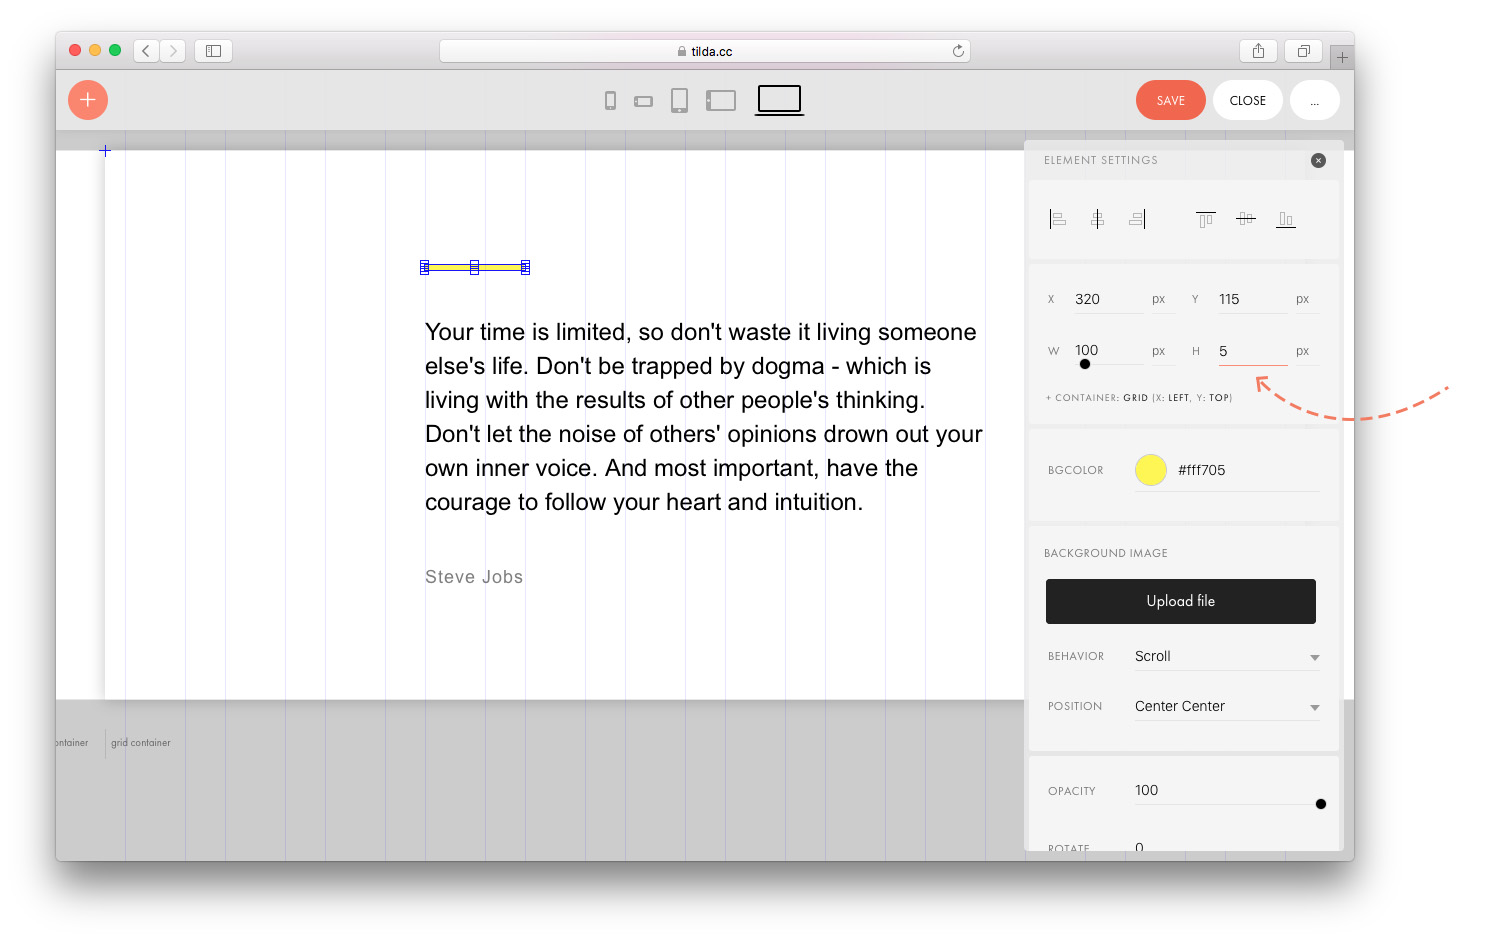
When you add a shape, a square appears on the page, which can be transformed into a rectangle, a circle, or a line.
Rectangle : change side lengths by dragging the control points.
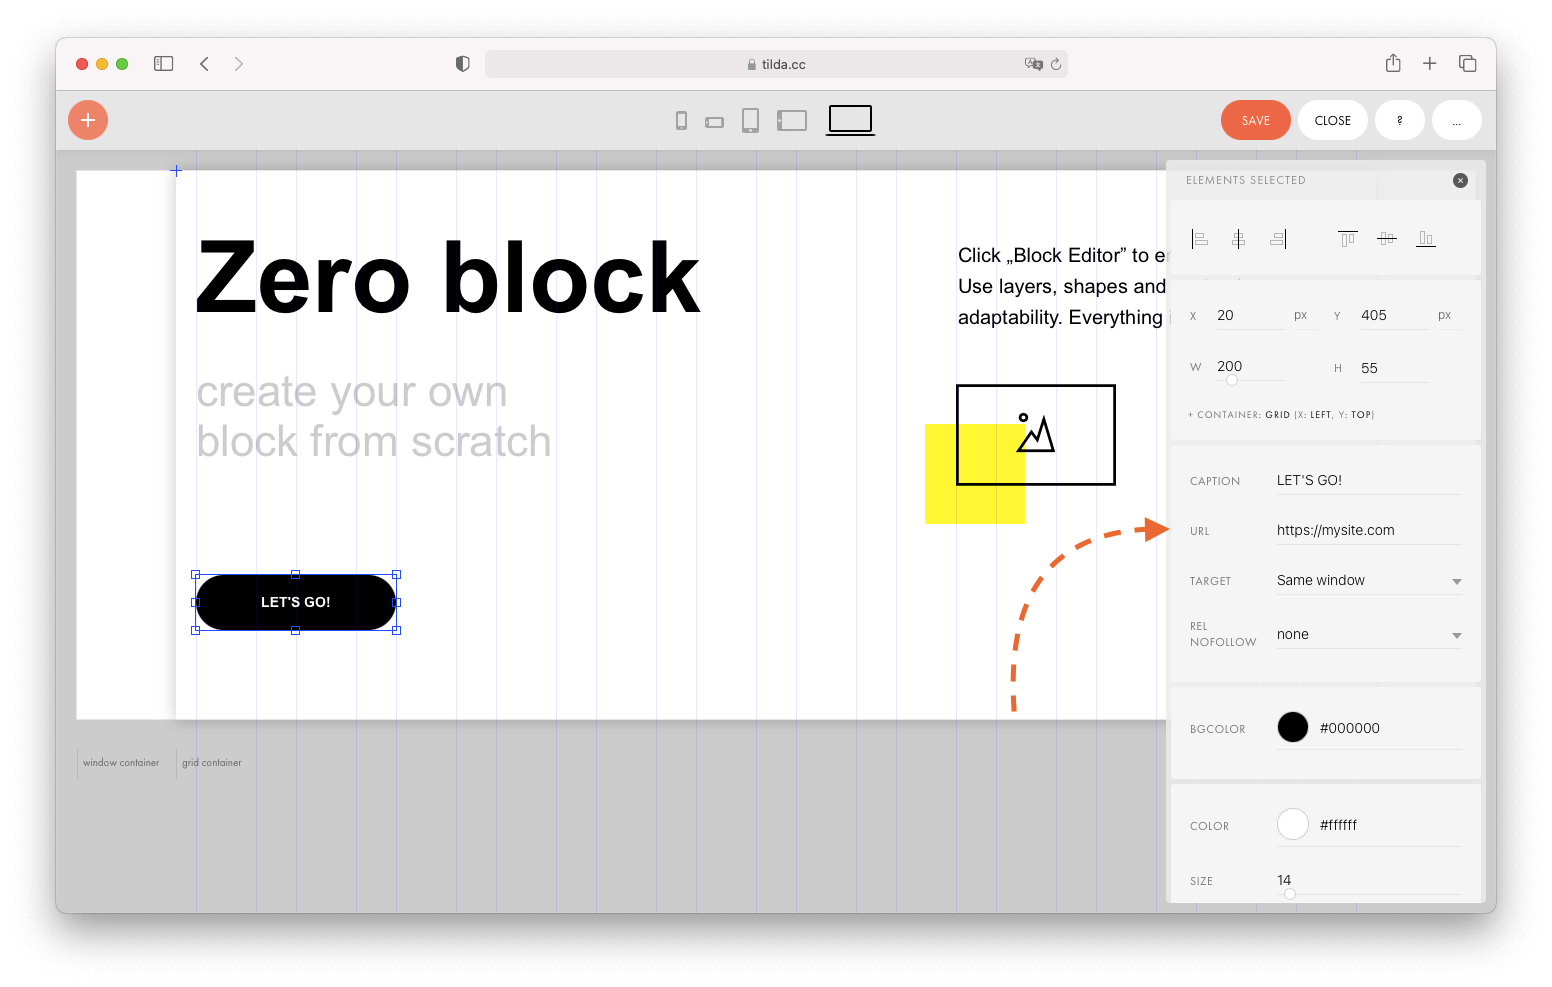
You can change the button’s size, color, and rounding radius. You can also add a shadow and a border to it.
You can set the button’s caption and link in the Settings panel of the element. There you can also set its size, type, opacity, and font color.
You can set the button’s behavior. For example, the background color, text color, and border color will change when the button is hovered over.
Tooltip is an interactive block element that displays a text hint and/or an image when you hover the pointer over it.
You can adjust the tooltip’s color, shadow, size, set the icon displayed inside the circle, upload the image that will pop up when you hover the pointer over it, and create an animation.
Be sure to check the tooltip’s location on all screen resolutions after arranging the elements in the block so that the tooltip is not cut off at the edges of the block.