- How to change font on tumblr text post
- Image caption on Tumblr Text posts
- How to Color Text on Tumblr Posts
- [Tutorial] Tumblr Colorful/Gradient Text
- How can I make h2 style text be two colors on tumblr?
- Styling tumblr reblog comments
- Change text on hover, CSS and html
- How To Add Text To Your Tumblr Blog’s Sidebar Or Footer?
- No built-in gadgets or widgets on Tumblr
- Customizing and modifying your Tumblr blog’s theme
- How to Make Color Text on Tumblr
- how to do a gradient text on tumblr !
- How to Change Text Color on Tumblr Mobile
- Color Text Generator
- Tumblr Text Color Gradient Generator
- Conclusion
How to change font on tumblr text post
Like this: Solution 2: Using & try this, add this to your css: then remove this , and from your css: also remove the word Welcome : now this is the magic of CSS 🙂 Solution 3: This is my css: It might look like overkill (and it might be more than you need), but what I found was that when people reply to a post on tumblr or reblog and add comments, it is possible to cut and paste from another application which will preserve formatting and html elements, so it took me some time to identify the variants and then reset them, I had to keep adding to this list of css.
Image caption on Tumblr Text posts
go to http://www.tumblr.com/customize and press “Edit HTML”
here is tumblr wiki for photo posts
P.S. Tumblr has no opportunity to add a special caption for images in text posts. For more flexibility styling you can add paragraph with custom class (e.g. .photo-caption ) and control it with css code like this:
and paste it in ‘Custom CSS’ field on the same customize page
Html — How do I change the font-size of an element, However, Chrome will let you apply font styles to the
How to Color Text on Tumblr Posts
Subscribe Now:http:// www.youtube.com /subscription_center?add_user=EhowtechWatch More:http:// www.youtube.com /EhowtechColoring text on …
[Tutorial] Tumblr Colorful/Gradient Text
How to make colorful/gradient text on Tumblr . Links used in this video in the description!♡━━━━━━━━━━━━━━━♡Gradient/ Text …
How can I make h2 style text be two colors on tumblr?
Try this, if it does not work please provide me your URL adress maybe there is a problem somewhere else 🙂
I’ve created two methods which work similarly, but in order to abstract them I’ve separated the inline styles into simple class names. However I don’t recommend using these class names, this is purely for illustrative purposes.
As black is a default font colour, the second method uses less markup.
Html — Image caption on Tumblr Text posts, On a Tumblr Post, if they are Image posts, the caption is placed below the Image. I can´t find how to do it on a text posts, and thus we are forced … Code samplephoto-caption
Styling tumblr reblog comments
To add to my comments, some time ago I wrote some css which resets some of the default tumblr styling for reblogs. These are often indented blockquote elements.
#header p, .post .sidebar p, .post h2, .post h3, .post strong, .post b, .post small, .post p, .post blockquote, .post ul, .post ol, .post .quote, .post .quote .quote, .post .conversation ul li, .description, #footer .footer, #footer .description p, #footer h2 < font-size: 12px; font-weight: normal; line-height: auto; >.post p, .post blockquote, .post ul, .post ol
It might look like overkill (and it might be more than you need), but what I found was that when people reply to a post on tumblr or reblog and add comments, it is possible to cut and paste from another application which will preserve formatting and html elements, so it took me some time to identify the variants and then reset them, I had to keep adding to this list of css.
It should be a good start though.
How to change font color inside nav element?, I have a element and I want to change the color of the links within it, but all other links on my page are styled using the following CSS: a:link < …
Change text on hover, CSS and html
You can use pseudo class :after and change its content on hover.
#welcome < position: absolute; top: 50%; left: 50%; width: auto; height: auto; -webkit-transform: translateX(-50%) translateY(-50%); -moz-transform: translateX(-50%) translateY(-50%); -ms-transform: translateX(-50%) translateY(-50%); transform: translateX(-50%) translateY(-50%); >#speechbubble < margin-left: 110px; width: 230px; height: 80px; line-height: 80px; text-align: center; font-size: 15px; letter-spacing: 2px; -moz-box-shadow: 5px 5px 5px #888; -webkit-box-shadow: 5px 5px 5px #888; box-shadow: 5px 5px 5px #888; font-family: < select: Title Font >; background: < color: Welcome background >; color: < color: Welcome text >; position: relative; font-weight:bold; >#speechbubble:after < content: "Welcome!"; >#speechbubble:before < position: absolute; right: 100%; top: 26px; width: 0; height: 0; border-top: 13px solid transparent; border-right: 18px solid < color: Welcome background >; border-bottom: 13px solid transparent; >#welcome:hover #speechbubble:after < content: "Scroll Down"; >#welcome:hover #speechbubble < -webkit-transition: all 0.7s ease-in-out; -moz-transition: all 0.3s ease-in-out; -o-transition: all 0.3s ease-in-out; transition: all 0.3s ease-in-out; margin-left: 120px; >#welcome #speechbubble
Using :after & :before try this, add this to your css:
#welcome:hover #speechbubble:after < content: "Scroll Down"; >#welcome:hover #speechbubble:before < content: ""; >#speechbubble:before
then remove this right , top and position from your css:
#speechbubble:before < content:""; /*position: absolute;*/ /*right: 100%;*/ /*top: 26px;*/ width: 0; height: 0; border-top: 13px solid transparent; border-right: 18px solid ; border-bottom: 13px solid transparent; > also remove the word Welcome :
now this is the magic of CSS :)
Here is an example code using pseduo elements with data- attributes to achieve the things:
#welcome < position: absolute; top: 50%; left: 50%; width: auto; height: auto; -webkit-transform: translateX(-50%) translateY(-50%); -moz-transform: translateX(-50%) translateY(-50%); -ms-transform: translateX(-50%) translateY(-50%); transform: translateX(-50%) translateY(-50%); >body < background: black; >/* .button */#speechbubble < display: inline-block; position: relative; margin: 1em; padding: 0.67em; border: 2px solid #FFF; overflow: hidden; text-decoration: none; font-size: 2em; outline: none; color: #FFF; background: transparent; font-family: 'raleway', sans-serif; >#speechbubble span < -webkit-transition: 0.6s; -moz-transition: 0.6s; -o-transition: 0.6s; transition: 0.6s; -webkit-transition-delay: 0.2s; -moz-transition-delay: 0.2s; -o-transition-delay: 0.2s; transition-delay: 0.2s; >#speechbubble:before < content: ''; position: absolute; top: 0.67em; left: 0; width: 100%; text-align: center; opacity: 0; -webkit-transition: .4s, opacity .6s; -moz-transition: .4s, opacity .6s; -o-transition: .4s, opacity .6s; transition: .4s, opacity .6s; >/* :before */#speechbubble:before < content: attr(data-hover); -webkit-transform: translate(-150%, 0); -moz-transform: translate(-150%, 0); -ms-transform: translate(-150%, 0); -o-transform: translate(-150%, 0); transform: translate(-150%, 0); >/* Span on :hover and :active */#speechbubble:hover span < opacity: 0; -webkit-transform: scale(0.3); -moz-transform: scale(0.3); -ms-transform: scale(0.3); -o-transform: scale(0.3); transform: scale(0.3); >/* We show :before pseudo-element on :hover */#speechbubble:hover:before
How To Add Text To Your Tumblr Blog’s Sidebar Or Footer?
Is it possible to add text on the sidebar or footer of your Tumblr (microblogging platform and social networking site) blog? The answer is yes, but how easy it is to do this depends on what kind of theme or template you’re using on your blog.
Some themes come with the option that lets you easily add any text you want on your blog’s sidebar and/or footer. But some templates don’t have this feature, so if you want text on your sidebar or footer, you’ll have to do it yourself.
Below, you’ll see a tutorial on how to add text to your blog’s sidebar and footer if your chosen Tumblr theme doesn’t have this feature as well as examples of some templates which come with this feature.

No built-in gadgets or widgets on Tumblr
Other blogging platforms, like Google Blogger, make it really easy and quick to add text to your blog’s sidebar and footer. In the case of Google Blogger, all you need to do is add the Text gadget to your sidebar or footer and configure the settings of said gadget to input whatever text you want.
Unfortunately, Tumblr doesn’t have gadgets or widgets. So wanting text on your blog isn’t as simple or as easy as clicking something and adding it to your site’s footer or sidebar and then typing the text that you want to input. Well, unless your chosen Tumblr theme comes with this feature anyway.
Customizing and modifying your Tumblr blog’s theme
If it doesn’t and you really want to add some text on your blog’s sidebar or footer, you’ll have to tinker with the HTML codes of your Tumblr theme and modify and customize it to your liking.
The first step is to go to the theme options page of your Tumblr blog’s theme. Once there, just click on the “Edit HTML” link on the left side of the page and you’ll be taken to the HTML editor.

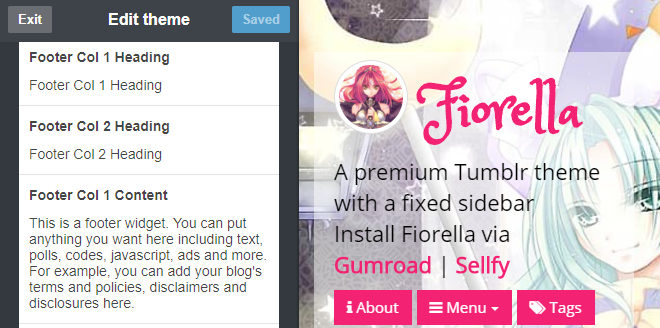
The theme comes with a 2-column footer where you can put any text you want as well as polls, codes, ads, javascript and more.

Adding text to your sidebar and footer using the Fiorella theme is as easy as going to the theme options page of your blog and typing whatever you want to show or display. Just look for the entry which corresponds to the feature you want to use.
For example, to customize your footer, just look for the text with the names, “Footer Col 1 Heading,” “Footer Col 1 Content,” etc.
This theme doesn’t come with a sidebar, but you can still add text on your blog’s header as well as footer.

The theme’s footer section comes with 2 columns:


The Rustelia theme comes with a 2-column footer:

The Sol Aki theme doesn’t have a footer text widget. However, it does have a sidebar and header widget.


Mystic Summer also comes with a three-column footer:

Weiss Zima doesn’t have a footer text widget, but it does have a sidebar text widget as you can see below:

The rest of the themes mentioned here are just like Fiorella. You can easily add text to your blog’s sidebar and/or footer just by going to the theme options page, looking for the feature you want to change or modify and then adding the text you want or toggling an option on or off.
All of these themes come with documentation as well as tutorials for your convenience. For more detailed information about these themes, you can check out my themes page here. If you have any questions, feel free to ask :-).
Notes:
-Image with added text was modified by Freya Yuki (CC:BY-SA) based on the image by Kazenokaze (CC:BY-SA) from deviantArt
-You can see the footer section of a Tumblr blog in this YouTube video
How to Make Color Text on Tumblr

To make color text on Tumblr, you need to use HTML. In the Tumblr editor, switch to HTML mode by clicking the “<>” button. Then, you can use the “span” tag to change the color of your text.
For example, if you want to make your text red, you would write “ This is my red text “. You can also use CSS to change the color of your text.
- On your Tumblr dashboard, click the “Create a post” button
- In the “Create a post” window, click the “Text” option
- In the “Text” editor, type out the text you want to make into color
- Highlight the text you want to colorize
- Click the drop-down menu next to the “A” icon and select a color from the palette or enter in a hex code for a specific color (#000000 for black, #FFFFFF for white, etc
- Click “Post” to publish your colored text on Tumblr!
how to do a gradient text on tumblr !

How to Change Text Color on Tumblr Mobile
If you want to change the color of your text on Tumblr Mobile, there are a few different ways that you can do it. One way is to go into the settings menu and tap on the “theme” option. From there, you can scroll through the various themes until you find one that has the text color that you want.
Another way to change the text color is to use HTML tags. You can do this by going into the “Edit theme” menu and then tapping on the “Customize” button. Once you’re in the customization menu, scroll down until you see the “Advanced Options” section.
In that section, there will be an option for “Use Custom HTML.” Tap on that and then enter in your desired HTML code for changing the text color.
Color Text Generator
If you are looking for a color text generator, there are a few different ways to go about it. You can use an online tool like this one from CoolText.com, or you can download and install a program like Adobe Photoshop. With an online tool, all you need to do is enter the text you want to generate and select the colors you want to use.
Then, just click the “Generate” button and your text will be created in the colors you selected. If you decide to download and install Photoshop, or another program like it, then you’ll have more control over the final product. With Photoshop (or similar), you can create custom gradients, add shadows and highlights, change the opacity of your colors, etc.
The options are endless! So whether you want a quick-and-easy solution or something with more customization options, there’s definitely a color text generator out there that will suit your needs.
Tumblr Text Color Gradient Generator
As we all know, Tumblr is a very popular blogging platform. And one of the things that make it so popular is its customization options. You can pretty much change anything and everything about your blog, from the layout to the colors.
And speaking of colors, did you know that you can create a color gradient for your text on Tumblr? It’s actually really easy to do. All you need is a little bit of HTML code.
First, you’ll need to choose the two colors that you want to use for your gradient. Let’s say we want to use black and white. Then, you’ll need to find the hex codes for those colors.
The hex code for black is #000000 and the hex code for white is #FFFFFF. Once you have those two codes, you’ll just need to insert them into this piece of code: YOUR TEXT HERE
Conclusion
If you want to add a pop of color to your Tumblr posts, you can do so by making colored text. To make colored text on Tumblr, you’ll need to use HTML code. Don’t worry, it’s easy!
Just follow these steps: 1. Find the HTML code for the color you want to use. You can search for “HTML color codes” online to find a list of codes.
2. In your Tumblr post, add before the text you want to color. 3. Add the HTML code for the color after the . For example, if you wanted to make red text, you would add before the text.
4. Finally, add after the text you want to color. This will close out the code and return your text back to its normal color.