- Dark/Light theme switcher with HTML, CSS & Javascript Only
- CSS Variables
- localStorage API
- Document Structure
- Defining the colors
- Changing Theme
- Как добавить темную тему на свой сайт с помощью CSS и JavaScript
- Добавление HTML
- Добавление CSS
- Добавление JavaScript
- Запоминание темы
- Как сделать темную тему для сайта
- Добавляем переключатель темной/светлой темы на сайт
- Подготовим код сайта
- Смена на темную тему и обратно при клике
- Сохраняем выбранную тему сайта в браузере
Dark/Light theme switcher with HTML, CSS & Javascript Only
There are different ways to implement dark mode on websites, from the simplest to the most complex, and the approach I show in this short tutorial I consider as the simplest and painless possible, for this we will implement using only HTML, CSS and Javascript. Two key concepts will be used for implementing dark mode, CSS Variables for colors, and localStorage to store the user’s current theme.
CSS Variables
CSS variables work like variables from any other language, where we assign values to it and we can modify it later, for implementation of dark mode we will assign the values of our colors to CSS variables, with that we can modify them later depending on the context.
/*creating a css variable */ --bg-grey-light: #f5f5f5; /*using the css variable */ background-color: var(--bg-grey-light); A special feature of CSS variables that makes it a good alternative to implementing dark mode is that all elements that are declared inside the parent element will
inherits them, so we’ll define our variables directly in the body so that all elements within it can inherit them.
localStorage API
For a better user experience, we will use localStorage which will store the user’s current theme, that way when the user comes back to the website, their favorite theme will be applied automatically.
// storing the theme on the user's machine localStorage.setItem('theme', 'dark'); //accessed the user's machine theme localStorage.getItem('theme'); // dark Document Structure
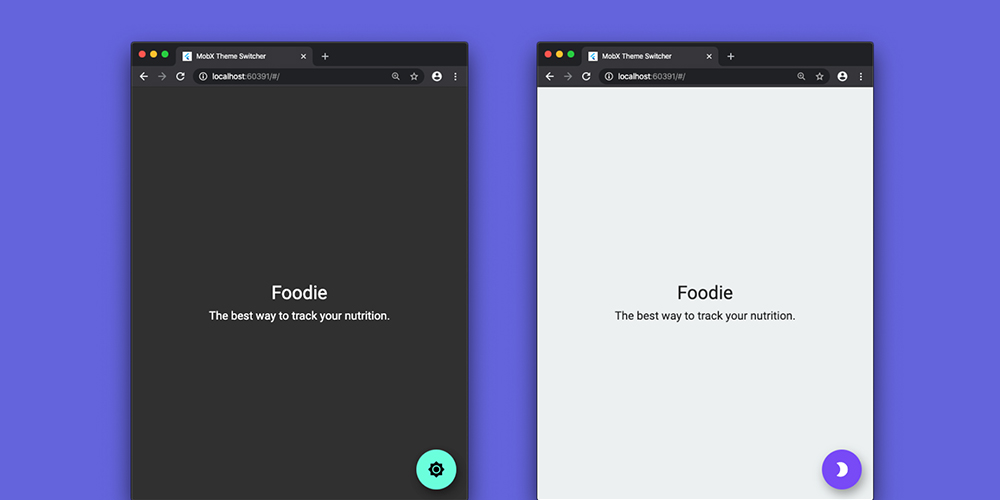
Being a very small project, our document will consist of two buttons and two blocks of text, the buttons will have the function of changing the theme and updating the page.
class="container"> class="heading"> How to make dark mode with HTML, CSS and Javascript only class="buttons"> //button to switch dark/light states id="toggle" class="button">toggle //button to refresh the page id="refresh" class="button">refresh class="text-wrapper"> class="paragraph"> The United States shall be President of the. class="text-wrapper"> class="paragraph"> Why, there's hardly enough of me left. src="script.js"> Defining the colors
Since we are dealing with two different contexts, for each color in the light theme there must be a variant for the dark theme, and the colors have to be defined according to your responsibilities, thus having colors for text, background colors…
/* Definition of colors */ body /* text colors */ --text-white: #ffffff; --text-dark: #142136; /* background colors */ --bg-grey-light: #f5f5f5; --bg-white: #ffffff; --bg-blue-dark: #142136; --bg-indigo: #6366f1; /* . */ > After defining the variables, we will create a class named .dark , which will contain the definition of the same variables, but with the value of the colors changed to the dark theme, so when we want to change the context to the dark theme, we just add the .dark class to the body via javascript so the variables previously defined will be overwritten by the ones defined in the .dark class.
.dark --text-white: #e6e6e6; --text-dark: #ffffff; --bg-grey-light: #142136; --bg-white: #22395d; --bg-blue-dark: #142136; --bg-indigo: #7577e1; > > note that the —text-dark variable which had its value: #142136 , was changed to #ffffff in the context of the dark theme, keeping that in mind, you just need to repeat the same process for all other colors of your code. How did the final .css file look like:
* margin: 0; padding: 0; box-sizing: border-box; > /* Definition of colors */ body /* text colors */ --text-white: #ffffff; --text-dark: #142136; /* background colors */ --bg-grey-light: #f5f5f5; --bg-white: #ffffff; --bg-blue-dark: #142136; --bg-indigo: #6366f1; font-family: "Inter", sans-serif; line-height: 1.7; background-color: var(--bg-grey-light); > .dark --text-white: #e6e6e6; --text-dark: #ffffff; --bg-grey-light: #142136; --bg-white: #22395d; --bg-blue-dark: #142136; --bg-indigo: #7577e1; > .container max-width: 600px; margin: 40px auto; display: flex; padding: 20px; flex-direction: column; > .text-wrapper width: 100%; padding: 20px; background-color: var(--bg-white); margin-bottom: 40px; border-radius: 10px; > .paragraph font-size: 16px; color: var(--text-dark); > .heading font-size: 40px; letter-spacing: 1px; font-weight: 900; margin-bottom: 40px; color: var(--text-dark); > .buttons width: 100%; display: flex; justify-content: space-between; margin-bottom: 40px; > .button width: 200px; padding: 5px; height: 40px; border: none; border-radius: 10px; font-family: inherit; cursor: pointer; background-color: var(--bg-indigo); color: var(--text-white); font-size: 16px; font-weight: 400; text-transform: capitalize; > As you can see in the code, no color was used directly, instead we used the previously defined variables.
Changing Theme
To switch the theme, we will use javascript, and the script will first check in localStorage if the previously stored theme is dark and apply it to body as soon as it loads.
We add an eventListener to the toggle button so when it is clicked it will remove or add the .dark class and also change the theme stored in localstorage depending on context.
const toggle = document.getElementById("toggle"); const refresh = document.getElementById("refresh"); const theme = window.localStorage.getItem("theme"); /* checks if the theme stored in localStorage is dark if yes apply the dark theme to the body */ if (theme === "dark") document.body.classList.add("dark"); // event listener stops when the change theme button is clicked toggle.addEventListener("click", () => document.body.classList.toggle("dark"); if (theme === "dark") window.localStorage.setItem("theme", "light"); > else window.localStorage.setItem("theme", "dark"); >); refresh.addEventListener("click", () => window.location.reload(); >); Demo: dark-mode.kelven.dev
Source code: Github Repo Thank you so much for reading this far, I hope my text somehow helped you.
This is my second article/blog post, so feel free to give your opinion about it, which helps me improve.
Take a look at my Portfolio I have some interesting projects there.
Как добавить темную тему на свой сайт с помощью CSS и JavaScript
С помощью CSS очень легко добавить темную тему для существующих веб-сайтов. В этом руководстве мы собираемся сделать это, используя переменные в CSS.
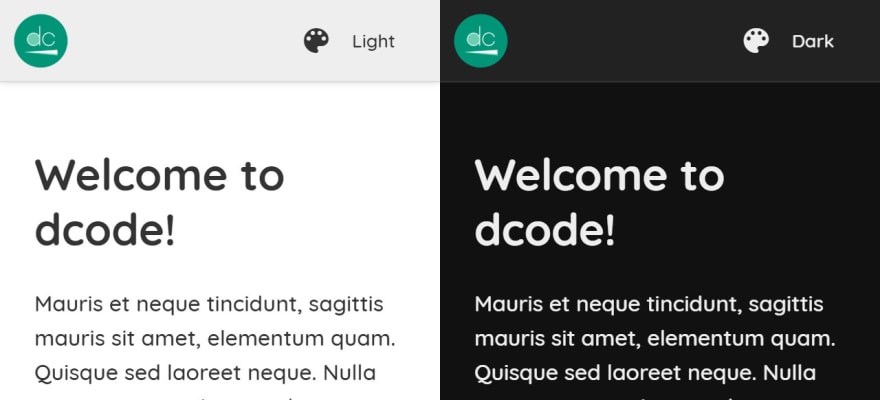
У нас будет 3 разных варианта темы — Auto (Авто), Light (Светлая) и Dark (Темная). Темы Light и Dark говорят сами за себя, но тема Auto будет использовать настройку темы операционной системы, чтобы решить, будет ли сайт светлым или темным.
Я не буду показывать вам, как создать этот конкретный макет или включить его в наш контент, вот пример того, что мы могли бы создать:
Добавление HTML
Начнем с HTML, мы можем представить атрибуте value в теге option как об идентификаторе для каждой темы:
Добавление CSS
Давайте теперь добавим немного CSS к тегу body, здесь вы указываете свои цвета для Light темы с помощью CSS-переменных:
Затем вы можете использовать свои CSS-переменные во всей таблице стилей — это ключ к тому, как наше решение будет работать. Например, вы можете сделать:
Мы собираемся реализовать темную тему, просто заменив значения объявленных выше переменных в тех случаях, когда мы собираемся использовать темную тему. Добавим этот CSS код:
Теперь, если вы добавите класс theme-dark к своему элементу, вы увидите, что темная тема работает. Вскоре мы будем использовать JavaScript для переключения этого значения, но давайте сейчас реализуем нашу опцию Auto:
@media (prefers-color-scheme: dark) < body.theme-auto < --background-color: var(--dark-background-color); --text-color: var(--dark-text-color); >>Вышеупомянутый CSS использует Media Queries, который проверяет, предпочитает ли операционная система темную тему, и если да, мы хотим применить вложенный набор правил для body.theme-auto .
По сути, мы говорим: «Предпочитает ли операционная система темный режим и есть ли у нее класс theme-auto? Если да, давайте использовать темный режим».
Попробуйте, изменив цвет темы своей ОС, или, что еще лучше, просмотрите веб-сайт на своем телефоне с включенным темным режимом.
Добавление JavaScript
Теперь, когда наш CSS работает, мы можем перейти к работе раскрывающегося списка выбора темы. Добавим следующий JavaScript:
function applyTheme(theme) < document.body.classList.remove("theme-auto", "theme-light", "theme-dark"); document.body.classList.add(`theme-$`); > document.addEventListener("DOMContentLoaded", () => < document.querySelector("#theme").addEventListener("change", function() < applyTheme(this.value); >); >);Здесь мы ждем, пока DOM будет готов, чтобы мы могли начать его использовать, и как только он будет готов, мы ожидаем, когда пользователь выбирает вариант в раскрывающемся списке выбора темы. После того, как пользователь изменит тему, мы удалим все существующие классы тем из (если есть), а затем просто добавим выбранную тему с помощью this.value .
Запоминание темы
Мы могли бы пойти дальше и дать браузеру возможность запоминать тему, выбранную при обновлении страницы. Для этого мы можем использовать Local Storage
Давайте добавим следующий JavaScript код, чтобы в итоге получилось следующее:
Как сделать темную тему для сайта
Приветствую, друзья, сегодня я покажу как сделать темную тему для сайта. Работать наша темная тема будет с помощью CSS, JS. Так же мы будем сохранять последнюю выбранную тему в LocalStorage, для того, что бы темная тема работала даже после перезагрузки страницы и закрытия браузера. Давайте начнем!
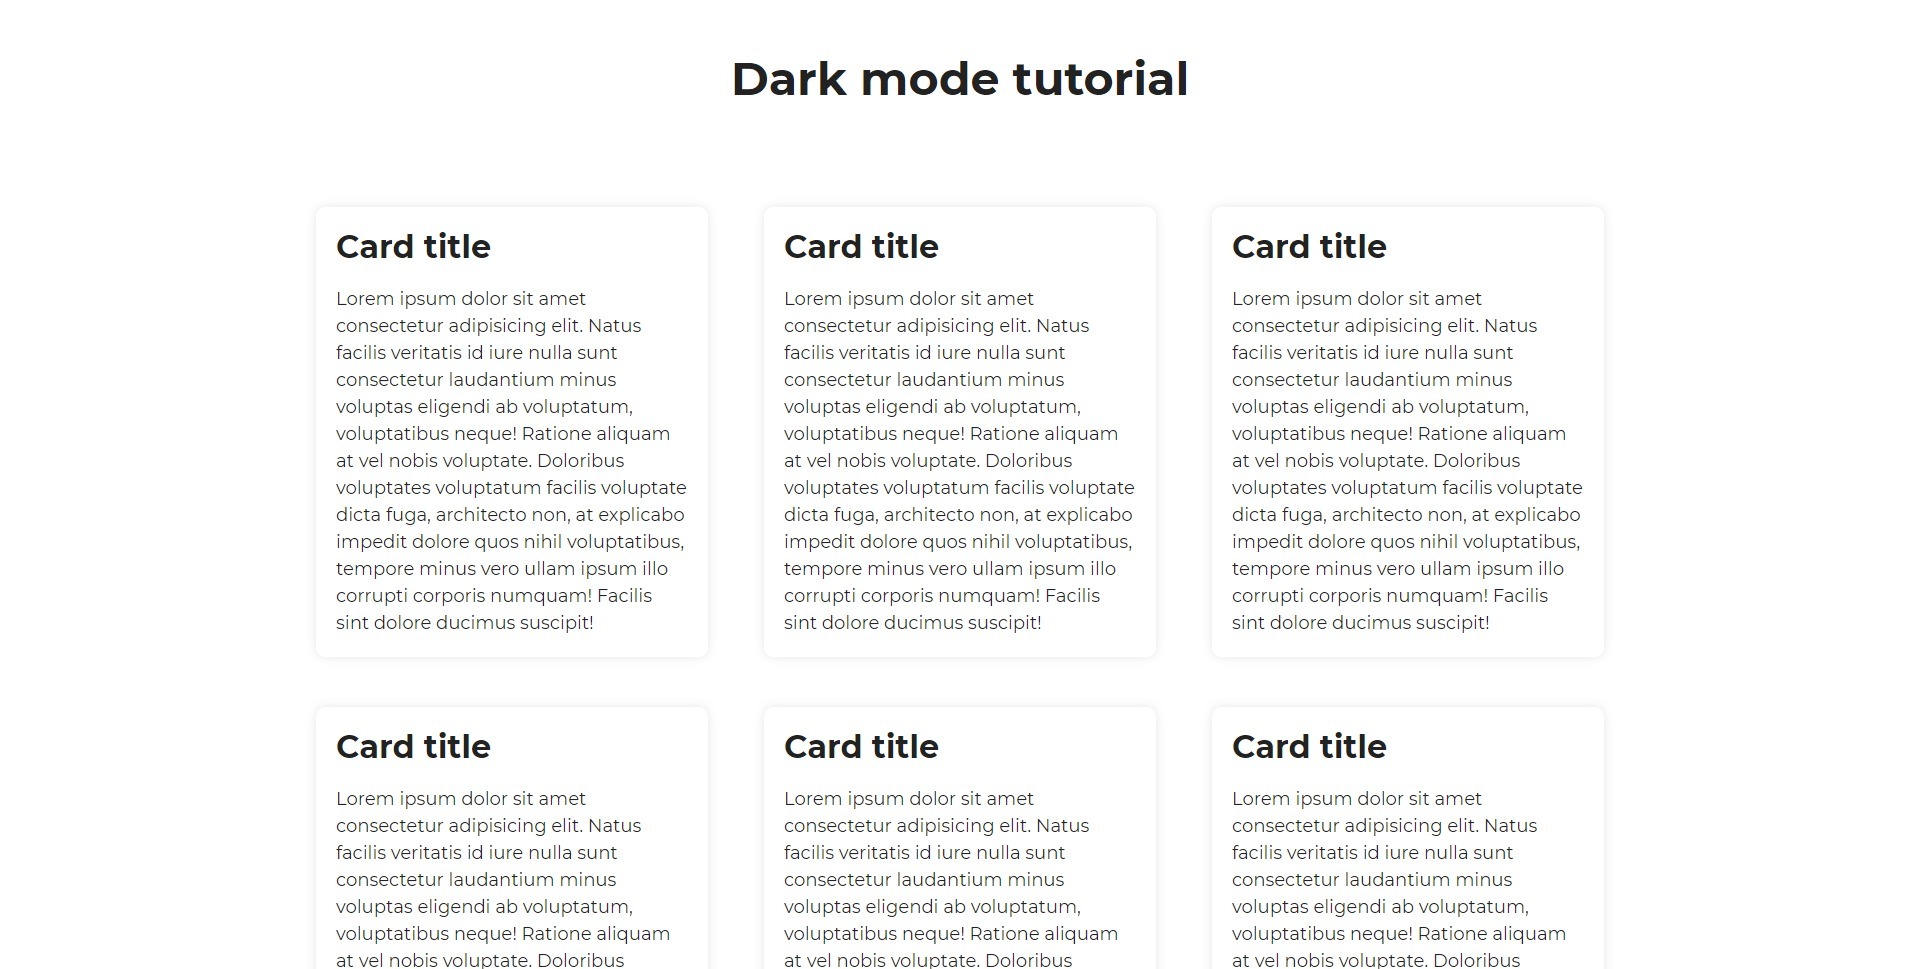
* < box-sizing: border-box; >body < margin: 0; padding: 0; font-family: 'Montserrat', sans-serif; background: #fff; >.wrapper < max-width: 1400px; margin: 0 auto; width: 100%; display: flex; align-items: center; justify-content: space-evenly; flex-wrap: wrap; >.page-title < margin-top: 50px; margin-bottom: 100px; text-align: center; font-size: 46px; color: #222222; >.card < width: 28%; padding: 20px; border-radius: 10px; background: #ffffff; box-shadow: 0 0 10px rgba(0,0,0,0.1); margin-bottom: 50px; >.card .title < font-size: 32px; color: #222222; margin-top: 0; margin-bottom: 20px; >.card .text
Добавляем переключатель темной/светлой темы на сайт
Далее реализуем переключатель темной и светлой темы для сайта. Я буду делать это в виде иконок солнца и луны, как и сейчас реализовано это на данном сайте. Так же я присвою иконкам класс, с помощью которого, мы будем определять, что пользователь хочет сменить тему. И так же добавлю аттрибут data-theme с названием темы, которую мы будем применять при клике. Код вы можете посмотреть ниже.
Подготовим код сайта
Далее нам необходимо создать еще 2 CSS файла. Я назову их theme-light.css и theme-dark.css. После этого, нам нужно вырезать с основного файла со стилями все стили, которые отвечают за те цвета, которые мы хотим менять при смене темы. Вставляем вырезанный код в файлы тем, которые мы только что создали. Теперь меняем цвета по своему усмотрению в зависимости от темы. В моем случае, файлы стилей будут выглядеть вот так:
theme-light.css
body < background: #fff; >.page-title < color: #222222; >.card < background: #ffffff; box-shadow: 0 0 10px rgba(0,0,0,0.1); >.card .title < color: #222222; >.card .text < color: #222222; >.theme
theme-dark.css
body < background: #222222; >.page-title < color: #ffffff; >.card < background: #222222; box-shadow: 0 0 10px rgba(255,255,255,255.1); >.card .title < color: #ffffff; >.card .text < color: #ffffff; >.theme
Смена на темную тему и обратно при клике
Далее нам необходимо реализовать смену темы сайта при клике. Код достаточно простой, так что я просто размещу его ниже и добавлю комментарии.
let changeThemeButtons = document.querySelectorAll('.changeTheme'); // Помещаем кнопки смены темы в переменную changeThemeButtons.forEach(button => < button.addEventListener('click', function () < // К каждой добавляем обработчик событий на клик let theme = this.dataset.theme; // Помещаем в переменную название темы из атрибута data-theme applyTheme(theme); // Вызываем функцию, которая меняет тему и передаем в нее её название >); >); function applyTheme(themeName) < document.querySelector('[title="theme"]').setAttribute('href', `css/theme-$.css`); // Помещаем путь к файлу темы в пустой link в head changeThemeButtons.forEach(button => < button.style.display = 'block'; // Показываем все кнопки смены темы >); document.querySelector(`[data-theme="$"]`).style.display = 'none'; // Но скрываем кнопку для активной темы >Сейчас у вас уже должна меняться тема при клике. Осталась только одна проблема — при перезапуске страницы выбранная тема не сохраняется. Давайте это исправим!
Сохраняем выбранную тему сайта в браузере
Использовать для этого мы будем LocalStorage. Ниже я размещу весь готовый JavaScript код и добавлю комментарии только к новому функционалу.
let changeThemeButtons = document.querySelectorAll('.changeTheme'); changeThemeButtons.forEach(button => < button.addEventListener('click', function () < let theme = this.dataset.theme; applyTheme(theme); >); >); function applyTheme(themeName) < document.querySelector('[title="theme"]').setAttribute('href', `css/theme-$.css`); changeThemeButtons.forEach(button => < button.style.display = 'block'; >); document.querySelector(`[data-theme="$"]`).style.display = 'none'; localStorage.setItem('theme', themeName); > let activeTheme = localStorage.getItem('theme'); // Проверяем есть ли в LocalStorage записано значение для 'theme' и присваиваем его переменной. if(activeTheme === null || activeTheme === 'light') < // Если значение не записано, или оно равно 'light' - применяем светлую тему applyTheme('light'); >else if (activeTheme === 'dark') < // Если значение равно 'dark' - применяем темную applyTheme('dark'); >На этом все! Но хочу отметить еще один момент. Если у вас при активной темной теме при перезагрузке на доли секунды виден белый задник — ничего страшного. Скорее всего, при загрузке сайта на хостинг проблема исчезнет. И если вы хотите минимизировать шанс возникновения этой проблемы на хостинге, то рекомендую вынести этот JavaScript в отдельный файл и разместить его вместе с элементом . Сверху .
Спасибо, что прочитали! Если у вас остались вопросы, задавайте их в комментариях на YouTube или в нашем Telegram чате .
Так же советую ознакомиться с другими моими статьями:
Full Stack разработчик, Frontend: Vue.js (2,3) + VueX + Vue Router, Backend: Node.js + Express.js. Раньше работал с РНР, WordPress, написал несколько проектов на Laravel. Люблю помогать людям изучать что-то новое)