Introduction
This library provides a pure Python, asynchronous interface for the Telegram Bot API. It’s compatible with Python versions 3.8+. In addition to the pure API implementation, this library features a number of high-level classes to make the development of bots easy and straightforward. These classes are contained in the telegram.ext submodule. A pure API implementation without telegram.ext is available as the standalone package python-telegram-bot-raw . See here for details.
Note
Installing both python-telegram-bot and python-telegram-bot-raw in conjunction will result in undesired side-effects, so only install one of both.
Telegram API support
Installing
$ pip install python-telegram-bot --upgrade
To install a pre-release, use the —pre flag in addition. You can also install python-telegram-bot from source, though this is usually not necessary.
$ git clone https://github.com/python-telegram-bot/python-telegram-bot $ cd python-telegram-bot $ python setup.py install Verifying Releases
We sign all the releases with a GPG key. The signatures are uploaded to both the GitHub releases page and the PyPI project and end with a suffix .asc . Please find the public keys here. The keys are named in the format -.gpg or -current.gpg if the key is currently being used for new releases. In addition, the GitHub release page also contains the sha1 hashes of the release files in the files with the suffix .sha1 . This allows you to verify that a release file that you downloaded was indeed provided by the python-telegram-bot team.
Dependencies & Their Versions
python-telegram-bot tries to use as few 3rd party dependencies as possible. However, for some features using a 3rd party library is more sane than implementing the functionality again. As these features are optional, the corresponding 3rd party dependencies are not installed by default. Instead, they are listed as optional dependencies. This allows to avoid unnecessary dependency conflicts for users who don’t need the optional features. The only required dependency is httpx ~= 0.24.1 for telegram.request.HTTPXRequest , the default networking backend. python-telegram-bot is most useful when used along with additional libraries. To minimize dependency conflicts, we try to be liberal in terms of version requirements on the (optional) dependencies. On the other hand, we have to ensure stability of python-telegram-bot , which is why we do apply version bounds. If you encounter dependency conflicts due to these bounds, feel free to reach out.
Optional Dependencies
- pip install «python-telegram-bot[passport]» installs the cryptography>=39.0.1 library. Use this, if you want to use Telegram Passport related functionality.
- pip install «python-telegram-bot[socks]» installs httpx[socks]. Use this, if you want to work behind a Socks5 server.
- pip install «python-telegram-bot[http2]» installs httpx[http2]. Use this, if you want to use HTTP/2.
- pip install «python-telegram-bot[rate-limiter]» installs aiolimiter~=1.1.0. Use this, if you want to use telegram.ext.AIORateLimiter .
- pip install «python-telegram-bot[webhooks]» installs the tornado~=6.2 library. Use this, if you want to use telegram.ext.Updater.start_webhook / telegram.ext.Application.run_webhook .
- pip install «python-telegram-bot[callback-data]» installs the cachetools~=5.3.1 library. Use this, if you want to use arbitrary callback_data.
- pip install «python-telegram-bot[job-queue]» installs the APScheduler~=3.10.1 library and enforces pytz>=2018.6, where pytz is a dependency of APScheduler . Use this, if you want to use the telegram.ext.JobQueue .
To install multiple optional dependencies, separate them by commas, e.g. pip install «python-telegram-bot[socks,webhooks]» .
Additionally, two shortcuts are provided:
- pip install «python-telegram-bot[all]» installs all optional dependencies.
- pip install «python-telegram-bot[ext]» installs all optional dependencies that are related to telegram.ext , i.e. [rate-limiter, webhooks, callback-data, job-queue] .
Quick Start
Our Wiki contains an Introduction to the API explaining how the pure Bot API can be accessed via python-telegram-bot . Moreover, the Tutorial: Your first Bot gives an introduction on how chatbots can be easily programmed with the help of the telegram.ext module.
Resources
- The package documentation is the technical reference for python-telegram-bot . It contains descriptions of all available classes, modules, methods and arguments as well as the changelog.
- The wiki is home to number of more elaborate introductions of the different features of python-telegram-bot and other useful resources that go beyond the technical documentation.
- Our examples section contains several examples that showcase the different features of both the Bot API and python-telegram-bot . Even if it is not your approach for learning, please take a look at echobot.py . It is the de facto base for most of the bots out there. The code for these examples is released to the public domain, so you can start by grabbing the code and building on top of it.
- The official Telegram Bot API documentation is of course always worth a read.
Getting help
If the resources mentioned above don’t answer your questions or simply overwhelm you, there are several ways of getting help.
- We have a vibrant community of developers helping each other in our Telegram group. Join us! Asking a question here is often the quickest way to get a pointer in the right direction.
- Ask questions by opening a discussion.
- You can even ask for help on Stack Overflow using the python-telegram-bot tag.
Concurrency
Since v20.0, python-telegram-bot is built on top of Pythons asyncio module. Because asyncio is in general single-threaded, python-telegram-bot does currently not aim to be thread-safe. Noteworthy parts of python-telegram-bots API that are likely to cause issues (e.g. race conditions) when used in a multi-threaded setting include:
- telegram.ext.Application/Updater.update_queue
- telegram.ext.ConversationHandler.check/handle_update
- telegram.ext.CallbackDataCache
- telegram.ext.BasePersistence
- all classes in the telegram.ext.filters module that allow to add/remove allowed users/chats at runtime
Contributing
Contributions of all sizes are welcome. Please review our contribution guidelines to get started. You can also help by reporting bugs or feature requests.
Donating
Occasionally we are asked if we accept donations to support the development. While we appreciate the thought, maintaining PTB is our hobby, and we have almost no running costs for it. We therefore have nothing set up to accept donations. If you still want to donate, we kindly ask you to donate to another open source project/initiative of your choice instead.
License
You may copy, distribute and modify the software provided that modifications are described and licensed for free under LGPL-3. Derivatives works (including modifications or anything statically linked to the library) can only be redistributed under LGPL-3, but applications that use the library don’t have to be.
telebot быстро и понятно. Телеграмм-бот
telebot (pyTelegramBotAPI) хорошая и лёгкая библиотека для создания бота на python для телеграмма.
Установка
Если у вас windows, тогда вам надо найти cmd на своём пк, а если у вас macOS, тогда вам надо открыть терминал.
Для установки telebot (pyTelegramBotAPI) на windows вам надо написать в cmd
pip install pyTelegramBotAPIДля установки на macOS нам надо написать в терминале
pip3 install pyTelegramBotAPIНаписание кода
Сначала надо получить токен. Для этого зайдём к боту botfather,чтобы получить токен (botfather)
Теперь можно начать писать код.Сначала мы импортируем библиотеку.
import telebot token="наш токен"Теперь создаём переменную под названием token, в ней мы будем хранить наш токен.
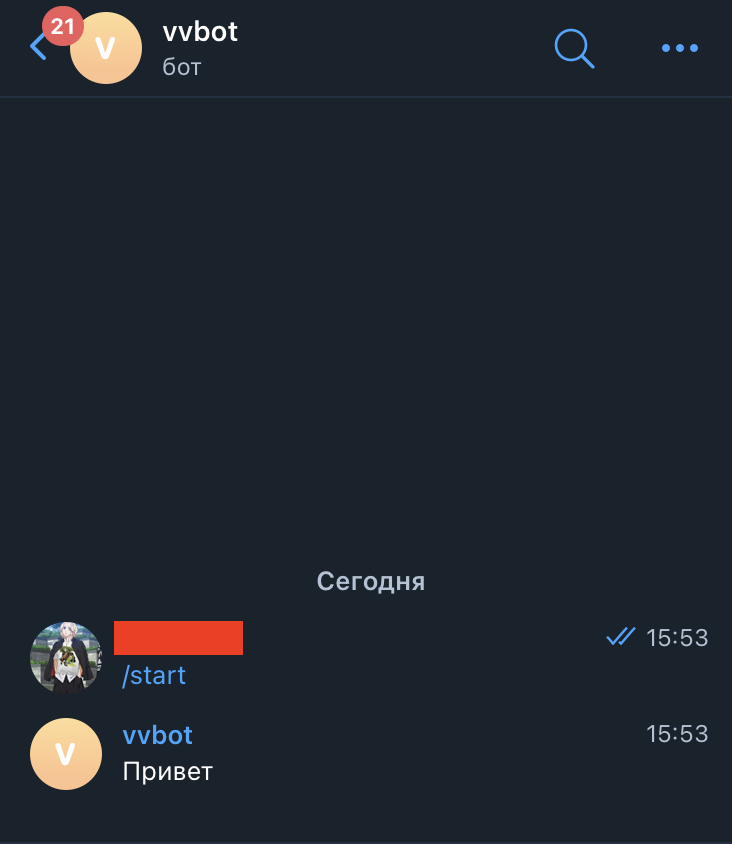
Теперь мы можем создать приветствие бота:
import telebot token='наш токен' bot=telebot.Telebot(token) @bot.message_handler(commands=['start']) def start_message(message): bot.send_message(message.chat.id,"Привет ✌️ ") bot.infinity_poling()Нам надо создать переменную bot, в ней мы пишем telebot.Telebot (наша переменная с токеном).
Создаём функцию под названием «start_message»
В скобках указываем «message».
Пишем внутри функции bot.send_message(message.chat.id,»Привет»)
и вне функции пишем bot.infinity_poling()
Теперь наш бот может приветствовать
Приветствие мы сделали, теперь давайте сделаем кнопку.
Надо написать from telebot import types там же, где мы импортировали библиотеку telebot
import telebot from telebot import types token='наш токен' bot=telebot.TeleBot(token) @bot.message_handler(commands=['start']) def start_message(message): bot.send_message(message.chat.id,'Привет') @bot.message_handler(commands=['button']) def button_message(message): markup=types.ReplyKeyboardMarkup(resize_keyboard=True) item1=types.KeyboardButton("Кнопка") markup.add(item1) bot.send_message(message.chat.id,'Выберите что вам надо',reply_markup=markup) bot.infinity_polling()Теперь пишем @bot.message_handler(commands=[‘button’]). Дальше мы создаём функцию под названием button_message, в скобках указываем message.
Дальше надо создать клавиатуру в переменной под названием markup, в переменной пишем types.ReplyKeyboardMarkup(resize_keyboard=True).
Потом создаём переменную item1, в ней будет хранится сама кнопка и пишем что item1=types.KeyboardButton(«текст на кнопке»).
Дальше к клавиатуре добавим нашу кнопку
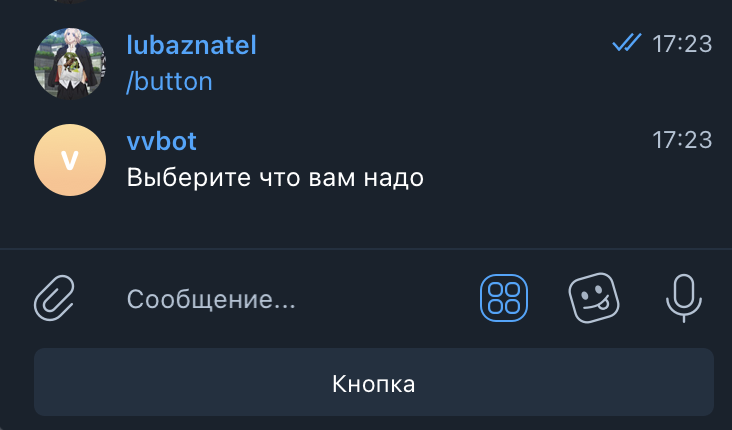
Далее надо отправить сообщение «Выберите что вам надо» и после текста написать reply_markup=markup и закрываем скобки.
Теперь у нас есть кнопка. Вот пример:
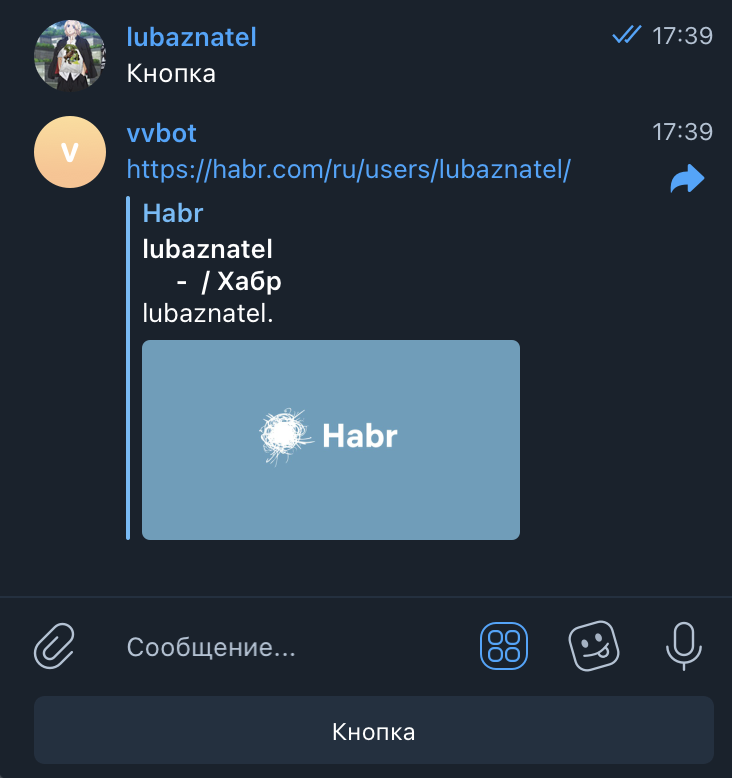
Но если мы на неё нажмём, то ничего не произойдёт. Сейчас мы сделаем так, чтобы при нажатии на кнопку выдавало ссылку на мою страницу в Хабре.
import telebot from telebot import types token='наш токен' bot=telebot.TeleBot(token) @bot.message_handler(commands=['start']) def start_message(message): bot.send_message(message.chat.id,'Привет') @bot.message_handler(commands=['button']) def button_message(message): markup=types.ReplyKeyboardMarkup(resize_keyboard=True) item1=types.KeyboardButton("Кнопка") markup.add(item1) bot.send_message(message.chat.id,'Выберите что вам надо',reply_markup=markup) @bot.message_handler(content_types='text') def message_reply(message): if message.text=="Кнопка": bot.send_message(message.chat.id,"https://habr.com/ru/users/lubaznatel/") bot.infinity_polling()Для начала мы напишем @bot.message_handler(content_types=’text’)
Дальше нам надо создать функцию по названием message_reply, а в скобках указать message.
Внутри функции надо указать условие «if message.text==»Кнопка:», а внутри условия отправить нам нужное сообщение.
Смена кнопок
Это последняя часть статьи.В следующей статье мы разберём с вами добавление в группу или канал.
Это можно считать самая лёгкая часть статьи.
Мы разберём сейчас с вами замену кнопок.
import telebot from telebot import types token='наш токен' bot=telebot.TeleBot(token) @bot.message_handler(commands=['start']) def start_message(message): bot.send_message(message.chat.id,'Привет') @bot.message_handler(commands=['button']) def button_message(message): markup=types.ReplyKeyboardMarkup(resize_keyboard=True) item1=types.KeyboardButton("Кнопка") markup.add(item1) bot.send_message(message.chat.id,'Выберите что вам надо',reply_markup=markup) @bot.message_handler(content_types='text') def message_reply(message): if message.text=="Кнопка": markup=types.ReplyKeyboardMarkup(resize_keyboard=True) item1=types.KeyboardButton("Кнопка 2") markup.add(item1) bot.send_message(message.chat.id,'Выберите что вам надо',reply_markup=markup) elif message.text=="Кнопка 2": bot.send_message(message.chat.id,'Спасибо за прочтение статьи!') bot.infinity_polling()Теперь нам просто надо создать клавиатуру с кнопками и добавить к клавиатуре кнопку как в прошлой части в тоже самое условие.Дальше в той же функции написать:
elif message.text=="Кнопка 2": bot.send_message(message.chat.id,'Спасибо за прочтение статьи!')Теперь при нажатии на Кнопку 1 она у нас сменяется на кнопку 2 и при нажатии на кнопку 2 у нас присылает сообщение «Спасибо за прочтение статьи!».