- Атрибут align
- Значение по умолчанию
- Аналог CSS
- Атрибут align
- Значение по умолчанию
- Аналог CSS
- CSS Layout — Horizontal & Vertical Align
- Example
- Center Align Text
- Example
- Center an Image
- Example
- Left and Right Align — Using position
- Example
- Left and Right Align — Using float
- Example
- The clearfix Hack
- Without Clearfix
- With Clearfix
- Example
- Center Vertically — Using padding
- Example
- Example
- Center Vertically — Using line-height
- Example
- Center Vertically — Using position & transform
- Example
- Center Vertically — Using Flexbox
- Example
- How to Right Align a Div Using CSS?
- How to Right Align a Div Using CSS?
- Method 1: Using the “float” Property
- Method 2: Using the “right” Property
- Method 3: Using Flex Layout
- Method 4: Using Grid Layout
- Conclusion
- About the author
- Abdul Moeed
Атрибут align
center Выравнивание текста по центру. Текст помещается по центру горизонтали окна браузера или контейнера, где расположен текстовый блок. Строки текста словно нанизываются на невидимую ось, которая проходит по центру веб-страницы. Подобный способ выравнивания активно используется в заголовках и различных подписях, вроде подрисуночных, он придает официальный и солидный вид оформлению текста. Во всех других случаях выравнивание по центру применяется редко по той причине, что читать большой объем такого текста неудобно. left Выравнивание текста по левому краю. В этом случае строки текста выравнивается по левому краю, а правый край располагается «лесенкой». Такой способ выравнивания является наиболее популярным на сайтах, поскольку позволяет пользователю легко отыскивать взглядом новую строку и комфортно читать большой текст. right Выравнивание текста по правому краю. Этот способ выравнивания выступает в роли антагониста предыдущему типу. А именно, строки текста равняются по правому краю, а левый остается «рваным». Из-за того, что левый край не выровнен, а именно с него начинается чтение новых строк, такой текст читать труднее, чем, если бы он был выровнен по левому краю. Поэтому выравнивание по правому краю применяется обычно для коротких заголовков объемом не более трех строк. Мы не рассматриваем специфичные сайты, где текст приходится читать справа налево, там возможно подобный способ выравнивания и пригодится. Но где вы у нас в стране видели такие сайты. justify Выравнивание по ширине, что означает одновременное выравнивание по левому и правому краю. Чтобы произвести это действие браузер в этом случае добавляет пробелы между словами.
Значение по умолчанию
Аналог CSS
#layer1 < background: #fc0; padding: 5px; >#layer2 Результат данного примера показан на рис. 1.

Рис. 1. Выравнивание элементов с помощью атрибута align
Атрибут align
center Выравнивание текста по центру. Текст помещается по центру горизонтали окна браузера или контейнера, где расположен текстовый блок. Строки текста словно нанизываются на невидимую ось, которая проходит по центру веб-страницы. Подобный способ выравнивания активно используется в заголовках и различных подписях, вроде подрисуночных, он придает официальный и солидный вид оформлению текста. Во всех других случаях выравнивание по центру применяется редко по той причине, что читать большой объем такого текста неудобно. left Выравнивание текста по левому краю. В этом случае строки текста выравнивается по левому краю, а правый край располагается «лесенкой». Такой способ выравнивания является наиболее популярным на сайтах, поскольку позволяет пользователю легко отыскивать взглядом новую строку и комфортно читать большой текст. right Выравнивание текста по правому краю. Этот способ выравнивания выступает в роли антагониста предыдущему типу. А именно, строки текста равняются по правому краю, а левый остается «рваным». Из-за того, что левый край не выровнен, а именно с него начинается чтение новых строк, такой текст читать труднее, чем, если бы он был выровнен по левому краю. Поэтому выравнивание по правому краю применяется обычно для коротких заголовков объемом не более трех строк. Мы не рассматриваем специфичные сайты, где текст приходится читать справа налево, там возможно подобный способ выравнивания и пригодится. Но где вы у нас в стране видели такие сайты. justify Выравнивание по ширине, что означает одновременное выравнивание по левому и правому краю. Чтобы произвести это действие браузер в этом случае добавляет пробелы между словами.
Значение по умолчанию
Аналог CSS
#layer1 < background: #fc0; padding: 5px; >#layer2 Результат данного примера показан на рис. 1.
Рис. 1. Выравнивание элементов с помощью атрибута align
CSS Layout — Horizontal & Vertical Align
Setting the width of the element will prevent it from stretching out to the edges of its container.
The element will then take up the specified width, and the remaining space will be split equally between the two margins:
This div element is centered.
Example
Note: Center aligning has no effect if the width property is not set (or set to 100%).
Center Align Text
To just center the text inside an element, use text-align: center;
Example
Tip: For more examples on how to align text, see the CSS Text chapter.
Center an Image
To center an image, set left and right margin to auto and make it into a block element:

Example
Left and Right Align — Using position
One method for aligning elements is to use position: absolute; :
In my younger and more vulnerable years my father gave me some advice that I’ve been turning over in my mind ever since.
Example
Note: Absolute positioned elements are removed from the normal flow, and can overlap elements.
Left and Right Align — Using float
Another method for aligning elements is to use the float property:
Example
The clearfix Hack
Note: If an element is taller than the element containing it, and it is floated, it will overflow outside of its container. You can use the «clearfix hack» to fix this (see example below).
Without Clearfix
![]()
With Clearfix
![]()
Then we can add the clearfix hack to the containing element to fix this problem:
Example
Center Vertically — Using padding
There are many ways to center an element vertically in CSS. A simple solution is to use top and bottom padding :
Example
To center both vertically and horizontally, use padding and text-align: center :
I am vertically and horizontally centered.
Example
Center Vertically — Using line-height
Another trick is to use the line-height property with a value that is equal to the height property:
I am vertically and horizontally centered.
Example
.center <
line-height: 200px;
height: 200px;
border: 3px solid green;
text-align: center;
>
/* If the text has multiple lines, add the following: */
.center p line-height: 1.5;
display: inline-block;
vertical-align: middle;
>
Center Vertically — Using position & transform
If padding and line-height are not options, another solution is to use positioning and the transform property:
I am vertically and horizontally centered.
Example
.center <
height: 200px;
position: relative;
border: 3px solid green;
>
.center p margin: 0;
position: absolute;
top: 50%;
left: 50%;
transform: translate(-50%, -50%);
>
Tip: You will learn more about the transform property in our 2D Transforms Chapter.
Center Vertically — Using Flexbox
You can also use flexbox to center things. Just note that flexbox is not supported in IE10 and earlier versions:
Example
.center <
display: flex;
justify-content: center;
align-items: center;
height: 200px;
border: 3px solid green;
>
Tip: You will learn more about Flexbox in our CSS Flexbox Chapter.
How to Right Align a Div Using CSS?
![]()
The balancing of content is a major part of a webpage that can increase and decrease the user’s focus and interest. In HTML, the div element is used to group several elements and allow CSS to apply properties on all the residing elements at once. The developer can display content in a better way without decreasing user experience using right and left alignment.
This article demonstrates the right alignment of a div with practical examples using CSS.
How to Right Align a Div Using CSS?
The developer can right align each div element or image in a way that makes the website more appealing. Due to their high flexibility, div elements can be utilized in several ways on the web page such as defining page sections, creating columns, and wrapping sets of related content.
Follow the below methods to right-align the div:
Method 1: Using the “float” Property
In the HTML file, create a div and assign it a class of “align-to-right”. This class and div are used throughout this article.
Now, select that div class “align-to-right” and assign the CSS properties. These properties are utilized for better visualization:
In the above code, the “float” property is set to the right. It floats or moves the div in the right direction on the webpage. The padding and background-color properties are set to “10px” and “hotpink” respectively.
After compiling the above code snippet, the webpage looks like this:
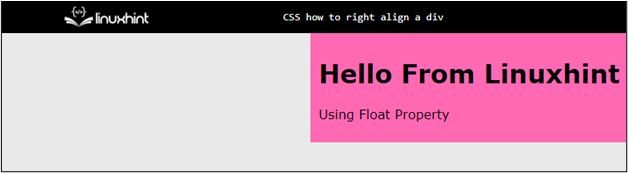
The above output confirms that the div moves in the right direction.
Method 2: Using the “right” Property
In the CSS, select the div class and set the “right” property to 0. It ensures that the distance of the selected div from the right side is equal to zero. Then, set the “position” property to “absolute” to make the div position fixed. In the end, apply some styling properties for better visualization:
After executing the code webpage looks like this:

The output shows that the div is now right-aligned.
Method 3: Using Flex Layout
Flex is the most efficient method, and it maintains the layout during resizing of the window. The div can be right-aligned using CSS “Flex Layout” properties. The Flex layout contains many properties for different purposes.
In the HTML file create a parent div and inside it creates two sibling divs. Also, assign each div a unique class:
Now inside the “ ” tag add the following CSS properties:
.align-to-right {
display: flex;
justify- content : space-between;
}
.right-aligned {
align-self: flex-end;
padding: 10px;
background- color : mediumpurple;
}
- Assign “flex” and “space-between” values to the “display” and “justify-content” properties, respectively. These properties make the div a flex and put equal spacing between the child divs.
- The “align-self” property is set to “flex-end”, which causes it to align to the right side of the container.
After executing the above code webpage looks like this:
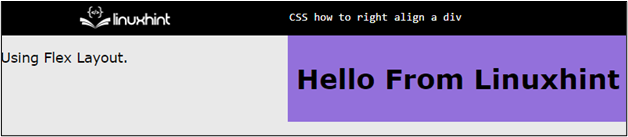
The output shows that the div is right aligned using the flex layout.
Method 4: Using Grid Layout
The grid layout can also be utilized to right-align the div. The HTML code structure remains the same:
.align-to-right {
display: grid;
grid-template-columns: repeat ( 2 , 1fr ) ;
}
.right-aligned {
grid-column- start : 2 ;
padding: 10px;
background- color : teal;
}
The description of the code is given below:
- First, select the parent div class “.align-to-right” and set its “display” property to “grid”.
- Then, create two columns with equal size using “grid-template-columns” set to “repeat(2, 1fr)”.
- In the end, select the child div class “.right-aligned” and set the “grid-column-start” property to 2. This property starts the element from the second column i.e., from the right side.
After executing the above code, the webpage looks like this:

The output illustrates that the div is now right aligned using the “grid” layout properties.
Conclusion
To align the div in the right direction, use “float”, “right”, “flex layout”, and “grid layout” properties. The “float” property sets to the right by assigning the value “0px”. For the “flex” property, set the display to flex and use the “align-self” property to “flex-end”. Using the grid property, make two equal size columns and make the child div start from the second column.
About the author
Abdul Moeed
I’m a versatile technical author who thrives on adaptive problem-solving. I have a talent for breaking down complex concepts into understandable terms and enjoy sharing my knowledge and experience with readers of all levels. I’m always eager to help others expand their understanding of technology.