- How to run HTML code in Visual Studio Code on Windows 10
- Video Tutorial: How to Run HTML in Visual Studio Code on Windows 10
- Step 1: Configure Visual Studio Code for Running HTML Code
- Subscribe Now!
- Also Read: How to Run Javascript in Visual Studio Code on Windows 10
- Ethix
- You May Also Like
- How to run HTML code in Visual Studio Code on Mac OS
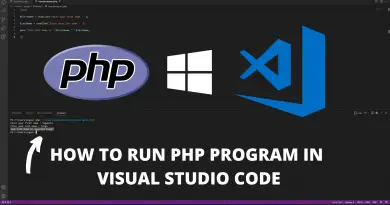
- How to run PHP in Visual Studio Code on Windows 11
- How to Install Xampp on Windows 11
- Leave a Reply Cancel reply
- Top Programming Courses
- 5 Best Coursera Data Science Courses Online 2022
- Настройка VSCode для работы с HTML
- Установка расширения Browser Preview
- Установка расширения Live Server
- Установка
- Создание проекта
- Проверка HTML-страницы
- Создание конфигурации для запуска Browser Preview
- Работа с Browser Preview
- Отладка сайта в браузере
- HTML in Visual Studio Code
- IntelliSense
- Close tags
- Auto update tags
- Color picker
- Hover
- Validation
- Folding
- Formatting
- Emmet snippets
- HTML custom data
- HTML extensions
- Next steps
- Common questions
- Does VS Code have HTML preview?
How to run HTML code in Visual Studio Code on Windows 10
When it comes to web development, the journey of every web developer starts with writing HTML webpages, but many people get stuck in the process of configuring their development environment for running HTML code snippets. Therefore in this article let’s find out how to run HTML in visual studio code on Windows 10 machines.
Video Tutorial: How to Run HTML in Visual Studio Code on Windows 10
If you’re finding it hard to run HTML code in Visual Studio Code on your Windows 10 machine then you can refer to the below video for a complete guide.
Step 1: Configure Visual Studio Code for Running HTML Code
1) Open up visual studio code, press the extensions button and search for “ code runner ”, select the first option from Jun Han and click on the small green install button.
with this extension, you can run the code by pressing Ctrl+Alt+N and stop the same by pressing Ctrl+Alt+M

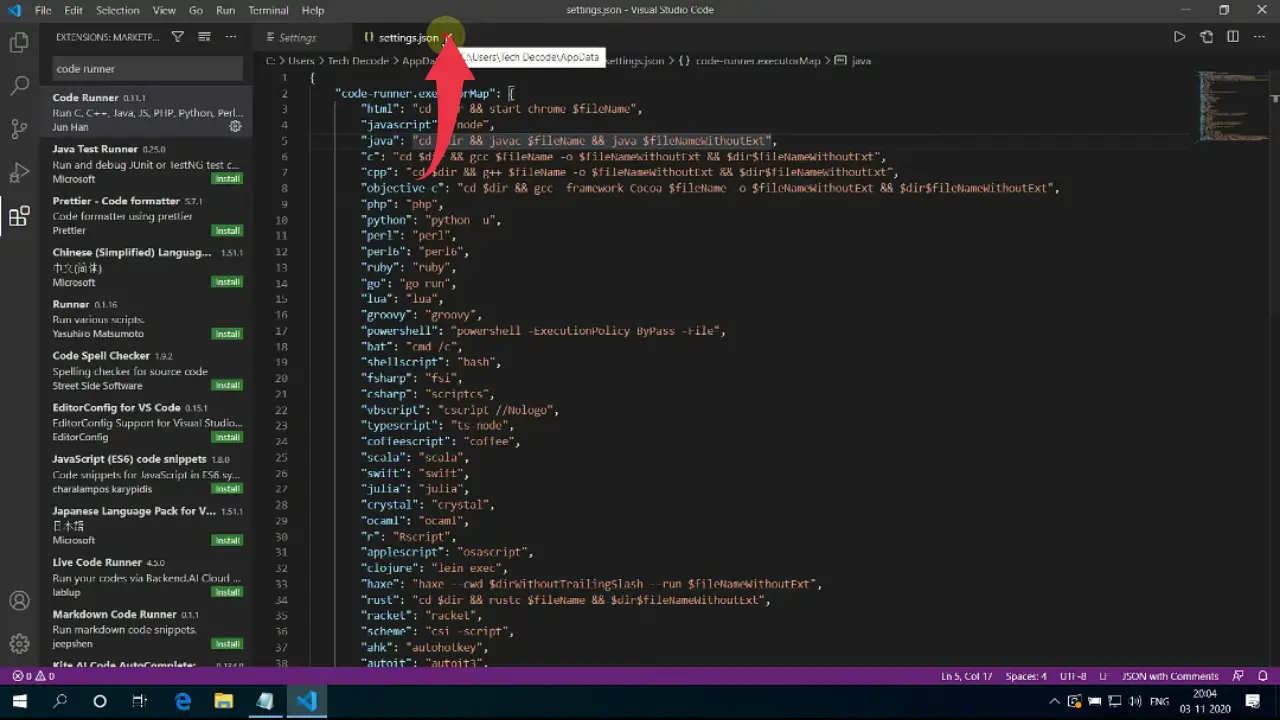
2) Now open code settings by clicking on file then preferences then settings .

3) After that click on the open setting JSON button to edit the code preferences in visual studio code.

4) In the JSON file type “ code-runner.executorMap ” within the curly braces and hit enter.

5) Again hit enter to create a new line and paste the below-provided snippet in the JSON file just like shown in the below image.
Make sure you have Google Chrome installed on your Windows 10 before continuing this step.
"html": "cd $dir && start chrome $fileName"

6) Now save the changes we’ve made by pressing “Ctrl +S ” and close all the windows open in visual studio code.
7) After that create a new file by pressing “ Ctrl+N ” and save it by any name you prefer. In our case, it’s “ subscribe.html “.
the key thing to note here is that you should always add a “. html ” extension to an HTML file otherwise vs code will not be able to detect the HTML file.

8) paste the below-provided HTML code, save the file by pressing “ Ctrl+S ” and press the small play button to run the HTML code, now you’ll be automatically redirected to Google Chrome and your designed webpage will be displayed.
Subscribe Now!

9) If you see something like the below image in Google Chrome then congrats you’ve successfully executed your HTML code.

Also Read: How to Run Javascript in Visual Studio Code on Windows 10
Ethix
I’m a coding geek interested in cyberspace who loves to write and read
You May Also Like
How to run HTML code in Visual Studio Code on Mac OS
How to run PHP in Visual Studio Code on Windows 11

How to Install Xampp on Windows 11
Leave a Reply Cancel reply
Top Programming Courses

5 Best Coursera Data Science Courses Online 2022
In today’s technologically driven society, data is the most valuable resource. It is crucial to any company’s performance since it
Настройка VSCode для работы с HTML
В прошлых статьях ( первая часть , вторая часть ) мы рассмотрели установку среды разработки VSCode под Windows 10 и добавили в неё поддержку языка C++. VSCode является универсальной IDE, благодаря наличию онлайн каталога с множеством расширений, позволяющих настроить среду как вам удобней. При этом её можно использовать для разработки на разных языках программирования. Данная среда может использоваться и для разработки HTML-страниц. Сегодня мы рассмотрим установку двух расширений Browser Preview и Live Server, которые позволяют создавать HTML-сайты не устанавливая отдельный web-сервер, и производить отладку и правку дизайна сайта не переключаясь между редактором и браузером!
Установка расширения Browser Preview

чтобы открыть окно Расширения. Нам потребуется установить расширения Browser Preview от автора Kenneth Auchenberg. Данное расширение позволяет вам организовывать просмотр страницы непосредственно в IDE, что очень полезно, при внесении в HTML-страницу множества мелких правок. Также нам понадобится расширение – Live Server от Ritwick Dey.
Установка расширения Live Server

Это по сути небольшой web-сервер не требующий долгой настройки и готовый к запуску по одному щелчку на кнопку! После установки Live Server обязательно закройте VSCode и запустите его снова.
Установка
Создание проекта
Давайте создадим тестовый проект для нашей страницы. Допустим, все проекты у нас будут храниться в папке d:\html Откроем консоль cmd.exe и введем команды:
d: mkdir d:\html\test1 cd d:\html\test1 code .Откроется новое окно VSCode, в котором уже открыта папка проекта test1:  Добавим в нее новый файл index.html Для этого нажмите на указанную кнопку и введите имя файла:
  Щелкните на файл, чтобы открыть его в редакторе. Давайте создадим простейшую страницу:
Это тест!
Проверка HTML-страницы

У нас есть проект и web-страница, пришло время её проверить. Сначала запустим Live Server, для этого просто нажмите кнопку Go Live: Откроется новое окно браузера и сервер будет запущен на порту

Закройте вкладку браузера, мы будем использовать Browser Preview
Создание конфигурации для запуска Browser Preview

Выберите меню Run -> Add configuration… Выберите пункт Browser Preview Будет создан файл launch.json замените его содержимое на:
Сохраните и закройте вкладку. Запустите Browser Preview, для этого нажмите F5 или на указанную кнопку, она появится после первого запуска конфигурации:  Откроется окно:
  . Нажмите на «Запустить test1…» Откроется вкладка с нашей страницей:
Работа с Browser Preview
Данное расширение очень удобно при разработке страниц с нуля, так как позволяет видеть изменения сразу после сохранения страницы. Давайте добавим текст на страницу:
Это тест!
1234 А это новый текст.

Нажмите Ctrl+S – страница будет сохранена и тут же обновиться вкладка с нашим сайтом в Browser Preview
Отладка сайта в браузере
Вы можете использовать внешний браузер для отладки сайта, запущенного в Live Server Запустите Google Chrome и откройте в нем ссылку http://localhost:5500 Я расположил окна рядом, для большей наглядности. Давайте добавим еще одну строку в html-файл:
Это тест!
1234 А это новый текст.
А этот текст еще новее.

Сохраним файл – содержимое обновится и в браузере, и во вкладке Browser Preview.
HTML in Visual Studio Code
Visual Studio Code provides basic support for HTML programming out of the box. There is syntax highlighting, smart completions with IntelliSense, and customizable formatting. VS Code also includes great Emmet support.
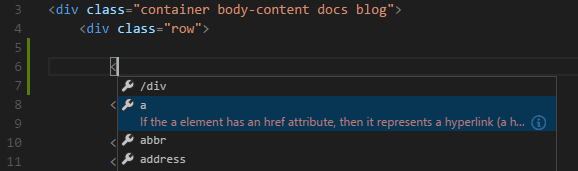
IntelliSense
As you type in HTML, we offer suggestions via HTML IntelliSense. In the image below, you can see a suggested HTML element closure