- Sudo apt update python
- Update Python on Windows
- Updating Python on Linux
- Update with Apt-Get
- Updating Python on MacOs
- Как обновить python на Ubuntu
- Подготавливаем данные с локальной версии
- Обновляем Ubuntu на сервере
- Обновляем python на сервере
- Меняем версию python в системе «по умолчанию»
- Устанавливаем новое окружение
- Install and Upgrade Python on Ubuntu
- Isn’t Python already installed?
- Install and Upgrade Python
- Python version in Ubuntu repositories is old?
- What should I do?
- I want updates!
- Using Deadsnakes PPA (if you really want the latest Python)
- Установка Python 3 в Ubuntu
- Установка Python в Ubuntu 20.04
- Установка Python 3.10 в Ubuntu
- Выводы
Sudo apt update python
In order to update python version on the terminal, you can use these commands depending on your operating system:
1#Linux 2 sudo apt update 3 sudo apt install python3.11 4 5 #MacOS 6brew install python
Here is a detailed guide about how to update python version in other operating systems. In this article, we are going to focus on how to install it on the terminal.
Update Python on Windows
To update Python on Windows you should download the Python version you want to upgrade to from python.org. In case you already have installed different Python versions and want to update the version of a virtual environment, you can do it by using the following command:
1python -m venv --upgrade VIRTUAL-ENVIRONMENT-PATH-HERE
To select which Python version we want to use, it’s as simple as as writing py -version-you-want-to-use , example:
1 py -3.8 #selects Python version 3.8 2 py -3.11 # Selects Python version 3.11
Updating Python on Linux
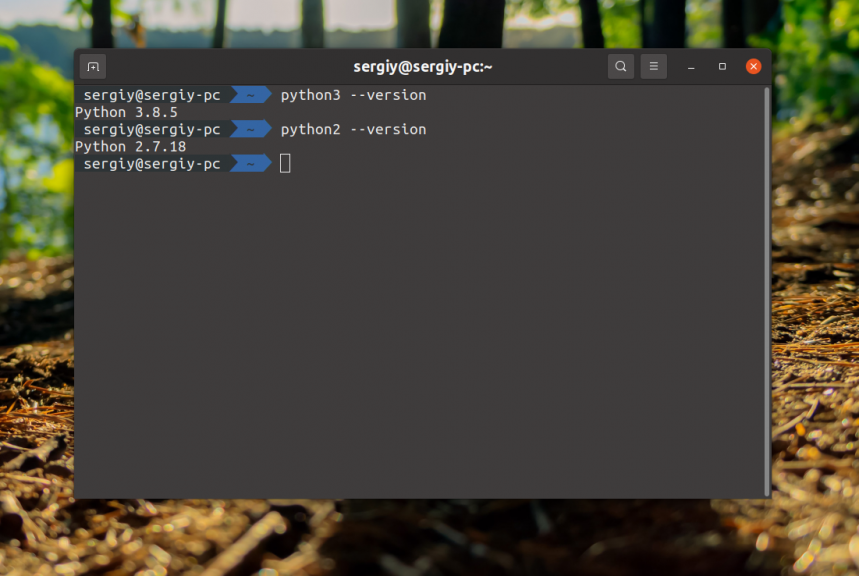
Before getting into upgrading Python, we need to know if it’s already installed (no use to upgrade something that doesn’t exist). To check if Python is installed type the following:
If there’s an installed version of Python, the output should show you the installed version like this:
If your computer doesn’t have Python installed, we need first to prepare our system to install Python, so we do the following:
1sudo apt update 2 sudo apt install software-properties-common
Once we have downloaded the necessary files to install Python latest version, we can install it using apt-get (recommended) or using the source code.
Update with Apt-Get
There’s no need to reinvent the wheel, Apt-Get it’s a package manager built in Linux that will make our life easier while installing. As a first step, let’s configure the deadsnakes PPA on the system by running the following command:
1sudo add-apt-repository ppa:deadsnakes/ppa
1sudo apt update 2 sudo apt install python3.9
Python is now updated, but still is pointing to the previously installed version. We need now to update this:
1 sudo update-alternatives --config python3
A list of options will be displayed and prompt to pick the Python version you want to point to, select it by writing the number corresponding to the version you want to use. To verify this selection, write:
Updating Python on MacOs
Updating Python on MacOs is more straight forward. In MacOs systems you can as well have different Python versions installed at the same time. This makes it simpler to update it by visiting python.org MacOs download page, select the installer to download and run it. If you are more of a Homebrew user, run the following commands:
Once the installation finishes, you’ll have the latest Python version installed which you can verify with the following code:
Как обновить python на Ubuntu
 Admin
Admin  30.10.2022
  Linux, Python, Ubuntu
Обновление на новые версии это всегда «весело». Вместе с новым функционалом понадобится убрать устаревшие функции, обновить потерявшие совместимость модули и в целом проделать большую работу.
Подготавливаем данные с локальной версии
Сначала обновляем версию локально, тестируем. Фиксируем изменения всех зависимостей командой:
Обновляем Ubuntu на сервере
Обновим систему и пакеты в ней:
Обновляем python на сервере
Если сразу запустить обновление, то возникнет ошибка:
sudo apt install python3.10
Чтение списков пакетов… Готово
Построение дерева зависимостей
Чтение информации о состоянии… Готово
E: Невозможно найти пакет python3.10
E: Не удалось найти ни один пакет с помощью шаблона «python3.10»
Сначала установим необходимые компоненты для добавления пользовательских PPA:
Добавим PPA-репозиторий deadsnakes/ppa в список источников диспетчера пакетов APT:
Запустим обновление APT для обновления менеджера пакетов — появится новый импортированный PPA:
Теперь можем установить новую версию python 3.10:
Проверим установленную версию:
Также проверим текущую версию по умолчанию:
Установим дополнительные модули стандартной библиотеки (venv):
Также могут пригодиться и другие модули:
sudo apt install python3.10-distutils -y
sudo apt install python3.10-lib2to3 -y
sudo apt install python3.10-gdbm -y
sudo apt install python3.10-tk -y
Многие дополнительные модули python нужны для работы библиотек, без них они не установятся и будут вылезать ошибки.
Меняем версию python в системе «по умолчанию»
По умолчанию python будет указывать на старую версию.
Например, Python 3 указывает на Python 3.8. Это значит, что когда мы запустим python3, он будет выполняться как python 3.8, мы же хотим выполнить его как python 3.10.
Для этого добавим альтернативы:
sudo update-alternatives —install /usr/bin/python3 python3 /usr/bin/python3.8 1
sudo update-alternatives —install /usr/bin/python3 python3 /usr/bin/python3.10 2
Устанавливаем новое окружение
Переименовываем старую директорию окружения (мы должны находится в директории сайта с виртуальным окружением):
Затем в этой директории создаем новое виртуальное окружение:
Install and Upgrade Python on Ubuntu

The Python language has been gaining popularity for several years, both as a programming and a scripting language.
Ubuntu and almost every other Linux distribution have been shipping with some version of Python for quite a long time.
You can check the version of python with the following command:
Running the command will show the version of Python v3 that you have installed.
Isn’t Python already installed?
Well yes, when you install Ubuntu, a version of Python is automatically installed as most system utilities also depend on it.
The problem here is that many people try to run python directly and they will be surprised when their Ubuntu system throws an error:
The thing is that in Ubuntu, the Python version 3.x is installed and its binary is named python3, not python.
Sometimes, the version that is pre-installed, or the latest version that is available from Ubuntu’s repositories is older than the one found on python.org.
To check the version of Python that is installed, run the following command in your terminal:
$ python3 --version Python 3.10.4At the time of writing this article, the latest version found on python.org is 3.10.4, which is exactly what I have installed from the first-party repository.
Weirdly, if Python is not found, you might get a similar error:
$ python3 --version python3: command not found![]()
Install and Upgrade Python
In case you do not have Python installed, fret not. You can easily install it from Ubuntu’s software repositories.
Use the apt package manager to install Python. Below is the command to run:
sudo apt update sudo apt install python3The first command will update the local package list, in case it was out of sync. The second command will install whatever the latest version of Python v3 is available at the moment.
Even if you have Python installed, the ‘apt’ package manager will install a newer version of Python, if available. This goes without saying, the dependencies will also be installed and/or upgraded as well.
Ubuntu takes care of the Python version it provides. If there are security or maintenance updates, you get them with the system updates. You just have to update your system to get Python upgrades (if there are any from Ubuntu).
Python version in Ubuntu repositories is old?
With the announcement of a new Annual Release Cycle for Python, a new version of Python will be released every year, as opposed to every 1.5 years.
This means the version available in repositories for Ubuntu’s LTS versions will not stay «latest and greatest» after a while.
This does not mean that you stop receiving updates to Python altogether. Even if the version of Python is old, you will get all the necessary security updates, including any additional bug fixes.
What should I do?
I recommend you use the version of Python provided by Ubuntu. As previously, Canonical (parent company of Ubuntu) will continue providing necessary updates to your stable version of Python. It includes up-to-date bug fixes and security updates for Python.
I want updates!
In any case, if you want to install a newer version of Python than what is available in Ubuntu’s repositories, you have a few options.
The easiest option is to use a third-party PPA. That way, you are out of the hassle of applying necessary patches and compiling every time a new version of Python is released.
Using Deadsnakes PPA (if you really want the latest Python)
The Deadsnakes PPA contains a more recent version of Python packaged for Ubuntu. This means you can install a newer version of Python even if the first-party repositories contain an older version.
A disclaimer from PPA maintainer themselves:
There is no guarantee of timely updates in case of security problems or other issues. If you want to use them in a security-or-otherwise-critical environment (say, on a production server), you do so at your own risk.
Before adding a PPA, the ‘software-properties-common’ package needs to be installed first. Do that with the following command:
sudo apt install software-properties-commonOnce the apt repositories manager package is installed, we can now easily add the Deadsnakes PPA. The command to do so is given below:
sudo add-apt-repository ppa:deadsnakes/ppaThe PPA is added. Now we need to update the local package list.
Finally, install the latest version of Python with the following command:
That will install the latest version of Python that is available.
Once the latest version of Python is installed, check it using the following command:
Ensure that the command’s output aligns with the version of Python you are in need of.
Well, that’s about it. You get to install Python version of your choice on Ubuntu. Enjoy scripting with Python.
Установка Python 3 в Ubuntu
Python — это один из самых популярных языков программирования для Linux. На нем написано множество различных инструментов и библиотек. Кроме того, Python популярен среди разработчиков, потому что на нем очень просто и быстро программировать, и вообще, его просто освоить.
По умолчанию в Ubuntu уже поставляется интерпретатор Python, но сейчас в официальных репозиториях доступна только версия 3.5 и версия 2.7 для совместимости со старыми скриптами. Но самая новая версия на данный момент — 3.8. Однако уже доступны и более новые версии. В этой статье мы рассмотрим как установить Python 3 в Ubuntu 20.04.
Установка Python в Ubuntu 20.04
Сначала посмотрите какая версия Python установлена в вашей системе. Для этого выполните команду:
Новая версия, Python 3.9 доступна в репозиториях universe. Поэтому вам нет необходимости добавлять PPA, достаточно просто обновить систему и установить пакет нужной версии. Для этого наберите:
sudo apt update
sudo apt install python3.9
После завершения установки снова можно проверить версию:
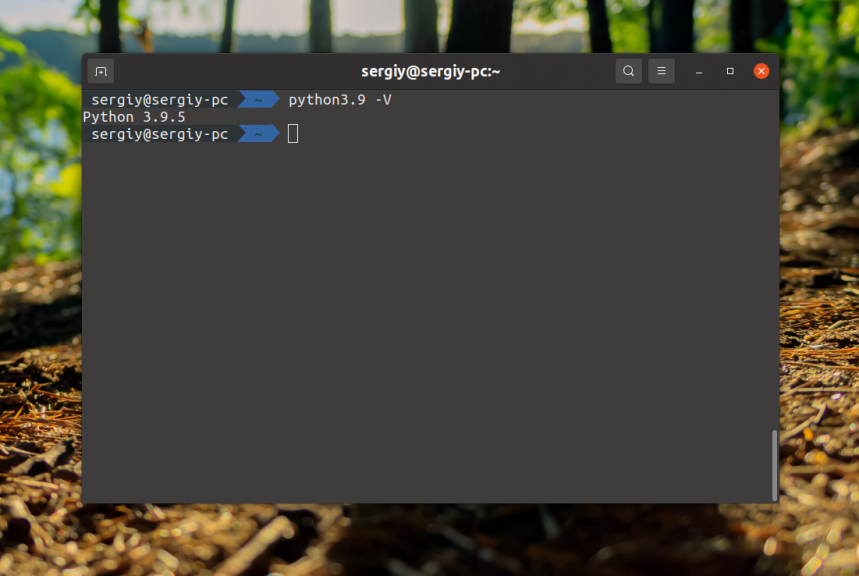
Обратите внимание, что старая версия никуда не делась, она по-прежнему доступна по имени python3, а новая теперь может быть загружена командой python 3.9. Если вы хотите использовать эту версию вместо 3.8 для запуска всех программ нужно выбрать её в качестве версии по умолчанию. Но я бы не рекомендовал этого делать. Множество системных программ написаны на Python и протестированы именно с версией, поставляемой по умолчанию. Если вы измените версию что-то может перестать работать. Если вы всё же решились надо сначала добавить альтернативы:
sudo update-alternatives —install /usr/bin/python3 python3 /usr/bin/python3.8 1
sudo update-alternatives —install /usr/bin/python3 python3 /usr/bin/python3.9 2
update-alternatives —list python3
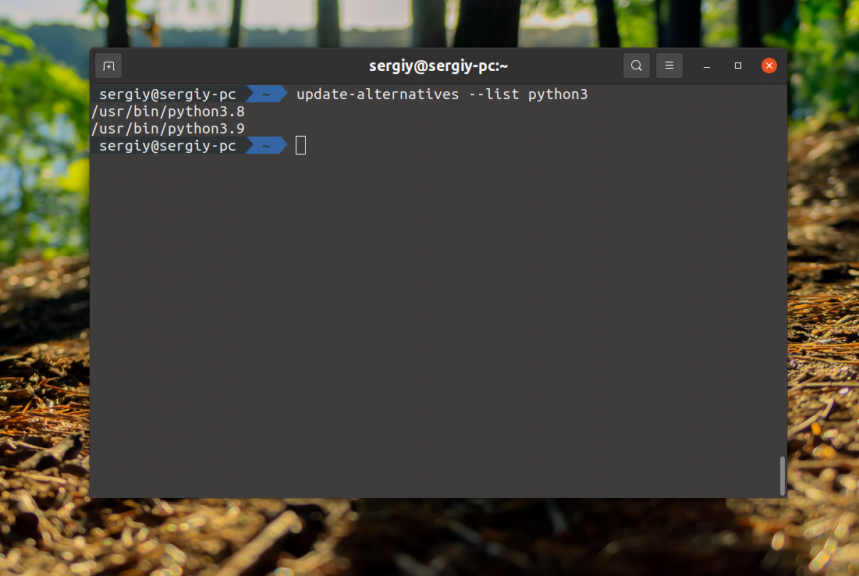
Теперь мы можем выбрать нужную нам версию и переключаться по необходимости. Для настройки используйте команду config:
sudo update-alternatives —config python3
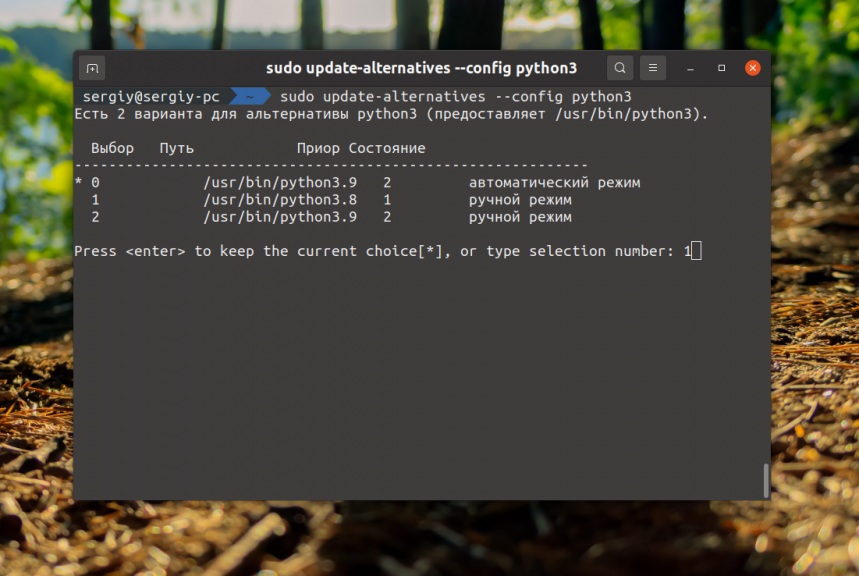
В запросе ввода нужно указать номер программы, которую следует использовать по умолчанию.
Установка Python 3.10 в Ubuntu
На момент написания статьи Python 3.10 ещё находится в разработке и дата выпуска намечена на октябрь 2021 года. Однако альфа версия уже доступна и вы можете её установить и потестировать если захотите.
sudo add-apt-repository ppa:deadsnakes/ppa
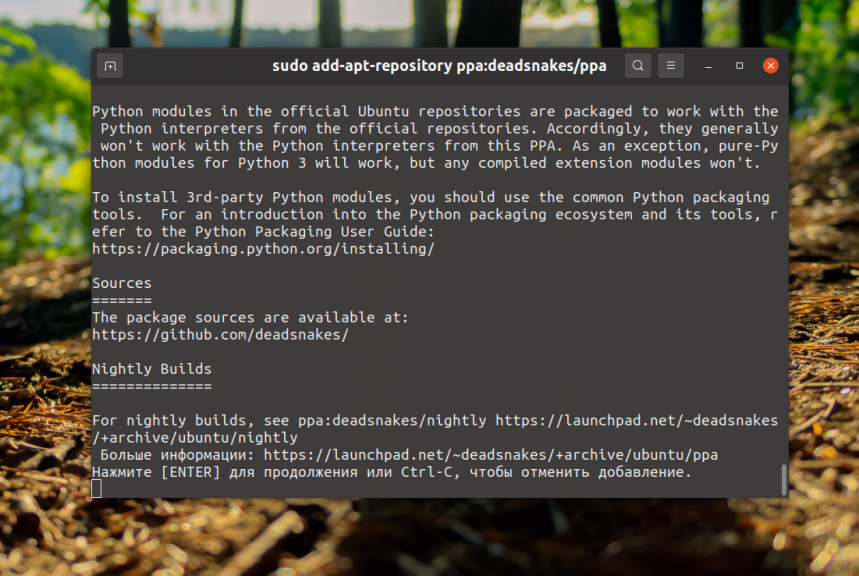
Установка Python 3.10 в Ubuntu 20.04 выполняется командой:
sudo apt install python3.10
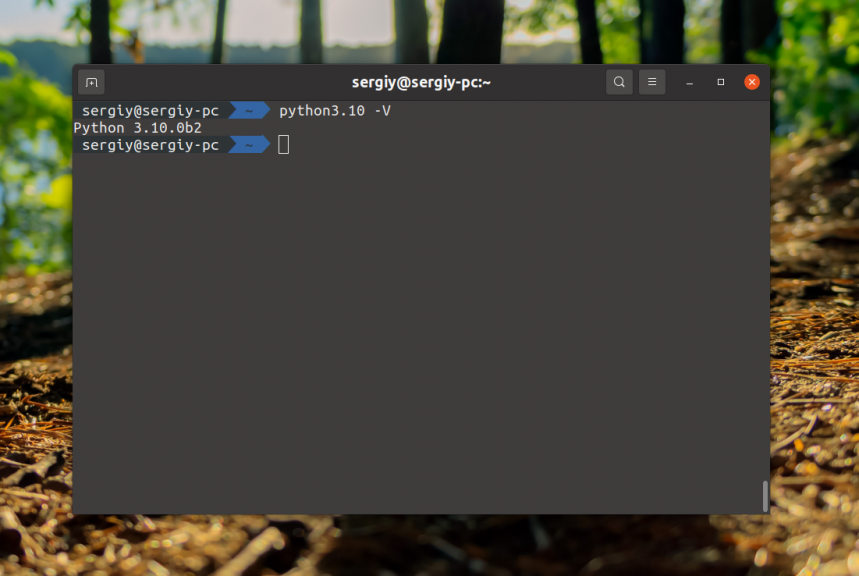
Готово, Python установлен и вы можете тестировать его и настраивать версии как описано выше. Для правильно ли прошла установка Python 3 Ubuntu, опять же выполните:
Выводы
В этой статье мы рассмотрели как установить Python на Ubuntu 20.04 и более ранних версий. Рассмотрели как выполняется установка из официальных репозиториев, из PPA и выбор версии. С выбором версии будьте аккуратны, не трогайте python, только python3, как я уже говорил, на Python 2.7 написано множество системных инструментов, и если вы попытаетесь запустить их не той версией интерпретатора, то ничего не получится. Если у вас остались вопросы, спрашивайте в комментариях!
Обнаружили ошибку в тексте? Сообщите мне об этом. Выделите текст с ошибкой и нажмите Ctrl+Enter.