- HTML Canvas — Adding Styles
- Styles to Lines
- Example
- Output
- Example
- Output
- Example
- Output
- Gradients
- Example 1 (linear gradient)
- Output
- Example 2 (radial-gradient)
- Output
- Example 3 (conic gradient)
- Output
- Patterns
- createPattern(image, type)
- Example
- Output
- Shadows
- Example
- Output
- Example
- Output
- HTML5 Canvas — Styles and Colors
- A fillStyle Example
- A strokeStyle Example
- Modifying the Canvas with CSS
- Assigning a Border and Background
- A Pop-Up Canvas—Animating Position and Opacity
HTML Canvas — Adding Styles
Similar to colors we can also add various stlyes to difference shapes available in HTML5 Canvas. Let us see them one by one.
Styles to Lines
One way to draw a line in HTML5 is to use the lineTo path element. We can also beautify these lines using the various style properties.
Since most of the objects we create on canvas are drawn using lines we can stryle these objects using the line properties. The properties that are used for styling lines are listed in the below table.
The width of the lines drawn can be assigned using this property. The thickness value of any line by default is 1 unit.
This property is generally used to style the ends of the line. There are three accepted input values for the property which are ‘butt’, ‘round’ and ‘square’. The default value is always ‘butt’.
When two lines are about to be joined, this property can be used to set the appearance of the corners where lines are joined. The values accepted by the property are ‘miter’, ‘bevel’, and ‘round’. The default value of the property is ‘miter’. The property does not affect the lines as there is no joining area added.
The thickness of the junction is changed using the property when two angles join at a sharp angle. This property determines the distance of outside connection to which inside connection point can be placed. The default value is 10 but the possible values completely depend on the lines used.
This specifies the dash pattern for the lines. This is used to make dotted and dash lined patterns. We can also use it in setLineDash() method and create animation effects.
Apart from these properties, two other methods can be used to apply styles for lines.
- The getLineDash() method − This returns the current line-dash pattern containing an even number of positive numbers.
- The setLineDash() method − To set the dash lines to create a shape or pattern using Canvas, this method is used. It takes segment array as inputs which consist of some line values. If nothing is given, a simple stroked line is given as output.
Example
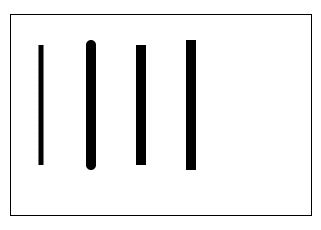
Following code demonstrates lineWidth and lineCap properties. The implementation is given below.
Output
The output for the following code is given below.
Example
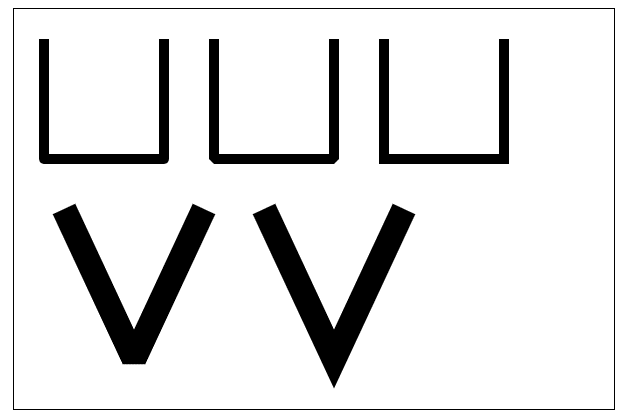
Following code demonstrates the lineJoin and miterlimit properties. The miterlimit property is demonstrated with values ‘2 units’ and ’20 units’ respectively. The code is given below.
Output
Following code gives the output as
Example
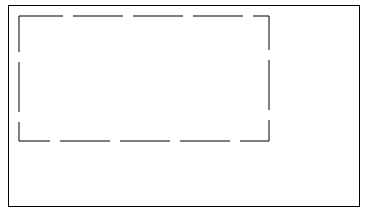
The following example uses setLineDash method and lineDashOffset property value to specify dish patterns for drawing shapes using lines. The implementation code is given below.
Output
The code returns the output as shown below. Paste the code in the editor to see the animation effect.
Gradients
We can simply fill and stroke shapes using gradients just like drawing a shape on a Canvas element. There are three types of gradients available in Canvas, they are linear, radial, and conic. We can create gradient objects using three methods. Each method is listed in the below table.
createLinearGradient(x1, y1, x2, y2)
createRadialGradient(x1, y1, r1, x2, y2, r2)
This method is used for creating a radial gradient object. It takes two circles as its parameters where the first circle radius is r1 and the center co-ordinates are (x1,y1). The second circle radius is r2 and its center co-ordinates are (x2,y2).
createConicGradient(angle, x, y)
To create a conic gradient object, this method is used which takes the starting angle in radians and the position point (x, y) as its parameters.
After creating a canvas gradient object, we can color it using the addColorStop() method. Its syntax and parameters are given below.
Canvas.addColorStop(position, color) − It creates a color stop for the canvas object created. The parameter position takes values between 0 and 1 which defines the position of color in the gradient. The color parameter is the color input that is rendered to the gradient object. There is no limit on the number of color stops for the single gradient object.
Example 1 (linear gradient)
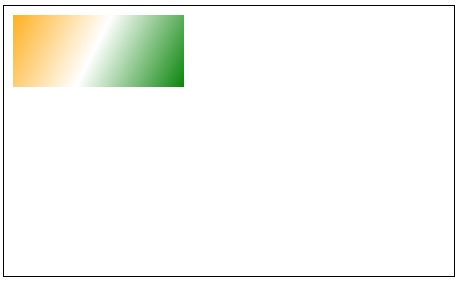
Following example shows how linear gradient is implemented. The code is given below.
Output
The linear gradient object formed from the above code is
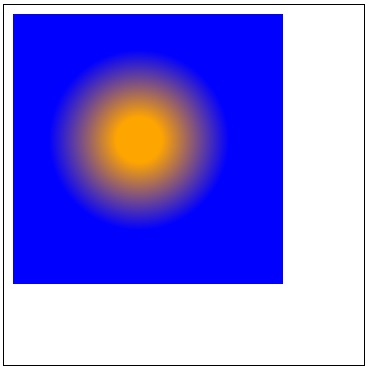
Example 2 (radial-gradient)
Following code demonstrates how a radial gradient is implemented in the Canvas element. We take two circles have same centers but different radius and colors to show the gradients.
function gradients()
Output
The output generated by the above code is
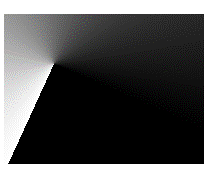
Example 3 (conic gradient)
The following example shows how conic gradient can build a gradient object that looks like a 3D element. It is actually a 2D shape. The implementation is given below.
function gradients()
Output
The gradient object formed for the above code is
Patterns
Paintings are drawn on Canvas. Hence the name Canvas element is coined in HTML5. The Canvas element can be used to draw and design various patterns using pattern methods which are very attractive and has huge applications. It is commonly used in interior house designing. Image patterns can be drawn by this property on the Canvas element. The method used to create a pattern is given below
createPattern(image, type)
This method creates a Canvas pattern object which generates the image many times in the given space inside the Canvas. The parameter ‘image’ takes an image, and video as an input and makes it a pattern. There are four possible string inputs for the ‘type’ parameter and are listed below
- repeat − this prints the input image in both horizontal and vertical positions.
- repeat-x − the image is only repeated horizontally across the Canvas element.
- repeat-y − the image is repeated vertically but not horizontally.
- no-repeat − the image is not repeated and is used only once.
This method only works when the image is loaded before it is called. If the image is not loaded, the pattern is drawn incorrectly which may lead to some errors resulting in not displaying the pattern.
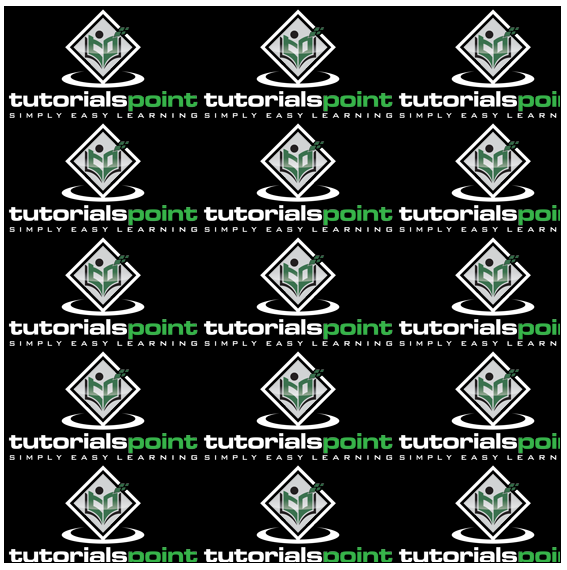
Example
Let us create a pattern using the method. Following shows the implementation
#canvas
Output
The pattern generated by the above code is given below
Shadows
Shadows make the shapes drawn inside the Canvas element more animative. Four properties can be applied to the Canvas element to use shadows. They are listed below
- shadowOffsetX − The property takes the float value and indicates the horizontal distance of the shadow from the shape. The default value is 0 and the property value does not get affected by the transformation matrix. Using negative values makes the shadow move to the left of the shape.
- shadowOffsetY − This property indicates at how much distance the shadow must be extended vertically. It takes float values, and the default value is 0. Using negative values makes the shadow move to the top. Like the above property, it is not affected by the transformation matrix.
- shadowBlur − It indicates how blurred the shadow should be. It takes the float value as the input. The default value is 0 and it does not indicate the pixel numbers.
- shadowColor − It takes standard CSS color as the input and applies it for the shadow effect. It is transparent black by default.
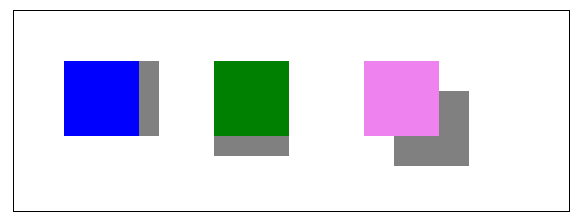
Example
The following example demonstrate shadow offset X and Y properties of shadow in three different shapes. The first square shows how shadowOffsetX is used, second square shows how shadowOffsetY is implemented, and the third square uses both the properties. The code is given below.
body
Output
The shadows formed for the above code is
Example
Following code implements the shadowBlur and shadowColor properties to the Canvas element.
body function shadow()
Output
The output for the above code is
HTML5 Canvas — Styles and Colors
This attribute represents the color or style to use inside the shapes.
This attribute represents the color or style to use for the lines around shapes.
By default, the stroke and fill color are set to black which is CSS color value #000000.
A fillStyle Example
Following is a simple example which makes use of the above-mentioned fillStyle attribute to create a nice pattern.
#test
The above example would produce the following result −
A strokeStyle Example
Following is a simple example which makes use of the above-mentioned fillStyle attribute to create another nice pattern.
#test
The above example would produce the following result −
Modifying the Canvas with CSS
Because the canvas is an HTML element, you can use CSS styles to modify its position, assign it a background color or image, add a border, and so on.
In Safari and other WebKit-based browsers, you can use WebKit transitions to smoothly animate changes in CSS properties.
Because the canvas can have a transparent background, you can use CSS to create animated graphics that roam freely across the webpage.
Assigning a Border and Background
The example in Listing 12-1 uses CSS to assign a background image and a border to the canvas element, as illustrated in Figure 12-1 .
A CSS background does not appear in the canvas bitmap, so it does not interfere with image processing.
The clearRect(x,y, width,height) method clears a section of the canvas, revealing the CSS background, allowing you to use a background image and clear small areas of the canvas quickly, without redrawing the background image.

Listing 12-1 Adding a CSS background and border
background-image: url('cork.png'); var can = document.getElementById("can"); A Pop-Up Canvas—Animating Position and Opacity
You can make the canvas element into a pop-up that responds to a hover, click, or rollover event on another webpage element.
Begin by using CSS to position the canvas element offscreen or make it transparent. When the event occurs that triggers the pop-up, use CSS to change the canvas top, left, or opacity properties to make the canvas appear at the appropriate place on the page.
If you set the position and opacity properties as -webkit-transition properties, any changes are automatically animated in Safari and other WebKit-based browsers. In non-WebKit-based browsers, the changes take place immediately and the canvas simply appears in the specified position.
The example in Listing 12-2 creates a canvas and uses CSS to position it offscreen and make it transparent by default. Touching or clicking and holding a particular text element on the page changes the class name of the canvas. The CSS class definition makes the canvas visible and positions it on the page. A mouseup event anywhere on the page changes the canvas’s class name to hide it again.
All CSS properties are set as webkit-transition properties for the canvas element, so the canvas fades in and out over 1 second in Safari. The canvas is given a CSS background image and a border, and animates a bouncing ball, just for fun.
Figure 12-2 Animating a pop-up canvas
Listing 12-2 Making the canvas a pop-up