- Стилизация кнопок CSS
- Скругленная кнопка
- Результат:
- Двойная рамка
- Результат:
- Yahoo
- Результат:
- Результат:
- Результат:
- Результат:
- Вконтакте
- Результат:
- Habr
- Результат:
- Bootstrap
- Результат:
- Результат:
- Комментарии 1
- Другие публикации
- CSS Buttons
- Example
- Button Sizes
- Example
- Example
- Rounded Buttons
- Example
- Colored Button Borders
- Example
- Hoverable Buttons
- Example
- Shadow Buttons
- Example
- Disabled Buttons
- Example
- Button Width
- Example
- Button Groups
- Example
- Bordered Button Group
- Example
- Vertical Button Group
- Example
- Button on Image
- Animated Buttons
- Example
- Example
- Example
- Example
- Styling buttons, the right way
- Resetting styles
- Writing a “button” CSS component
- Styling hover and active states
- Managing focus styles
- What are focus styles?
- Custom focus styles
- Sticky focus styles
Стилизация кнопок CSS
Стилизация ссылок и кнопок на примере разных сайтов с поддержкой разными состояний – наведение курсора, нажатие, попадание в фокус и заблокированное состояние элемента.
Скругленная кнопка
.btn < display: inline-block; box-sizing: border-box; padding: 0 25px; margin: 0 15px 15px 0; outline: none; border: 1px solid #fff; border-radius: 50px; height: 46px; line-height: 46px; font-size: 14px; font-weight: 600; text-decoration: none; color: #444; background-color: #fff; box-shadow: 0 4px 6px rgb(65 132 144 / 10%), 0 1px 3px rgb(0 0 0 / 8%); cursor: pointer; user-select: none; appearance: none; touch-action: manipulation; vertical-align: top; transition: box-shadow 0.2s; >.btn:focus-visible < border: 1px solid #4c51f9; outline: none; >.btn:hover < transition: all 0.2s; box-shadow: 0 7px 14px rgb(65 132 144 / 10%), 0 3px 6px rgb(0 0 0 / 8%); >.btn:active < background-color: #808080; >.btn:disabled
Результат:
Двойная рамка
.btn < display: inline-block; box-sizing: border-box; padding: 1px; margin: 0 15px 15px 0; outline: none; border: 1px solid #F18230; border-radius: 25px; height: 46px; line-height: 0; font-size: 14px; font-weight: 500; text-decoration: none; color: #fff; background-color: #fff; position: relative; overflow: hidden; vertical-align: top; cursor: pointer; user-select: none; appearance: none; touch-action: manipulation; >.btn span < display: block; box-sizing: border-box; padding: 0 25px; height: 42px; line-height: 38px; border: 1px solid #F18230; border-radius: 25px; font-size: 14px; color: #FFFFFF; background: linear-gradient(180deg, rgba(255, 255, 255, 0.25) 0%, rgba(255, 255, 255, 0) 100%), #F18230; text-align: center; font-weight: 600; >.btn:focus-visible < box-shadow: 0 0 0 3px lightskyblue; >.btn:hover span < background-color: #fba768 >.btn:active span < background-color: #c17237 !important; >.btn:disabled
Результат:
Yahoo
.btn < display: inline-block; box-sizing: border-box; padding: 0 20px; margin: 0 15px 15px 0; outline: none; border: none; border-radius: 4px; height: 32px; line-height: 32px; font-size: 14px; font-weight: 500; text-decoration: none; color: #fff; background-color: #3775dd; box-shadow: 0 2px #21487f; cursor: pointer; user-select: none; appearance: none; touch-action: manipulation; vertical-align: top; >.btn:hover < background-color: #002fed; >.btn:active < background-color: #2f599e !important; >.btn:focus-visible < box-shadow: 0 0 0 3px lightskyblue; >.btn:disabled
Результат:
const buttons = document.querySelectorAll(".btn"); buttons.forEach((button) => < button.onclick = function(e)< let x = e.clientX - e.target.offsetLeft; let y = e.clientY - e.target.offsetTop; let ripple = document.createElement("span"); ripple.style.left = `$px`; ripple.style.top = `$px`; this.appendChild(ripple); setTimeout(function()< ripple.remove(); >, 600); > >);.btn < display: inline-block; box-sizing: border-box; padding: 0 15px; margin: 0 15px 15px 0; outline: none; border: none; border-radius: 4px; height: 36px; line-height: 36px; font-size: 14px; font-weight: 500; text-decoration: none; color: #fff; background-color: #1a73e8; position: relative; overflow:hidden; vertical-align: top; cursor: pointer; user-select: none; appearance: none; touch-action: manipulation; z-index: 1; >.btn span < position: absolute; background: #fff; transform: translate(-50%, -50%); border-radius: 50%; pointer-events: none; animation: btn_ripples 0.6s linear infinite; >@keyframes btn_ripples < 0% < width: 0px; height: 0px; opacity: 0.5; >100% < width: 1000px; height: 1000px; opacity: 0; >> .btn:hover < box-shadow: 0 1px 2px 0 rgb(26 115 232 / 45%), 0 1px 3px 1px rgb(26 115 232 / 30%); background-color: #297be6; >.btn:active < box-shadow: 0 1px 2px 0 rgb(26 115 232 / 45%), 0 2px 6px 2px rgb(26 115 232 / 30%); background-color: #1a73e8 !important; >.btn:focus-visible < box-shadow: 0 0 0 3px lightskyblue; >.btn:disabled
Результат:
.btn < display: inline-block; box-sizing: border-box; padding: 0 24px; margin: 0 15px 15px 0; outline: none; border: none; border-radius: 3px; height: 37px; line-height: 37px; font-size: 14px; text-transform: uppercase; font-weight: normal; text-decoration: none; color: #07bc4c; background-color: #fff; cursor: pointer; user-select: none; appearance: none; touch-action: manipulation; transition: box-shadow .18s ease-out,background .18s ease-out,color .18s ease-out; >.btn:focus-visible < box-shadow: 0 0 0 3px lightskyblue; >.btn:hover < box-shadow: 0 1px 1px 0 #cfcfcf, 0 2px 5px 0 #cfcfcf; >.btn:active < background-color: #efefef !important; >.btn:disabled < background-color: #eee; color: #444; pointer-events: none; >.btn-2 < display: inline-block; box-sizing: border-box; padding: 0 24px; margin: 0 15px 15px 0; outline: none; border: none; border-radius: 3px; height: 37px; line-height: 37px; font-size: 14px; text-transform: uppercase; font-weight: normal; text-decoration: none; color: #fff; background-color: #05cd51; cursor: pointer; user-select: none; appearance: none; touch-action: manipulation; transition: box-shadow .18s ease-out,background .18s ease-out,color .18s ease-out; >.btn-2:focus-visible < box-shadow: 0 0 0 3px lightskyblue; >.btn-2:hover < box-shadow: 0 1px 1px 0 #cfcfcf, 0 2px 5px 0 #cfcfcf; >.btn-2:active < background-color: #058c38 !important; >.btn-2:disabled
Результат:
.btn < display: inline-block; box-sizing: border-box; padding: 0 20px; margin: 0 15px 15px 0; outline: none; border: none; border-radius: 6px; height: 40px; line-height: 40px; font-size: 17px; font-weight: 600; text-decoration: none; color: #385898; background-color: #e7f3ff; cursor: pointer; user-select: none; appearance: none; touch-action: manipulation; >.btn:focus-visible < box-shadow: 0 0 0 2px #666; >.btn:hover < background-color: #DBE7F2; >.btn:active < transform: scale(0.96); >.btn:disabled
Результат:
Вконтакте
.btn < display: inline-block; box-sizing: border-box; padding: 0 16px; margin: 0 15px 15px 0; outline: none; border: none; border-radius: 4px; height: 30px; line-height: 30px; font-size: 12.5px; font-weight: normal; text-decoration: none; vertical-align: top; color: #55677d; background-color: #dfe6ed; cursor: pointer; user-select: none; appearance: none; touch-action: manipulation; overflow: hidden; >.btn:focus-visible < box-shadow: 0 0 0 3px lightskyblue; >.btn:hover < opacity: 0.88; >.btn:active < line-height: 32px; >.btn:disabled < pointer-events: none; opacity: 0.65; >.btn-2 < display: inline-block; box-sizing: border-box; padding: 0 16px; margin: 0 15px 15px 0; outline: none; border: none; border-radius: 4px; height: 30px; line-height: 30px; font-size: 12.5px; font-weight: normal; text-decoration: none; vertical-align: top; color: #fff; background-color: #5181b8; cursor: pointer; user-select: none; appearance: none; touch-action: manipulation; overflow: hidden; >.btn-2:focus-visible < box-shadow: 0 0 0 3px lightskyblue; >.btn-2:hover < opacity: 0.88; >.btn-2:active < line-height: 32px; >.btn-2:disabled
Результат:
Habr
.btn < display: inline-block; box-sizing: border-box; padding: 0 13px; margin: 0 15px 15px 0; outline: none; border: 1px solid #a4afba; border-radius: 3px; height: 32px; line-height: 32px; font-size: 14px; font-weight: 500; text-decoration: none; color: #838a92; background-color: #fff; cursor: pointer; user-select: none; appearance: none; touch-action: manipulation; >.btn:focus-visible < box-shadow: 0 0 0 3px lightskyblue; >.btn:hover < border-color: #65a3be; color: #4e879c; >.btn:active < border-color: #78a2b7 !important; color: #3a728b !important; >.btn:disabled < background-color: #eee; color: #444; pointer-events: none; >.btn-2 < display: inline-block; box-sizing: border-box; padding: 0 13px; margin: 0 15px 15px 0; outline: none; border: 1px solid transparent; border-radius: 3px; height: 32px; line-height: 32px; font-size: 14px; font-weight: 500; text-decoration: none; color: #fff; background-color: #65a3be; cursor: pointer; user-select: none; appearance: none; touch-action: manipulation; >.btn-2:focus-visible < box-shadow: 0 0 0 3px lightskyblue; >.btn-2:hover < border-color: transparent; background-color: #4986a1; color: #fff; >.btn-2:active < border-color: #6f9cbc !important; background-color: #367089 !important; >.btn-2:disabled
Результат:
Bootstrap
.btn < display: inline-block; box-sizing: border-box; padding: 0 15px; margin: 0 15px 15px 0; outline: none; border: 1px solid #6c757d; border-radius: 5px; height: 38px; line-height: 38px; font-size: 14px; font-weight: 600; text-decoration: none; color: #6c757d; background-color: #fff; cursor: pointer; user-select: none; appearance: none; touch-action: manipulation; >.btn:focus < box-shadow: 0 0 0 3px rgb(108 117 125 / 50%); >.btn:hover < color: #fff; background-color: #6c757d; border-color: #6c757d; >.btn:active < color: #fff; background-color: #6c757d; border-color: #6c757d; >.btn:disabled < pointer-events: none; opacity: 0.65; >.btn-2 < display: inline-block; box-sizing: border-box; padding: 0 15px; margin: 0 15px 15px 0; outline: none; border: 1px solid #7952b3; border-radius: 5px; height: 38px; line-height: 38px; font-size: 14px; font-weight: 600; text-decoration: none; color: #fff; background-color: #7952b3; cursor: pointer; user-select: none; appearance: none; touch-action: manipulation; >.btn-2:focus < box-shadow: 0 0 0 3px rgb(121 82 179 / 25%); >.btn-2:hover < background-color: #61428f; border-color: #61428f; >.btn-2:active < background-color: #61428f !important; border-color: #61428f !important; >.btn-2:disabled
Результат:
body < padding: 15px 0; >.btn < text-decoration: none; color: #6b5770; background-image: linear-gradient(90deg, #fd7f34, #bd155b); display: inline-block; padding: 14px 30px; border: 1px solid; position: relative; z-index: 0; border-radius: 5px; box-sizing: border-box; margin: 0 15px 15px 0; outline: none; cursor: pointer; user-select: none; appearance: none; touch-action: manipulation; >.btn:before < content: ''; position: absolute; left: -2px; top: -2px; width: calc(100% + 4px); height: calc(100% + 4px); background: linear-gradient(90deg, #fd7f34, #bd155b); z-index: -2; transition: .4s; border-radius: 5px; >.btn:after < content: ''; position: absolute; left: 0; top: 0; width: 100%; height: 100%; background: linear-gradient(90deg, #fff, #fff); z-index: -1; transition: .4s; border-radius: 4px; >.btn:hover < color: #fff; transition: .3s; >.btn:hover:after < background: linear-gradient(90deg, #fd7f34, #bd155b); >.btn:active:after < background: linear-gradient(90deg, #d96d2d, #760f3a); >.btn:focus-visible < box-shadow: 0 0 0 3px #fd7f34; >.btn:disabled < pointer-events: none; >.btn:disabled:before
Результат:
Комментарии 1
Авторизуйтесь, чтобы добавить комментарий.
Другие публикации
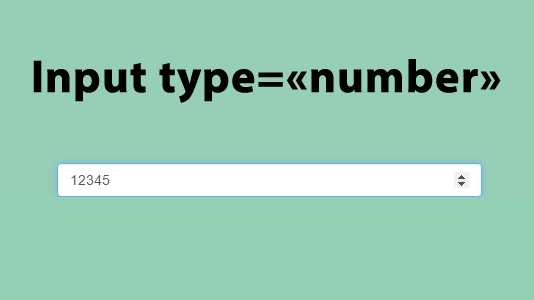
В HTML5 появилось специальное поле input с атрибутом type=number для вода чисел. Рассмотрим его возможности.

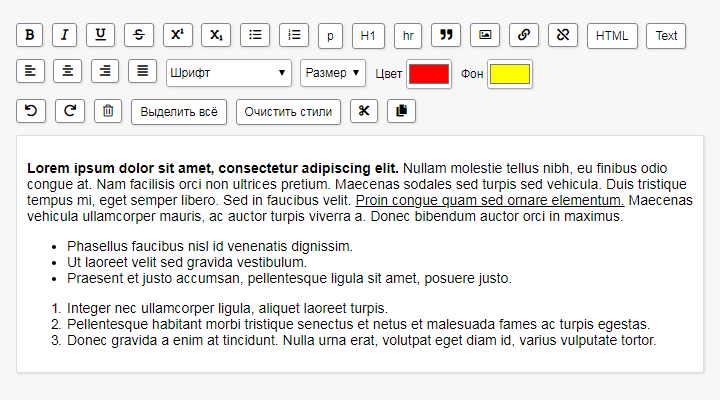
Если добавить атрибут contenteditable к элементу, его содержимое становится доступно для редактирования пользователю, а.

Ниже приведенная функция getPosition() получает текущие координаты курсора. Используя ее в разных jQuery событиях можно получить координаты клика или координаты курсора когда он находится над.
CSS Buttons
Use the background-color property to change the background color of a button:
Example
Button Sizes
Use the font-size property to change the font size of a button:
Example
Use the padding property to change the padding of a button:
10px 24px 12px 28px 14px 40px 32px 16px 16px
Example
.button1
.button2
.button3
.button4
.button5
Rounded Buttons
Use the border-radius property to add rounded corners to a button:
Example
Colored Button Borders
Use the border property to add a colored border to a button:
Example
Hoverable Buttons
Use the :hover selector to change the style of a button when you move the mouse over it.
Tip: Use the transition-duration property to determine the speed of the «hover» effect:
Example
.button <
transition-duration: 0.4s;
>
.button:hover background-color: #4CAF50; /* Green */
color: white;
>
.
Shadow Buttons
Use the box-shadow property to add shadows to a button:
Example
.button1 <
box-shadow: 0 8px 16px 0 rgba(0,0,0,0.2), 0 6px 20px 0 rgba(0,0,0,0.19);
>
.button2:hover box-shadow: 0 12px 16px 0 rgba(0,0,0,0.24), 0 17px 50px 0 rgba(0,0,0,0.19);
>
Disabled Buttons
Use the opacity property to add transparency to a button (creates a «disabled» look).
Tip: You can also add the cursor property with a value of «not-allowed», which will display a «no parking sign» when you mouse over the button:
Example
Button Width
By default, the size of the button is determined by its text content (as wide as its content). Use the width property to change the width of a button:
Example
Button Groups
Remove margins and add float:left to each button to create a button group:
Example
Bordered Button Group
Use the border property to create a bordered button group:
Example
Vertical Button Group
Use display:block instead of float:left to group the buttons below each other, instead of side by side:
Example
Button on Image

Button
Animated Buttons
Example
Example
Add a «pressed» effect on click:
Example
Example
Add a «ripple» effect on click:
Styling buttons, the right way
If you’re building a website or a web app, you probably have buttons. And maybe links that look like buttons? Anyway, it’s important to get them right.
Resetting styles
As a rule, 99.9% of the clickable things in your website or app should be either or elements. If you’re not sure what element to use in a given situation:
Using the correct element has a few advantages: it’s SEO-friendly (especially for links!), it works well with keyboard navigation, and it improves accessibility for all users.
In spite of this, developers rarely use the element. All over the Web, we can see a lot of buttons that trigger JavaScript actions, and on closer inspection it turns out they’re coded with , or .
Why is the element so underused?
- Knowledge: many developers don’t know about it (learning HTML’s 100+ elements takes a little while).
- Styling:comes with complex default styles, which can make it hard to achieve a custom look.
Thankfully, the styling part can be fixed!
/** * Reset button styles * It takes a little bit of work to achieve a “blank slate” look. */ button < padding: 0; border: none; font: inherit; color: inherit; background-color: transparent; /* Show a hand cursor on mouse-over instead of the default arrow cursor. (Some argue that we should keep the default arrow cursor for buttons, to be consistent with how desktop operating systems treat buttons.) */ cursor: pointer; >We end up with buttons that look like regular text.
The downside of this approach is that now we have to style all our buttons, or users won’t recognize them.
If we want to avoid that, another option is to use this style as a mixin (with Sass or another preprocessor) and apply it selectively:
@mixin button-reset < padding: 0; border: none; font: inherit; color: inherit; background-color: transparent; cursor: pointer; >.my-custom-button
Writing a “button” CSS component
Now that we’ve removed default styles, let’s define our own button styles. This is what we’d like to do:
- a “button” style that can be applied to both links or buttons;
- we want to apply it selectively, because we’ll have other link and button styles in our pages.
This calls for a CSS component. A CSS component is a style or collection of styles which we can apply using classes, often on top of a few different types of HTML elements. You may be familiar with this concept from CSS frameworks like Bootstrap or Foundation.
We’ll call this component .btn — like Bootstrap does, but we’ll restrict ourselves to a single color and size, to keep things simple.
Here is what our button component looks like:
You may be wondering why contrast is such a big deal. That second line of buttons looks nice; who doesn’t like a pastel look?
Simply put: with good contrast, you can reach more users. Some of your users have imperfect vision. Or bad screens that make washed out colors hard to differentiate. Others may be looking at your site on their phone, in broad daylight. You can check your contrast ratios here, and read more about the UX of text contrast here.
Styling hover and active states
It’s cool that your button looks nice, but… users are going to interact with it, and they will need visual feedback when the button’s state changes.
Browsers come with default styles for states like “hover” (mouse pointer is hovering the element) and “active” (the element is being pressed); and by resetting button styles we’ve removed some of those. We would also like to have styles for mouse-over, and overall we want styles that are visible and match our design.
Let’s start with a style for the :active state:
/* Old-school "push button" effect on clic + color tweak */ .btn:active
We could change the button’s colors when clicked, but I want to reserve this effect for our mouse-over styles:
/* Swap colors on mouse-over */ .btn:hover
Here’s our result — try out the active and hover styles. In the next section, we’ll deal with focus styles.
Managing focus styles
What are focus styles?
Users of your websites or web apps can use a keyboard or some other input software or device (gamepads, speech input software, head pointers, motion tracking or eye tracking, single switch entry devices, etc.) to navigate the page. Those methods will move the current “focus” from one element to the next, so that the user may activate an interactive element or type in a focused text field.
Even if you primarily use a mouse or trackpad, you might still be using the Tab key when using a web form, to jump from one form field to the next. Even your mouse users are keyboard users some of the time.
To serve all users, we need the currently focused element to be clearly visible. Thankfully, browsers do it by default:
- Historically, browsers like Internet Explorer and older versions of Firefox had a very subtle focus style: a thin dotted outline. This led to the recommandation to add your own custom and more accessible focus style.
- In recent years, Chrome, Edge, Firefox and other browsers ship with a default focus style that uses a double outline with two colors, which is more often accessible on varied backgrounds.
If you’re not sure what to do, you can keep the browser’s default style. But if you do want to customize it, read on.
Custom focus styles
Let’s define a custom focus style with the aptly-named :focus pseudo-class. We’d like this style to follow accessibility guidelines, including:
- Encloses the visual presentation of the user interface component;
- Has a contrast ratio of at least 3:1 between its pixels in the focused and unfocused states;
- Has a contrast ratio of at least 3:1 against adjacent colors.
So we basically need a kind of outline or border, and it should be contrasted enough against part of the element itself and its environment, which can be a bit hard to always achieve. For instance, if you have a button with a gray border on a white page, and you just want to change the border’s color when that button is focused, picking a color can be tricky:
And when you’re not sure what the surrounding background color is going to be, it can be even harder to ensure your focus styles have good contrast every time.
To make our focus styles always perceptible, we can try creating a double-outline effect like the default focus style of Chrome and Firefox. Because the outline property only accepts a single outline, we’ll have to use a combination of outline and box-shadow to achieve the same effect.
That works pretty well. And since we are setting a custom outline value, we don’t have to do anything like outline-color: transparent or outline: none to override the default outline style.
Sticky focus styles
There is one tricky issue left. When you click a link or button, two states will apply:
The :active state stops as soon as you stop pressing the mouse button or trackpad. But in most browsers, clicking an interactive element gives it focus, so the :focus style applies until the user clicks somewhere else on the page.
This has been a headache for many web designers and developers for almost two decades. I cannot count the number of clients who have told me “when I click here, there is a strange border around the button, please remove it!”
Even if you know that this strange border helps make their site accessible, convincing a client to leave it be can be an uphill battle! (And if you don’t know, sadly you’ll find plenty of blogs, forum posts and StackOverflow answers telling you to “just use outline: none ” and call it a day.)
Thanksfully there is a better way, implemented in all browsers in recent years: the :focus-visible pseudo-class.
How it works in a nutshell: for buttons and links, browsers will set the :focus-visible state on an element after a keyboard or keyboard-like interaction, but not after a click.
We can replace :focus with :focus-visible to fix our issue with focus styles sticking around after a click:
Note that Web browsers have recently moved to use :focus-visible for their own default focus styles. In that case, we don’t need to do anything about default focus styles, because our custom :focus-visible style will override them.
And if some browsers are showing focus styles on :focus instead of :focus-visible , we can use this style to make sure that only our custom focus styles would show up, and only on :focus-visible :
/* disable the default outline on a focused element which doesn’t have the :focus-visible state (e.g. a button after a mouse click) */ .btn:focus:not(:focus-visible)
And with that, here is our our final result:
Go ahead and look at the final code to review everything we’ve seen in this tutorial.