- SQLite JAVA Tutorial
- SQLite in JAVA Interface
- Connect to SQLite Database using Java
- Create Table in SQLite Database using Java
- DML (Insert, Select, Update, Delete) Operations Using Java
- Java Connect to SQLite with JDBC Example
- 1. Download SQLite JDBC driver
- 2. SQLite JDBC database connection URL
- 3. Loading SQLite JDBC driver
- 4. Making SQLite JDBC connection
- JDBC API References:
- Related JDBC Tutorials:
- About the Author:
- SQLite Java: Connect To SQLite Database Using SQLite JDBC Driver
- Download SQLite JDBC Driver
- SQLite connection strings
- Connect to an SQLite database via JDBC
- Step 1
- Step 2
- Step 3
- Step 4
- Step 5
- Step 6
- Step 7
- Step 8
- Step 9
- Troubleshooting
- How the program works
SQLite JAVA Tutorial
Here we will learn how to use SQLite in JAVA programming language to connect SQLite database, CREATE Table, INSERT, UPDATE, DELETE and SELECT operations on SQLite tables using JDBC driver with examples.
SQLite in JAVA Interface
We can easily interact with SQLite in JAVA language using a JDBC driver. This JDBC driver is known as the SQLite-JDBC package which contains both JAVA classes and SQLite libraries to perform different operations like connect to the database, create tables, insert data in tables, etc. on Windows, Linux, and Mac OS platform.
Before we proceed to interact with SQLite using JAVA language first we need to make sure that JAVA setup available in our PC. In case if JAVA setup is not available means follow Java Tutorial for JAVA installation.
If JAVA setup available in our PC, now we will install SQLite-JDBC driver for that download latest JDBC driver sqlite-jdbc-version.jar from available list of JDBC drivers.
Now we need to add downloaded JDBC driver jar file (sqlite-jdbc-version.jar) to our classpath like shown in our following programs.
Connect to SQLite Database using Java
Now we will connect to the SQLite database using JAVA if exists otherwise it will create a new database and then connect to it.
Following is the JAVA program which is used to connect a database if it exists otherwise first it will create a database and then connect to it.
public static void main( String args[] )
c = DriverManager.getConnection( «jdbc:sqlite:SqliteJavaDB.db» );
System.err.println( e.getClass().getName() + «: » + e.getMessage() );
System. out .println( «database successfully created» );
If you observe above code we are trying to connect “ SqliteJavaDB.db ” if exists otherwise it will create new database in current path and we are assuming that sqlite-jdbc-3.8.11.2.jar is available at the same location where our program exists.
java -classpath «.;sqlite-jdbc-3.8.11.2.jar» SQLiteJDBC
database successfully created
The above statements will compile and run our program to create “SqliteJavaDB.db” in current directory. If you check the current directory of the program, one file called SqliteJavaDB.db created.
Create Table in SQLite Database using Java
Now, we will create new table in previously created database named SqliteJavaDB.db using java for that write the code like as shown below.
public class TableUsingJava
public static void main( String args[] )
c = DriverManager.getConnection( «jdbc:sqlite:SqliteJavaDB.db» );
System. out .println( «Database Opened. \n» );
String sql = «CREATE TABLE Product » +
«(p_id INTEGER PRIMARY KEY AUTOINCREMENT,» +
System.err.println( e.getClass().getName() + «: » + e.getMessage() );
System. out .println( «Table Product Created Successfully. » );
If you observe above code we are creating a new table called “ Product ” in our “ SqliteJavaDB.db ” database.
Now compile and run the program using the following commands.
java -classpath «.;sqlite-jdbc-3.8.11.2.jar» TableUsingJava
Table Product Created Successfully.
The above statements complied with our program and created “Product” table in our database.
DML (Insert, Select, Update, Delete) Operations Using Java
Now, we try to perform DML operations (insert, select, update, delete) on previously created table named Product using JAVA language.
Following program contains all 4 DML operations like INSERT, UPDATE, DELETE and SELECT.
public class OperationUsingJava
public static void main( String args[] )
System. out .println( «Select DML Operation For Product Table. » );
System. out .println( «1. Insert» );
System. out .println( «2. Update» );
System. out .println( «3. Delete» );
System. out .println( «4. Select» );
System. out .println( «5. Exit» );
Scanner reader = new Scanner(System. in );
System. out .println( «Enter a choice: » );
c = DriverManager.getConnection( «jdbc:sqlite:SqliteJavaDB.db» );
scanName= new Scanner(System. in );
System. out .println( «Enter Product Name:» );
System. out .println( «Enter Product Price:» );
System. out .println( «Enter Product Quantity:» );
sql = «INSERT INTO Product (p_name,price,quantity) » +
System. out .println( «Inserted Successfully. » );
System. out .println( «Enter Product id:» );
scanName= new Scanner(System. in );
System. out .println( «Enter Product Name:» );
scanName= new Scanner(System. in );
System. out .println( «Enter Product Price:» );
System. out .println( «Enter Product Quantity:» );
sql = «UPDATE Product SET p_name = ‘» + name + «‘,price color: #a31515;»>»,quantity color: #a31515;»>» WHERE p_id color: blue;»>out .println( «Updated Successfully. » );
System. out .println( «Enter Product id:» );
scanName= new Scanner(System. in );
sql= «DELETE FROM Product WHERE p_id color: #a31515;»>»;» ;
System. out .println( «Deleted Successfully. » );
ResultSet rs = stmt.executeQuery( «SELECT * FROM Product;» );
System. out .println( «ID\t Name\t\t Price\t Qty » );
quantity = rs.getInt( «quantity» );
System. out .println(id+ «\t » +name+ » \t » +price+ «\t » +quantity);
System. out .println( «Oops. Wrong Choice. » );
System.err.println( e.getClass().getName() + «: » + e.getMessage() );
System. out .println( «Continue Y OR N?» );
reader= new Scanner(System. in );
> while (flag.equalsIgnoreCase( «Y» ));
If you observe above program we are performing INSERT, UPDATE, DELETE and SELECT operations on table called “Product”. Now, let’s compile and run the program to examine the output like as shown below.
java -classpath «.;sqlite-jdbc-3.8.11.2.jar» OperationUsingJava
Select DML Operation For Product Table.
Select DML Operation For Product Table.
Select DML Operation For Product Table.
Select DML Operation For Product Table.
Select DML Operation For Product Table.
Select DML Operation For Product Table.
Select DML Operation For Product Table.
Java Connect to SQLite with JDBC Example
SQLite is a simple, small, fast, reliable, server-less, zero-configuration and no-installation SQL database library which is running in-process with the client application. Although there is no official JDBC driver library from www.sqlite.org, there is one provided by www.xerial.org – an XML Database Management System project.
1. Download SQLite JDBC driver
You can download the latest version of JDBC driver for SQLite here. The download is categorized by versions, so browse a directory for a specific version you want: 3.5.9, 3.6.16, 3.7.2, etc. As of this writing, the latest version is 3.7.2 which corresponds to the jar file sqlite-jdbc-3.7.2.jar .
Beside Java class files, the jar file includes SQLite binaries for Windows, Linux and Mac (for both 32-bit and 64-bit).
Place the sqlite-jdbc-VERSION.jar into your classpath.
2. SQLite JDBC database connection URL
Here is the syntax of database connection URL for file system database:
jdbc:sqlite:database_file_path
Where database_file_path can be either relative or absolute path. For example:
jdbc:sqlite:C:/work/product.db
And here is the syntax of database connection URL for memory database:
3. Loading SQLite JDBC driver
Class.forName("org.sqlite.JDBC"); DriverManager.registerDriver(new org.sqlite.JDBC());
4. Making SQLite JDBC connection
The following example program creates a connection to a SQLite database file product.db which is in the same directory as the program, prints some database metadata information, and closes the connection:
package net.codejava.jdbc; import java.sql.Connection; import java.sql.DatabaseMetaData; import java.sql.DriverManager; import java.sql.SQLException; /** * This program demonstrates making JDBC connection to a SQLite database. * @author www.codejava.net * */ public class JdbcSQLiteConnection < public static void main(String[] args) < try < Class.forName("org.sqlite.JDBC"); String dbURL = "jdbc:sqlite:product.db"; Connection conn = DriverManager.getConnection(dbURL); if (conn != null) < System.out.println("Connected to the database"); DatabaseMetaData dm = (DatabaseMetaData) conn.getMetaData(); System.out.println("Driver name: " + dm.getDriverName()); System.out.println("Driver version: " + dm.getDriverVersion()); System.out.println("Product name: " + dm.getDatabaseProductName()); System.out.println("Product version: " + dm.getDatabaseProductVersion()); conn.close(); >> catch (ClassNotFoundException ex) < ex.printStackTrace(); >catch (SQLException ex) < ex.printStackTrace(); >> > To see the coding in action, I recommend you to watch the video below:
JDBC API References:
Related JDBC Tutorials:
About the Author:

Nam Ha Minh is certified Java programmer (SCJP and SCWCD). He started programming with Java in the time of Java 1.4 and has been falling in love with Java since then. Make friend with him on Facebook and watch his Java videos you YouTube.
SQLite Java: Connect To SQLite Database Using SQLite JDBC Driver
Summary: in this tutorial, we will show you how to download SQLite JDBC Driver and connect to the SQLite database via JDBC.
Download SQLite JDBC Driver
To download the latest version of SQLite JDBC Driver, you go to the download page. You should download the latest version of the driver. At the time of this writing, the latest version is sqlite-jdbc-3.27.2.1.jar .
The JAR file includes both Java class files and SQLite binaries for Mac OX S, Linux, and Windows, Both 32-bit and 64-bit.
SQLite connection strings
The SQLite JDBC driver allows you to load an SQLite database from the file system using the following connection string:
jdbc:sqlite:sqlite_database_file_pathCode language: Java (java)The sqlite_data_file_path is the path to the SQLite database file, which is either relative or absolute path as follows:
jdbc:sqlite:sample.dbCode language: SQL (Structured Query Language) (sql)jdbc:sqlite:C:/sqlite/db/chinook.dbCode language: Java (java)To connect to an in-memory database, you use the following connection string:
jdbc:sqlite::memory:Code language: Java (java)Connect to an SQLite database via JDBC
Step 1
Create a new directory called java under c:\sqlite
Step 2
Inside the java folder create a new folder called connect .
Step 3
Copy the jar file sqlite-jdbc-3.27.2.1.jar to the c:\sqlite\connect folder.
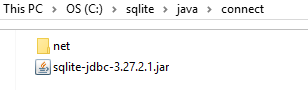
Step 4
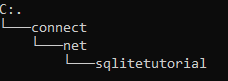
Create a new subfolder called net inside c:\sqlite\connect\ and another subfolder called sqlitetutorial inside the net folder.
Step 5
Create a new file named Connect.java in the sqlitetutorial folder with the following contents. The program will connect to the chinook.db database located in the c:\sqlite\db\ folder.
package net.sqlitetutorial; import java.sql.Connection; import java.sql.DriverManager; import java.sql.SQLException; /** * * @author sqlitetutorial.net */ public class Connect < /** * Connect to a sample database */ public static void connect() < Connection conn = null; try < // db parameters String url = "jdbc:sqlite:C:/sqlite/db/chinook.db"; // create a connection to the database conn = DriverManager.getConnection(url); System.out.println("Connection to SQLite has been established."); > catch (SQLException e) < System.out.println(e.getMessage()); >finally < try < if (conn != null) < conn.close(); >> catch (SQLException ex) < System.out.println(ex.getMessage()); >> > /** * @param args the command line arguments */ public static void main(String[] args) < connect(); >>Code language: Java (java)Note that you should have the chinook.db file downloaded and copied to the C:/sqlite/db/ folder.
Step 6
Launch the command line window and navigate to the sqlitetutorial subfolder created above using the following command:
cd c:\sqlite\java\connect\net\sqlitetutorialCode language: Shell Session (shell)Step 7
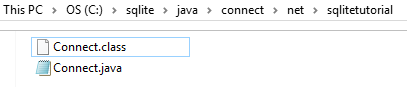
Compile the Connect.java file using the following command:
javac Connect.javaCode language: SQL (Structured Query Language) (sql)You will see a new class file generated:
Note that your JDK must be on the PATH, otherwise you will get an error.
Step 8
Change the current directory to the connect directory:
c:\sqlite\java\connect\net\sqlitetutorial>cd.. c:\sqlite\java\connect\net>cd..Code language: Shell Session (shell)Step 9
Run the net.sqlitetutorial.Connect class using the following command:
java -classpath ".;sqlite-jdbc-3.27.2.1.jar" net.sqlitetutorial.ConnectCode language: Shell Session (shell)Connection to SQLite has been established.Code language: Shell Session (shell)Troubleshooting
If you receive the following message, you should have missed step 8:
Error: Could not find or load main class net.sqlitetutorial.ConnectCode language: Shell Session (shell)How the program works
First, declare a variable that holds a connecting string to the sqlite database c:\sqlite\db\chinook.db
String url = "jdbc:sqlite:C:/sqlite/db/chinook.db";Code language: Java (java)Next, use the DriverManager class to get a database connection based on the connection string.
conn = DriverManager.getConnection(url);Code language: Java (java)Then, trap any SQLException in the try catch block and display the error message.
After that, close the database connection in the finally block.
Finally, call the connect() method in the main() method of the Connect class.
In this tutorial, you have learned step by step how to use the SQLite JDBC driver to connect to an SQLite database from a Java program.