HTML5 Tutorial: How to Build a Single Product Page
In this post, we are going to work on a fictional project, creating a single product page to offer iPhone 4S, and in this project we are also going to implement the methods that we have discussed in the previous posts; the element and the negation selector.
The HTML5 Markup
First, we need to create an html document with the following markup:
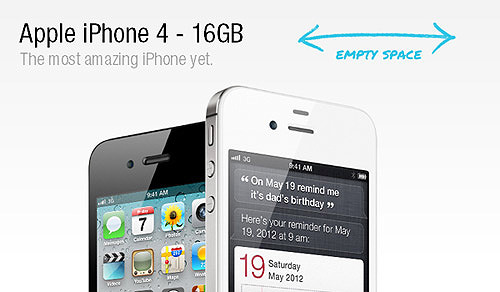
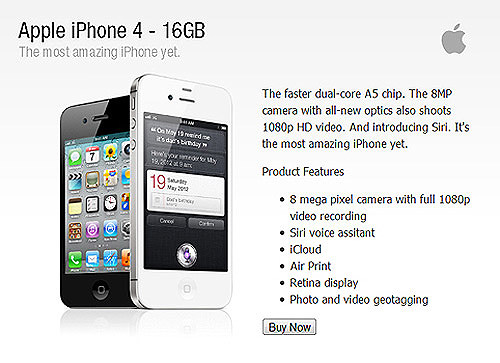
Apple iPhone 4 - 16GB
The most amazing iPhone yet.
The faster dual-core A5 chip. The 8MP camera with all-new optics also shoots 1080p HD video. And introducing Siri. It's the most amazing iPhone yet.
Product Features
8 mega pixel camera with full 1080p video recording
Siri voice assitant
iCloud
Air Print
Retina display
Photo and video geotagging
We use several new tags from HTML5 spec., like the header , hgroup , figure , section , and one we’ve discussed before; the details and summary tag.
However, we are not going to dig into these tags, not because we are not willing to, but rather these are basic topics that you can find easily elsewhere. So, if you are really new to HTML5, I would recommend you read the following references of those tags; they have explained them comprehensively:
Now let’s see our page’s first appearance.
Well, it looks sensible without any styles. At the very top there is the header, and then comes the section for the image, description and lastly the ‘Buy Now’ button. Now, let’s perk up this page.
The Styles
We will start off by normalizing all default styles using this stylesheet and add a gradient background to the html tag.
Remember that our product elements are all wrapped within a div with the product class. So, here we would like to center the wrapper and set the width to be about 650px .
The header section
In the header section we have two headings h1 and h4 , so let’s style these elements.
And then add a little space at the bottom of the header with a margin.
If you look at the very right side of the header, there would be a lot whitespace in that side.
So why don’t we also put the Apple logo in there.
The Product Image
Next, float the image to the left and set the image maximum width to 350px .
Since the image has been pushed to the left, then we will float the description section to the right and set the width to 300px .
Now let’s see the result so far.
It starts looking good, but the details tag still doesn’t work yet (except in Chrome), so let’s style the button next.
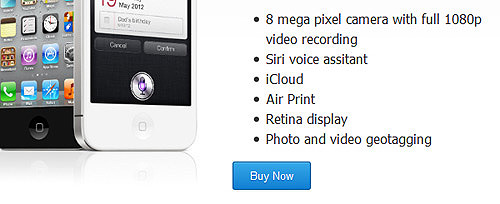
The Button
For the button styles, we will mimic the one from the Apple.com Store. And here is all the syntax you need to put in your stylesheet for the button.
As usual IE (Internet Explorer) always causes some trouble; if you open this in any IE lower than 9, the page will remain un-styled.
This is because Internet Explorer does not recognize the new elements ( section , header , etc.) so the styles that we’ve specified failst to apply. Thus, in the next step we will work on solving this problem.
Testing Browser Support
In our previous post, we have tackled the browser support for the details element using this polyfill; so that it could work in the unsupported browsers. However, this time we will try different ways of doing it with Modernizr.
From its official website, «Modernizr is an open-source JavaScript library that helps you build the next generation of HTML5 and CSS3-powered websites«. Technically, Modernizr will test the browser support for certain new elements and features. If support is not provided, we must then provide a fallback whether it is by giving different styles or providing polyfills. In this case, we will use Modernizr to help us test the details and summary element.
Go to Modernizr and proceed to its download page.
In the download page, Modernizr provides some options to configure the library, so you only have to select certain features you really need for your website. In this case, we need:
HTML5Shiv 3.4
Add CSS Classes, this feature will automatically insert classes in the html tag.
the Modernizr.load,
go to the community add-ons box and select elem-details,
In the Extensibility section, select Modernizr.addTest.
Generate and download the file.
Link it to your html and reload the page in Internet Explorer. The page should’ve now been styled since Internet Explorer can now recognize the tags.
And, if you view the source or inspect element, you will find the no-details class has been inserted in the html tag; indicating that the browser where we are previewing the page; is currently not supporting details element. @@@@ [ I can’t understand this sentence. ]
We can then create a fallback using this class as the hook, which we will be doing in the next step.
The Fallback
In this step we will provide similar details element functionality for other browsers (excluding Chrome). In the previous post, this step was automatically done using this script, but this time we will create it on our own.
Note: Just reviewing a bit from our previous post; the details element is currently only supported in Chrome browser.
So, let’s start working on the CSS first.
On the summary tag, we change its cursor mode to pointer, so the user will notice that it is clickable.
To give more spaces at the top and bottom of the details element with a margin.
By default, the summary tag will have an arrow. But here we would like to replace it with a plus-minus icon.
Note: Before proceeding, I previously have downloaded the icons from this collection by Fugue, download and sprite them into one file.
Let’s add a before pseudo-element and attach the icon as background. Notice that at this point, the background position is at the top which will show the plus icon.
Then, when the details element is open, the background position will move to the bottom which will show the minus icon.
The [open] sign is a selector. In this case, it will select the details open attribute in supporting browser.
Lastly we should hide the arrow that by default is shown in Chrome.
details > summary::-webkit-details-marker
Then, let’s see the result in a browser for a while.
The default arrow now has been replaced with our icon, and if you see it in Chrome you’ll already have a toggle effect when you click on it; the icon will change accordingly. But, in other browsers nothing will happen still. So, in the next step we will try to replicate the effect with jQuery.
The toggle effect with jQuery
Before we begin with the jQuery part, I would like to thank Ian Devlin for the inspiration, the script below is actually a slight modification of his.
All right, let’s create a variable to store the summary tag.
var summary = $('details summary');
Then we wrap all the sibling elements of the summary with a div .
And hide that div when the details element does not have the open class.
Now let’s test it in the browser; the toggle effect should’ve now worked on all browsers, I personally have checked (until Internet Explorer 7).
Tips: Alternatively you can change the .toggle() with .slideToggle() to create a slide effect. Also if you want the detail to be opened initially you can add a class open in the details element.
Conclusion
We have been through all the steps of creating a single product page using HTML5, debugging for unsupported browsers as well as replicate the toggle effect for detail element on our own, so hopefully you can learn a lot from it.
However, I’m aware that I did not explain everything in detail in this post, so if you want to clear something up, feel free to post the question in the comment box below.
In this lesson, we will learn how to create a Product detail page In HTML and CSS without using a single line of javascript. In the last post, we created an Ecommerce product page design. So, this time our target is to create a single product page design in HTML and CSS. So, let us create this page using HTML and CSS.
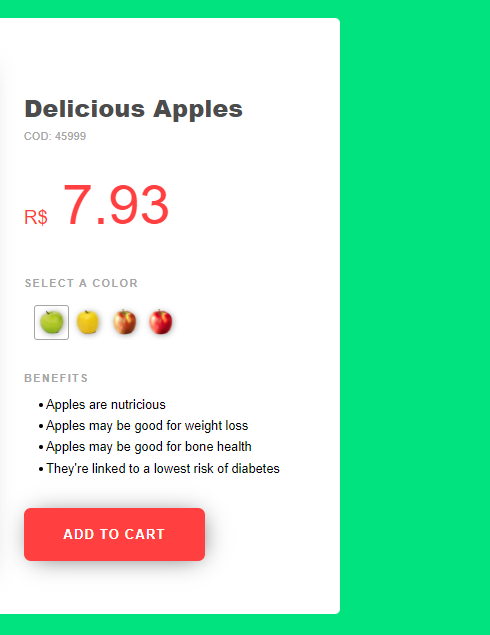
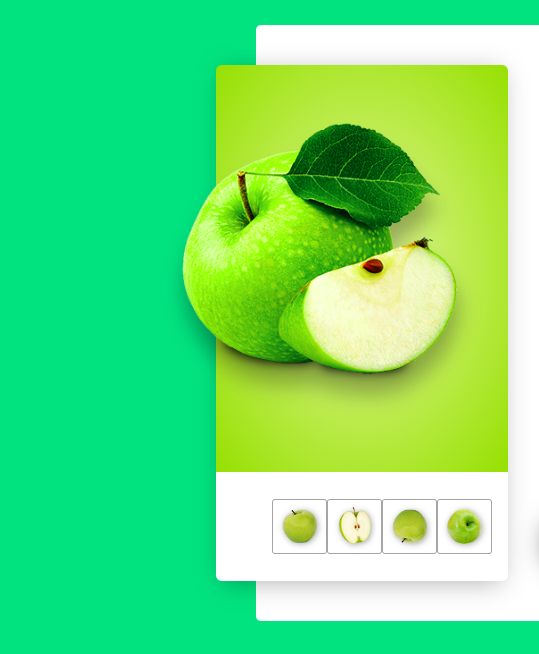
Product detail page:
As you can see in the image we have created a Product detail page in HTML and CSS for our eCommerce store. A single page is used for products when we want to display the details of our products. It has all the necessary information about that product. Like we have added names, pictures, prices, variations, benefits or features, add to cart, add to wishlist and share details.
All of these things are created with the help of HTML and CSS. Lets, ‘s check why we have used Html and CSS in our project.
You might like it:
Html:
As you can see we have added text, icons, images, etc on the page. All these things are created with the help of HTML. Html helps us to build projects from the scratch. We cant design anything using HTML tags. For design purposes, we need to get the help of CSS properties. Without using HTML we cant create web pages and without using CSS we cant design our web pages. So, both languages help each other to fulfill all the functionalities.
CSS:
After using HTML tags our next target is to use CSS along with HTML. It will help us to create a beautiful single page of products for our store. As we have a beautiful solid color background and it is created with the help of CSS property. Then we created a box. In this box, we have added all the content except the picture. In this box, we have a heading at the top of the page. Below this, we have the category of product. These things are created with the help of a heading and paragraph tag.
After that, we have the price of the product. Then we have the suggestion of the color and you can pick anyone. Below this, we have the heading of benefits and then all the features are mentioned in the form of numbering. It is created in a button tag of HTML and designed in CSS along with CSS properties.
On the left side, we have a picture of the product. We have the product image and below this, we have the different images of this particular product. These boxes are created using a div tag. By using the div tag we can put all the things inside the div and then we can design them using CSS. Now, let us see how to create a Product detail page in HTML and CSS.
How to create a Product detail page in HTML and CSS?
For the development of this type of Product detail page, we will use HTML and CSS as a language.
Download a code editor for the Product detail page:
It is the first step toward the development of any project. We will be using a sublime text editor for this project. VS code is also recommended for this project.
Html source code:
It is a markup language and it is used to create the basics of this page. Open your code editor and create a new file in your editor. Then save this file by using the extension of .html at the end of the HTML file name. We are using .html as an extension because this extension converts the simple file into an HTML file.