- border
- Try it
- Constituent properties
- Syntax
- Values
- Description
- Borders vs. outlines
- Formal definition
- Formal syntax
- Examples
- Setting a pink outset border
- HTML
- CSS
- Result
- Specifications
- Browser compatibility
- See also
- Found a content problem with this page?
- MDN
- Support
- Our communities
- Developers
- CSS Borders
- CSS Border Style
- Example
- Div Border Style For HTML
- Add a Border to a Div in HTML
- Comments
- See Also
- Do you have a question or comment about this article?
- Рамки и границы
- Свойство outline
- Разноцветные рамки
- Рамка при использовании :hover
- Рамка вокруг полей формы
- Рамки через box-shadow
border
The border shorthand CSS property sets an element’s border. It sets the values of border-width , border-style , and border-color .
Try it
Constituent properties
This property is a shorthand for the following CSS properties:
Syntax
/* style */ border: solid; /* width | style */ border: 2px dotted; /* style | color */ border: outset #f33; /* width | style | color */ border: medium dashed green; /* Global values */ border: inherit; border: initial; border: revert; border: revert-layer; border: unset;
The border property may be specified using one, two, or three of the values listed below. The order of the values does not matter.
Note: The border will be invisible if its style is not defined. This is because the style defaults to none .
Values
Sets the thickness of the border. Defaults to medium if absent. See border-width .
Sets the style of the border. Defaults to none if absent. See border-style .
Sets the color of the border. Defaults to currentcolor if absent. See border-color .
Description
As with all shorthand properties, any omitted sub-values will be set to their initial value. Importantly, border cannot be used to specify a custom value for border-image , but instead sets it to its initial value, i.e., none .
The border shorthand is especially useful when you want all four borders to be the same. To make them different from each other, however, you can use the longhand border-width , border-style , and border-color properties, which accept different values for each side. Alternatively, you can target one border at a time with the physical (e.g., border-top ) and logical (e.g., border-block-start ) border properties.
Borders vs. outlines
Borders and outlines are very similar. However, outlines differ from borders in the following ways:
- Outlines never take up space, as they are drawn outside of an element’s content.
- According to the spec, outlines don’t have to be rectangular, although they usually are.
Formal definition
- border-width : as each of the properties of the shorthand:
- border-top-width : medium
- border-right-width : medium
- border-bottom-width : medium
- border-left-width : medium
- border-top-style : none
- border-right-style : none
- border-bottom-style : none
- border-left-style : none
- border-top-color : currentcolor
- border-right-color : currentcolor
- border-bottom-color : currentcolor
- border-left-color : currentcolor
- border-width : as each of the properties of the shorthand:
- border-bottom-width : the absolute length or 0 if border-bottom-style is none or hidden
- border-left-width : the absolute length or 0 if border-left-style is none or hidden
- border-right-width : the absolute length or 0 if border-right-style is none or hidden
- border-top-width : the absolute length or 0 if border-top-style is none or hidden
- border-bottom-style : as specified
- border-left-style : as specified
- border-right-style : as specified
- border-top-style : as specified
- border-bottom-color : computed color
- border-left-color : computed color
- border-right-color : computed color
- border-top-color : computed color
- border-color : as each of the properties of the shorthand:
- border-bottom-color : a color
- border-left-color : a color
- border-right-color : a color
- border-top-color : a color
- border-bottom-width : a length
- border-left-width : a length
- border-right-width : a length
- border-top-width : a length
Formal syntax
border =
||
||=
|
thin |
medium |
thick=
none |
hidden |
dotted |
dashed |
solid |
double |
groove |
ridge |
inset |
outsetExamples
Setting a pink outset border
HTML
div>I have a border, an outline, and a box shadow! Amazing, isn't it?div>
CSS
div border: 0.5rem outset pink; outline: 0.5rem solid khaki; box-shadow: 0 0 0 2rem skyblue; border-radius: 12px; font: bold 1rem sans-serif; margin: 2rem; padding: 1rem; outline-offset: 0.5rem; >Result
Specifications
Browser compatibility
BCD tables only load in the browser
See also
Found a content problem with this page?
This page was last modified on Jul 18, 2023 by MDN contributors.
Your blueprint for a better internet.
MDN
Support
Our communities
Developers
Visit Mozilla Corporation’s not-for-profit parent, the Mozilla Foundation.
Portions of this content are ©1998– 2023 by individual mozilla.org contributors. Content available under a Creative Commons license.CSS Borders
The CSS border properties allow you to specify the style, width, and color of an element’s border.
I have borders on all sides.
I have a red bottom border.
I have a blue left border.
CSS Border Style
The border-style property specifies what kind of border to display.
The following values are allowed:
- dotted — Defines a dotted border
- dashed — Defines a dashed border
- solid — Defines a solid border
- double — Defines a double border
- groove — Defines a 3D grooved border. The effect depends on the border-color value
- ridge — Defines a 3D ridged border. The effect depends on the border-color value
- inset — Defines a 3D inset border. The effect depends on the border-color value
- outset — Defines a 3D outset border. The effect depends on the border-color value
- none — Defines no border
- hidden — Defines a hidden border
The border-style property can have from one to four values (for the top border, right border, bottom border, and the left border).
Example
Demonstration of the different border styles:
A groove border. The effect depends on the border-color value.
A ridge border. The effect depends on the border-color value.
An inset border. The effect depends on the border-color value.
An outset border. The effect depends on the border-color value.
Note: None of the OTHER CSS border properties (which you will learn more about in the next chapters) will have ANY effect unless the border-style property is set!
Div Border Style For HTML
What is a div? In HTML a div is used to group together other elements. This grouping allows a visual style (or position on the web page) to be applied to all elements of the div group easily. In modern responsive web development the div is a key page element. When using divs it can be useful to view its position on a page. Adding a border to the div achieves that. A border can also be used for decorative purposes. This brief article shows how easy it is to add a broder to a div. The article shows how to change the div border color (colour), width and padding.
Add a Border to a Div in HTML
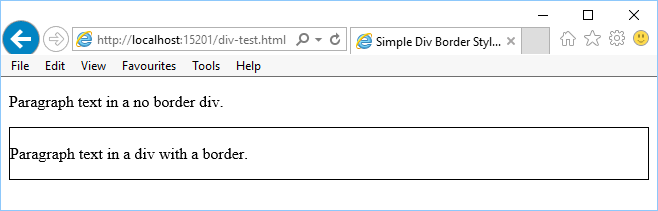
In the following example HTML the two paragraphs are each in a div. The second div has a style attribute set to border:1px solid black; and the image shows the page loaded in a browser:
Paragraph text in a no border div.
Paragraph text in a div with a border.

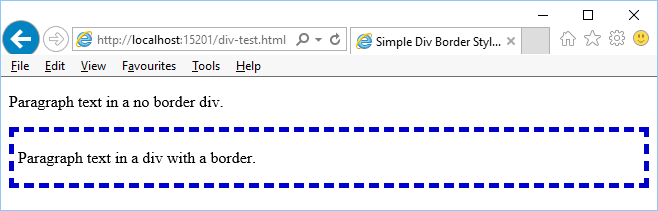
Change the thickness of the border by increasing the number of pixels (e.g. 5px), other web units can be used such as ems. Change the color, e.g. blue, or use color values, e.g. #0000FF. To put a gap between the text and border add a little padding. The following image shows a style setting of border:5px dashed #0000cc;padding-left:4px, by setting the color differently for each div it is possible to spot each div in a complex layout. Once the layout is finalised the div borders can be removed.
Note a div border can affect the layout of the HTML elements contained within it, especially if the borders are thick. Remember that if you experience odd layout behaviour, especially for percentage based layouts.
Comments
On 3rd October at 13:51pm, Richard said: On this page you introduced an initial
element, with an inside , and then a closing. But what if I just want to put a border on a
and I do not want the coding inside?On 4th October at 17:05pm, Tek Eye said: The paragraph element (
) is not required, only required for completeness. I prefer all text content, and all content, to be contained in a relevant element, to help with styling options. If you remove the tags the text no longer has the padding from the paragraph element and is pulled tighter to the div element.
See Also
- Tek Eye has some HTML articles to help new web developers.
- See w3schools.com to learn about HTML and web development.
- View the Tek Eye full Index for other articles.
Author: Daniel S. Fowler Published: 2015-10-19
Do you have a question or comment about this article?
(Alternatively, use the email address at the bottom of the web page.)
↓markdown↓ CMS is fast and simple. Build websites quickly and publish easily. For beginner to expert.
Free Android Projects and Samples:
Рамки и границы
С помощью CSS можно добавить рамку к элементу несколькими способами. В основном, конечно же, применяется свойство border , как наиболее универсальное, а также outline и, как ни удивительно, box-shadow , основная задача которого — создание тени. Далее рассмотрим эти методы и их различия между собой.
Свойство outline
Самое простое свойство для создания рамок. Имеет те же параметры, что и border , но существенно отличается от него некоторыми деталями:
- outline выводится вокруг элемента ( border внутри);
- outline не влияет на размеры элемента ( border добавляется к ширине и высоте элемента);
- outline можно установить только вокруг элемента целиком, но никак не на отдельных сторонах ( border можно использовать для любой стороны или всех сразу);
- на outline не действует радиус скругления, заданный свойством border-radius (на border действует).
Возникает вопрос — в каких случаях нужен outline , когда его роль, несмотря на перечисленные отличия, вполне берёт на себя border ? Ситуаций не так и много, но они встречаются:
- создание сложных разноцветных рамок;
- добавление рамки к элементу при наведении на него курсора мыши;
- сокрытие рамки, добавляемой браузером автоматически для некоторых элементов при получении фокуса;
- для outline можно задать расстояние от края элемента до рамки с помощью свойства outline-offset , для создания различных дизайнерских эффектов.
Разноцветные рамки
Надо понимать, что outline ни в коей мере не заменяет border и вполне может существовать вместе с ним, как показано в примере 1.
В данном примере вокруг элемента добавляется чёрная рамка, которая отделена от фона белой каймой (рис. 1).
Рис. 1. Рамка вокруг элемента
Рамка при использовании :hover
При добавлении рамки через border происходит увеличение ширины элемента, что довольно заметно при сочетании border и псевдокласса :hover . Есть два способа, как это «победить». Самое простое — заменить border на outline , которое, как мы знаем, не оказывает влияния на размеры элемента (пример 2).
Пример 2. Рамка при наведении
outline не всегда годится, хотя бы потому, что на него скругление уголков не действует. Здесь подойдёт второй метод — добавляем невидимую рамку или рамку, совпадающую с цветом фона, а затем меняем её параметры при наведении (пример 3). Тогда никакого смещения элемента происходить не будет, поскольку рамка изначально уже есть. Но всегда помним, что ширина элемента при этом складывается из значений width , border слева и border справа. Аналогично обстоит и с высотой.
Пример 3. Рамка при наведении
Рамка вокруг полей формы
В некоторых браузерах (Chrome, Safari, последние версии Opera) вокруг полей формы при получении ими фокуса отображается небольшая цветная рамка (рис. 2). Чтобы её убрать, достаточно в стилях добавить к свойству outline значение none , как показано в примере 4.

Рамки через box-shadow
Хотя свойство box-shadow предназначено для добавления тени вокруг элемента, с его помощью можно и создавать рамки, причём такие, которые невозможно сделать через border или outline . Всё благодаря тому, что число теней может быть неограниченным, параметры которых перечисляются через запятую.
Чтобы получить рамку, первые три параметра следует задать нулевыми, они отвечают за положение тени и её размытие. Четвёртый параметр в данном случае отвечает за толщину границы, а пятый устанавливает цвет рамки. Для второй рамки четвёртый параметр равняется сумме толщин двух рамок.
В примере 4 показано добавление двух рамок и одной границы справа с помощью одного свойства box-shadow .
Пример 4. Использование box-shadow
Результат данного примера показан на рис. 3.
Рис. 3. Рамки, созданные свойством box-shadow