- Set buttons in html
- Button without a value
- Using buttons
- A simple button
- Adding keyboard shortcuts to buttons
- Disabling and enabling a button
- Setting the disabled attribute
- Inheriting the disabled state
- Validation
- Examples
- Technical summary
- Specifications
- HTML Button Type – How to Add Buttons to your Website
- How to Add Buttons to your Website with the Button Tag
- How to Add Buttons to your Websites with an Anchor Tag
- How to Add Buttons to your Websites with the Input Type Button
- How to Add Buttons to your Websites with the Input Type Submit
- Mini Project: How to Make a Neon Light Button with HTML and CSS
- Conclusion
Set buttons in html
An elements’ value attribute contains a string that is used as the button’s label.
input type="button" value="Click Me" /> Button without a value
If you don’t specify a value , you get an empty button:
Using buttons
A simple button
We’ll begin by creating a simple button with a click event handler that starts our machine (well, it toggles the value of the button and the text content of the following paragraph):
form> input type="button" value="Start machine" /> form> p>The machine is stopped.p>
const button = document.querySelector("input"); const paragraph = document.querySelector("p"); button.addEventListener("click", updateButton); function updateButton() if (button.value === "Start machine") button.value = "Stop machine"; paragraph.textContent = "The machine has started!"; > else button.value = "Start machine"; paragraph.textContent = "The machine is stopped."; > >
The script gets a reference to the HTMLInputElement object representing the in the DOM, saving this reference in the variable button . addEventListener() is then used to establish a function that will be run when click events occur on the button.
Adding keyboard shortcuts to buttons
Keyboard shortcuts, also known as access keys and keyboard equivalents, let the user trigger a button using a key or combination of keys on the keyboard. To add a keyboard shortcut to a button — just as you would with any for which it makes sense — you use the accesskey global attribute.
In this example, s is specified as the access key (you’ll need to press s plus the particular modifier keys for your browser/OS combination; see accesskey for a useful list of those).
form> input type="button" value="Start machine" accesskey="s" /> form> p>The machine is stopped.p>
const button = document.querySelector("input"); const paragraph = document.querySelector("p"); button.addEventListener("click", updateButton); function updateButton() if (button.value === "Start machine") button.value = "Stop machine"; paragraph.textContent = "The machine has started!"; > else button.value = "Start machine"; paragraph.textContent = "The machine is stopped."; > >
Note: The problem with the above example of course is that the user will not know what the access key is! In a real site, you’d have to provide this information in a way that doesn’t interfere with the site design (for example by providing an easily accessible link that points to information on what the site accesskeys are).
Disabling and enabling a button
To disable a button, specify the disabled global attribute on it, like so:
input type="button" value="Disable me" disabled /> Setting the disabled attribute
You can enable and disable buttons at run time by setting disabled to true or false . In this example our button starts off enabled, but if you press it, it is disabled using button.disabled = true . A setTimeout() function is then used to reset the button back to its enabled state after two seconds.
input type="button" value="Enabled" /> const button = document.querySelector("input"); button.addEventListener("click", disableButton); function disableButton() button.disabled = true; button.value = "Disabled"; setTimeout(() => button.disabled = false; button.value = "Enabled"; >, 2000); >
Inheriting the disabled state
If the disabled attribute isn’t specified, the button inherits its disabled state from its parent element. This makes it possible to enable and disable groups of elements all at once by enclosing them in a container such as a element, and then setting disabled on the container.
The example below shows this in action. This is very similar to the previous example, except that the disabled attribute is set on the when the first button is pressed — this causes all three buttons to be disabled until the two second timeout has passed.
fieldset> legend>Button grouplegend> input type="button" value="Button 1" /> input type="button" value="Button 2" /> input type="button" value="Button 3" /> fieldset>
const button = document.querySelector("input"); const fieldset = document.querySelector("fieldset"); button.addEventListener("click", disableButton); function disableButton() fieldset.disabled = true; setTimeout(() => fieldset.disabled = false; >, 2000); >
Note: Firefox will, unlike other browsers, by default, persist the dynamic disabled state of a across page loads. Use the autocomplete attribute to control this feature.
Validation
Buttons don’t participate in constraint validation; they have no real value to be constrained.
Examples
div class="toolbar"> input type="color" aria-label="select pen color" /> input type="range" min="2" max="50" value="30" aria-label="select pen size" />span class="output">30span> input type="button" value="Clear canvas" /> div> canvas class="myCanvas"> p>Add suitable fallback here.p> canvas>
body background: #ccc; margin: 0; overflow: hidden; > .toolbar background: #ccc; width: 150px; height: 75px; padding: 5px; > input[type="color"], input[type="button"] width: 90%; margin: 0 auto; display: block; > input[type="range"] width: 70%; > span position: relative; bottom: 5px; > const canvas = document.querySelector(".myCanvas"); const width = (canvas.width = window.innerWidth); const height = (canvas.height = window.innerHeight - 85); const ctx = canvas.getContext("2d"); ctx.fillStyle = "rgb(0,0,0)"; ctx.fillRect(0, 0, width, height); const colorPicker = document.querySelector('input[type="color"]'); const sizePicker = document.querySelector('input[type="range"]'); const output = document.querySelector(".output"); const clearBtn = document.querySelector('input[type="button"]'); // covert degrees to radians function degToRad(degrees) return (degrees * Math.PI) / 180; > // update sizepicker output value sizePicker.oninput = () => output.textContent = sizePicker.value; >; // store mouse pointer coordinates, and whether the button is pressed let curX; let curY; let pressed = false; // update mouse pointer coordinates document.onmousemove = (e) => curX = e.pageX; curY = e.pageY; >; canvas.onmousedown = () => pressed = true; >; canvas.onmouseup = () => pressed = false; >; clearBtn.onclick = () => ctx.fillStyle = "rgb(0,0,0)"; ctx.fillRect(0, 0, width, height); >; function draw() if (pressed) ctx.fillStyle = colorPicker.value; ctx.beginPath(); ctx.arc( curX, curY - 85, sizePicker.value, degToRad(0), degToRad(360), false, ); ctx.fill(); > requestAnimationFrame(draw); > draw();
Technical summary
Specifications
HTML Button Type – How to Add Buttons to your Website

Kolade Chris
Buttons are an essential part of websites. You need them for various functionalities, from submitting information and getting access to more content to linking to different parts of the web page and other websites.
HTML gives you several ways to add buttons to your website – with the button tag, the anchor link, and the input types of button and submit .
In this article, I will walk you through 4 of those methods, so you can start adding buttons to your websites comfortably.
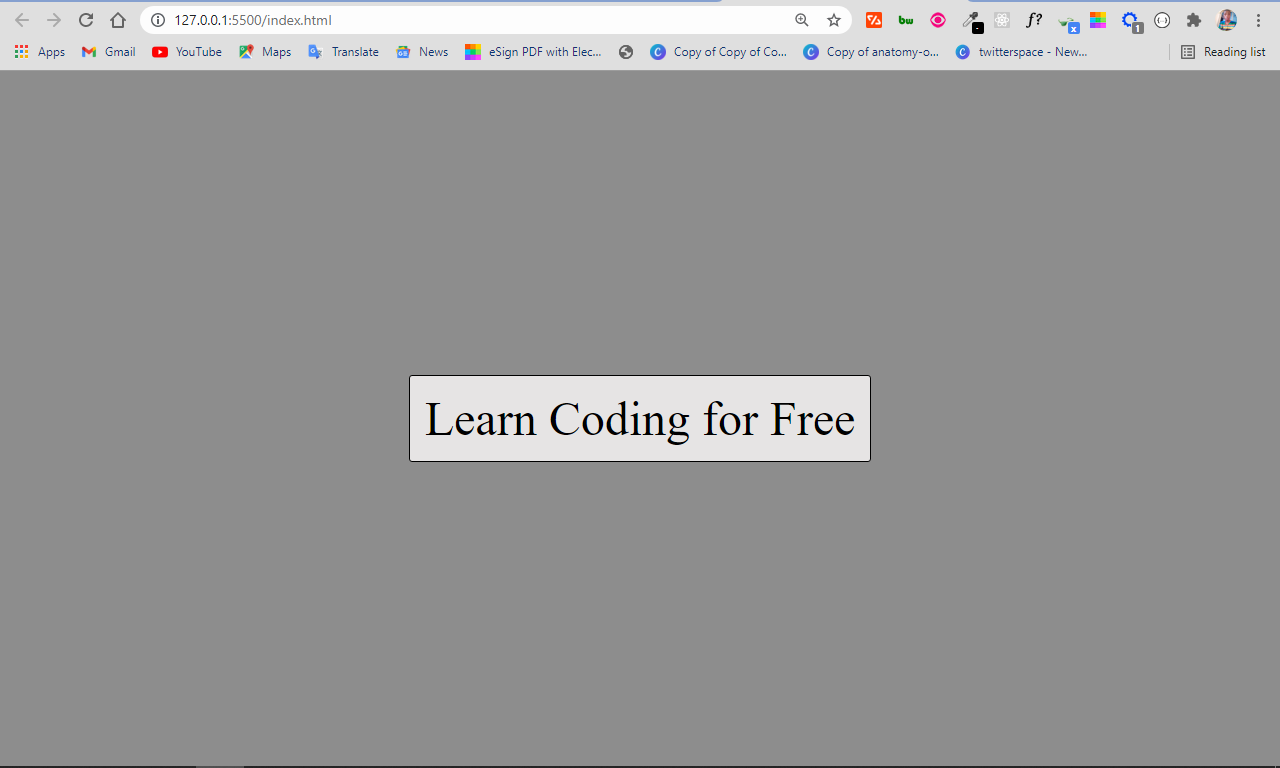
How to Add Buttons to your Website with the Button Tag
The button tag is one of the simplest ways to add buttons to your websites. To use it, all you have to do is put the text you want the button to have right between the opening and closing tag, like this:

I have put the button at the center horizontally and vertically using flexbox, margin, and height properties:
Everything on the page will be centered with this CSS as we move forward.
To make this kind of button active, you have to add some JavaScript. In the code snippet below, with some inline JavaScript, I make the button display an alert box in the browser any time it is clicked:

How to Add Buttons to your Websites with an Anchor Tag
You can also add buttons to your websites with the anchor tag. The anchor tag is primarily used to add links to your websites, but you can style it with CSS to look like an actual button.
The advantage of this is approach is that you can link to a page without any JavaScript.
In the example below, I make a button with the anchor tag and link it to the freeCodeCamp official website:

It looks like a link in the browser:
You can make it look like a button with some CSS by removing the default underline and text color, setting a backgound color and foreground color with the color properties, and adding padding and a border radius:
All I did in the CSS was try to mimic the default appearance given to buttons in HTML.
The anchor tag now looks like this:
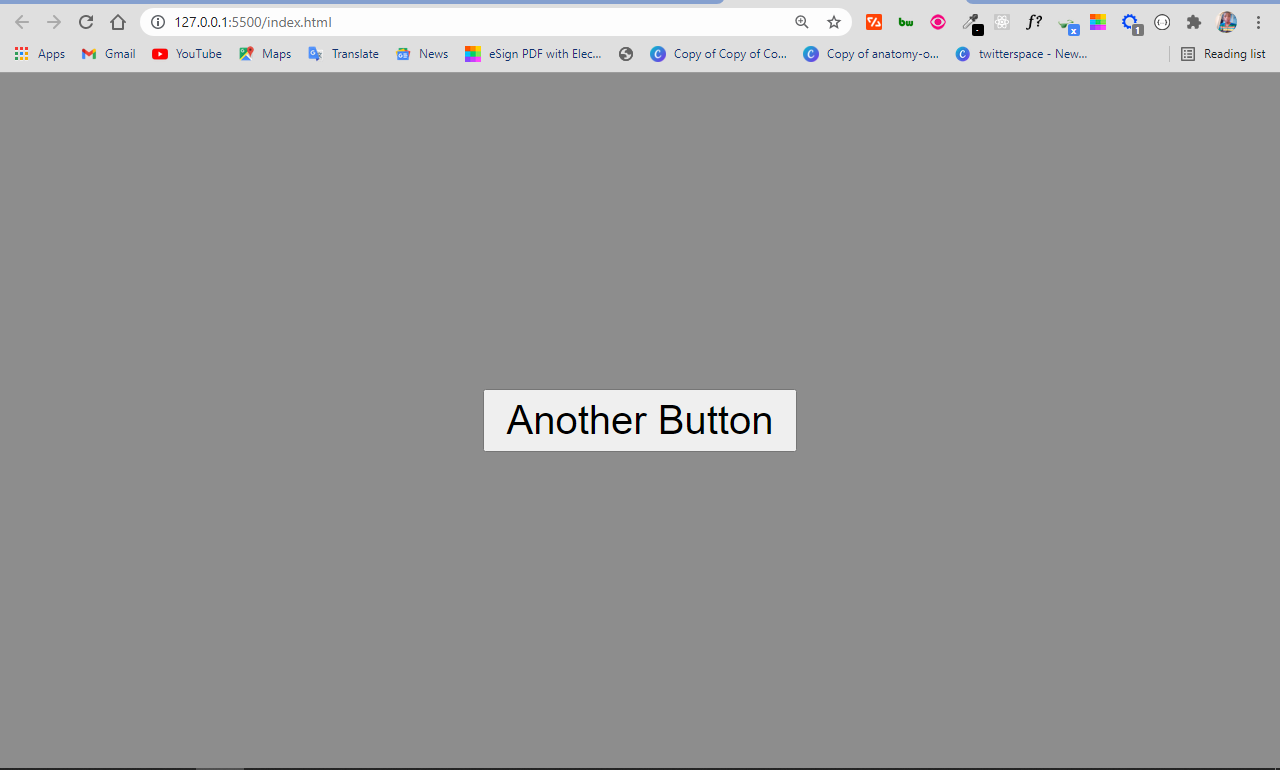
How to Add Buttons to your Websites with the Input Type Button
You can also add buttons to your website with the input type of button. It behaves exactly like the button tag.
The input tag is an empty element, meaning it doesn’t have a closing tag. So how do you display text in the button? You do it with the value attribute!

How to Add Buttons to your Websites with the Input Type Submit
You usually use the input type of submit inside a form element so that the data filled in by the user gets submitted when the button is clicked.
Just like the input type of button, it’s an empty element, so you need a value attribute to communicate to the user what the button is about.
The difference between the input type button and input type submit is that when you use the submit button type in a form, the data get submitted without any manipulation with JavaScript.
But the input type button, on the other hand, needs some manipulation with JavaScript to work. So when you use an input type of button inside a form element, the data doesn’t get submitted automatically when it is clicked.
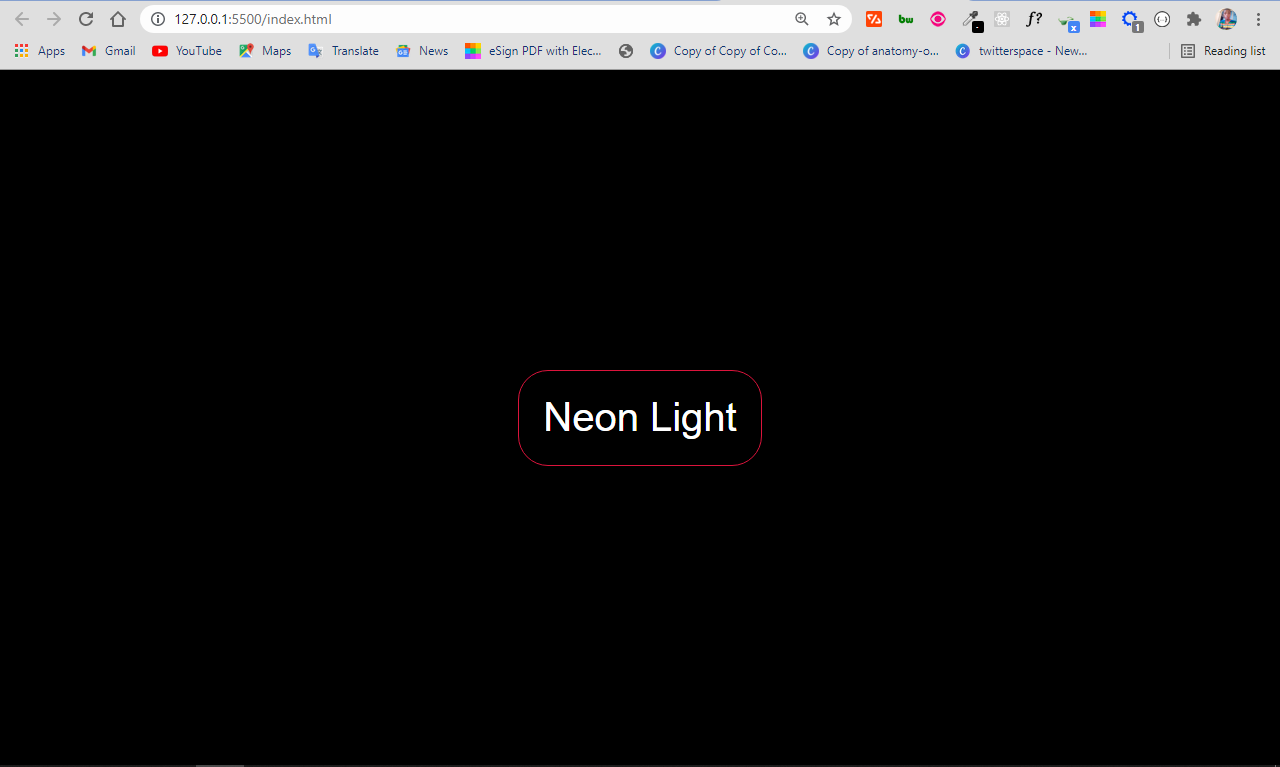
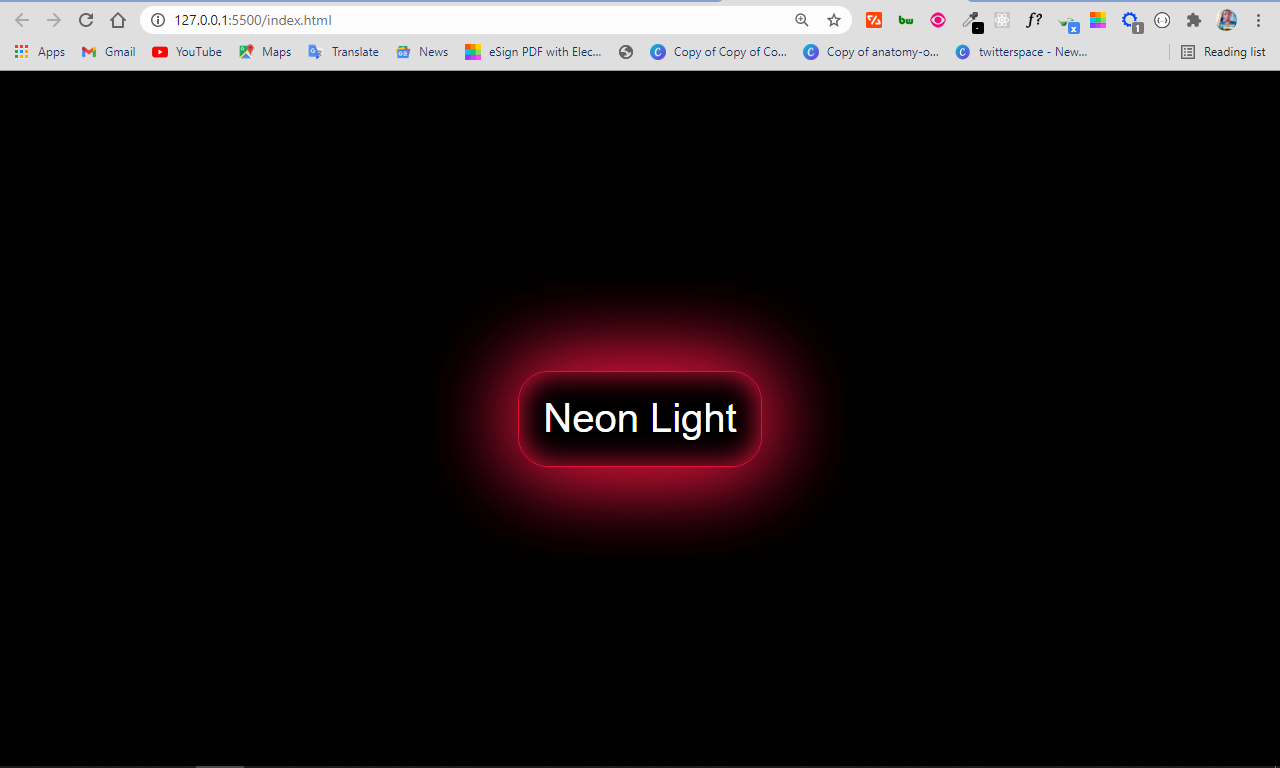
Mini Project: How to Make a Neon Light Button with HTML and CSS
The neon light button is a design trend that’s making waves because it’s beautiful. With what you’ve learned in this article, you can make one with a button tag and some CSS.
Firstly, you have to change the default styles of the button:
So far, the button looks like this:
To implement the neon light effect, you can use the box-shadow property. It allows multiple values, which will be instrumental in making the neon light effect.
In the box-shadow property:
- the first value represents the offset on the x-axis
- the second value represents the offset on the y-axis
- the third value represents the blur radius
- the fourth value represents the spread radius
- the fifth value is the color to be applied to the shadow
I only wanted the spread radius and color, so I set other values to zero. Then I made the last of the box-shadow values apply to the inside of the button by attaching inset to it.
There is now a neon light effect on the button:
Conclusion
This article showed you several ways you can add buttons to a website.
In HTML and CSS, there are always multiple ways of doing the same thing – that’s one of the reasons you can add buttons to a website even with an anchor tag.
You can even make a button behave like a link by wrapping an anchor tag around a button.
You can also add buttons with almost any other tag, such as div, span, and even the p tag. But you should avoid doing this for accessibility and so you don’t hurt the SEO of your website. After all, you have to make life easy for web crawlers, too.
Thank you for reading, and keep coding.