- How to take Screenshots using Python and Selenium
- Prerequisites for setting up Selenium & Python for Screenshots
- How to take a screenshot using Python and Selenium
- Import the packages
- Take the first screenshot using save_screenshot
- Output
- Screenshot using selenium-screenshot
- Output
- Taking a Full Page Screenshot
- Output
- How To Take A Screenshot Using Python & Selenium?
- What Is Selenium Python Bindings?
- selenium screenshot python
- Take screenshot Selenium
- Take screenshot of html element
How to take Screenshots using Python and Selenium
Python and Selenium are often favored by QAs for automation testing purposes. Going beyond automating basic tasks, Python and Selenium can also be used to automatically take screenshots. This article will discuss how testers can go about doing exactly that.
Before proceeding, there are a few major advantages to using Python and Selenium for screenshot automation that deserve a look:
- Open-source, fast, and offers easier web interaction
- Supports multiple operating systems and mobile devices
- Provides the ability to run tests across various web browsers
Prerequisites for setting up Selenium & Python for Screenshots
There are a few dependencies that must be taken care of in order to take a screenshot using Python and Selenium. They are listed below:
- Install Python and an IDE, preferably PyCharm. It becomes easier to work with the Selenium binding that comes with Python with an IDE.
- When using Python-Selenium, to get automated responses from web browsers it is necessary to make sure that the Selenium WebDriver is working without any errors. For a hassle-free working of Python and Selenium, make sure the webdriver is in path and matches the compatible version with the web browser.
- Another Python package named Selenium-Screenshot is often used to take screenshots. Install the package using the pip command (the easiest way to install it).
- To view the screenshot taken by Selenium and Selenium-Screenshot, use another python package pillow or PIL, from which testers use the Image module to open and display the screenshot.
- Ensure the path is set correctly for all dependencies. If this is not in place, it may throw unnecessary errors while running the program.
Now that we know about the dependencies, let’s focus on the actual operations.
How to take a screenshot using Python and Selenium
Let’s divide the whole process into steps for clarity:
- Import the packages – Selenium, Selenium-Screenshot, Pillow
- Take the first screenshot using Selenium WebDriver and function save_screenshot()
- Take a screenshot using Python selenium-screenshot – Using Screenshot_Clipping from the Screenshot module, and the full_Screenshot() function.
- View the screenshot using the Image module from the PIL package, and open() and show() functions.
Import the packages
To use python and selenium, install the following packages. Simply use the pip install command to install them and import the same in the program.
[python] from selenium import webdriver from PIL import Image from Screenshot import Screenshot_clipping [/python]
Take the first screenshot using save_screenshot
In this example, Selenium will navigate to a specific URL (using the Chrome browser) and then take a screenshot using the save_screenshot() function. It will then display the screenshot using pillow.
While taking the screenshot, testers need Selenium WebDriver to open a web browser automatically. Now, WebDriver may throw an error stating that the ChromeDriver needs to be in the PATH. To resolve this, simply download a Chrome Driver that is compatible with the current version and give the executable path as shown in the example.
This example uses a chrome web driver, but testers can use another web browser. Additionally, in order to interact with desktop applications instead of a web application, use one of the several python bindings built for the purpose.
[python] driver = webdriver.Chrome(executable_path = ‘path\to\chromedriver.exe’’) url = "https://www.google.com/"’ driver.get(url) [/python]
The above code will open the web browser and open the URL given in the driver.get().
After this, the next part of the code will take the screenshot and save it as a .png file.
[python] driver.save_screenshot(‘ss.png’) [/python]
The next line of the code will show the screenshot taken using the Selenium WebDriver.
[python] screenshot = Image.open(‘ss.png’) screenshot.show() [/python]
Let’s take a look at the full code below and the output the tester will receive as the screenshot.
[python] from selenium import webdriver from PIL import Image driver = webdriver.Chrome(executable_path = ‘path\to\chromedriver.exe’’) url = "https://www.google.com/"’ driver.get(url) driver.save_screenshot(‘ss.png’) screenshot = Image.open(‘ss.png’) screenshot.show() [/python]
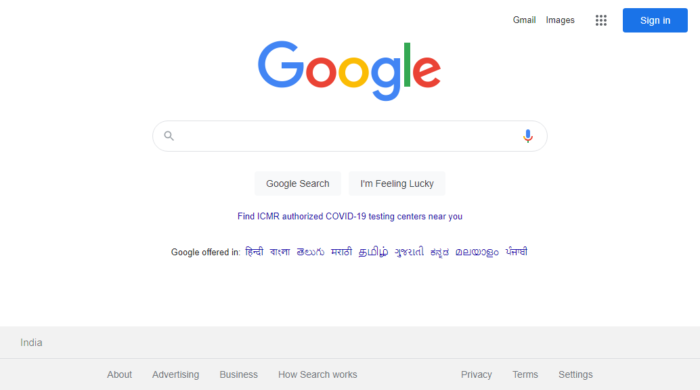
Output
Selenium automated the task of opening the web browser and navigating to a custom URL that opened the page shown in the output. After this, using the save_screenshot() method, Selenium grabbed the following image as a screenshot.

Screenshot using selenium-screenshot
The process here is fairly similar to the one using Python selenium-screenshot. Let’s take a look at the syntax to understand how it’s done.
[python] from Screenshot import Screenshot_Clipping from selenium import webdriver from PIL import Image ss = Screenshot_clipping.Screenshot() driver = webdriver.Chrome() driver.get("https://www.google.com/”’) screen_shot = ss.full_screenshot(driver, save_path = ‘/path’, image_name= ‘name.png’) screen = Image.open(screen_shot) screen.show() [/python] Output
Here, Selenium opens a browser, navigates to a URL and then captures the screenshot using the full_Screenshot() method of the Screenshot_clipping module.
Taking a Full Page Screenshot
Use the code below to get the full page screenshot using Selenium and Python.
[python] from selenium import webdriver from PIL import Image from Screenshot import Screenshot_Clipping ss = Screenshot_Clipping.Screenshot() driver = webdriver.Chrome(executable_path=r'C:\Users\waseem k\Desktop\chromedriver.exe') url = "https://www.browserstack.com/" driver.get(url) image = ss.full_Screenshot(driver, save_path=r'.' , image_name='name.png') screen = Image.open(image) screen.show() [/python]
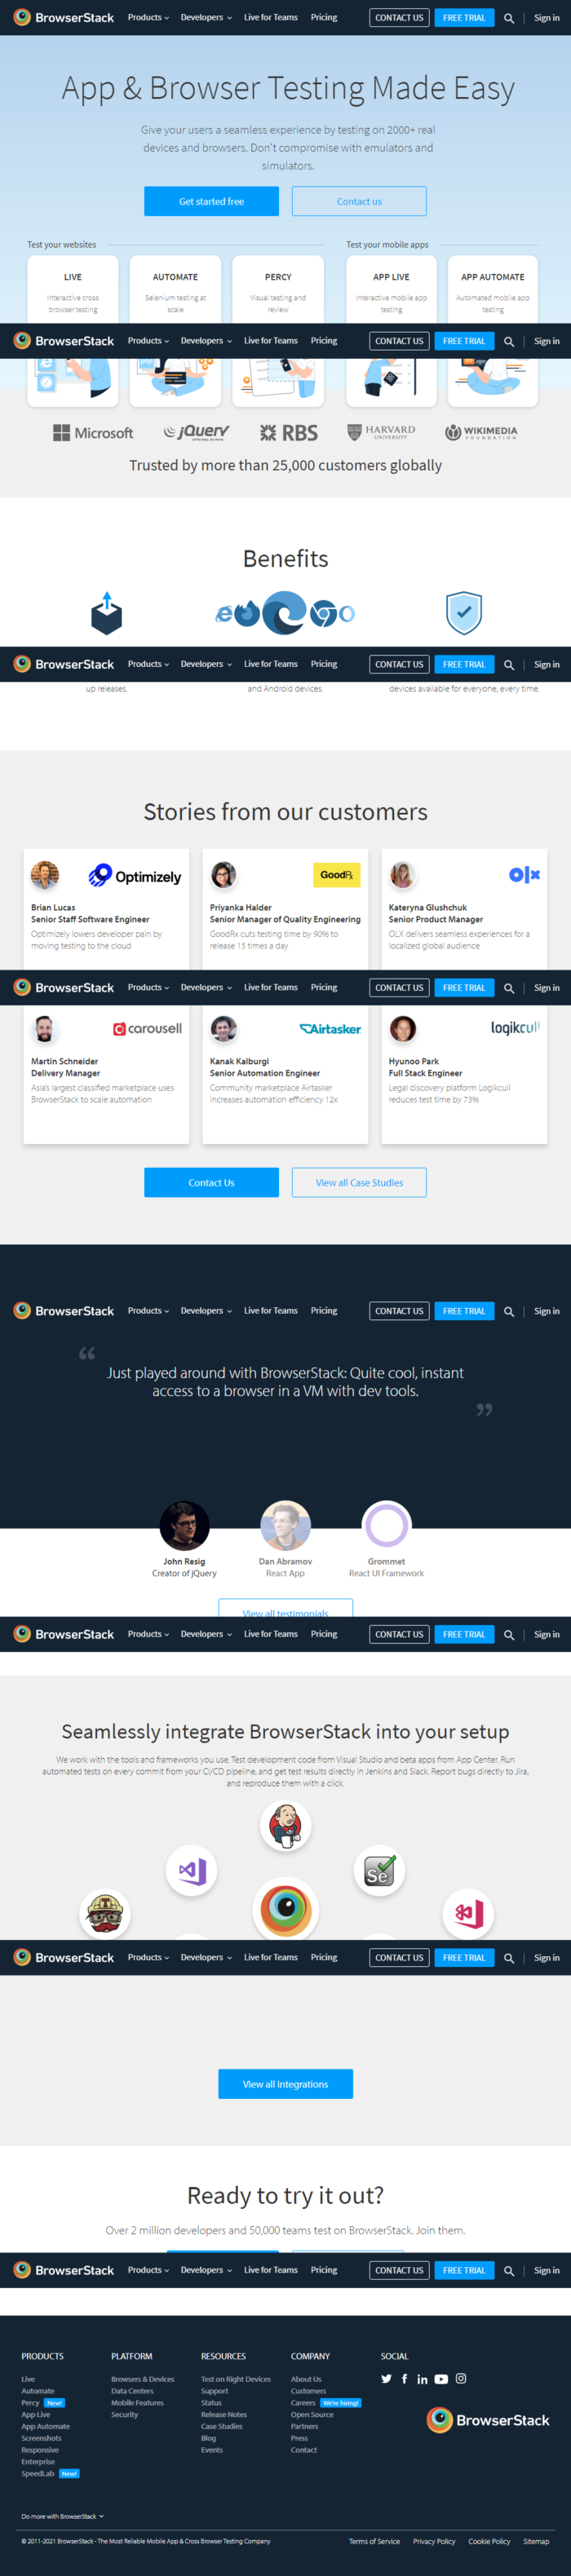
Output
Here instead of just the visible screen, the driver was able to hover down to the bottom of the web page and capture a long screenshot/full length screenshot using the full_Screenshot() method in the Screenshot_Clipping module.
As the article demonstrates, taking screenshots using Selenium and Python is easy enough. Run the code outlined, and start taking screenshots quickly and effectively to streamline their automated Selenium testing.
How To Take A Screenshot Using Python & Selenium?

This article is a part of our Content Hub. For more in-depth resources, check out our content hub on Selenium Python Tutorial.
The goto software framework for any web developer looking for an open-source, free test automation tool is Selenium. It is used with various programming languages, including Java, Python, PHP, Perl, and C#. Selenium can also be used as a web-scraping tool or to create a human-replica bot to automate social-media or even test PDF files! Geeks at Google & Thoughtworks are highly credited for its development and maintenance.
In this Python Selenium screenshot tutorial, we are going to explore different ways of taking screenshots using Selenium’s Python bindings. Before we hop-on to capturing Python Selenium screenshots, let’s first acquaint ourselves with Selenium Python bindings.
What Is Selenium Python Bindings?
Selenium has different components; we have Selenium WebDriver, Selenium IDE, and Selenium Grid. Selenium Python bindings is an API interface to use Python with Selenium WebDriver for writing functional/acceptance tests. We shall be using these Python bindings for Selenium to capture full page screenshots, HTML element-specific screenshots and save it in our desired location.
Installing Dependencies
Before we learn how to use Selenium Python for taking screenshots, we need to install some dependencies. Below is a list of all that you need in your machine-
- Python
- Pip
- Selenium Python bindings
- GeckoDriver
- ChromeDriver

Note: Python 2 is redundant now. So, if your Linux or Mac system is having the older version, you may consider updating them to the latest stable versions.
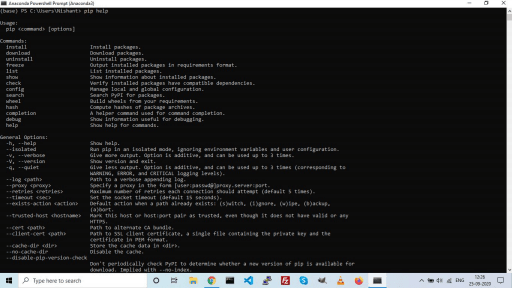 If it displays something like this-
 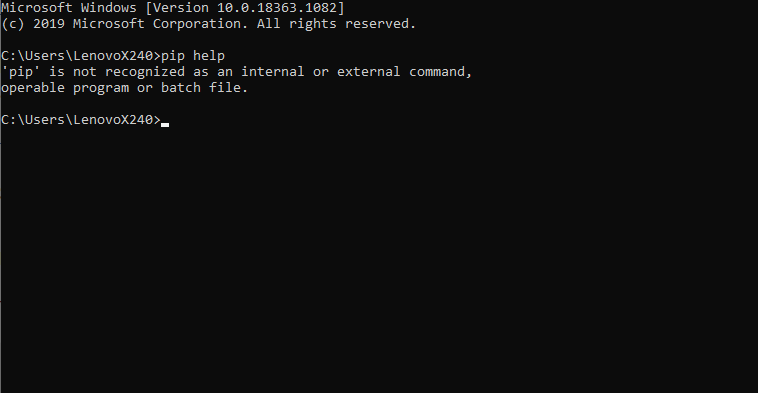 Then you have to download this get-pip.py file to any location in your system, but you should have the path to the file. Remember, you only have to do this if pip is not installed in your system. Next, run this command to install pip. python get-pip.py If you aren’t in the directory as that of the downloaded file, replace the file name in the command given above with the full path to the file location. Now try the command pip help again, you should see the screen we shared earlier.
- Chrome
- Firefox
- Edge
- Internet Explorer
Now let’s make a trial file named check_setup.py. Write the following code in it –
selenium screenshot python
Selenium is a web automation framework that can be used for automated testing, web scraping and anything you can do with a web browser. We can use Selenium to take automated screenshots of a webpage.
Take screenshot Selenium
The way this works is that Python uses the selenium driver to open a module, then selenium will start the defined web browser and open the page url. It will then take a screenshot and save it to the local hard disk.
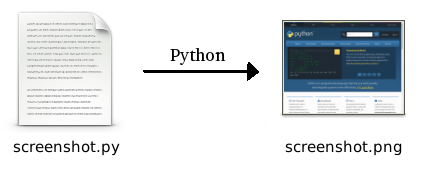
take screenshot using python code
We start a web driver (Chromium) and open the webpage python.org.
from selenium import webdriver
driver = webdriver.Chrome()
driver.get(‘https://python.org’)
driver.save_screenshot(«screenshot.png»)
The screenshot will be saved in the same directory as the program: the program path.
The full code is shown below. Now because I’ve tested with the chromium browser, it contains the ChromeOptions as parameter.
from selenium import webdriver
options = webdriver.ChromeOptions()
options.add_argument(‘—ignore-certificate-errors’)
options.add_argument(«—test-type»)
options.binary_location = «/usr/bin/chromium»
driver = webdriver.Chrome(chrome_options=options)
driver.get(‘https://python.org’)
driver.save_screenshot(«screenshot.png»)
driver.close()
Remember to call driver.close() otherwise the browser stays open after the program finishes.
So you could use a shorter version, if you use another web browser like
from selenium import webdriver
driver = webdriver.Chrome()
driver.get(‘https://pythonspot.com’);
driver.save_screenshot(«screenshot.png»);
Take screenshot of html element
You can take a screenshot of a html element. The way this works is that you first take a screenshot of the whole page and then crop it to its html element size.
from selenium import webdriver
from PIL import Image
# take screenshot
driver = webdriver.Chrome();
driver.get(‘https://www.google.com’);
element = driver.find_element_by_id(«hplogo»);
location = element.location;
size = element.size;
driver.save_screenshot(«pageImage.png»);
# crop image
x = location[‘x’];
y = location[‘y’];
width = location[‘x’]+size[‘width’];
height = location[‘y’]+size[‘height’];
im = Image.open(‘pageImage.png’)
im = im.crop((int(x), int(y), int(width), int(height)))
im.save(‘element.png’)
driver.quit()