Learn, practice, and test your application using articles about selenium, java, maven.
2. Simple example Maven pom.xml for Java based Selenium WebDriver project
Here’s a basic POM.xml file. It includes maven plugin, selenium and testNG libraries.
You can see that it has code which automatically downloads Chrome Driver for mac. It is happenning by using WebDriver Extensions (go to github for more info).
Maven simplifies the creation of a Selenium WebDriver project by handling dependencies and providing a standardized project structure, making it easier to manage and build the project effectively.
Having a hard time using Maven? Then read this express tutorial to create a Selenium Webdriver maven project using TestNG and Eclipse IDE.
In this article, you’ll find some quick visual instructions to set up a Selenium Webdriver maven project in Eclipse. And it won’t take more than five minutes of your precious time.
If you are already using Webdriver & TestNG with Eclipse, then you may skip to the next section. If you don’t, then check if you’ve TestNG plugin installed in your Eclipse. Just go to Window >> Preferences and search for TestNG. It’ll appear in the window pane if your Eclipse IDE has it.
More Read
How to Create TestNG Test Case in Selenium Webdriver
Use Maven and Eclipse to Run Webdriver Tests
Next, you should ensure that you’ve Maven integration for Eclipse enabled. You can test it by opening the Eclipse marketplace window and searching for the maven keyword. In the search results, look for the text: Maven Integration for Eclipse. If it’s not already added, then click to install the Maven support.
So you are now ready with all the prerequisites needed to create your first Selenium Webdriver maven project. Next, follow the visual aids and the description given in the below sections.
While you are going through this maven tutorial, we recommend that you should start practicing the below steps. This way you can remember them much more easily.
Create a Maven Project in Eclipse IDE
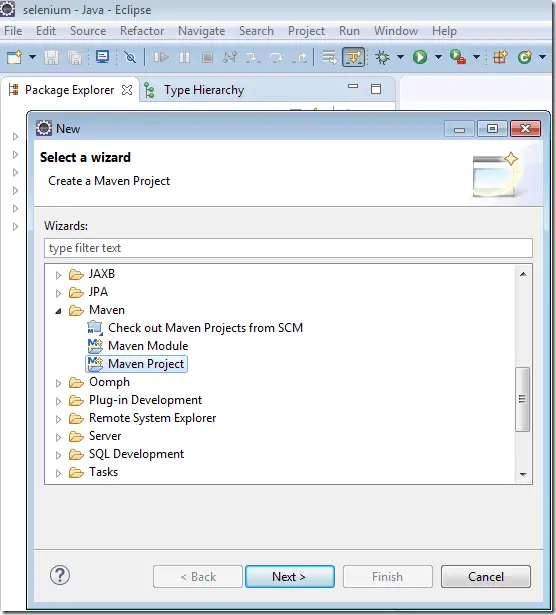
1. Open Eclipse and right-click on Package Explorer. Select New >> Maven project. And click the Next button.
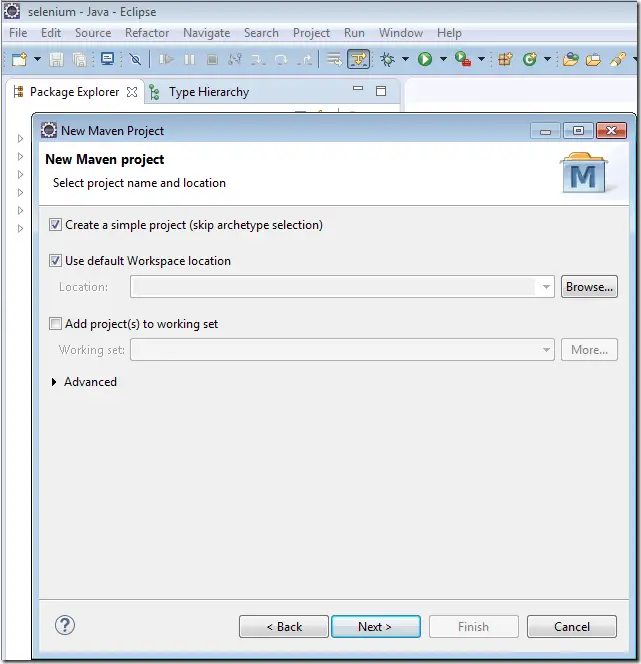
2. Tick the Create a Simple Project (skip archetype selection)> checkbox and click Next.
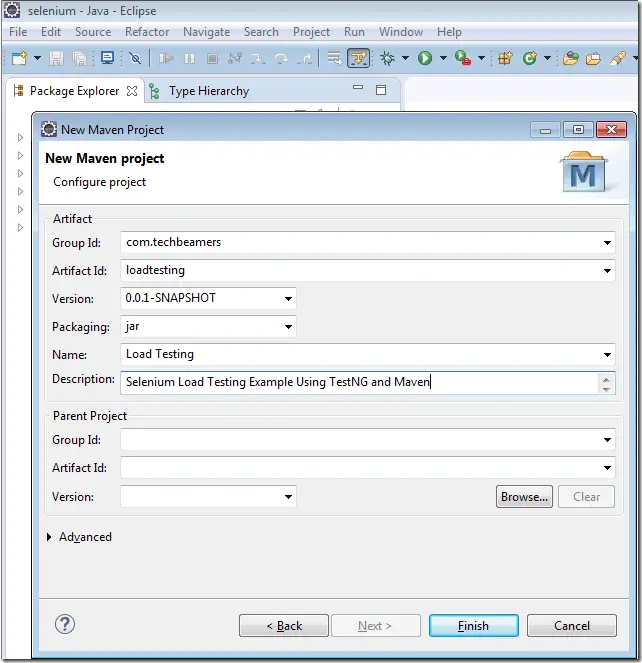
3. Fill in the group id, artifact id, and name. And click the Finish button to create the project.
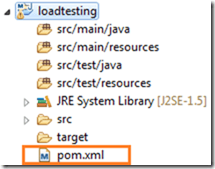
4. The project structure would look something like the one shown in the below image.
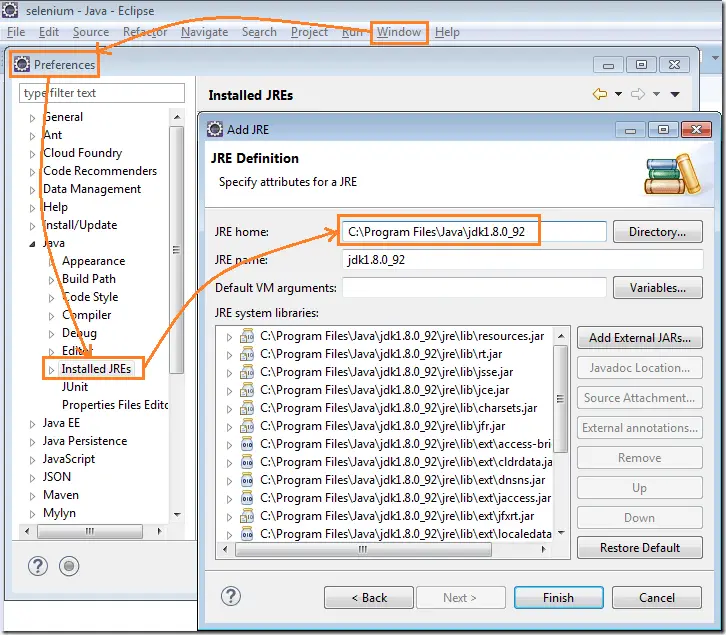
5. Also, you must make sure that the Installed JRE setting is correctly pointing to a JDK path on your system. You can change it from the Preferences window.
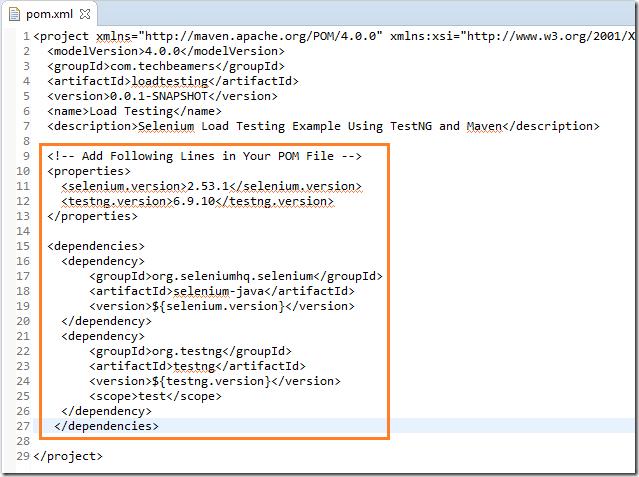
6. Every maven project uses a POM file to add the required dependencies. So we’ll also be adding some libs required for our Webdriver maven project. Namely, these are the Selenium and TestNG JAR files. Please check the below screenshot.
Note: Make sure you provide the correct version for each dependency you add in the POM.
The above clip was just for informational purposes. We’ll attach the full POM file in the below section.
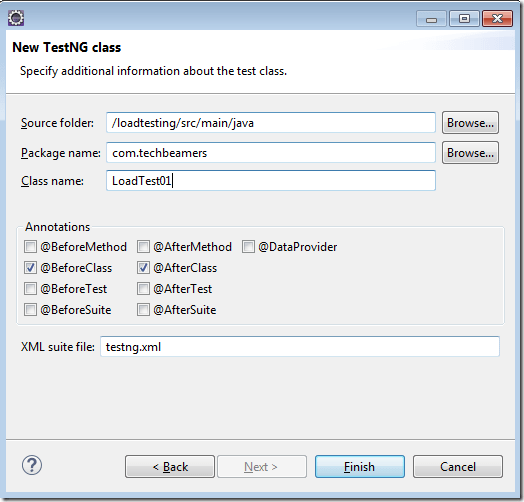
1. Go to your project and right-click on the src/main/java folder. Then, click to select “New >> TestNG class”.
2. Assign a proper name to the class. And select the required methods. Also, specify the name of the testng.xml> file as shown below.
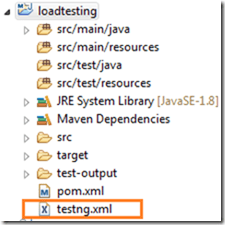
3. Next, you should consider moving the TestNG file to the root of the project. See the below snapshot for reference.
Sample Code to Copy into Your Project
We provided the Java source code and the POM file. You need to copy/paste them into your Web Driver Maven project files.
Java source code:
package com.techbeamers; import java.util.concurrent.TimeUnit; //-- import org.openqa.selenium.By; //-- import org.openqa.selenium.WebDriver; //-- import org.openqa.selenium.WebElement; //-- import org.openqa.selenium.firefox.FirefoxDriver; //-- import org.testng.Assert; //-- import org.testng.annotations.AfterClass; //-- import org.testng.annotations.BeforeClass; //-- import org.testng.annotations.Test; public class LoadTest01 < private WebDriver driver; @BeforeClass public void beforeClass() < driver = new FirefoxDriver(); >@AfterClass public void afterClass() < driver.quit(); >@Test public void verifySearchButton() < driver.manage().timeouts().implicitlyWait(10, TimeUnit.SECONDS); driver.get("http://www.google.com"); String search_text = "Google Search"; WebElement search_button = driver.findElement(By.name("btnK")); String text = search_button.getAttribute("value"); Assert.assertEquals(text, search_text, "Text not found!"); >>
POM File:
4.0.0com.techbeamersloadtesting0.0.1-SNAPSHOTLoad TestingSelenium Load Testing Example Using TestNG and Maven2.53.16.9.10org.seleniumhq.seleniumselenium-java$org.testngtestng$ test
Execution:
To run your WebDriver Maven project, right-click on the testng.xml> file. And select Run As >> TestNG suite. That’s how you should be able to run your code using the TestNG.
Run WebDriver Maven Project with POM File
Since we’ve used Maven in our Webdriver project, we can also utilize its POM file to run our tests. But we’ll need to add a few entries for the following plugins in the POM file.
To include these two plugins, you would need to append the following XML snippet to your project’s POM file.
In conclusion, this tutorial has provided a step-by-step guide on creating a Selenium WebDriver Maven project. By following the instructions, you have learned how to set up the necessary dependencies, configure the project structure, and write code to interact with web elements using WebDriver. With this knowledge, you are equipped to start automating web testing and efficiently developing robust Selenium WebDriver projects. Keep exploring and practicing to enhance your skills in web automation testing with Selenium WebDriver.