- Row and column python
- Установка ячейки виджета
- Конфигурация грида
- Отступы
- Объединение ячеек
- Выравнивание
- Working with DataFrame Rows and Columns in Python
- What is a Data Frame?
- Creating a simple DataFrame
- Result
- Selectively Printing One Dataframe Column
- Adding Columns to a Dataframe in Python
- Output
- Deleting a column
- Working With Dataframe Rows
- Selecting a Row
- Creating a Dataframe Row in Python
- Output
- Deleting a Row
- Conclusion
Row and column python
Метод grid() позволяет поместить виджет в определенную ячейку условной сетки или грида.
Метод grid применяет следующие параметры:
- column : номер столбца, отсчет начинается с нуля
- row : номер строки, отсчет начинается с нуля
- columnspan : сколько столбцов должен занимать элемент
- rowspan : сколько строк должен занимать элемент
- ipadx и ipady : отступы по горизонтали и вертикали соответственно от границ элемента до его содержимого
- padx и pady : отступы по горизонтали и вертикали соответственно от границ ячейки грида до границ элемента
- sticky : выравнивание элемента в ячейке, если ячейка больше элемента. Может принимать значения n, e, s, w, ne, nw, se, sw, которые указывают соответствующее направление выравнивания
Установка ячейки виджета
Например, определим грид из 9 кнопок:
from tkinter import * from tkinter import ttk root = Tk() root.title("METANIT.COM") root.geometry("250x200") for r in range(3): for c in range(3): btn = ttk.Button(text=f"(,)") btn.grid(row=r, column=c) root.mainloop() Здесь в цикле создается девять кнопок, каждая из которых помещается в свою ячейку. В итоге у нас получится следующий грид
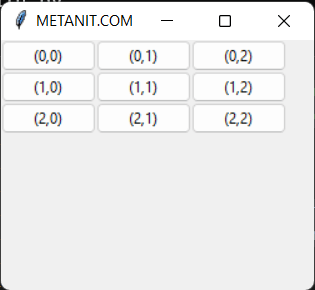
По умолчанию для каждой ячейки выделяется столько места, сколько необходимо для виджета в ней. Соответственно мы получаем небольшую таблицу и много пустого места вне грида, что, возможно, смотрится не лучшим образом. И ситуация усугубляется, если мы попробуем растянуть окно — появится еще больше пустого пространства. Чтоюбы решить эту проблему, надо сконфигурировать грид у контейнера.
Конфигурация грида
Для конфигурации грида в контейнере применяются два метода:
container.columnconfigure(index, weight) container.rowconfigure(index, weight)
Метод columnconfigure() настраивает столбец. В качестве параметра index метод получает индекс столбца, а через параметр weight устанавливает его вес. Столбцы распределяются по всей ширине контейнера в соответствии со своим весом.
Метод rowconfigure() настраивает строку аналогичным образом. В качестве параметра index метод получает индекс строки, а через параметр weight устанавливает ее вес. Строки распределяются по всей длине контейнера в соответствии со своим весом.
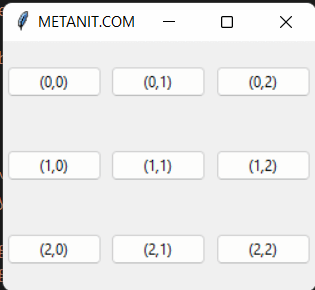
Например, изменим код выше, добавив конфигурацию строк и столбцов:
from tkinter import * from tkinter import ttk root = Tk() root.title("METANIT.COM") root.geometry("250x200") for c in range(3): root.columnconfigure(index=c, weight=1) for r in range(3): root.rowconfigure(index=r, weight=1) for r in range(3): for c in range(3): btn = ttk.Button(text=f"(,)") btn.grid(row=r, column=c) root.mainloop() Поскольку у нас три строки, для упрощения в цикле для каждой строки устанавливаем вес 1. То есть в итоге каждая из трех строк будет занимать треть высоты контейнера (пространство_контейнера / сумму всех весов строк).
Аналогично в цикле для каждого столбца устанавливаем вес 1. То есть в итоге каждый из трех столбец будет занимать треть ширины контейнера.
Отступы
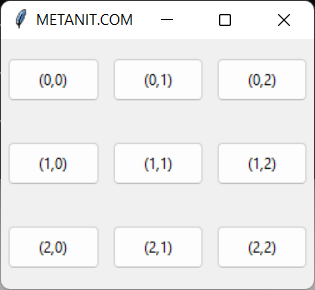
Параметры padx и pady повзвозяют установить отступы по горизонтали и вертикали соответственно от границ ячейки грида до границ виджета, а ipadx и ipady — отступы по горизонтали и вертикали соответственно от границ виджета до его содержимого
from tkinter import * from tkinter import ttk root = Tk() root.title("METANIT.COM") root.geometry("250x200") for c in range(3): root.columnconfigure(index=c, weight=1) for r in range(3): root.rowconfigure(index=r, weight=1) for r in range(3): for c in range(3): btn = ttk.Button(text=f"(,)") btn.grid(row=r, column=c, ipadx=6, ipady=6, padx=4, pady=4) root.mainloop() В данном случае внешние отсуты равны 4 единиц, а внутренние — 6 единицам.
Для параметров padx и pady можно установить отступы с двух сторон в виде списка:
btn.grid(row=r, column=c, ipadx=6, ipady=6, padx=[15, 4], pady=4)
Здесь внешний отступ слева равен 10, а справа — 4 единицам.
Объединение ячеек
Параметр columnspan указывает, столько столбцов, а параметр
rowspan сколько строк должен занимать виджет. То есть с помощью подобных параметров мы можем объединить ячейки.
Растяжение на два столбца:
from tkinter import * from tkinter import ttk root = Tk() root.title("METANIT.COM") root.geometry("250x200") for c in range(2): root.columnconfigure(index=c, weight=1) for r in range(2): root.rowconfigure(index=r, weight=1) btn1 = ttk.Button(text="button 1") # columnspan=2 - растягиваем на два столбца btn1.grid(row=0, column=0, columnspan=2, ipadx=70, ipady=6, padx=5, pady=5) btn3 = ttk.Button(text="button 3") btn3.grid(row=1, column=0, ipadx=6, ipady=6, padx=5, pady=5) btn4 = ttk.Button(text="button 4") btn4.grid(row=1, column=1, ipadx=6, ipady=6, padx=5, pady=5) root.mainloop() 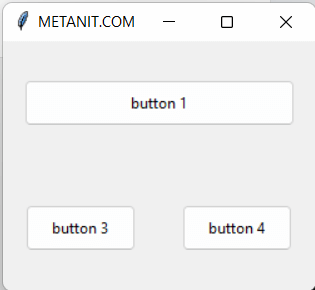
from tkinter import * from tkinter import ttk root = Tk() root.title("METANIT.COM") root.geometry("250x200") for c in range(2): root.columnconfigure(index=c, weight=1) for r in range(2): root.rowconfigure(index=r, weight=1) btn2 = ttk.Button(text="button 2") # rowspan=2 - растягиваем на две строки btn2.grid(row=0, column=1, rowspan=2, ipadx=6, ipady=55, padx=5, pady=5) btn1 = ttk.Button(text="button 1") btn1.grid(row=0, column=0, ipadx=6, ipady=6, padx=5, pady=5) btn3 = ttk.Button(text="button 3") btn3.grid(row=1, column=0, ipadx=6, ipady=6, padx=5, pady=5) root.mainloop() 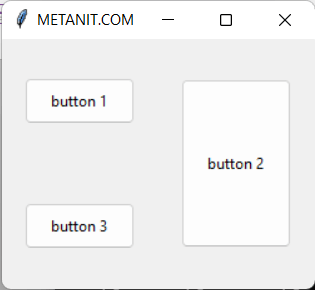
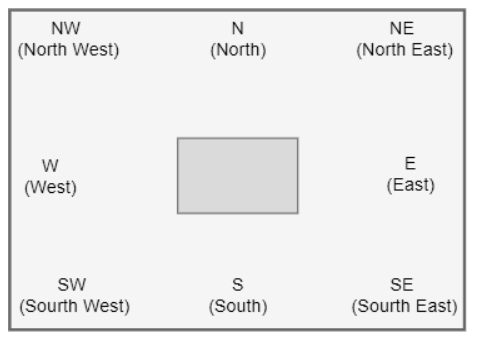
Выравнивание
Параметр sticky задает выравнивание виджета в ячейке, если размер ячейки больше размера этого виджета. Этот параметр может принимать следующие значения:
- n : положение вверху по центру
- e : положение в правой части контейнера по центру
- s : положение внизу по центру
- w : положение в левой части контейнера по центру
- nw : положение в верхнем левом углу
- ne : положение в верхнем правом углу
- se : положение в нижнем правом углу
- sw : положение в нижнем левом углу
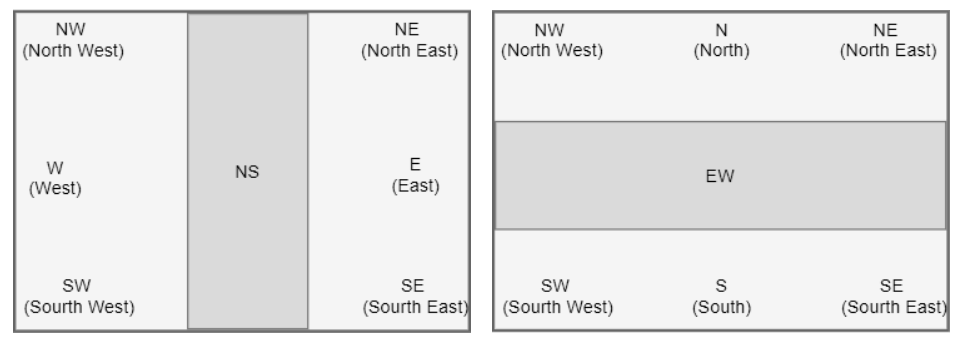
- ns : растяжение по вертикали
- ew : растяжение по горизонтали
- nsew : растяжение по горизонтали и вертикали
По умолчанию виджет позиционируется по центру ячейки
Наглядно растяжение по вертикали и горизонтали
Стоит отметить, что значение в кавычках для параметра anchor передается в нижнем регистре, без кавычек — в верхнем регистре
Например, растянем виджет по всему пространству ячейки (значение NSEW):
from tkinter import * from tkinter import ttk root = Tk() root.title("METANIT.COM") root.geometry("250x200") for c in range(3): root.columnconfigure(index=c, weight=1) for r in range(3): root.rowconfigure(index=r, weight=1) for r in range(3): for c in range(3): btn = ttk.Button(text=f"(,)") btn.grid(row=r, column=c, ipadx=6, ipady=6, padx=4, pady=4, sticky=NSEW) root.mainloop() Working with DataFrame Rows and Columns in Python

In this article, let us see how to create table-like structures using Python and to deal with their rows and columns. This would be very useful when we are creating data science applications that would require us to deal with a large collection of data. Let us see how can we execute basic functions such as creating, updating, and deleting rows/columns using Python.
What is a Data Frame?
Python, being a language widely used for data analytics and processing, has a necessity to store data in structured forms, say as in our conventional tables in the form of rows and columns. We use the DataFrame object from the Pandas library of python to achieve this. Internally the data is stored in the form of two-dimensional arrays. Let us learn more about DataFrame rows and columns in this article.
Creating a simple DataFrame
Let us learn to create a simple DataFrame with an example.
import pandas as pd data = < "TotalScore": [420, 380, 390], "MathScore": [50, 40, 45] >#load data into a DataFrame object: df = pd.DataFrame(data) print(df)
Result
TotalScore MathScore 0 420 50 1 380 40 2 390 45
Selectively Printing One Dataframe Column
Let us see how to select the desired column in python. Consider that we have a dataframe as seen in the above case. We can select the desired column by their column.
The above code would just print the values of ‘MathScore’ column.
Adding Columns to a Dataframe in Python
Now, at times, we might want to add some more columns as part of our data gathering. we can add more columns to our data frame by declaring a new list and converting it into a column in the dataframe.
# creating a new list called name. name = ['Rhema', 'Mehreen', 'Nitin'] # Using 'Name' as the column name # and equating it to the list df['Name'] = name # Observe the result print(df)
Output
TotalScore MathScore Name 0 420 50 Rhema 1 380 40 Mehreen 2 390 45 Nitin
Deleting a column
We can use the drop() method in the pandas dataframe to delete a particular column.
# dropping passed columns df.drop(["Name"], axis = 1, inplace = True)
Now the column ‘Name’ will be deleted from our dataframe.
Working With Dataframe Rows
Now, let us try to understand the ways to perform these operations on rows.
Selecting a Row
To select rows from a dataframe, we can either use the loc[] method or the iloc[] method. In the loc[] method, we can retrieve the row using the row’s index value. We can also use the iloc[] function to retrieve rows using the integer location to iloc[] function.
# importing pandas package import pandas as pd # making data frame from csv file data = pd.read_csv("employees.csv", index_col ="Name") # retrieving row by loc method first = data.loc["Shubham"] second = data.loc["Mariann"] print(first, "\n\n\n", second) In the above code, we are loading a CSV file as a dataframe and assigning the column ‘Name’ as its index value. Later we use the index of the rows to retrieve them.
Creating a Dataframe Row in Python
To insert a new row into our dataframe, we can use append() function, concat() function or loc[] function in the dataframe.
#adding a new row using the next index value. df.loc[len(df.index)] = ['450', '80', 'Disha'] display(df) #using append function new_data = df = df.append(new_data, ignore_index = True) #using concat function concat_data = <'Name':['Sara', 'Daniel'], 'MathScore':[89, 90], 'TotalScore':[410, 445] >df2 = pd.DataFrame(concat_data) df3 = pd.concat([df, df2], ignore_index = True) df3.reset_index() print(df3)
Output
Using loc[] method TotalScore MathScore Name 0 420 50 Rhema 1 380 40 Mehreen 2 390 45 Nitin 3 450 80 Disha Using append() function TotalScore MathScore Name 0 420 50 Rhema 1 380 40 Mehreen 2 390 45 Nitin 3 450 80 Disha 4 465 89 Ripun Using Concat() function TotalScore MathScore Name 0 420 50 Rhema 1 380 40 Mehreen 2 390 45 Nitin 3 450 80 Disha 4 465 89 Ripun 5 410 89 Sara 6 445 90 Daniel
Deleting a Row
We can use the drop() method to delete rows. We have to pass the index value of the row as an argument to the method.
# importing pandas module import pandas as pd # making data frame from csv file data = pd.read_csv("employees.csv", index_col ="Name" ) # dropping passed values data.drop(["Shubham", "Mariann"], inplace = True) Conclusion
Hence, in this article, we have discussed various ways to deal with rows and columns in python. In general, data frames are two-dimensional structures in Python that we can use to store data and perform various other functions.