- How To Create Rounded Images In HTML CSS (Simple Examples)
- TLDR – QUICK SLIDES
- TABLE OF CONTENTS
- DOWNLOAD & NOTES
- QUICK NOTES
- EXAMPLE CODE DOWNLOAD
- CSS ROUNDED IMAGES
- EXAMPLE 1) BASIC ROUNDED IMAGE
- 1A) THE HTML & CSS
- 1B) MUST BE A SQUARE IMAGE!
- EXAMPLE 2) ROUNDED BACKGROUND IMAGE
- 2A) BASIC ROUNDED BACKGROUND IMAGE
- 2B) POSITIONING THE BACKGROUND IMAGE
- 2C) MULTIPLE BACKGROUND IMAGES
- EXTRA BITS & LINKS
- LINKS & REFERENCES
- TUTORIAL VIDEO
- INFOGRAPHIC CHEAT SHEET
- THE END
- Leave a Comment Cancel Reply
- Search
- Breakthrough Javascript
- Socials
- About Me
- Как создать круглое изображение средствами CSS
- Итак, как сделать круговое изображение только с помощью CSS?
- Округленное изображение с использованием CSS свойством border-radius
- Округленное изображение с использованием CSS свойством background-image
- Адаптивное закругленное изображение с использованием CSS
- Закругленное изображение с использованием CSS свойством clip-path
- Заключение
- New Repeating Background Image Options in CSS3
- background-repeat: space
- background-repeat: round
- Differing Horizontal and Vertical Repeats
- Changing the Background Position
- Browser Compatibility
- Share This Article
How To Create Rounded Images In HTML CSS (Simple Examples)
Welcome to a quick on how to create rounded images in HTML and CSS. So you have a website and want to display images in a circular format? Thankfully, it is easy to do so with modern CSS.
There are 2 quick ways to create rounded images in CSS.
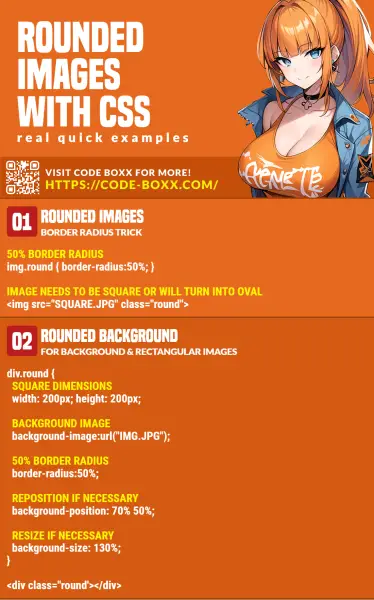
- For square images, simply add a 50% border radius.
- For images that are rectangular, set it as the background image of a square then add the 50% border radius.
- #demo < width: 200px; height: 200px; >
- #demo
That about covers the essentials, but let us walk through some examples in this guide. Read on!
ⓘ I have included a zip file with all the example source code at the start of this tutorial, so you don’t have to copy-paste everything… Or if you just want to dive straight in.
TLDR – QUICK SLIDES

TABLE OF CONTENTS
DOWNLOAD & NOTES
Firstly, here is the download link to the example code as promised.
QUICK NOTES
If you spot a bug, feel free to comment below. I try to answer short questions too, but it is one person versus the entire world… If you need answers urgently, please check out my list of websites to get help with programming.
EXAMPLE CODE DOWNLOAD
Click here to download the source code, I have released it under the MIT license, so feel free to build on top of it or use it in your own project.
CSS ROUNDED IMAGES
All right, let us now get into the examples of creating rounded images in HTML and CSS.
EXAMPLE 1) BASIC ROUNDED IMAGE
1A) THE HTML & CSS
.roundimg


Yep, it’s that simple. As some of you guys already know, we normally use border-radius to create rounded corners… So when we do a border-radius: 50% , it literally turns the container (or image) into a circle.
1B) MUST BE A SQUARE IMAGE!
Take extra note though – The 50% border radius trick will only work on square images . If we apply it to a rectangular image, it turns into an oval instead.
EXAMPLE 2) ROUNDED BACKGROUND IMAGE
2A) BASIC ROUNDED BACKGROUND IMAGE
.roundedA

To deal with rectangle and background images, we use the same strategy as above – But we apply it to a instead.
- width: 200px; height: 200px; border-radius: 50%; will turn the into a circular container.
- The image is then “added” using background-image: url(«zman.webp») .
2B) POSITIONING THE BACKGROUND IMAGE
As you may have also noticed – CSS will, by default, place the top left side of the image as the background. It will be “cut off” in an awkward manner if the image is off-centered. To fix that, we can manually reposition it using background-position , and also, resize it using background-size .
2C) MULTIPLE BACKGROUND IMAGES
Finally, what happens if we have to deal with multiple round images? As a small extra, I will recommend putting all the “basics” in a .rounded CSS class and manually specify the background-image in the inline style . Yep… This is kind of painful, but it’s better than manually editing every image.
EXTRA BITS & LINKS
That’s all for this guide, and here is a small section on some extras and links that may be useful to you.
LINKS & REFERENCES
TUTORIAL VIDEO
INFOGRAPHIC CHEAT SHEET
THE END
Thank you for reading, and we have come to the end of this guide. I hope that it has helped you with your project, and if you want to share anything with this guide, please feel free to comment below. Good luck and happy coding!
Leave a Comment Cancel Reply
Search
Breakthrough Javascript

Take pictures with the webcam, voice commands, video calls, GPS, NFC. Yes, all possible with Javascript — Check out Breakthrough Javascript!
Socials
About Me

W.S. Toh is a senior web developer and SEO practitioner with over 20 years of experience. Graduated from the University of London. When not secretly being an evil tech ninja, he enjoys photography and working on DIY projects.
Code Boxx participates in the eBay Partner Network, an affiliate program designed for sites to earn commission fees by linking to ebay.com. We also participate in affiliate programs with Bluehost, ShareASale, Clickbank, and other sites. We are compensated for referring traffic.
Как создать круглое изображение средствами CSS
В CSS есть проблема с отображением круглого изображения, так как изображения имеют прямоугольную или квадратную форму.
Вы всегда можете использовать графический редактор, например, Gimp или Photoshop чтобы обрезать изображение в виде круга или даже использовать онлайн-инструменты, такие как MockoFun, чтобы обрезать изображение онлайн. Но эта заметка о том, как сделать круглые изображения с помощью CSS.
Итак, как сделать круговое изображение только с помощью CSS?
В этой заметке ее автор расскажет вам, как использовать CSS для преобразования прямоугольного или квадратного изображения в круглое.

Округленное изображение с использованием CSS свойством border-radius
Самое простое решение для отображения изображения в виде круга с помощью CSS — это использование border-radius . Это свойство используется для создания закругленных границ для элементов HTML, поэтому оно также работает и для изображений.
Чтобы этот метод работал с изображениями любых размеров (в горизонтальной, вертикальной или горизонтальной ориентации), необходимо, чтобы изображение имело родительский HTML-элемент («обертку»). Мы будем использовать элемент span в качестве оболочки с именем CSS-класса circle-image .
И CSS для создания круглого изображения:
.circle-image < display: inline-block; border-radius: 50%; overflow: hidden; width: 50px; height: 50px; >.circle-image img
Вот и весь код CSS, который вам нужен для отображения круглого изображения!
Автор использовал display: inline-block , потому что элемент span по-умолчанию строчный, и ему нужно менять значение display , чтобы можно было установить размеры.
Установка значения border-radius равным 50% на самом деле и создает закругленное изображение с помощью CSS, поскольку оно округляет углы с радиусом 50% (половиной) от всего размера изображения.
Для img автор просто использовал 100% для размера, чтобы убедиться, что он плотно прилегает к элементу «обертки». Свойство object-fit: cover обеспечивает сохранение соотношения изображения, чтобы оно не растягивалось.
Этот подход довольно прост, но он не лишен неудобств. Например, вы должны указывать размер изображения. В примере автор поставил значение, равное 50px , а вам нужно будет указывать ваш размер.
Округленное изображение с использованием CSS свойством background-image
По сути, мы используем CSS, чтобы установить наше изображение в качестве фона HTML-элемента и сделать элемент округлым. Таким образом мы получим желаемый результат.
и CSS-код, закругляющий наше изображение:
Если вам нужно расположить изображение внутри круга нестандартно, вы можете использовать CSS-свойство background-position , чтобы указать левую и верхнюю позиции или комбинации значений: bottom | top | center | left | right .
В большинстве случаев описанных решений будет достаточно, но что, если вам нужно сделать адаптивное изображение круга с помощью CSS?
Адаптивное закругленное изображение с использованием CSS
Нравится нам это или нет, но адаптивный веб-дизайн является важным требованием для веб-сайтов. Давайте посмотрим, что нам нужно изменить в нашем CSS-коде кругового изображения выше, чтобы сделать его адаптивным.
HTML-код остается прежним, потому что нам все еще нужен элемент-обертка:
и адаптивный CSS-код, закругляющий наше изображение:
.circle-image < display: inline-block; overflow: hidden; width: 33%; padding-bottom: 33%; height: 0; position: relative; >.circle-image img
Ну, во-первых, мы установили ширину ( width ) элемента span («обертки») в процентах. Это делает изображение круга адаптивным. Автор использовал значение, равное 33%, поэтому он будет масштабирован до 1/3 контейнера изображения.
Мы знаем, что для размещения адаптивных изображений, нужно использовать намного больше CSS, таких как, например, медиа-запросы, но это выходит за рамки этой статьи.
Есть один хитрый трюк, чтобы превратить фигуру в квадрат: установка height равной 0 и padding-bottom , равного ширине ( width ) элемента. Это нужно нам для того, чтобы убедиться, что изображение становится кругом, а не сжатым овалом.
Этот трюк автор статьи придумал не сам, а нашел здесь .
И последнее, что мы установили для элемента «обертки» - правило position: relative . Это связано с тем, что изображение внутри будет иметь position: absolute , и мы хотим, чтобы изображение было позиционировано как абсолютное, относительно элемента обтекания, а не всего документа. Наконец, мы снова установим border-radius равный 50%, но на этот раз для изображения. Это сделает изображение закругленным.
Закругленное изображение с использованием CSS свойством clip-path
Теперь давайте рассмотрим другой способ использования CSS для закругления изображений.
CSS-свойство clip-path создает область отсечения, которая определяет, какая часть элемента должна отображаться. Части, которые находятся внутри области, показаны, а те, которые снаружи, скрыты. Одним из значений этого свойства CSS является circle .
Таким образом, с помощью этого свойства CSS вы можете обрезать элемент изображения в форме круга с указанным центром и радиусом.
А в CSS-коде адаптивного кругового изображения мы заменяем свойство border-radius на clip-path :
.circle-image < display: inline-block; overflow: hidden; width: 33%; padding-bottom: 33%; height: 0; position: relative; >.circle-image img
При добавлении свойства clip-path изображение обрезается в виде круга с радиусом, равным половине элемента «обертки».
Заключение
Мы рассмотрели несколько вариантов создания кругового изображения с помощью CSS. Теперь вы знаете все их «за» и «против». Если у вас есть какие-либо вопросы или замечания, пожалуйста, напишите автору комментарий в конце статьи и он постарается помочь.
Если вам понравился этот пост и вы хотите изучить HTML и CSS, автор рекомендует вам в следующий раз прочитать пост « Создание красивых HTML-диаграмм ».
Оригинал статьи: CSS Circle Image: “How To” Complete Guide
Автор статьи: John Negoita
New Repeating Background Image Options in CSS3
In CSS2.1, the background-repeat property had four options: no-repeat , repeat , repeat-x and repeat-y . While these are undoubtedly useful, they don’t permit finer control over the repeating process and tiles will be clipped if they don’t fit the container an exact number of times.
CSS3 introduces two new options: space and round …
background-repeat: space
The space option will repeat a tile horizontally and vertically without clipping or resizing the or image, e.g.
background-repeat: round
The round option will repeat a tile horizontally and vertically without clipping, but the image may be resized, e.g.
Assume we have a background image with a width 100px (actual or resized using the CSS3 background-size property). This is contained in an element with 520 horizontal pixels, so:
round(520 / 100) = round(5.2) = 5The browser will render five images in the space but adjust the image width to 104px (520px / 5). The image is made wider to fit the container.
Differing Horizontal and Vertical Repeats
background-repeat can be passed two values to alter the horizontal and vertical repeating, e.g.
background-repeat: round space; /* width resizes, height static */ background-repeat: space round; /* width static, height resizes */ background-repeat: space no-repeat; /* fit tiles horizontally only */Changing the Background Position
Tiling with space or round will only work as you expect if the background-position is set to 0 0. You are free to change it; the image sizes and spacing will be tiled the same but the top-left offset is moved accordingly.
Browser Compatibility
Two browsers support the space and round properties. Guess which ones? You’re wrong: it’s IE9 and Opera. At the time of writing, they are not implemented in Firefox, Chrome or Safari. It gets worse:


- When Firefox encounters space or round it falls back to repeat .
- When Chrome or Safari encounter space or round they fall back to no-repeat . In addition, the webkit browsers appear to recognize the properties but don’t render them correctly.
The only way to achieve any sort of consistency is to force Firefox to render like webkit, e.g.
- IE9 and Opera will correctly repeat a tile horizontally and vertically without clipping or resizing the image.
- Firefox won’t recognize space , falls back to the no-repeat setting and shows a single tile.
- Chrome and Safari recognize space but incorrectly show a single, non-repeated title.
Nasty. It might be best to wait a few more months until Mozilla and Webkit add full support for CSS3 background-repeat .
Share This Article
Craig is a freelance UK web consultant who built his first page for IE2.0 in 1995. Since that time he's been advocating standards, accessibility, and best-practice HTML5 techniques. He's created enterprise specifications, websites and online applications for companies and organisations including the UK Parliament, the European Parliament, the Department of Energy & Climate Change, Microsoft, and more. He's written more than 1,000 articles for SitePoint and you can find him @craigbuckler.