- How to Make an Image a Circle in CSS: A Comprehensive Guide
- Using the Border-Radius Property to Create a Circular Image
- Using the Clip-Path: Circle() Property to Create a Circular Image
- How to Circle Images with HTML and CSS on VS Code
- Center-Aligning Circular Images with CSS
- Using the CSS Border Radius Property to Draw a Circle
- Common Use Cases for Circular Images in Web Development
- Other helpful code examples for creating circular images in CSS
- Conclusion
- How To Create Rounded Images In HTML CSS (Simple Examples)
- TLDR – QUICK SLIDES
- TABLE OF CONTENTS
- DOWNLOAD & NOTES
- QUICK NOTES
- EXAMPLE CODE DOWNLOAD
- CSS ROUNDED IMAGES
- EXAMPLE 1) BASIC ROUNDED IMAGE
- 1A) THE HTML & CSS
- 1B) MUST BE A SQUARE IMAGE!
- EXAMPLE 2) ROUNDED BACKGROUND IMAGE
- 2A) BASIC ROUNDED BACKGROUND IMAGE
- 2B) POSITIONING THE BACKGROUND IMAGE
- 2C) MULTIPLE BACKGROUND IMAGES
- EXTRA BITS & LINKS
- LINKS & REFERENCES
- TUTORIAL VIDEO
- INFOGRAPHIC CHEAT SHEET
- THE END
- Leave a Comment Cancel Reply
- Search
- Breakthrough Javascript
- Socials
- About Me
- Round image with border css
How to Make an Image a Circle in CSS: A Comprehensive Guide
Learn how to create circular images in CSS using the border-radius, clip-path, and CSS border radius properties. Improve your web design skills with our tips and tricks.
- Using the Border-Radius Property to Create a Circular Image
- Using the Clip-Path: Circle() Property to Create a Circular Image
- How to Circle Images with HTML and CSS on VS Code
- Center-Aligning Circular Images with CSS
- Using the CSS Border Radius Property to Draw a Circle
- Common Use Cases for Circular Images in Web Development
- Other helpful code examples for creating circular images in CSS
- Conclusion
- How do I shape an image into a circle in CSS?
- How do I change the shape of an image in CSS?
- How do I make a circle object in CSS?
- How do I make a circular picture shape?
If you’re looking to add a touch of creativity to your website or application design, one way to do so is by using circular images. They can add a personal touch to your website, as well as create a more inviting environment for your users. In this article, we’ll be exploring how to create circular images using CSS.
Using the Border-Radius Property to Create a Circular Image
The border-radius property is one of the most commonly used CSS properties for creating circular images . This property is used to round the corners of an element, and it can also be used to create circular images.
To create a circular image, you’ll need to set the border-radius property to 50%. This will make the element perfectly round. You can adjust the percentage to make the image more or less circular.
Here’s an example of how to create a circular image using the border-radius property:
.img-circular border-radius: 50%; > Using the Clip-Path: Circle() Property to Create a Circular Image
Another way to create a circular image is by using the clip-path property. This property is used to create a clipping region that sets the boundaries for an element. You can use the circle() function to create a circle clipping region.
Here’s an example of how to create a circular image using the clip-path property:
.img-circular clip-path: circle(50%); > One advantage of using the clip-path property is that it allows you to create more complex shapes. However, it may not be supported by all browsers, so it’s important to test your website on different browsers to ensure it works as expected.
How to Circle Images with HTML and CSS on VS Code
In this video, I will show you how to make images circular in Visual Studio Code by using CSS Duration: 2:17
Center-Aligning Circular Images with CSS
Once you’ve created a circular image, you may want to center-align it on your website. You can do this by using the background-position property.
Here’s an example of how to center-align a circular image using the .img-circular class:
.img-circular background-position: center; > This will center-align the circular image both vertically and horizontally.
Using the CSS Border Radius Property to Draw a Circle
You can also use the border-radius property to draw a circle. To do so, you’ll need to set the border-radius property to 50% and make sure the element has equal height and width.
Here’s an example of how to draw a circle using the border-radius property:
.circle width: 200px; height: 200px; border-radius: 50%; > Common Use Cases for Circular Images in Web Development
Circular images have various use cases in web development. They can be used for avatars, icons, or any other image that you want to give a circular shape.
One common use case for circular images is in user profile pictures. By using circular images for profile pictures, you can create a more personalized and inviting experience for your users.
Another use case for circular images is in product images. By using circular images for product images, you can create a more creative and aesthetically pleasing design for your website or application.
Other helpful code examples for creating circular images in CSS
In css, how to make image a circle css code example
In css, css photo circle code example
In css, css create a circle image code example
clip-path: circle(50.0% at 50% 50%);Conclusion
In conclusion, creating circular images using css is a straightforward process that requires just a few lines of code. By using the border-radius and clip-path properties, you can easily create circular images that add a touch of creativity to your website or application. Additionally, Center-Aligning Circular Images and drawing circles using the border-radius property can help you achieve the perfect design for your website. Remember to test your website on different browsers to ensure it works as expected.
If you’re looking to add circular images to your website or application, we hope this guide has been helpful. By following the tips and best practices outlined in this article, you can create beautiful circular images that enhance the design and user experience of your website or application.
How To Create Rounded Images In HTML CSS (Simple Examples)
Welcome to a quick on how to create rounded images in HTML and CSS. So you have a website and want to display images in a circular format? Thankfully, it is easy to do so with modern CSS.
There are 2 quick ways to create rounded images in CSS.
- For square images, simply add a 50% border radius.
- For images that are rectangular, set it as the background image of a square then add the 50% border radius.
- #demo < width: 200px; height: 200px; >
- #demo
That about covers the essentials, but let us walk through some examples in this guide. Read on!
ⓘ I have included a zip file with all the example source code at the start of this tutorial, so you don’t have to copy-paste everything… Or if you just want to dive straight in.
TLDR – QUICK SLIDES

TABLE OF CONTENTS
DOWNLOAD & NOTES
Firstly, here is the download link to the example code as promised.
QUICK NOTES
If you spot a bug, feel free to comment below. I try to answer short questions too, but it is one person versus the entire world… If you need answers urgently, please check out my list of websites to get help with programming.
EXAMPLE CODE DOWNLOAD
Click here to download the source code, I have released it under the MIT license, so feel free to build on top of it or use it in your own project.
CSS ROUNDED IMAGES
All right, let us now get into the examples of creating rounded images in HTML and CSS.
EXAMPLE 1) BASIC ROUNDED IMAGE
1A) THE HTML & CSS
.roundimg


Yep, it’s that simple. As some of you guys already know, we normally use border-radius to create rounded corners… So when we do a border-radius: 50% , it literally turns the container (or image) into a circle.
1B) MUST BE A SQUARE IMAGE!
Take extra note though – The 50% border radius trick will only work on square images . If we apply it to a rectangular image, it turns into an oval instead.
EXAMPLE 2) ROUNDED BACKGROUND IMAGE
2A) BASIC ROUNDED BACKGROUND IMAGE
.roundedA

To deal with rectangle and background images, we use the same strategy as above – But we apply it to a instead.
- width: 200px; height: 200px; border-radius: 50%; will turn the into a circular container.
- The image is then “added” using background-image: url(«zman.webp») .
2B) POSITIONING THE BACKGROUND IMAGE
As you may have also noticed – CSS will, by default, place the top left side of the image as the background. It will be “cut off” in an awkward manner if the image is off-centered. To fix that, we can manually reposition it using background-position , and also, resize it using background-size .
2C) MULTIPLE BACKGROUND IMAGES
Finally, what happens if we have to deal with multiple round images? As a small extra, I will recommend putting all the “basics” in a .rounded CSS class and manually specify the background-image in the inline style . Yep… This is kind of painful, but it’s better than manually editing every image.
EXTRA BITS & LINKS
That’s all for this guide, and here is a small section on some extras and links that may be useful to you.
LINKS & REFERENCES
TUTORIAL VIDEO
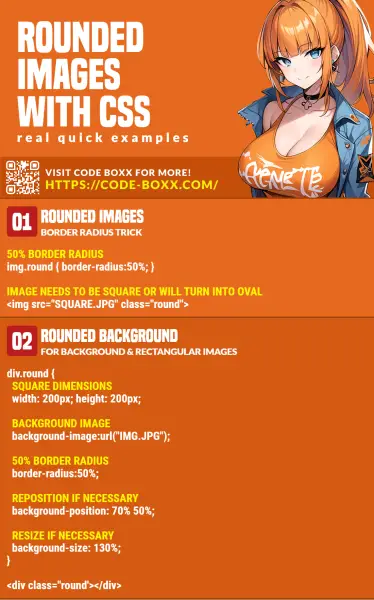
INFOGRAPHIC CHEAT SHEET
THE END
Thank you for reading, and we have come to the end of this guide. I hope that it has helped you with your project, and if you want to share anything with this guide, please feel free to comment below. Good luck and happy coding!
Leave a Comment Cancel Reply
Search
Breakthrough Javascript

Take pictures with the webcam, voice commands, video calls, GPS, NFC. Yes, all possible with Javascript — Check out Breakthrough Javascript!
Socials
About Me

W.S. Toh is a senior web developer and SEO practitioner with over 20 years of experience. Graduated from the University of London. When not secretly being an evil tech ninja, he enjoys photography and working on DIY projects.
Code Boxx participates in the eBay Partner Network, an affiliate program designed for sites to earn commission fees by linking to ebay.com. We also participate in affiliate programs with Bluehost, ShareASale, Clickbank, and other sites. We are compensated for referring traffic.
Round image with border css
By Cory LaViska on June 13, 2019
Need a perfectly round image without cropping or wrapping it in extra elements? Here are four lines of CSS that will save the day.

We all know that setting border-radius: 50% on an image is an easy way to make it round, but that doesn’t work so well if the image isn’t perfectly square. Let’s take a look at three different images from placekitten, one square, one portrait, and one landscape.

Since we want these to be perfectly round, like an avatar, we’ll need to set the dimensions and add the usual border-radius trick. Let’s use the rounded class to keep things simple.
Here's what we end up with. Notice how the portrait and landscape images are squished?
In the good ol' days of CSS, we'd need to crop the images manually or add a wrapper with some overflow: hidden magic to fix this. Fortunately, we have object-fit now!
Perfect! With just four lines of CSS, we've managed to get rounded images that aren't squished. You're probably wondering what the catch is — there are two.
First, you don't have control over how the images are positioned. You're pretty much stuck with them being centered. Second, this property doesn't work in Internet Explorer. Of course, if you're targeting modern browsers, you're good to go!
Never used object-fit before? Learn more about it here.
Making static websites easier to edit since 2008. Come see why thousands of websites trust Surreal CMS.

