Registration Form in Java With Database Connectivity Tutorial
Hello friends, welcome to another tutorial. In this tutorial, we will learn how to create a Gui Registration Form in Java With Database Connectivity . For this example, I will create a student registration form using Java swing with the database connectivity, and the source code can be downloaded at the end of the tutorial.
In my previous tutorial we have learned about how to create a Login Form in Java, and also we have learned about how to create a Simple Calculator Using Java Swing, and now we will see how we can create the registration form in Java and we will connect it with MySQL database.
I will use Eclipse IDE for the coding part of my program, and for my database, I am going to use MySQL workbench. MySQL workbench is nothing but a GUI version of MySQL console where we can visually design, model, generate and design databases.
So let’s start our tutorial Registration Form in Java With Database Connectivity.
Registration Form in Java With Database Connectivity
Prerequisites
After you have downloaded these Softwares from the above links just follow the simple installation process and you are ready to go.
You can also see my Article How to install MySQL Workbench to learn about the installation process of MySQL Workbench with simple and easy steps.
Creating Database in MySQL WorkBench
step 1
- Open MySQL WorkBench and then go to Database>Connect to Database.
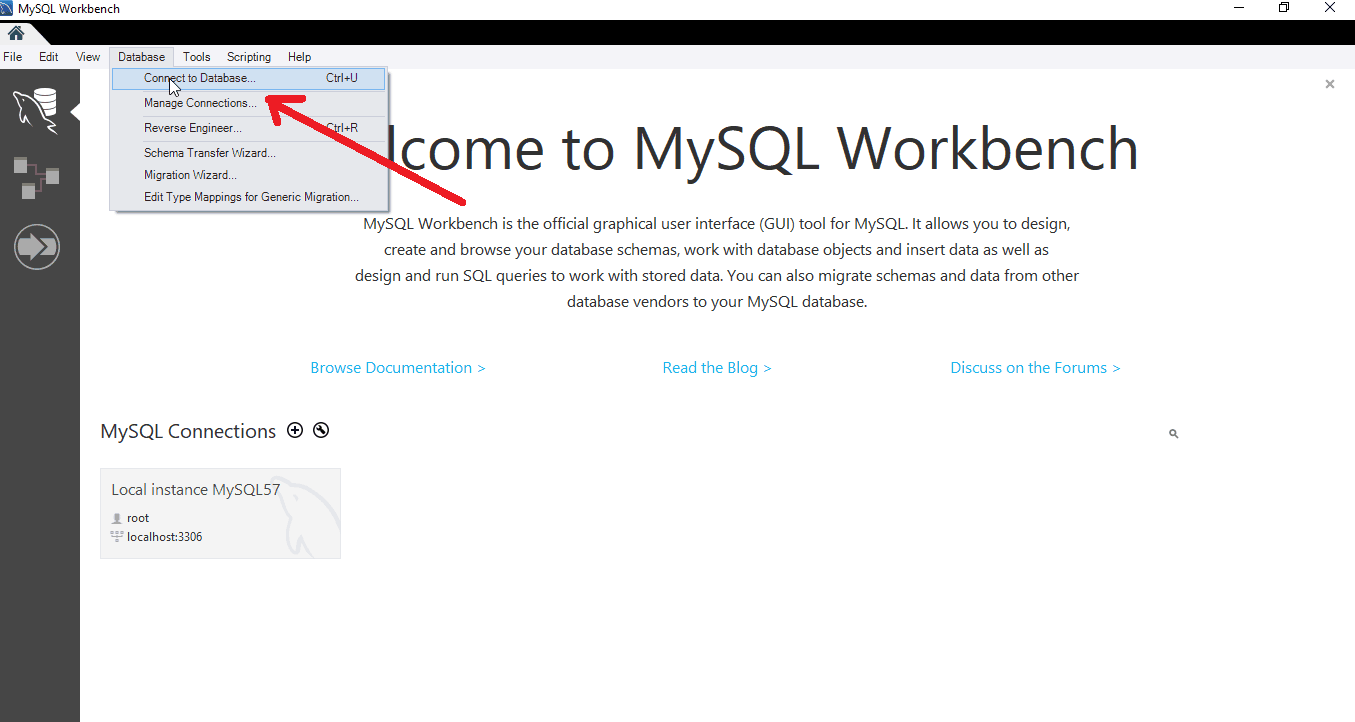
- A pop-up window will be opened just click on ok.
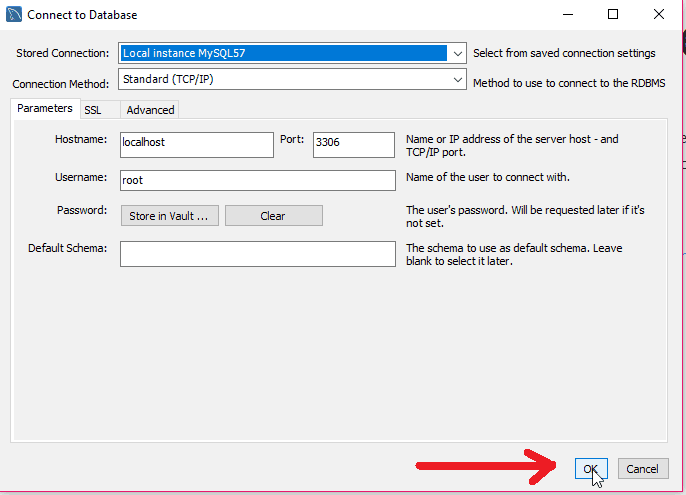
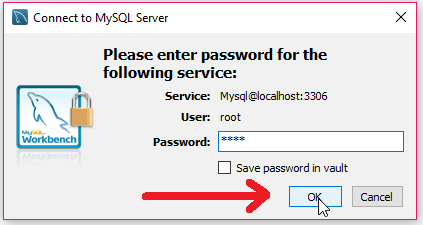
- Once you click on “ok” it will ask you for a password.it is the same password which you have used during the installation process. So enter the correct password and then click on the “ok” button.
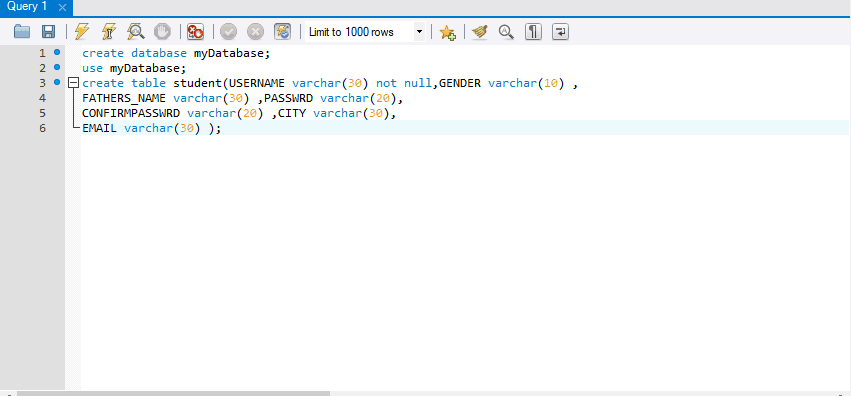
- Now we will create a database (myDatabase in this example) and inside that database, we will create a table (student in this example) with the following fields,
- USERNAME
- GENDER
- FATHERS_NAME
- PASSWRD
- CONFIRMPASSWRD
- CITY
Creating Window For Our Registration Form
Step 2
- The next thing we have to do is to create the window for our registration form so that we can add components to it.
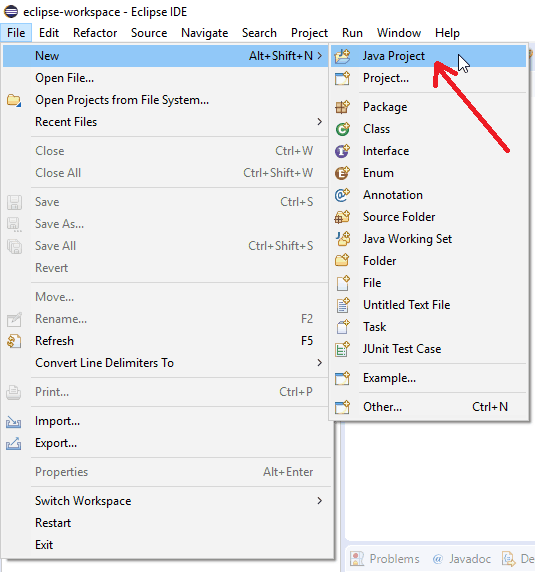
- Go to Eclipse IDE and create a new Java Project.
- For this, you click on the Java Project under the new section of File Menu (File>>New>>Java Project).
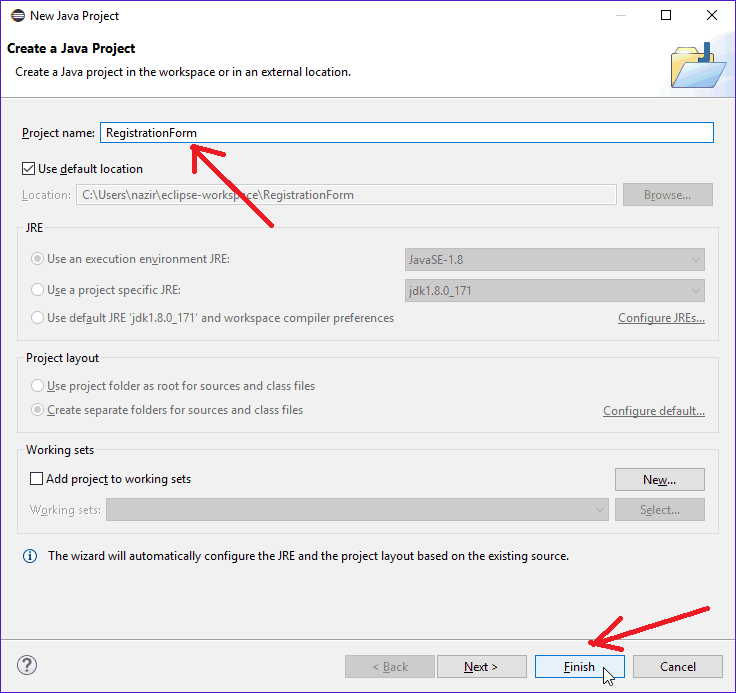
- Now give a name to your project (RegistrationForm in this example) and click on “Finish”.
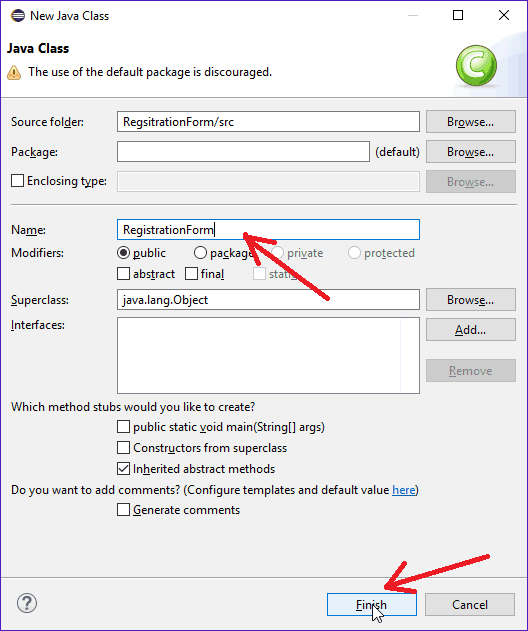
- Now right click on the project and create a new Java class (New>>Class).

- Now give a name to your class(RegistrationForm in this Example) and then click on the Finish button.
- Now import all necessary packages.
- Implement ActionListener interface to our class so that we will be able to do some button click event in our program.And if we are implementing the ActionListener interface in our class then we have to override it’s method actionPerformed() into our class.
- Now create an object of the JFrame class.
- Create a user-defined method createWindow() and inside that, we will set all the properties of our JFrame like its title, its Location and Size, its Visibility, its Default Close Operation, Its Background color, its Layout etc.
- Now create the constructor of the class and we will call the createWindow() method from constructor.
- Now again right click on the Project and create another class (Main in this example) so that we can create the object of RegistrationForm class inside main() method.

- Now run your program.
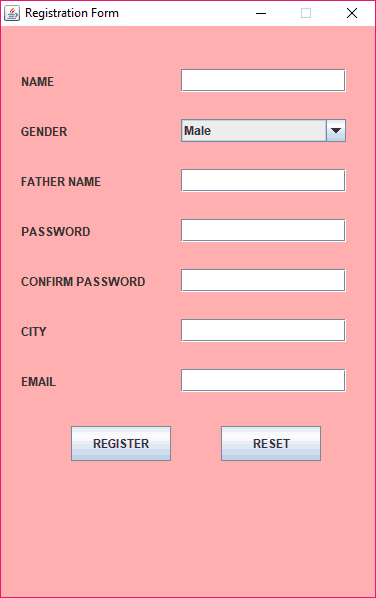
- As you can see that we have created our window and now we can add components to it.
Adding Components To Window
- Create the object of
- 7 JLabel (NAME,GENDER,FATHER NAME,PASSWORD,CONFIRM PASSWORD,CITY,EMAIL).
- 4 JTextField (For entering the information name,father name,city and email).
- 2 JPasswordField (one for entering the password and other for confirming the password)
- An array of String with two items “Male” and “Female”.
- One JComboBox for selecting gender of the user and we will pass String array to the constructor of JComboBox.
- 2 JButton(REGISTER and RESET).
- Now as we have created components now the next task is to set the location and size of them using the setBounds() method and when we are done with setting the size and location of our components then we have to add them to the JFrame(our Window) using the add() method.

- Now run your program.
- Now you can see that we have successfully added the components to our window.
- Now we have to do is to add actionListener to the buttons so that when we click on the buttons actionPerformed() method will be called.
Adding ActionListener to Buttons
- For this, we are going to call addActionListener() method using the object of JButton and in its argument we will pass the object of the class in which the ActionListener interface is implemented.
Connecting With Database
Step 5
- You can refer to this Article How to connect MySQL Database with Java Using Eclipse for the detailed explanations about the connection of MySQL database with Java.
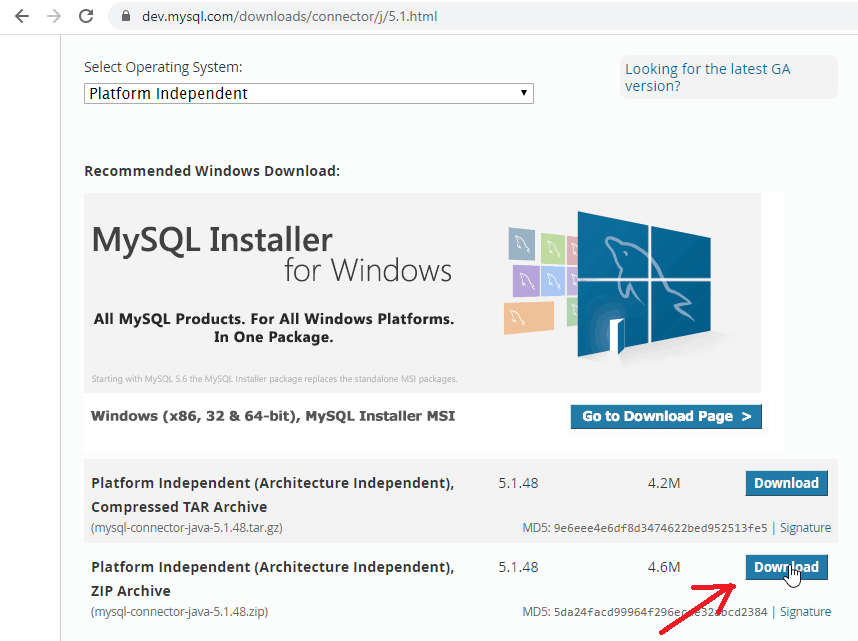
- In order to connect our java program with MySQL database, we need to include MySQL JDBC driver which is a JAR file, namely mysql-connector-java-5.1.45-bin.jar. The version number in the Jar file can be different.
- You can download the latest version of MySQL connector from this link (MySQL Connector Java download) As shown in the figure below.
- Extract the zip archive and you will get the jar file.
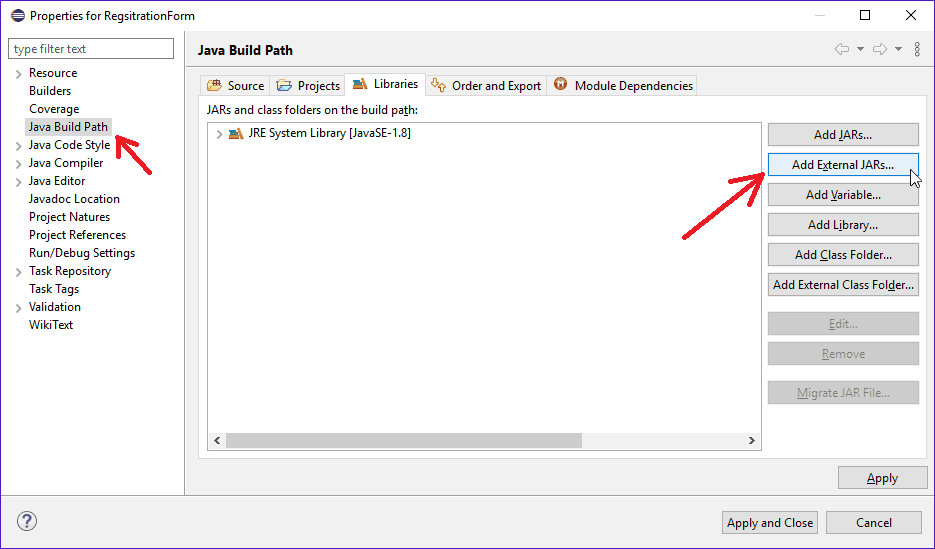
- Next, we have to include this jar file into our program so that we will be able to connect our java program with MySQL database.
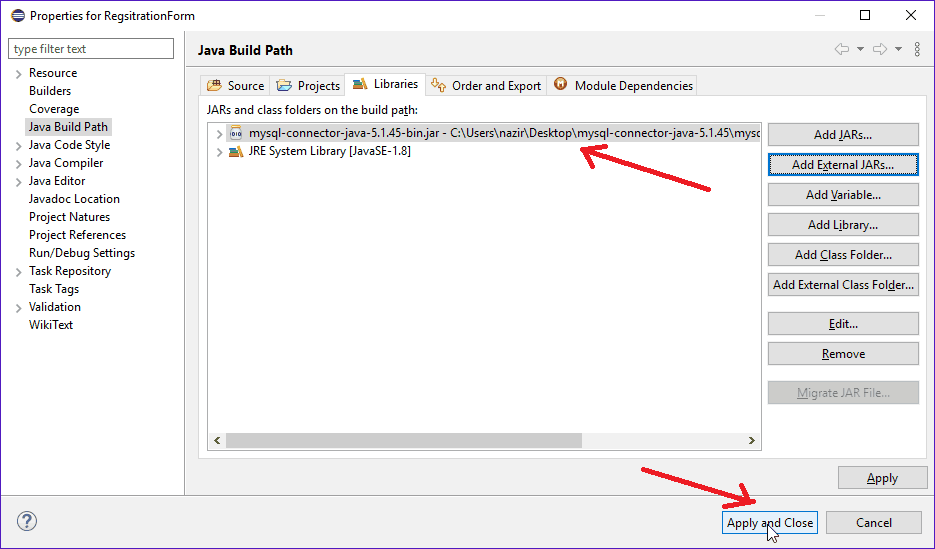
- Right-click on the project, go to the properties section then select Java Build Path and click on the Add External JARs button.
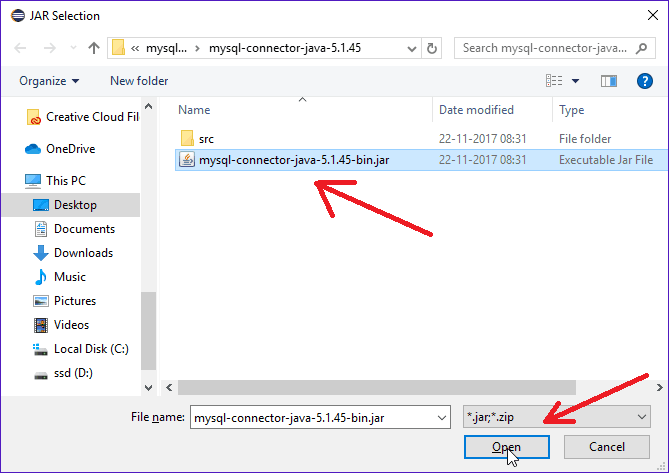
- After clicking on the button a pop-up window will appear where you have to select and open the jar file.
- You can see the added Jar file as shown in the figure below. Now click on the Apply and Close button.
- Now we want that when we click on the REGISTER button all the entered information should be stored in our database and when we click on the RESET button it should clear the fields and allow us to enter new information also if the passwords entered by the user did not match then it should display us a message that “password did not match”.
- For doing this, we should know about Java Database Connectivity and also about Prepared Statement in java.
- Now let’s move to the coding part.