- Java Platform, Enterprise Edition 7: Creating HTML5 Pages in JavaServer Faces 2.2
- Time to Complete
- Introduction
- Scenario
- Software Requirements
- Prerequisites
- Setting Up the Project
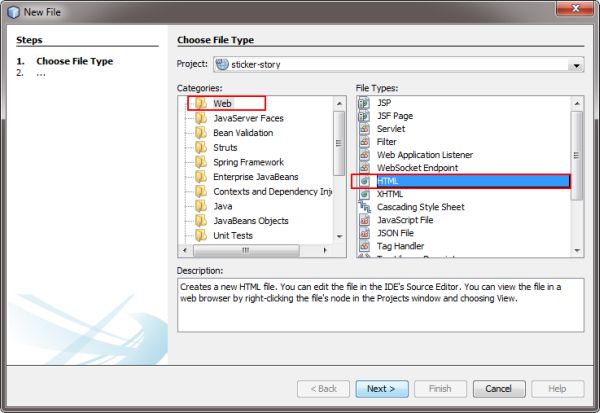
- Creating a JSF with HTML Markup
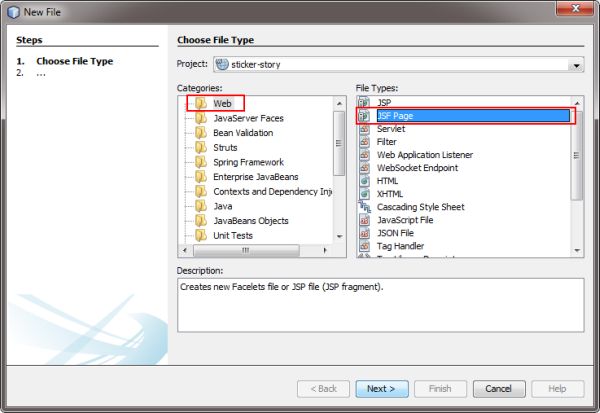
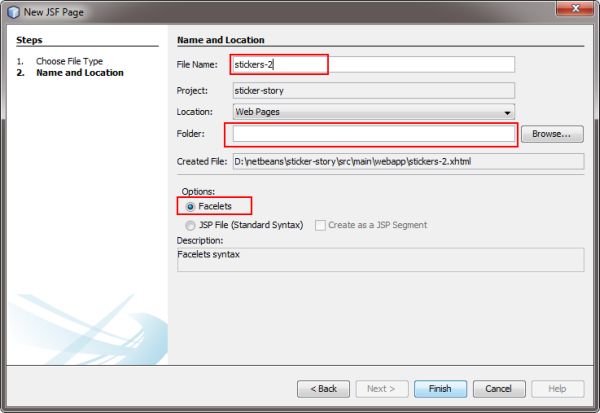
- Creating a JSF Page
- stickers-4.xhtml page
- Summary
- Resources
- Credits
- Делаем HTML5/Flash игры на Java
- Viper Engine и PlayN
- Готовим инструменты
- Пишем игры
- Резюмируя
Java Platform, Enterprise Edition 7: Creating HTML5 Pages in JavaServer Faces 2.2
This tutorial shows you how to convert a static HTML5 page into a dynamic JavaServer Faces (JSF) page with HTML5-friendly markup.
Time to Complete
Introduction
JSF is a presentation technology that allows developers to create pages with component-oriented design. The design reduces development time and increases interactivity of applications. HTML5 is the new standard for writing web pages. Modern web applications require collaboration between web developers and enterprise developers to achieve great design and usability. Java Platform, Enterprise Edition 7 (Java EE 7) with JSF 2.2 bridges the gap for web developers: They can integrate their web designs by using HTML5 in JSF pages. This tutorial shows the conversion steps of an HTML5 page to a JSF-enabled page.
Please note that the pages are viable solutions that can be used in an application. The goal of this tutorial is to show you the different versions that you can use in Java EE 7 with JSF 2.2, as follows:
- A pure HTML5 solution using JavaScript for interactivity and dynamic data
- An HTML5 page with JSF attributes that adds dynamic data to a pure HTML5 page
- An HTML5 page with JSF components that will be rendered as HTML5 elements adding passthrough parameters for extended HTML5 properties
- A JSF component-oriented page that uses HTML5 elements when necessary
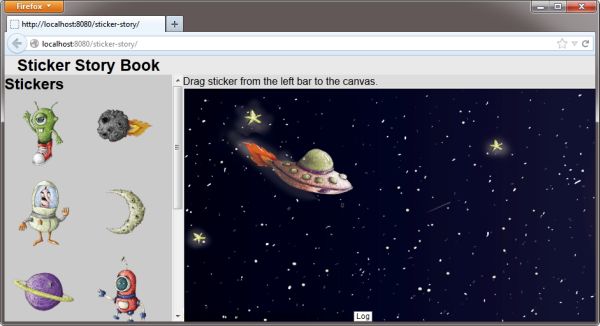
Scenario
In this tutorial, you modify the sticker story web application developed in the previous tutorial (Using WebSocket for Real-Time communication in Java Platform, Enterprise Edition 7) to use JSF with HTML5-friendly markup.
Software Requirements
The following are the software requirements:
- Download and install the Java 7 development kit: http://www.oracle.com/technetwork/java/javase/downloads/index.html.
- Download and install the Java NetBeans 7.3.1 integrated development environment (IDE) for Java EE development with GlassFish 4.0: https://netbeans.org/downloads/index.html.
- (Optional) Download and install the GlassFish Server Open Source Edition 4.0: http://glassfish.java.net/download.html.
Prerequisites
Before starting this tutorial, you should:
- Have knowledge of the Java programming language.
- Have basic knowledge of Java EE (JSF) and HTML.
- Have completed the tutorial entitled Using WebSocket for Real-Time Communication in Java Platform, Enterprise Edition 7. If you prefer, you can download the completed project here.
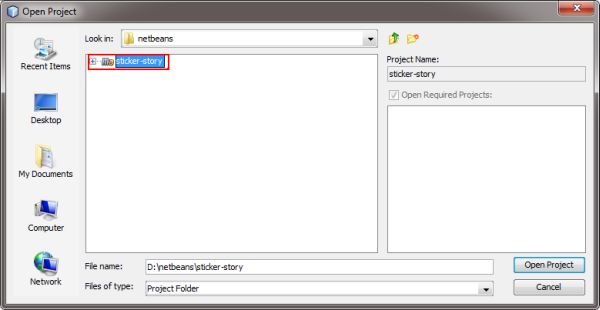
Setting Up the Project
In this section, you set up the project. If you completed the tutorial entitled Using WebSocket for Real-Time Communication in Java Platform, Enterprise Edition 7, use the same project and skip to step 8.

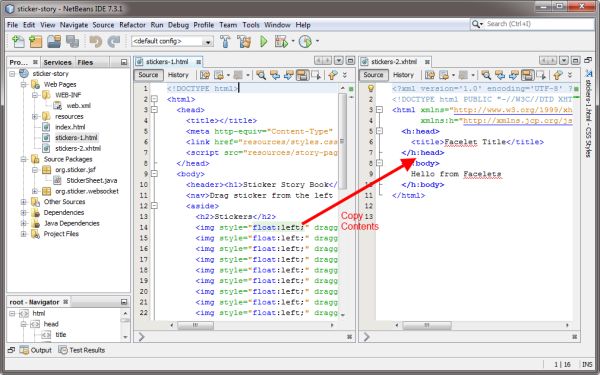
As you can see, the stickers-2 page has HTML5 code with JSF attributes that give dynamic data. This situation is ideal if your web designer creates HTML5 pages, and you must add JSF functionality on top.
Creating a JSF with HTML Markup
In this section, you incorporate JSF components inside an HTML5 page to add JSF functionality. For simplicity, you will use the stickers-2 page as the base for the new page.
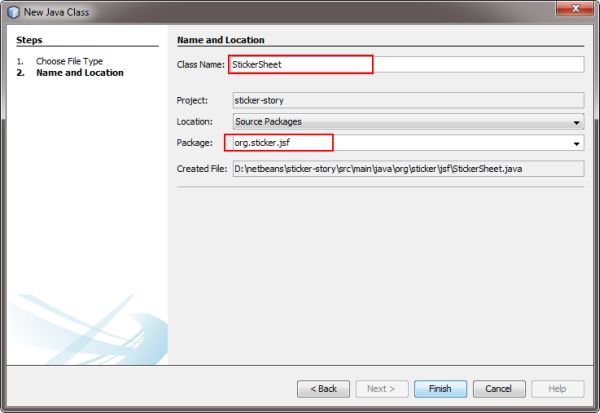
Creating a JSF Page
In this section, you modify the page again to use JSF components.
Use the following code sample for reference. The tags to replace are highlighted.
stickers-4.xhtml page
html> html xmlns="http://www.w3.org/1999/xhtml" xmlns:ui="http://xmlns.jcp.org/jsf/facelets" xmlns:h="http://xmlns.jcp.org/jsf/html" xmlns:p="http://xmlns.jcp.org/jsf/passthrough"> h:head> title>Sticker Storytitle> h:outputStylesheet name="styles.css"/> h:outputScript name="story-page.js"/> h:head> h:body> header> h1>Sticker Story Bookh1> header> nav> Drag stickers from the left bar to the canvas. nav> aside> h2>Stickersh2> h:panelGroup layout="block" id="stickerContainer"> ui:repeat var="imgName" value="#stickerSheet.allStickers>"> h:graphicImage name="stickers/$imgName>" style="float:left" p:draggable="true" p:ondragstart="drag(event)" p:data-sticker="$imgName>" /> ui:repeat> h:panelGroup> aside> h:panelGroup layout="block" id="content"> canvas id="board" width="1000" height="580" ondrop="drop(event)" ondragover="allowDrop(event)"> Canvas Not Supported. canvas> h:graphicImage name="canvas2.png" id="background_img" style="display:none;"/> h:panelGroup> footer> small>Made with JSF 2.2 + HTML5 + WebSockets and JSONsmall> ol> li onclick="toggleLog();">Logli> ol> footer> div id="logContainer"> h2>logh2> h:panelGroup layout="block" id="log"/> div> h:body> html> Rerun the application and test the newly created page.
Summary
In this tutorial, you learned how to:
- Use JSF attributes in HTML pages
- Use JSF components in HTML pages
- Use JSF passthrough parameters to create HTML5 markup
Resources
- The Java EE 7 tutorial
- The JSF 2.2 specification
- The Java EE documentation
- The HTML5 specification
- To learn more about Java EE 7, refer to additional OBEs in the Oracle Learning Library.
Credits
- Lead Curriculum Developer: Eduardo Moranchel
- Other Contributors:
- Edgar Martinez
- Miguel Salazar
To help navigate this Oracle by Example, note the following: Hiding Header Buttons: Click the Title to hide the buttons in the header. To show the buttons again, simply click the Title again. Topic List Button: A list of all the topics. Click one of the topics to navigate to that section. Expand/Collapse All Topics: To show/hide all the detail for all the sections. By default, all topics are collapsed Show/Hide All Images: To show/hide all the screenshots. By default, all images are displayed. Print: To print the content. The content currently displayed or hidden will be printed.
To navigate to a particular section in this tutorial, select the topic from the list.
Делаем HTML5/Flash игры на Java
На прошедшей конференции Google IO в Сан Франциско была представлена библиотека PlayN. Сессия называлась — Kick-ass Game Programming. И эта технология действительно заманчиво выглядит. Только представить, что пишешь игру на одном языке на любой ОС и используя любимые IDE, а на выходе получаешь игру под HTML5/Android/Native/Flash(!). PlayN свободный и с открытым исходным кодом, а еще на нем была сделана Angry Birds (HTML5).
Viper Engine и PlayN
Пару недель назад я решил сделать игру на PlayN и понял, что уровень абстракции, который выбрали разработчики не дает быстро создавать игры. Платформа нуждается в фреймворке, который будет решать обычные задачи при написании 2d игр. Такие задачи как: анимация, эффекты частиц, игровая камера, игровая сцена и смена сцен, простая физика, сборка игровых объектов в группы.
Через неделю был сделан alpha вариант движка Viper с помощью которого мы и создадим простую HTML5 игру на Java.Готовим инструменты
1. Устанавливаем PlayN
Для начала запустим playn и его примеры:
Начало работы с PlayN
Клонируем библиотеку PlayN:
PlayN код содержится в Git. Если у вас установлен Git:Вам нужен Maven версии 3 или выше, чтобы собрать PlayN. Вы можете установить Maven по следующей ссылке :install Maven.
Проверьте версию Maven:
mvn -V
Она должна быть 3 и выше.После установим playn в локальное хранилище maven’а.
cd playn
mvn clean installЧтобы запустить один из примеров PlayN:
cd playn/sample/showcase
mvn clean package
mvn test -P test-htmlОткрываем браузер(конечно Google Chrome) и вводим: 127.0.0.1:8080/
Отлично вы видите перед собой демку, которую инженеры Google представляли на IO.mvn test -P test-flash
А теперь flash. Вводим: localhost:8080/cd android
mvn android:deploy
И Android.Да и не забудьте установить плагины для Eclipse, чтобы продолжить вашу работу в IDE.
Установим Maven Integration for Eclipse выбираем Help → Install New Software, выбираем All Available Sites и делаем поиск по слову maven.
Устанавливаем Google Plugin for Eclipse.
Устанавливаем Web Tools Platform for Eclipse. Выбираем Help → Install New Software. enter download.jboss.org/jbosstools/updates/m2eclipse-wtp выбираем Work with, и устанавливаем Maven Integration for WTP.2. Создаем скелет будущей игры в Eclipse
Открываем File → New → Other. затем выбираем Maven → Maven Project затем жмем далее.
Ставим галочку Include snapshot archetypes и производим двойное нажатие мыши на playn-archetype в списке архетипов.
Настраиваем Group Id, Artifact Id, Version, Package, и gameName.
Group ID пример: com.mydomain.myproject.
Artifact ID пример: gameamazing
Version пример: 1.0-SNAPSHOT или 0.01a
Package пример: com.mydomain.myproject
Ну и gameName пример: LolGameЖмем Finish и получаем 5 проектов в Package Explorer.
Отлично у нас есть скелет игры.
Для заметки процедура настройки всего этого займет значительно больше времени чем написание самой игры.3. Получаем Viper Engine с примерами
cd Viper-Engine-Demos
mvn clean install
mvn test -P test-htmlТеперь импортируем проект в Eclipse.
Пишем игры
Игра на Viper Engine должна иметь входной класс наследуемый от VipGame.
В конструкторе устанавливаем начальные значения для игры.
public ViperExamples() <
// Устанавливаем размер игрового поля и игрового мира.
// Устанавливаем первую игровую сцену.
// И частоту кадров.
super(640, 480, 800, 800, new LogoDemo(), 33);
>Игровая сцена на Viper должна быть унаследована от VipState.
И требует обязательной перегрузки метода create();
В нем описывается все что должно находится на сцене. А для динамической обработки в игровых циклах, надо перегрузить метод update();Вот пример простого создания пары спрайтов и модификаций их во времени:
public class MovingDemo extends VipStateprivate VipSprite img;
private VipSprite img2;
private VipKeyboardStandart kListener;@Override
public void create() img = new VipSprite(20, 20, «images/house.png»);
add(img);
img.velocity.x = 0.2f;img2 = new VipSprite(270, 200, «images/house.png»);
add(img2);
img2.angularVelocity = 0.002f;kListener = new VipKeyboardStandart();
addKeybordControl(kListener);
>@Override
public void update() <
super.update();
if (kListener.ESC) VipG.switchState(new LogoDemo());
>
if (img.x > 350)
img.velocity = new VipPoint(0, 0.2f);
if (img.y > 250)
img.velocity = new VipPoint(- 0.2f, 0);
if (img.x < 20)
img.velocity = new VipPoint();if (img2.scale.x < 2)
img2.scale.x += 0.002f;
if (img2.scale.x > 2)
img2.scale.x = 1.0f;
>
>Резюмируя
Итак, в итоге мы имеем фреймворк для написания игр под Html5/flash/android.
Нет, нет, нет! Все не очень стабильно и плохо пока работает. Пока только HTML5 работает замечательно и очень шустро. Ведь не зря его так долго демонстрировали на IO и Angry Birds писали. Это не может не порадовать ведь писать html5 игры на java по мне значительно удобнее чем на js. Радует пока только сам потенциал будущих возможностей. И этот потенциал может быть реализован только при совместной работе над проектами PlayN от компании Google и Viper Engine(@Partysun).