Python 3 — Tkinter Radiobutton
This widget implements a multiple-choice button, which is a way to offer many possible selections to the user and lets user choose only one of them.
In order to implement this functionality, each group of radiobuttons must be associated to the same variable and each one of the buttons must symbolize a single value. You can use the Tab key to switch from one radionbutton to another.
Syntax
Here is the simple syntax to create this widget −
w = Radiobutton ( master, option, . )
Parameters
- master − This represents the parent window.
- options − Here is the list of most commonly used options for this widget. These options can be used as key-value pairs separated by commas.
The background color when the mouse is over the radiobutton.
The foreground color when the mouse is over the radiobutton.
If the widget inhabits a space larger than it needs, this option specifies where the radiobutton will sit in that space. The default is anchor = CENTER.
The normal background color behind the indicator and label.
To display a monochrome image on a radiobutton, set this option to a bitmap.
The size of the border around the indicator part itself. Default is 2 pixels.
A procedure to be called every time the user changes the state of this radiobutton.
If you set this option to a cursor name (arrow, dot etc.), the mouse cursor will change to that pattern when it is over the radiobutton.
The font used for the text.
The color used to render the text.
The number of lines (not pixels) of text on the radiobutton. Default is 1.
The color of the focus highlight when the radiobutton does not have focus.
The color of the focus highlight when the radiobutton has the focus.
To display a graphic image instead of text for this radiobutton, set this option to an image object.
If the text contains multiple lines, this option controls how the text is justified: CENTER (the default), LEFT, or RIGHT.
How much space to leave to the left and right of the radiobutton and text. Default is 1.
How much space to leave above and below the radiobutton and text. Default is 1.
Specifies the appearance of a decorative border around the label. The default is FLAT; for other values.
The color of the radiobutton when it is set. Default is red.
If you are using the image option to display a graphic instead of text when the radiobutton is cleared, you can set the selectimage option to a different image that will be displayed when the radiobutton is set.
The default is state = NORMAL, but you can set state = DISABLED to gray out the control and make it unresponsive. If the cursor is currently over the radiobutton, the state is ACTIVE.
The label displayed next to the radiobutton. Use newlines («\n») to display multiple lines of text.
To slave the text displayed in a label widget to a control variable of class StringVar, set this option to that variable.
You can display an underline (_) below the nth letter of the text, counting from 0, by setting this option to n. The default is underline = -1, which means no underlining.
When a radiobutton is turned on by the user, its control variable is set to its current value option. If the control variable is an IntVar, give each radiobutton in the group a different integer value option. If the control variable is a StringVar, give each radiobutton a different string value option.
The control variable that this radiobutton shares with the other radiobuttons in the group. This can be either an IntVar or a StringVar.
Width of the label in characters (not pixels!). If this option is not set, the label will be sized to fit its contents.
You can limit the number of characters in each line by setting this option to the desired number. The default value, 0, means that lines will be broken only at newlines.
Methods
Clears (turns off) the radiobutton.
Flashes the radiobutton a few times between its active and normal colors, but leaves it the way it started.
You can call this method to get the same actions that would occur if the user clicked on the radiobutton to change its state.
Sets (turns on) the radiobutton.
Example
Try the following example yourself −
# !/usr/bin/python3 from tkinter import * def sel(): selection = "You selected the option " + str(var.get()) label.config(text = selection) root = Tk() var = IntVar() R1 = Radiobutton(root, text = "Option 1", variable = var, value = 1, command = sel) R1.pack( anchor = W ) R2 = Radiobutton(root, text = "Option 2", variable = var, value = 2, command = sel) R2.pack( anchor = W ) R3 = Radiobutton(root, text = "Option 3", variable = var, value = 3, command = sel) R3.pack( anchor = W) label = Label(root) label.pack() root.mainloop()
Result
When the above code is executed, it produces the following result −
Radiobutton tkinter python 3 примеры
Виджет Radiobutton представляет переключатель, который может находиться в двух состояниях: отмеченном или неотмеченном. Но в отличие от Checkbutton переключатели могут создавать группу, из которой одномоментно мы можем выбрать только один переключатель.
Среди параметров конструктора Radiobutton стоит выделить следующие:
- command : ссылка на функцию, которая вызывается при нажатии на переключатель
- cursor : курсор при наведении на виджет
- image : графическое изображение, отображаемое виджетом
- padding : отступы от содержимого до границы переключателя
- state : состояние виджета, может принимать значения NORMAL (по умолчанию), DISABLED и ACTIVE
- text : текст виджета
- textvariable : устанавливает привязку к переменной StringVar, которая задает текст переключателя
- underline : индекс подчеркнутого символа в тексте виджета
- variable : ссылка на переменную, как правило, типа IntVar, которая хранит состояние переключателя
- value : значение переключателя
- width : ширина виджета
Определим группу переключателей:
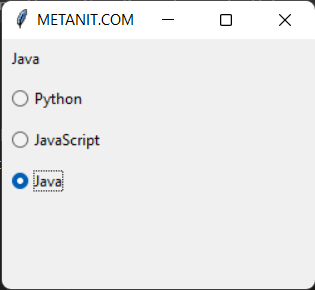
from tkinter import * from tkinter import ttk root = Tk() root.title("METANIT.COM") root.geometry("250x200") position = python = "Python" java = "Java" javascript = "JavaScript" lang = StringVar(value=java) # по умолчанию будет выбран элемент с value=java header = ttk.Label(textvariable=lang) header.pack(**position) python_btn = ttk.Radiobutton(text=python, value=python, variable=lang) python_btn.pack(**position) javascript_btn = ttk.Radiobutton(text=javascript, value=javascript, variable=lang) javascript_btn.pack(**position) java_btn = ttk.Radiobutton(text=java, value=java, variable=lang) java_btn.pack(**position) root.mainloop() Здесь определено три переключателя. Все они привязаны к одной переменной lang, которая представляет тип StringVar. При этом они имеют разные значения, устанавливаемые через параметр value . Начальное значение переменной lang («java») соответствует значению value последнего переключателя, поэтому по умолчанию будет выбран последний переключатель.А при выборе одного переключателя, другой автоматически перейдет в неотмеченное состояние.
Для вывода выделенного значения над переключателями определена текстовая метка, которая отображает значение переменной lang:
В примере выше отображаемый текст (параметр text) и значение (параметр value) совпадают, но это необязательно
Обработка выбора пользователя
Параметр command позволяет установить функцию, которая обрабатывает выбор переключателя. Например:
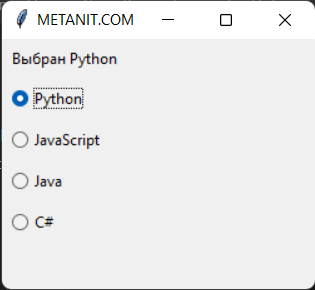
from tkinter import * from tkinter import ttk root = Tk() root.title("METANIT.COM") root.geometry("250x200") position = languages = ["Python", "JavaScript", "Java", "C#"] selected_language = StringVar() # по умолчанию ничего не выборанно header = ttk.Label(text="Выберите язык") header.pack(**position) def select(): header.config(text=f"Выбран ") for lang in languages: lang_btn = ttk.Radiobutton(text=lang, value=lang, variable=selected_language, command=select) lang_btn.pack(**position) root.mainloop() Здесь для упрощения данные переключателей определены в виде списка languages. В цикле for пробегаемся по всем элементам списка и создаем переключатель. При нажатии на каждый переключатель будет срабатывать функция select() , которая установит для метки header соответствующий текст:
Установка изображения
Для установки изображения применяется параметр image :
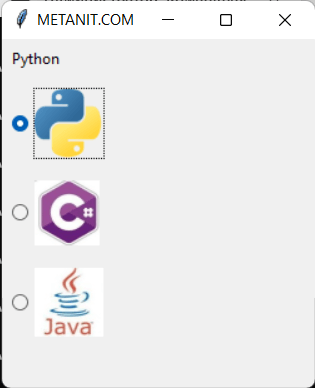
from itertools import chain from tkinter import * from tkinter import ttk root = Tk() root.title("METANIT.COM") root.geometry("250x200") position = python = "Python" java = "Java" csharp = "C#" lang = StringVar(value=java) # по умолчанию будет выбран элемент с value=java header = ttk.Label(textvariable=lang) header.pack(**position) python_img = PhotoImage(file="./python_sm.png") csharp_img = PhotoImage(file="./csharp_sm.png") java_img = PhotoImage(file="./java_sm.png") python_btn = ttk.Radiobutton( value=python, variable=lang, image=python_img) python_btn.pack(**position) csharp_btn = ttk.Radiobutton(value=csharp, variable=lang, image=csharp_img) csharp_btn.pack(**position) java_btn = ttk.Radiobutton(value=java, variable=lang, image=java_img) java_btn.pack(**position) root.mainloop() Параметру image передается объект PhotoImage, в конструкторе которого через параметр file устанавливается путь к изображению. Здесь предполагается, что в одной папке с файлом приложения находятся файлы изображений «python_sm.png», «csharp_sm.png» и «java_sm.png».
Если необходимо также отображать и текст, то для этого можно установить параметр compound , который определяет положение текста по отношению к изображению с помощью одного из следующих значений:
- top : изображение поверх текста
- bottom : изображение под текстом
- left : изображение слева от текста
- right : изображение справа от текста
- none : при наличии изображения отображается только изображение
- text : отображается только текст
- image : отображается только изображение
Например, отобразим картинку поверх текста:
from itertools import chain from tkinter import * from tkinter import ttk root = Tk() root.title("METANIT.COM") root.geometry("250x200") position = languages = [ , , ] lang = StringVar(value=languages[0]["name"]) # по умолчанию будет выбран элемент с value=python header = ttk.Label(textvariable=lang) header.pack(**position) for l in languages: btn = ttk.Radiobutton(value=l["name"], text=l["name"], variable=lang, image=l["img"], compound="top") btn.pack(**position) root.mainloop() 

