- PyQt5 Tutorial – QListWidget
- How to use the PyQt5 QListWidget
- Retrieve Selected Option from QListWidget
- Other PyQt5 Signals for QListWidget
- Alternate ways of getting selected Item(s)
- Multiple Item Selection in QListWidget
- QListWidget
- ListWidget
- QDropEvent
- PyQt QListWidget
- Introduction to the PyQt QListWidget
- PyQt QListWidget class example
- Summary
PyQt5 Tutorial – QListWidget
In this Python PyQt5 Tutorial, we will discuss how to create and use the QListWidget in our GUI programs. The QListWidget is a higher level version of the QListView widget, designed to be very easy-to-use (at the cost of a little customization).
This widget is used to display items in the form of a list. We can either add or remove items from this list using various built-in-functions.
How to use the PyQt5 QListWidget
First we need to make all the required imports. There are two “ListWidget” specific imports that we need to make from the PyQt5 QtWidgets module, “QListWidget” and “QListWidgetItem”.
from PyQt5.QtWidgets import QApplication, QWidget, QListWidget, QVBoxLayout, QListWidgetItem import sys
Next we need to define our basic PyQt Application. The below code features an empty PyQt Window, with a single main layout.
class Window(QWidget): def __init__(self): super().__init__() mainlayout = QVBoxLayout() self.setLayout(mainlayout) app = QApplication(sys.argv) window = Window() window.show() sys.exit(app.exec_())
We will now create our QListWidget using the PyQt5 QListWidget Class inside our Window Class that we defined earlier.
self.listWidget = QListWidget()
After this, we need to “populate” our List Widget with some “items”. To create an item, we need to use the QListWidgetItem Class. It takes as parameter a text string and returns an item object which we can then add into our ListWidget by using the addItem() method.
item1 = QListWidgetItem("Option 1") item2 = QListWidgetItem("Option 2") item3 = QListWidgetItem("Option 3") self.listWidget.addItem(item1) self.listWidget.addItem(item2) self.listWidget.addItem(item3) mainlayout.addWidget(self.listWidget) Don’t forget to add your ListWidget to the MainLayout at the end, otherwise it won’t show up!
Here is the complete code.
from PyQt5.QtWidgets import QApplication, QWidget, QListWidget, QVBoxLayout, QListWidgetItem import sys class Window(QWidget): def __init__(self): super().__init__() mainlayout = QVBoxLayout() self.setLayout(mainlayout) self.listWidget = QListWidget() item1 = QListWidgetItem("Option 1") item2 = QListWidgetItem("Option 2") item3 = QListWidgetItem("Option 3") self.listWidget.addItem(item1) self.listWidget.addItem(item2) self.listWidget.addItem(item3) mainlayout.addWidget(self.listWidget) app = QApplication(sys.argv) window = Window() window.show() sys.exit(app.exec_()) 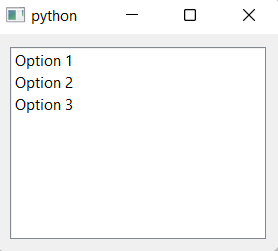
Retrieve Selected Option from QListWidget
Right now, even though the user can select various options from our ListWidget, there is no way for us “the programmers” to know which option was selected.
The ListWidget has various “signals” to which we can attach a function (a.k.a “slot”). These “signals” are generated whenever an action is performed. There are various types of signals, each representing a unique event.
We will make use of the “ItemDoubleClicked” event to connect a function called “on_clicked” to our Widget (We haven’t defined the on_clicked function yet).
self.listWidget.itemDoubleClicked.connect(self.on_clicked)
Here is the definition for the on_clicked() function. Remember to include this as method in our Window Class, not as a separate function.
def on_clicked(self, item): print("Value: ", item.text()) Some signals automatically pass in arguments into the function that you connect to it. “itemDoubleClicked” is one of those signals which passes in the “current Item” that was selected. You can then use the text() method on it to retrieve its string value.
Other PyQt5 Signals for QListWidget
There are many different signals to choose from, other than “itemDoubleClicked”. For example, we can use “itemClicked” instead, which works for single clicks on the options in the ListWidget.
self.listWidget.itemClicked.connect(self.on_clicked)
Alternate ways of getting selected Item(s)
Sometimes you may not want to rely on the automatically passed in argument (such as when you want to get the selected value upon clicking a button). In this case, we need to directly call a method on the ListWidget to get it’s “selected Items” as shown below.
def on_clicked(self): items = self.listWidget.selectedItems() for item in items: print(item.text())
The selectedItems() method returns a list of selected Items. This is just in case you have multiple options selected at the same time.
Multiple Item Selection in QListWidget
To enable multi-selection, you need to make the following adjustments (one import and one method call on our widget)
from PyQt5.QtWidgets import QApplication, QWidget, QListWidget, QVBoxLayout, \ QListWidgetItem, QAbstractItemView . . . self.listWidget.setSelectionMode(QAbstractItemView.ExtendedSelection)
Which allows you to do this:

You can select multiple options either through dragging your mouse, or using CTRL + Z when clicking on items (Windows feature). Linux and macOS should also have similar features.
This marks the end of the PyQt5 QListWidget Tutorial. Any suggestions or contributions for CodersLegacy are more than welcome. Questions regarding the tutorial content can be asked in the comments section below.
QListWidget
The QListWidget class is an entry-based interface for adding or removing entries from a list, each entry in the list is a QListWidgetItem object, and QListWidget can be set to multi-select.
ListWidget
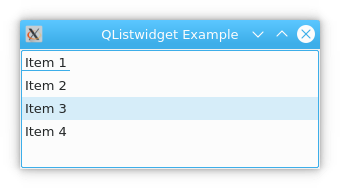
The program shows the QListWidget example. It adds several items using the method addItem() .
If you click on a widget item, it will show a popup. A clicked event will be sent and it shows a QMessageBox.
import sys from PyQt5.QtCore import * from PyQt5.QtGui import * from PyQt5.QtWidgets import * class ListWidget(QListWidget): def clicked(self, item): QMessageBox.information(self, "ListWidget", "ListWidget: " + item.text()) if __name__ == '__main__': app = QApplication(sys.argv) listWidget = ListWidget() listWidget.resize(300, 120) listWidget.addItem("Item 1") listWidget.addItem("Item 2") listWidget.addItem("Item 3") listWidget.addItem("Item 4") listWidget.setWindowTitle('QListwidget Example') listWidget.itemClicked.connect(listWidget.clicked) listWidget.show() sys.exit(app.exec_())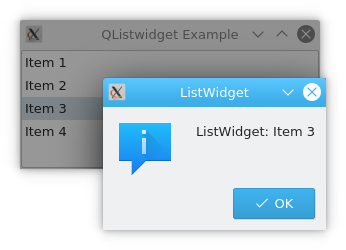
This example is similar to the previous QListView implementation, except that the controls used are different, one is QListView and one is QListWidget.
This creates a List Widget:
listWidget.addItem("Item 1") listWidget.addItem("Item 2") listWidget.addItem("Item 3") listWidget.addItem("Item 4")Connect clicked() to the itemClicked event:
listWidget.itemClicked.connect(listWidget.clicked)QListWidget has these methods:
- addItem()
- addItems()
- insertItem()
- clear()
- setCurrentItem()
- sortItems()
QListWidget has these events:
QDropEvent
You can set QListWidget to accept drag/drop events. The example below lets you drop from the right QListWidget to the left QListWidget.
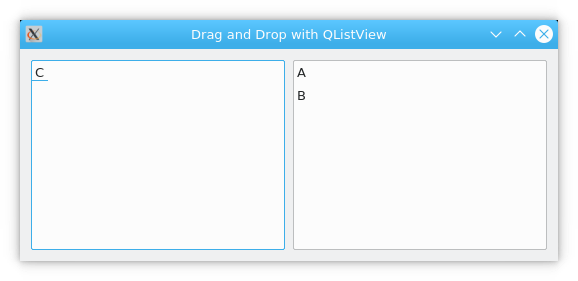
import sys from PyQt5.QtGui import * from PyQt5.QtCore import * from PyQt5.QtWidgets import * class DropInList(QListWidget): def __init__(self): super(DropInList,self).__init__() self.setAcceptDrops(True) def dropEvent(self, QDropEvent): source_Widget=QDropEvent.source() items=source_Widget.selectedItems() print(items) for i in items: source_Widget.takeItem(source_Widget.indexFromItem(i).row()) self.addItem(i) print('drop event') class MainWidget(QWidget): def __init__(self): super(MainWidget,self).__init__() self.setWindowTitle('Drag and Drop with QListView') self.main_layout=QHBoxLayout() self.left_widget=DropInList() self.right_widget=QListWidget() pre_list=['A','B','C'] self.right_widget.addItems(pre_list) self.right_widget.setDragEnabled(True) self.right_widget.setDragDropOverwriteMode(False) self.right_widget.setSelectionMode(QAbstractItemView.ExtendedSelection) self.right_widget.setDefaultDropAction(Qt.MoveAction) self.main_layout.addWidget(self.left_widget) self.main_layout.addWidget(self.right_widget) self.setLayout(self.main_layout) if __name__ == '__main__': app=QApplication(sys.argv) m=MainWidget() m.show() sys.exit(app.exec_())PyQt QListWidget
Summary: in this tutorial, you’ll learn how to use the Python QListWidget class to create a list view.
Introduction to the PyQt QListWidget
The QListWidget class allows you to create a list view widget that has a single column of items. The QListWidgetItem class represents the items on the list.
The QListWidget class has various useful methods for manipulating items including:
- addItems(iterable) – adds items to the list from an iterable of strings.
- addItem(QListWidgetItem) – adds an item to the end of the list.
- insertItem(row, QListWidgetItem) – inserts an item at the specified row.
- takeItem(row) – removes an item from a specified row.
- clear() – removes and deletes all items from the list.
PyQt QListWidget class example
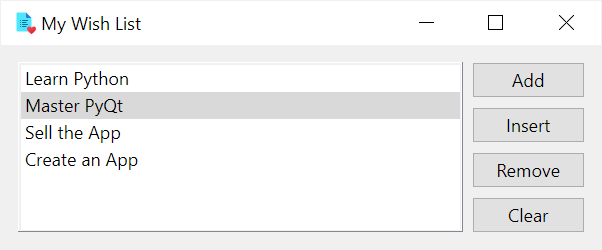
The following example shows how to add, insert, remove, and clear all items from a QListWidget :
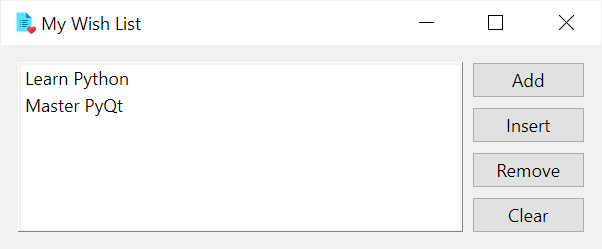
import sys from PyQt6.QtWidgets import QInputDialog, QApplication, QWidget, QGridLayout, QListWidget, QPushButton from PyQt6.QtGui import QIcon class MainWindow(QWidget): def __init__(self, *args, **kwargs): super().__init__(*args, **kwargs) self.setWindowTitle('My Wish List') self.setWindowIcon(QIcon('./assets/wishlist.png')) self.setGeometry(100, 100, 400, 100) layout = QGridLayout(self) self.setLayout(layout) self.list_widget = QListWidget(self) self.list_widget.addItems(['Learn Python', 'Master PyQt']) layout.addWidget(self.list_widget, 0, 0, 4, 1) # create buttons add_button = QPushButton('Add') add_button.clicked.connect(self.add) insert_button = QPushButton('Insert') insert_button.clicked.connect(self.insert) remove_button = QPushButton('Remove') remove_button.clicked.connect(self.remove) clear_button = QPushButton('Clear') clear_button.clicked.connect(self.clear) layout.addWidget(add_button, 0, 1) layout.addWidget(insert_button, 1, 1) layout.addWidget(remove_button, 2, 1) layout.addWidget(clear_button, 3, 1) # show the window self.show() def add(self): text, ok = QInputDialog.getText(self, 'Add a New Wish', 'New Wish:') if ok and text: self.list_widget.addItem(text) def insert(self): text, ok = QInputDialog.getText(self, 'Insert a New Wish', 'New Wish:') if ok and text: current_row = self.list_widget.currentRow() self.list_widget.insertItem(current_row+1, text) def remove(self): current_row = self.list_widget.currentRow() if current_row >= 0: current_item = self.list_widget.takeItem(current_row) del current_item def clear(self): self.list_widget.clear() if __name__ == '__main__': app = QApplication(sys.argv) window = MainWindow() sys.exit(app.exec())Code language: Python (python)First, create a QListWidget object:
self.list_widget = QListWidget(self)Code language: Python (python)Second, add a list of items to the list:
self.list_widget.addItems(['Learn Python', 'Master PyQt'])Code language: Python (python)Third, create four buttons add, insert, remove, and clear and connect their clicked signals to the corresponding method.
Fourth, define the add() method that gets a text from the user and adds it to the list using the addItem() method:
def add(self): text, ok = QInputDialog.getText(self, 'Add a New Wish', 'New Wish:') if ok and text: self.list_widget.addItem(text)Code language: Python (python)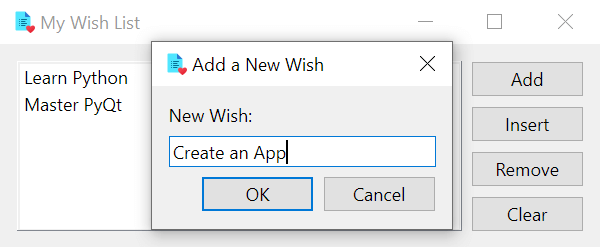
The QInputDialog .getText() returns a tuple of two elements. The first element stores the input text and the second element indicates whether the user clicks the OK button.
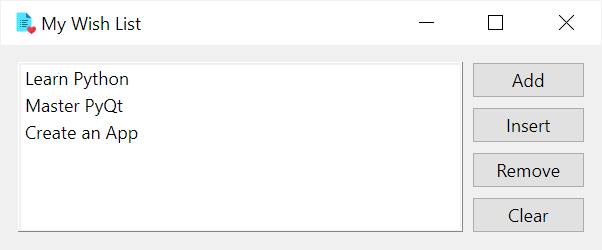
If the user enters a text and clicks the OK button, we add it to the list using the addItem() method of the QListWidget object.
Note that you can create a QListWidgetItem object and add it to the list instead of using a string. For example:
def add(self): text, ok = QInputDialog.getText(self, 'Add a New Wish', 'New Wish:') if ok and text: list_item = QListWidgetItem() list_item.setText(text) self.list_widget.addItem(list_item)Code language: Python (python)The QListWidgetItem provides more functionality like setting an icon to the list item.
Fifth, insert a new item to the list after the currently selected item:
def insert(self): text, ok = QInputDialog.getText(self, 'Insert a New Wish', 'New Wish:') if ok and text: current_row = self.list_widget.currentRow() self.list_widget.insertItem(current_row+1, text)Code language: Python (python)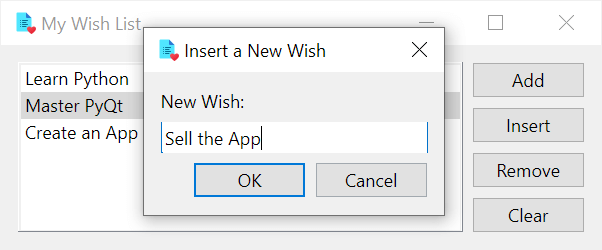
In this insert() method , we use the currentRow() method of the QListWidget object to get the current row of the currently selected item and insertItem() method to insert an item at the next row.
Sixth, define the remove() method that removes the currently selected item from the list:
def remove(self): current_row = self.list_widget.currentRow() if current_row >= 0: current_item = self.list_widget.takeItem(current_row) del current_itemCode language: Python (python)In this remove() method, we get the row of the currently selected item and use the takeItem() method of the QListWidget object to remove the item.
Seventh, define the clear() function to remove all items from the list:
def clear(self): self.list_widget.clear()Code language: Python (python)In this clear() method, we use the clear() method of the QListWidget object to remove all items from the list.