- Saved searches
- Use saved searches to filter your results more quickly
- larsks/micropython-stepper-motor
- Name already in use
- Sign In Required
- Launching GitHub Desktop
- Launching GitHub Desktop
- Launching Xcode
- Launching Visual Studio Code
- Latest commit
- Git stats
- Files
- README.md
- Stepper Motor Control In Python
- Basic Stepper Motor
- Buy Stepper Motors for the Pi
- Interfacing With The Pi
- Example Stepper Motor Python Script
- Step Wait Time
- Step Sequences
- Final Thoughts
- Saved searches
- Use saved searches to filter your results more quickly
- alangibson/steppyr
- Name already in use
- Sign In Required
- Launching GitHub Desktop
- Launching GitHub Desktop
- Launching Xcode
- Launching Visual Studio Code
- Latest commit
- Git stats
- Files
- README.md
- About
Saved searches
Use saved searches to filter your results more quickly
You signed in with another tab or window. Reload to refresh your session. You signed out in another tab or window. Reload to refresh your session. You switched accounts on another tab or window. Reload to refresh your session.
larsks/micropython-stepper-motor
This commit does not belong to any branch on this repository, and may belong to a fork outside of the repository.
Name already in use
A tag already exists with the provided branch name. Many Git commands accept both tag and branch names, so creating this branch may cause unexpected behavior. Are you sure you want to create this branch?
Sign In Required
Please sign in to use Codespaces.
Launching GitHub Desktop
If nothing happens, download GitHub Desktop and try again.
Launching GitHub Desktop
If nothing happens, download GitHub Desktop and try again.
Launching Xcode
If nothing happens, download Xcode and try again.
Launching Visual Studio Code
Your codespace will open once ready.
There was a problem preparing your codespace, please try again.
Latest commit
Git stats
Files
Failed to load latest commit information.
README.md
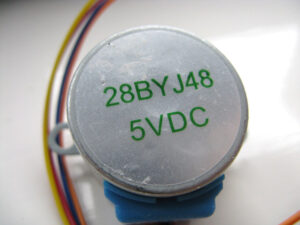
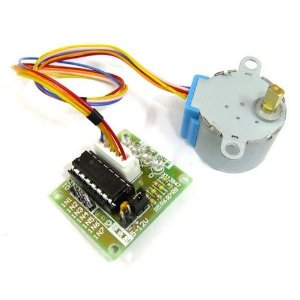
MicroPython Stepper Motor Driver
Code to drive a 28BYJ-48 motor attached to a ULN2003 driver.
The module motor.py implements the following classes:
- FullStepMotor — This class drives a stepper motor using full steps, which with the 28BYJ-48 means 2048 steps for a single rotation.
- HalfStepMotor — This class drives a stepper motor using half steps, so 4096 steps for a single rotation.
Motor objects support the following methods:
- zero() — set the current position as position 0.
- step(n) — move forward (positive n ) or backwards (negative n ) the given number of steps
- step_until(position) — move motor to the given position. By default the motor will move in the shortest direction, but you can force a direction with the optional dir keyword argument ( 1 for forward, -1 for reverse).
- step_until_angle(angle) — move motor to the given angle.
If you have a ULN2003 connected to a Wemos D1 on pins D5, D6, D7, D8, like this (pinout):
| Wemos pin | ULN2003 pin |
|---|---|
| D5 (GPIO14) | IN1 |
| D6 (GPIO12) | IN2 |
| D7 (GPIO13) | IN3 |
| D8 (GPIO15) | IN4 |
Then you could create a HalfStepMotor object like this:
import motor m = motor.HalfStepMotor.frompins(14,12,13,15) Once you have a motor object, you can run it forward:
You can run it to a specific position:
When using the step_until* methods, the motor will by default move in the direction of shortest distance. You can force a direction with the optional dir keyword argument:
Stepper Motor Control In Python
![]()
![]()
Having played with LEDs, switches and buzzers I felt the natural next step was playing with a stepper motor or two. Unlike conventional electric motors, stepper motors allow you to rotate the axis in precise increments. This makes them useful in all sorts of Raspberry Pi projects.
Basic Stepper Motor
There is a huge selection of stepper motors to buy but I decided to experiment with a 28BJY-48 with ULN2003 control board. The reasons I chose this device where :
- It is cheap
- Runs on 5V
- Easy to interface to the Pi’s GPIO header
- Small but relatively powerful
- Widely available from both overseas and UK sellers
- Easy to obtain with a controller board
Buy Stepper Motors for the Pi
The 28BJY-48 stepper motors can be obtained from :
Interfacing With The Pi
The stepper motor connects to the controller board with a pre-supplied connector. The controller board has six pins which need to be connected to the Pi’s GPIO header :
The P1-XX references above represent the Pi header pins I used. These are defined in the Python example below in the StepPins list so if you use different pins be sure to update the Python list as well. You can use other GPIO pins if required just remember to update your Python script.
To rotate the stepper motor you provide a sequence of “high” and “low” levels to each of the 4 inputs in sequence. By setting the correct sequence of high and low levels the motor spindle will rotate. Reversing the sequence results in the direction being reversed.
Example Stepper Motor Python Script
Here is a copy of the stepper motor script I used to rotate the stepper motor. It uses the RPi.GPIO library and defines a 4-step and 8-step sequence.
#!/usr/bin/python # Import required libraries import sys import time import RPi.GPIO as GPIO # Use BCM GPIO references # instead of physical pin numbers GPIO.setmode(GPIO.BCM) # Define GPIO signals to use # Physical pins 11,15,16,18 # GPIO17,GPIO22,GPIO23,GPIO24 StepPins = [17,22,23,24] # Set all pins as output for pin in StepPins: print "Setup pins" GPIO.setup(pin,GPIO.OUT) GPIO.output(pin, False) # Define advanced sequence # as shown in manufacturers datasheet Seq = [[1,0,0,1], [1,0,0,0], [1,1,0,0], [0,1,0,0], [0,1,1,0], [0,0,1,0], [0,0,1,1], [0,0,0,1]] StepCount = len(Seq) StepDir = 1 # Set to 1 or 2 for clockwise # Set to -1 or -2 for anti-clockwise # Read wait time from command line if len(sys.argv)>1: WaitTime = int(sys.argv[1])/float(1000) else: WaitTime = 10/float(1000) # Initialise variables StepCounter = 0 # Start main loop while True: print StepCounter, print Seq[StepCounter] for pin in range(0, 4): xpin = StepPins[pin]# if Seq[StepCounter][pin]!=0: print " Enable GPIO %i" %(xpin) GPIO.output(xpin, True) else: GPIO.output(xpin, False) StepCounter += StepDir # If we reach the end of the sequence # start again if (StepCounter>=StepCount): StepCounter = 0 if (StepCounter<0): StepCounter = StepCount+StepDir # Wait before moving on time.sleep(WaitTime)You can download it directly to your Pi using :
wget https://bitbucket.org/MattHawkinsUK/rpispy-misc/raw/master/python/stepper.pyThe script needs to be run using “sudo” :
Step Wait Time
The script adds a small delay between each step to give the motor time to catch up.In this example the default wait time is set to 0.01 seconds (10 milliseconds). To change the speed of rotation you can change this value. I found I could reduce it to 4ms before the motor stopped working. If the script runs too fast the motor controller can’t keep up. This performance may vary depending on your motor and its controller.
To specify a different wait time you can pass a number of milliseconds as an argument on the command line using :
where 20 is the number of milliseconds.
Step Sequences
The complete step sequence consists of 8 steps. If StepDir is set to -2 or 2 the number of steps is reduced to 4.
The 4 step sequence is faster but the torque is lower. It’s easy to stop the rotation by holding the motor spindle. The 8 step sequence is slower but the torque is much higher. For my turntable application I prefer the torque over speed so I will be using the 8 step sequence.
Final Thoughts
You can now control a stepper motor using a Raspberry Pi and a Python script. If you add another motor you’ve got the beginnings of a small robot!
Saved searches
Use saved searches to filter your results more quickly
You signed in with another tab or window. Reload to refresh your session. You signed out in another tab or window. Reload to refresh your session. You switched accounts on another tab or window. Reload to refresh your session.
A stepper motor library in Python
alangibson/steppyr
This commit does not belong to any branch on this repository, and may belong to a fork outside of the repository.
Name already in use
A tag already exists with the provided branch name. Many Git commands accept both tag and branch names, so creating this branch may cause unexpected behavior. Are you sure you want to create this branch?
Sign In Required
Please sign in to use Codespaces.
Launching GitHub Desktop
If nothing happens, download GitHub Desktop and try again.
Launching GitHub Desktop
If nothing happens, download GitHub Desktop and try again.
Launching Xcode
If nothing happens, download Xcode and try again.
Launching Visual Studio Code
Your codespace will open once ready.
There was a problem preparing your codespace, please try again.
Latest commit
Git stats
Files
Failed to load latest commit information.
README.md
A stepper motor library in Python
Installing WiringPi/GPIO for TMC4361
If you are using the TMC4361 and want to use the Raspberry Pi to provide the external clock signal, you will need to use the gpio program included with wiringPi in order to activate the clock pin. This is mainly due to the fact that the RPi.GPIO library does not support setting the clock pin.
git clone git://git.drogon.net/wiringPi cd wiringPi ./build gpio readallTMC4361 motion controller
If you are using the TMC4361 and want to use the Raspberry Pi to provide the external clock signal, you will need to manually set the clock pin (BCM 4).
gpio mode 7 clock gpio clock 7 1600000For a TMC26X driver, first make sure you have spidev installed:
# Create the stepper driver stepper = AccelStepper( profile=RectangleProfile(), activator=TMC26XDriver( spi=SPI(bus=0, device=0), dir_pin=pinout.dir_pin, step_pin=pinout.step_pin ) ) stepper.set_target_speed(1000) # steps per second # stepper.set_target_acceleration(40000) # steps per second per second # stepper.set_pulse_width(2) # microsecondsspi = SPI(bus=0, device=1) tmc4361 = TMC4361( spi=spi, reset_pin=26 ) driver = StepperController( activator=tmc4361, profile=tmc4361 )For all other STEP/DIR drivers.
driver = StepperController( profile=AccelProfile(), activator=A4988Driver( dir_pin=1, step_pin=2, enable_pin=3, ms1_pin=4, ms2_pin=5, ms3_pin=6 ) )
source test/env python3 -m unittest discover
TMC4361/TMC4361-Eval to TMC2660
TMC4361 TMC4361-Eval TMC2660
STPOUT_PWMA DIO6 (#17) STEP
DIRPOUT_PWMB DIO7 (#18) DIR
MP1 DIO14 (#36) SG_TST
NSCSDRV_SDO SPI2_CSN0 (#24) CSN
SDODRV_SCLK SPI2_SDO (#28) SDI
SCKDRV_NSDO SPI_SCK (#27) SCK
SDIDRV_NSCLK SPI2_SDI (#29) SDOTMC 260/261/262/2660 Stepper library for Python
Based on the Arduino TMC26X Stepper Motor Controller Library https://github.com/trinamic/TMC26XStepper
Arduino library for A4988, DRV8825, DRV8834 and generic two-pin (DIR/STEP) stepper motor drivers https://github.com/laurb9/StepperDriver
Arduino TMC26X Stepper Motor Controller Library https://github.com/trinamic/TMC26XStepper
About
A stepper motor library in Python