- Python tkinter entry password
- Получение введенного текста
- Вставка и удаление текста
- Валидация
- Tkinter Entry
- Introduction to Tkinter Entry widget
- Setting the focus to the Tkinter Entry widget
- Showing a Tkinter password entry
- Tkinter Entry widget example
- Summary
- How to create a Password Entry Field in Tkinter?
- Example
- Output
Python tkinter entry password
Элемент Entry представляет поле для ввода текста. С помощью конструктора Entry можно установить ряд параметров, основные из них:
- background : фоновый цвет
- cursor : курсор указателя мыши при наведении на текстовое поле
- foreground : цвет текста
- font : шрифт текста
- justify : устанавливает выравнивание текста. Значение LEFT выравнивает текст по левому краю, CENTER — по центру, RIGHT — по правому краю
- show : задает маску для вводимых символов
- state : состояние элемента, может принимать значения NORMAL (по умолчанию) и DISABLED
- textvariable : устанавливает привязку к элементу StringVar
- width : ширина элемента
Элемент Entry имеет ряд методов. Основные из них:
- insert(index, str) : вставляет в текстовое поле строку по определенному индексу
- get() : возвращает введенный в текстовое поле текст
- delete(first, last=None) : удаляет символ по индексу first. Если указан параметр last, то удаление производится до индекса last. Чтобы удалить до конца, в качестве второго параметра можно использовать значение END.
- focus() : установить фокус на текстовое поле
Простейшее текстовое поле:
from tkinter import * from tkinter import ttk root = Tk() root.title("METANIT.COM") root.geometry("250x200") ttk.Entry().pack(anchor=NW, padx=8, pady= 8) root.mainloop() 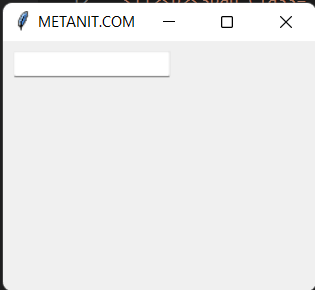
Получение введенного текста
Для получения текста из Entry, можно использовать его метод get() . Так, определим элемент Entry и по нажатию на кнопку выведем введенный текст на текстовую метку:
from tkinter import * from tkinter import ttk def show_message(): label["text"] = entry.get() # получаем введенный текст root = Tk() root.title("METANIT.COM") root.geometry("250x200") entry = ttk.Entry() entry.pack(anchor=NW, padx=6, pady=6) btn = ttk.Button(text="Click", command=show_message) btn.pack(anchor=NW, padx=6, pady=6) label = ttk.Label() label.pack(anchor=NW, padx=6, pady=6) root.mainloop() 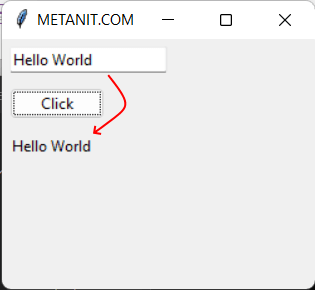
Вставка и удаление текста
Рассмотрим вставку и удаление текста в Entry:
from tkinter import * from tkinter import ttk def clear(): entry.delete(0, END) # удаление введенного текста def display(): label["text"] = entry.get() # получение введенного текста root = Tk() root.title("METANIT.COM") root.geometry("250x150") label = ttk.Label() label.pack(anchor=NW, padx=6, pady=6) entry = ttk.Entry() entry.pack(anchor=NW, padx=6, pady=6) # вставка начальных данных entry.insert(0, "Hello World") display_button = ttk.Button(text="Display", command=display) display_button.pack(side=LEFT, anchor=N, padx=6, pady=6) clear_button = ttk.Button(text="Clear", command=clear) clear_button.pack(side=LEFT, anchor=N, padx=6, pady=6) root.mainloop() При запуске программы в текстовое поле сразу же добавляется текст по умолчанию:
Кнопка Clear очищает оба поля, вызывая метод delete:
def clear(): entry.delete(0, END)
Вторая кнопка, используя метод get, получает введенный текст:
def display(): label["text"] = entry.get()
Валидация
С помощью параметра validate конструктора Entry можно задать, когда проводить валидацию введенного значения. Этот параметр может принимать следующие значения:
- none : отсутствие валидации, значение по умолчанию
- focus : валидация при получении фокуса
- focusin : валидация при изменении фокуса
- focusout : валидация при потере фокуса
- key : валидация при каждом вводе нового символа
- all : валидация при измении фокуса и вводе символов в поле
Параметр validatecommand позволяет установить команду валидации.
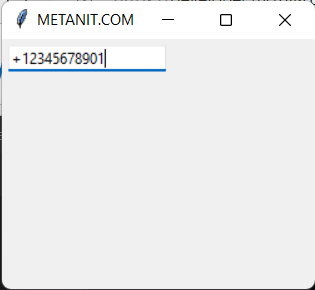
Рассмотрим небольшой пример. Допустим, пользовтаель должен ввести номер телефона в формете +xxxxxxxxxxx. То есть сначала должен идти знак +, а затем 11 цифр, например, +12345678901:
from tkinter import * from tkinter import ttk import re def is_valid(newval): return re.match("^\+\d$", newval) is not None root = Tk() root.title("METANIT.COM") root.geometry("250x200") check = (root.register(is_valid), "%P") phone_entry = ttk.Entry(validate="key", validatecommand=check) phone_entry.pack(padx=5, pady=5, anchor=NW) root.mainloop() Итак, параметр validate=»key» указывает, что мы будем валидировать ввод при каждом нажати на клавиатуру. Параметр validatecommand=check говорит, что валидировать ввод будет команда «check». Эта команда представляет кортеж из двух элементов:
check = (root.register(is_valid), "%P")
Первый элемент — вызов метода root.register(is_valid) регистрирует функцию, которая собственно будет производить валидацию — это функция is_valid() . Второй элемент — подстановка «%P» представляет новое значение, которое передается в функцию валидации.
Собственно саму валидацию выполняет функция is_valid() . Она принимает один параметр — текущее значение Entry, которое надо валидировать. Она возвращает True, если значение прошло валидацию, и False, если не прошло. Сама логика валидации представляет проверку строки на регулярное выражение «^\+\d*$» . Если новое значение соответствует этому выражению, и в нем не больше 12 символов, то оно прошло валидацию.
В итоге мы сможем ввести в текстовое поле только символ + и затем только 11 цифр.
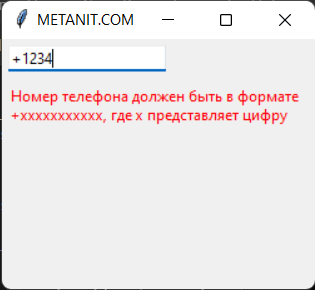
Теперь немного изменим код и добавим вывод ошибок валидации:
from tkinter import * from tkinter import ttk import re def is_valid(newval): result= re.match("^\+\d$", newval) is not None if not result and len(newval)
Здесь для вывода ошибок валидации добавлен виджет Label. Если введенное значение не соответствует регулярному выражению (например, пользователь попытался ввести нецифровой символ), и длина ввода меньше и равно 12 символов (проверять ввод больше 12 символов нет смысла, так как номер телефона содержит только 12 символов), то в метке выводим сообщение об ошибке

Также мы можем передать значение параметра validate, чтобы в функции валидации в зависимости от того, нажал пользователь на клавишу или убрал фокус с поля, производить те или иные действия. В этом случае необходимо передать команде валидации дополнительный аргумент:
check = (root.register(is_valid), "%P", "%V")
Здесь значение "%V" представляет событие, которое вызывает валидацию (focus/focusin/focusout/key). Тогда в функции валидации с помощью второго параметра мы сможем получить это значение:
def is_valid(newval, op): result= re.match("^\+\d$", newval) is not None if op=="key": # некоторые действия elif op=="focus": # некоторые действия return result Tkinter Entry
Summary: in this tutorial, you’ll learn how to use the Tkinter Entry widget to create a textbox.
Introduction to Tkinter Entry widget
The Entry widget allows you to enter a sing-line text. In Tkinter, to create a textbox, you use the Entry widget:
textbox = ttk.Entry(container, **options)Code language: Python (python)
- The container is the parent frame or window. on which you want to place the widget.
- The options is one or more keyword arguments used to configure the Entry widget.
Note that if you want to enter multi-line text, you should use the Text widget.
To get the current text of a Entry widget as a string, you use the get() method:
textbox.get()Code language: Python (python)Typically, you associate the current value of the textbox with a StringVar object like this:
text = tk.StringVar() textbox = ttk.Entry(root, textvariable=text)Code language: Python (python)- First, create a new instance of the StringVar class. The text will be the value holder for a string variable.
- Second, assign the text variable to the textvariable of the Entry widget.
In this case, you can use call the get() method of the StringVar() object to get the current value of the entry widget:
text.get()Code language: CSS (css)Setting the focus to the Tkinter Entry widget
To provide a better user experience, you can place move the focus to the first Entry widget after the window appears. Once the Entry widget has focus, it’s ready to accept the user input.
To do it, you use the focus() method of the Entry widget like this:
textbox.focus()Code language: Python (python)Showing a Tkinter password entry
To hide sensitive information on the Entry widget e.g., a password, you can use the show option.
The following creates a password entry. When you enter a password, it doesn’t show the actual characters but the asterisks (*) specified in the show option:
password = tk.StringVar() password_entry = ttk.Entry( root, textvariable=password, show='*' ) password_entry.pack()Code language: Python (python)Tkinter Entry widget example
The following program shows how to use the Entry widgets to create a sign-in form:
import tkinter as tk from tkinter import ttk from tkinter.messagebox import showinfo # root window root = tk.Tk() root.geometry("300x150") root.resizable(False, False) root.title('Sign In') # store email address and password email = tk.StringVar() password = tk.StringVar() def login_clicked(): """ callback when the login button clicked """ msg = f'You entered email: and password: ' showinfo( title='Information', message=msg ) # Sign in frame signin = ttk.Frame(root) signin.pack(padx=10, pady=10, fill='x', expand=True) # email email_label = ttk.Label(signin, text="Email Address:") email_label.pack(fill='x', expand=True) email_entry = ttk.Entry(signin, textvariable=email) email_entry.pack(fill='x', expand=True) email_entry.focus() # password password_label = ttk.Label(signin, text="Password:") password_label.pack(fill='x', expand=True) password_entry = ttk.Entry(signin, textvariable=password, show="*") password_entry.pack(fill='x', expand=True) # login button login_button = ttk.Button(signin, text="Login", command=login_clicked) login_button.pack(fill='x', expand=True, pady=10) root.mainloop()Code language: Python (python)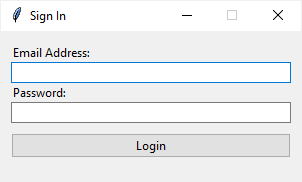
First, create two string variables to hold the current text of the email and password Entry widgets:
# store email address and password email = tk.StringVar() password = tk.StringVar()Code language: Python (python)Second, create the email Entry widget and associate it with the email variable:
email_entry = ttk.Entry(signin, textvariable=email)Code language: Python (python)The following sets focus on the email entry:
email_entry.focus()Code language: Python (python)Third, create the password entry widget and assign the password variable to its textvariable :
password_entry = ttk.Entry(signin, textvariable=password, show="*")Code language: Python (python)Finally, display a message box that shows the entered email and password if the login button is clicked.
Summary
- Use the ttk.Entry widget to create a textbox.
- Use an instance of the StringVar() class to associate the current text of the Entry widget with a string variable.
- Use the show option to create a password entry.
How to create a Password Entry Field in Tkinter?
Suppose you are creating a Login Form for a Tkinter application. In many cases, an ideal login requires a standard format of username, password, and other details of the user. Users can enter the password in the Entry field with any combination of alphanumeric characters. Generally, to establish a secure bridge between the user and the application, the password fields store the input in the form of "*" characters. In order to create a field that accepts the input in the form of "*," we have to use show="*" attribute in the Entry widget.
Example
The following example will have an Entry widget that accepts the password in hidden form. If we click "Show Password", it will show the password on the screen.
# Import the required libraries from tkinter import * from tkinter import ttk # Create an instance of tkinter frame or window win = Tk() # Set the size of the window win.geometry("700x350") # Define a function to show the entered password def show(): p = password.get() ttk.Label(win, text="Your Password is: " + str(p)).pack() password = StringVar() # Add an Entry widget for accepting User Password entry = Entry(win, width=25, textvariable=password, show="*") entry.pack(pady=10) # Add a Button to reveal the password ttk.Button(win, text="Show Password", command=show).pack() win.mainloop() Output
Running the above code will display a password field and a button to reveal the password on the screen.

Now, click the "Show Password" button to reveal the password on the screen.