- Setting Background color for Tkinter in Python
- Example
- Output
- Set Tkinter Background Color
- Method configure(background= )
- Attribute bg or background
- How to change Tkinter Button Background Color?
- Examples
- 1. Set Tkinter Button color to blue
- 2. Set Tkinter Button background color to black
- 3. Set Tkinter Button background color to Hex color
- Summary
- Работа с цветами и шрифтами / tkinter 7
- Как работает настройка цвета
- Задание шрифтов виджета
- Как работает настройка шрифтов?
Setting Background color for Tkinter in Python
We can customize the tkinter widgets using the tkinter.ttk module. Tkinter.ttk module is used for styling the tkinter widgets such as setting the background color, foreground color, activating the buttons, adding images to labels, justifying the height and width of widgets, etc.
In order to add a background color in tkinter widgets, we can specify the background property in the widget.
Example
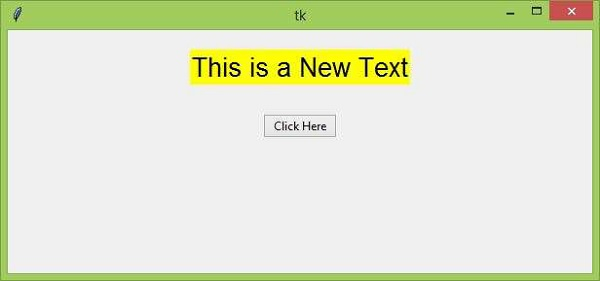
In the following example, we will create a button that will change the background of the text label.
#Import the tkinter library from tkinter import * from tkinter.ttk import * #Create an instance of tkinter frame win = Tk() #Set the geometry win.geometry("600x400") #Add a class to style the tkinter widgets style = ttk.Style() style.configure('TEntry', foreground = 'red') #Define a function to change the text color def change_color(): text.configure(background="red") #Create a text widget text=Label(win,text="This is a New Text",foreground="black", background="yellow",font=('Aerial bold',20)) text.pack(pady=20) #Create a Button widget Button(win, text= "Click Here", command= change_color).pack(pady=10) win.mainloop() Output
Running the above code will create a window containing a text label with a «yellow» background color.
Now, click the «Click Here» button. It will change the background color of the text label to «Red».
Set Tkinter Background Color
- Method configure(background= )
- Attribute bg or background
- Tkinter Color Code
Tkinter widget class method configure and attribute bg or background could be used to set the Tkinter widget/window background color.
Method configure(background= )
try: import Tkinter as tk except: import tkinter as tk app = tk.Tk() app.title("configure method") app.geometry('300x200') app.configure(bg='red') app.mainloop() app.configure(bg=’red’) configures the background color of app to be red . You could also use background instead of bg .
Attribute bg or background
background or bg is one attribute in most of Tkinter widgets, and could be used to set the background color directly.
try: import Tkinter as tk except: import tkinter as tk app = tk.Tk() app.title("bg attribute") app.geometry('300x200') app['bg'] = 'blue' app.mainloop() How to change Tkinter Button Background Color?
You can change the background color of a Tkinter Button by setting the bg property of Tkinter Button with a color string or HEX value.
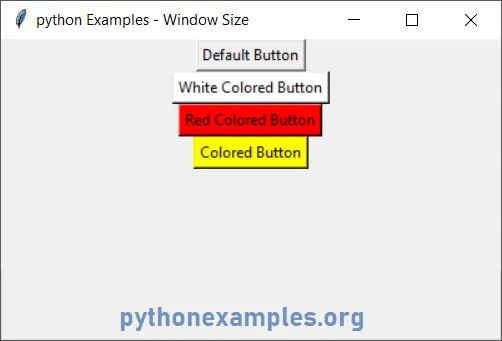
Assign any standard color or rgb hex value to the bg property as shown below.
button = Button(tkWindow, bg='blue') button = Button(tkWindow, bg='black') button = Button(tkWindow, bg='white') button = Button(tkWindow, bg='red') #hex values button = Button(tkWindow, bg='#54FA9B') button = Button(tkWindow, bg='#A877BA')The default color of Tkinter Button is grey. In this tutorial, we will learn how to change the color of Tkinter Button.
Examples
1. Set Tkinter Button color to blue
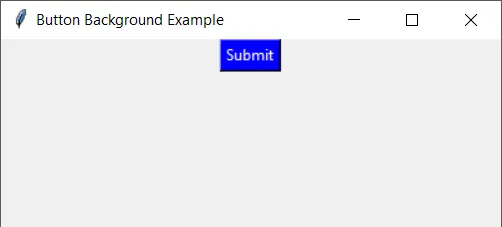
In this example, we have set the Button’s background color to blue by assigning named property bg in Button() class to blue.
Python Program
from tkinter import * tkWindow = Tk() tkWindow.geometry('400x150') tkWindow.title('Button Background Example') button = Button(tkWindow, text = 'Submit', bg='blue', fg='white') button.pack() tkWindow.mainloop()2. Set Tkinter Button background color to black
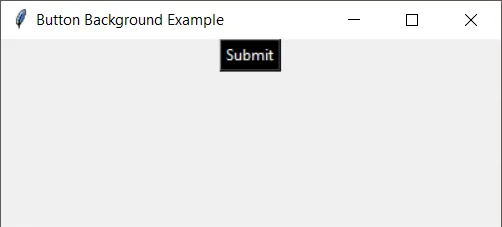
In this example, we have set the background color of the button to black with bg=’black’.
Python Program
from tkinter import * tkWindow = Tk() tkWindow.geometry('400x150') tkWindow.title('Button Background Example') button = Button(tkWindow, text = 'Submit', bg='black', fg='white') button.pack() tkWindow.mainloop()
3. Set Tkinter Button background color to Hex color
You can also assign any RGB equivalent hex color to the bg property.
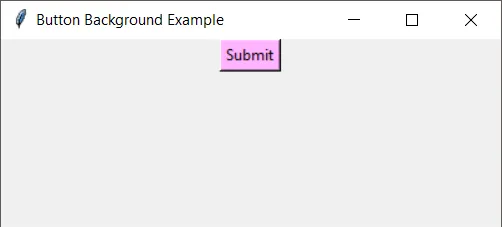
In this example, we assigned bg=’#ffb3fe’.
Python Program
from tkinter import * tkWindow = Tk() tkWindow.geometry('400x150') tkWindow.title('Button Background Example') button = Button(tkWindow, text = 'Submit', bg='#ffb3fe') button.pack() tkWindow.mainloop()
Summary
In this tutorial of Python Examples, we learned to set the background color of Tkinter button.
Работа с цветами и шрифтами / tkinter 7
В примерах из прошлых материалов цвета задавались с помощью их названий: например, white, blue или yellow. Эти значения передаются в виде строк параметрам foreground и background , которые изменяют цвет текста и фона виджета соответственно.
Названия цветов дальше уже привязываются к RGB-значениям (аддитивной модели, которая представляет цвета за счет комбинации интенсивности красного, зеленого и синего цветов). Этот перевод делается на основе таблицы, которая отличается от платформы к платформе. Если же нужно отображать один и тот же цвет на разных платформах, то можно передавать RGB-значение в параметры виджета.
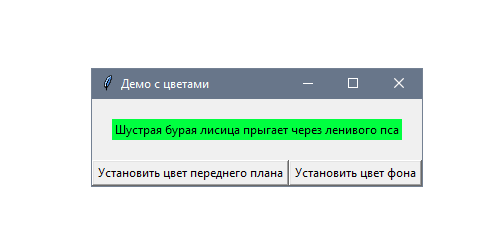
Следующее приложение показывает, как можно динамически менять параметры foreground и background у метки, которая демонстрирует зафиксированный текст:
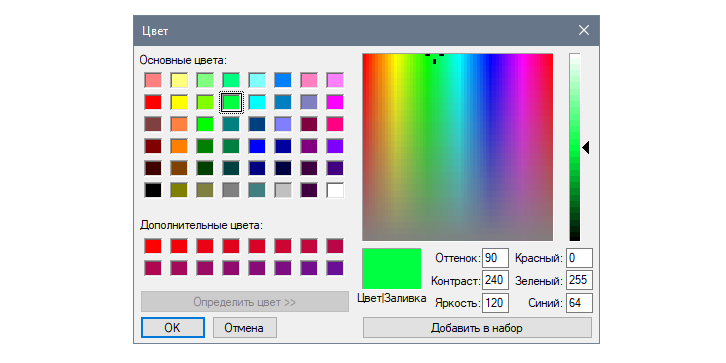
Цвета определены в формате RGB и выбираются с помощью нативного модального окна. На следующем скриншоте представлено диалоговое окно из Windows 10:
Традиционно будем работать с настройками виджета с помощью кнопок — по одной для каждого параметра. Основное отличие по сравнению с предыдущими примерами в том, что значения могут быть прямо выбраны с помощью диалогового окна askcolor из модуля tkinter.colorchooser :
from functools import partial import tkinter as tk
from tkinter.colorchooser import askcolor class App(tk.Tk):
def __init__(self):
super().__init__()
self.title("Демо с цветами")
text = "Шустрая бурая лисица прыгает через ленивого пса"
self.label = tk.Label(self, text=text)
self.fg_btn = tk.Button(self, text="Установить цвет текста",
command=partial(self.set_color, "fg"))
self.bg_btn = tk.Button(self, text="Установить цвет фона",
command=partial(self.set_color, "bg"))
self.label.pack(padx=20, pady=20)
self.fg_btn.pack(side=tk.LEFT, fill=tk.BOTH, expand=True)
self.bg_btn.pack(side=tk.LEFT, fill=tk.BOTH, expand=True)
def set_color(self, option):
color = askcolor()[1]
print("Выбрать цвет:", color)
self.label.config(**)
if __name__ == "__main__":
app = App()
app.mainloop()Если нужно проверить RGB-значение выбранного цвета, то его можно вывести в консоль при подтверждении выбора. Если же ничего не было выбрано, то и консоль останется пустой.
Как работает настройка цвета
Обе кнопки используют функцию partial в качестве обратного вызова. Это инструмент из модуля functools , который создает новый вызываемый объект. Он ведет себя как оригинальная функция, но с некоторыми зафиксированными аргументами. Возьмем в качестве примера такую инструкцию:
tk.Button(self, command=partial(self.set_color, "fg"), . )Предыдущая инструкция выполняет то же действие, что и следующая:
tk.Button(self, command=lambda: self.set_color("fg"), . )Так делается для того, чтобы переиспользовать метод set_color() из модуля functools . Это особенно полезно в более сложных сценариях, например, когда нужно создать несколько функций, и очевидно, что некоторые аргументы заданы заранее.
Нужно лишь помнить тот нюанс, что foreground и background кратко записаны как fg и bg . Эти строки распаковываются с помощью ** при настройке виджета в инструкции:
def set_color(self, option):
color = askcolor()[1]
print("Выбрать цвет:", color)
self.label.config(**) # same as (fg=color)
or (bg=color)askcolor возвращает кортеж с двумя элементами, которые представляют собой выбранный цвет. Первый — кортеж цветов из RGB-значений, а второй — шестнадцатеричное представление в виде строки. Поскольку первый вариант не может быть прямо передан в параметры виджета, используется второй.
Если нужно преобразовать название цвета в RGB-формат, можно использовать метод winfo_rgb() из предыдущего виджета. Поскольку он возвращает кортеж целых чисел от 0 до 65535, которые представляют 16-битные RGB-значения, их можно конвертировать в более привычное представление #RRGGBB , сдвинув вправо 8 битов:
rgb = widget.winfo_rgb("lightblue")
red, green, blue = [x>>8 for x in rgb]
print("#".format(red, green, blue))В предыдущем коде использовался для форматирования каждого целого числа в два шестнадцатеричных.
Задание шрифтов виджета
В Tkinter можно менять шрифт виджета на кнопках, метках и записях. По умолчанию он соответствует системному, но его можно поменять с помощью параметра font .
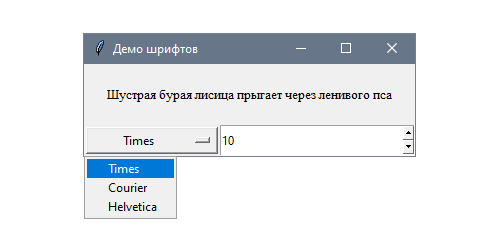
Следующее приложение позволяет пользователю динамически менять тип шрифта и его размер для статического текста. Попробуйте разные значения, чтобы увидеть результаты настройки:
В данном случае для настройки используются два вида виджетов: выпадающее меню со списком шрифтов и поле ввода с предустановленными вариантами Spinbox для выбора размера:
import tkinter as tk class App(tk.Tk):
def __init__(self):
super().__init__()
self.title("Демо шрифтов")
text = "Шустрая бурая лисица прыгает через ленивого пса"
self.label = tk.Label(self, text=text)
self.family = tk.StringVar()
self.family.trace("w", self.set_font)
families = ("Times", "Courier", "Helvetica")
self.option = tk.OptionMenu(self, self.family, *families)
self.size = tk.StringVar()
self.size.trace("w", self.set_font)
self.spinbox = tk.Spinbox(self, from_=8, to=18,
textvariable=self.size)
self.family.set(families[0])
self.size.set("10")
self.label.pack(padx=20, pady=20)
self.option.pack(side=tk.LEFT, fill=tk.BOTH, expand=True)
self.spinbox.pack(side=tk.LEFT, fill=tk.BOTH, expand=True)
def set_font(self, *args):
family = self.family.get()
size = self.size.get()
self.label.config(font=(family, size)) if __name__ == "__main__":
app = App()
app.mainloop()Стоит обратить внимание, что у переменных Tkinter есть некоторые значения по умолчанию, которые привязаны к каждому полю.
Как работает настройка шрифтов?
Кортеж FAMILIES включает три типа шрифтов, которые Tk гарантированно поддерживает на всех платформах: Times (Times New Roman), Courier и Helvetica. Между ними можно переключаться с помощью виджета OptionMenu , который привязан к переменной self.family .
Подобный подход используется также для того, чтобы задать размер шрифта в Spinbox . Обе переменных вызывают метод, который меняет шрифт метки:
