Как обрабатывать события от мыши
То в консоли мы увидим кортеж из координат положения мыши относительно клиентской области окна. То есть, свойство pos хранит координаты мыши и мы ими всегда можем воспользоваться. Если вместо атрибута pos записать атрибут rel:
print("Смещение мыши: ", event.rel)
то увидим относительные смещения курсора мыши (относительно положения в предыдущем событии MOUSEMOTION). Причем, свойство rel существует только для события pygame.MOUSEMOTION. Давайте теперь рассмотрим программу, которая позволяет рисовать в окне прямоугольник с помощью мыши. Она будет следующей:
flStartDraw = False sp = ep = None sc.fill(WHITE) pygame.display.update() while 1: for event in pygame.event.get(): if event.type == pygame.QUIT: exit() elif event.type == pygame.MOUSEBUTTONDOWN and event.button == 1: flStartDraw = True sp = event.pos elif event.type == pygame.MOUSEMOTION: if flStartDraw: pos = event.pos width = pos[0] - sp[0] height = pos[1] - sp[1] sc.fill(WHITE) pygame.draw.rect(sc, RED, pygame.Rect(sp[0], sp[1], width, height)) pygame.display.update() elif event.type == pygame.MOUSEBUTTONUP and event.button == 1: flStartDraw = False clock.tick(FPS)
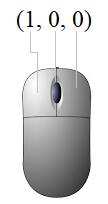
Ее работа вполне очевидна. При нажатии на левую кнопку мыши мы устанавливаем флаг flStartDraw в значение True, т.е. включаем режим рисования при перемещении мыши. Соответственно, при событии MOUSEMOTION срабатывает условие и рисуется прямоугольник от начальной координаты sp до текущей позиции pos. При отпускании левой кнопки мыши, переменная flStartDraw становится равной False. Однако, обратите внимание, события MOUSEBUTTONDOWN и MOUSEBUTTONUP срабатывают только один раз. То есть, если все время держать нажатой кнопку мыши, то произойдет только одно событие MOUSEBUTTONDOWN. А вот событие MOUSEMOTION происходит постоянно при каждом перемещении курсора мыши в клиентской области окна. Если на каждой итерации главного цикла нужно определять: нажата ли какая-либо кнопка мыши, то следует использовать модуль pygame.mouse в котором, в частности, имеется функция: pygame.mouse.get_pressed() Она работает аналогично функции pygame.key.get_pressed() – определения нажатия клавиш, о которой мы говорили на прошлом занятии. Здесь все то же самое, только с кнопками мыши. На выходе pygame.mouse.get_pressed() выдает кортеж с тремя значениями: Единица соответствует нажатой кнопке в соответствии с ее индексом:
- 0 – левая кнопка;
- 1 – центральная;
- 2 – правая кнопка.
Перепишем предыдущую программу с использованием этой функции:
sp = None sc.fill(WHITE) pygame.display.update() while 1: for event in pygame.event.get(): if event.type == pygame.QUIT: exit() pressed = pygame.mouse.get_pressed() if pressed[0]: pos = pygame.mouse.get_pos() if sp is None: sp = pos width = pos[0] - sp[0] height = pos[1] - sp[1] sc.fill(WHITE) pygame.draw.rect(sc, RED, pygame.Rect(sp[0], sp[1], width, height)) pygame.display.update() else: sp = None clock.tick(FPS)
Смотрите, мы здесь вначале проверяем нажатие левой кнопки мыши (индекс 0) и если величина sp равна None, то начальной позиции для рисования прямоугольника еще нет и ее нужно приравнять текущей позиции курсора. Текущая позиция определяется с помощью функции get_pos(). Затем, удерживая нажатой левую кнопку и перемещая мышь, мы будем получать другие значения pos, но начальная позиция sp будет неизменной. В результате выполняется рисование прямоугольника. При отпускании левой кнопки, значение sp вновь становится равным None. Наконец, можно скрыть курсор мыши с помощью функции: pygame.mouse.set_visible(False) И отобразить свой собственный, например, так:
pygame.mouse.set_visible(False) while 1: for event in pygame.event.get(): if event.type == pygame.QUIT: exit() sc.fill(WHITE) pos = pygame.mouse.get_pos() if pygame.mouse.get_focused(): pygame.draw.circle(sc, BLUE, pos, 7) pressed = pygame.mouse.get_pressed() if pressed[0]: if sp is None: sp = pos width = pos[0] - sp[0] height = pos[1] - sp[1] pygame.draw.rect(sc, RED, pygame.Rect(sp[0], sp[1], width, height)) else: sp = None pygame.display.update() clock.tick(FPS)
How To Get Mouse Clicks With Python
This demonstration shows you how to track mouse clicks, movements and even scrolls using the pynput module. These can then be logged to a file as no console is displayed. This is very similar to a mouse logger.
If you haven’t used or setup pip before, go to my tutorial at how-to-setup-pythons-pip to setup pip.
We will be using the pynput module to listen to mouse events. To install this module execute pip install pynput in cmd. Watch the output to make sure no errors have occurred; it will tell you when the module has been successfully installed.

To double-check that it was installed successfully, open up IDLE and execute the command import pynput ; no errors should occur.

Create a new python file and save it with a .py file extension. You will first want to import Listener from pynput.mouse.
from pynput.mouse import Listener Setup the listener by creating an instance in a with statement and using it’s .join() method to join it to the main thread.
with Listener() as listener: listener.join() Create three methods; on_move, on_click and on_scroll with the parameters as shown below.
def on_move(x, y): pass def on_click(x, y, button, pressed): pass def on_scroll(x, y, dx, dy): pass Link these methods to the listener instance with the function names as the args; I have named the methods as they are defined in the listener class. Now when an action occurs, one of these methods will be run.
with Listener(on_move=on_move, on_click=on_click, on_scroll=on_scroll) as listener: To make sure these are running, add some print statements to each method. Save and run the script. Move your mouse around a bit, you should see output like below.
def on_move(x, y): print ("Mouse moved") def on_click(x, y, button, pressed): print ("Mouse clicked") def on_scroll(x, y, dx, dy): print ("Mouse scrolled") 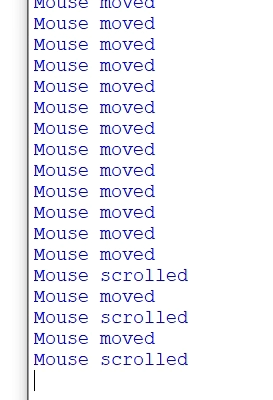
Using these print statements and the parameters provided, we can give more information when printing. Run this again to make sure it is working properly (example output below).
def on_move(x, y): print ("Mouse moved to ( , )".format(x, y)) def on_click(x, y, button, pressed): if pressed: print ('Mouse clicked at ( , ) with '.format(x, y, button)) def on_scroll(x, y, dx, dy): print ('Mouse scrolled at ( , )( , )'.format(x, y, dx, dy)) 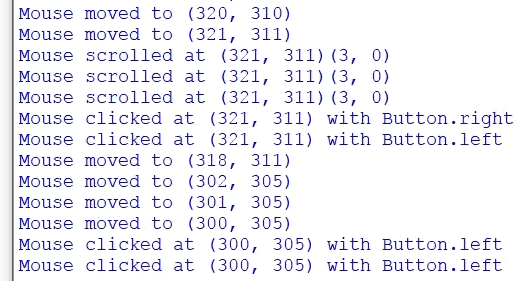
If you want this script to be run in the background. Click File -> Save As and save it with a .pyw file extension. Now when it is run outside IDLE there will be no console window and it will not look like it is running. But to make sure the console doesn’t appear, we need to first remove the print statements.
Import logging and setup the basic configuration as I have below. After that, change all print statements to logging.info.
logging.basicConfig(filename="mouse_log.txt", level=logging.DEBUG, format='%(asctime)s: %(message)s') def on_move(x, y): logging.info("Mouse moved to ( , )".format(x, y)) def on_click(x, y, button, pressed): if pressed: logging.info('Mouse clicked at ( , ) with '.format(x, y, button)) def on_scroll(x, y, dx, dy): logging.info('Mouse scrolled at ( , )( , )'.format(x, y, dx, dy)) Now when the script is run, nothing should be printed to the console. This is because it is all being saved to the file declared in the basic configuration.
Save and close IDLE. Open the file named mouse_log.txt next to your python script; all the events should be logged in here.
The actual location of this file will be in the current working directory of where you run the script from
Just as a quick note, the Listener class is a thread which means as soon as it has joined to the main thread no code will be executed after the .join() until the Listener is stopped.
As stated here in the pynput docs on readthedocs.io, we can call pynput.mouse.Listener.stop anywhere in the script to stop the thread or return False from a callback to stop the listener. As shown in my video, we can also just call listener.stop() in one of the definitions due to the fact that that the listener is now in scope and is an instance os Listener.
from pynput.mouse import Listener import logging logging.basicConfig(filename="mouse_log.txt", level=logging.DEBUG, format='%(asctime)s: %(message)s') def on_move(x, y): logging.info("Mouse moved to ( , )".format(x, y)) def on_click(x, y, button, pressed): if pressed: logging.info('Mouse clicked at ( , ) with '.format(x, y, button)) def on_scroll(x, y, dx, dy): logging.info('Mouse scrolled at ( , )( , )'.format(x, y, dx, dy)) with Listener(on_move=on_move, on_click=on_click, on_scroll=on_scroll) as listener: listener.join() Common Issues and Questions
ModuleNotFoundError/ImportError: No module named ‘pynput’
Did you install pynput? This error will not occur if you installed it properly. If you have multiple versions of Python, make sure you are installing pynput on the same version as what you are running the script with.
Syntax errors are caused by you and there is not much I can offer to fix it apart from telling you to read the error. They always say where the error is in the output using a ^. Generally people that get this issue have incorrect indentation, brackets in the wrong place or something spelt wrong. You can read about SyntaxError on Python’s docs here.
Owner of PyTutorials and creator of auto-py-to-exe. I enjoy making quick tutorials for people new to particular topics in Python and tools that help fix small things.