- Get Image Size in OpenCV Python
- OpenCV Python – Get Image Size
- Example
- Conclusion
- OpenCV — быстрый старт: базовые операции с изображениями
- Доступ к отдельным пикселям
- Изменение пикселей
- Обрезка картинок
- Масштабирование изображений
- cv2.resize() — синтаксис и аргументы
- Чуть подробнее о том, что тут происходит
- Первый вариант масштабирования: коэффициенты масштаба
- Второй вариант масштабирования: сразу укажем нужные размеры
- Масштабирование с сохранением пропорций
- Сохранимся-с!
- Отражение картинки
- Get image size (width, height) with Python, OpenCV, Pillow (PIL)
- OpenCV: Get image size (width, height) with ndarray.shape
- For color images
- For grayscale (monochrome) images
- Pillow (PIL): Get image size (width, height) with size , width , height
Get Image Size in OpenCV Python
In this OpenCV Tutorial, we will learn how to get image size in OpenCV Python using NumPy Array shape property, with an example.
OpenCV Python – Get Image Size
In Image Processing applications, it is often necessary to know the size of an image that is loaded or transformed through various stages.
When working with OpenCV Python, images are stored in numpy ndarray. To get the image shape or size, use ndarray.shape to get the dimensions of the image. Then, you can use index on the dimensions variable to get width, height and number of channels for each pixel.
In the following code snippet, we have read an image to img ndarray. And then we used ndarray.shape to get the dimensions of the image.
img = cv2.imread('/path/to/image.png') dimensions = img.shape Example
In this example, we have read an image and used ndarray.shape to get the dimension.

We can access height, width and number of channels from img.shape: Height is at index 0, Width is at index 1; and number of channels at index 2.
Python Program
import cv2 # read image img = cv2.imread('/home/img/python.png', cv2.IMREAD_UNCHANGED) # get dimensions of image dimensions = img.shape # height, width, number of channels in image height = img.shape[0] width = img.shape[1] channels = img.shape[2] print('Image Dimension : ',dimensions) print('Image Height : ',height) print('Image Width : ',width) print('Number of Channels : ',channels) Image Dimension : (149, 200, 4) Image Height : 149 Image Width : 200 Number of Channels : 4
img.shape returns (Height, Width, Number of Channels)
- Height represents the number of pixel rows in the image or the number of pixels in each column of the image array.
- Width represents the number of pixel columns in the image or the number of pixels in each row of the image array.
- Number of Channels represents the number of components used to represent each pixel.
In the above example, Number of Channels = 4 represent Alpha, Red, Green and Blue channels.
Conclusion
Concluding this OpenCV Python Tutorial, we have learnt how to get the image shape using OpenCV ndarray.shape.
OpenCV — быстрый старт: базовые операции с изображениями
Судя по количеству закладок на первой части, работа моя — не зряшная.
В прошлый раз разбирали скучное открывание-закрывание картинки, в этот раз засунем в неё руки поглубже:
- Доступ к пикселям и работа с ними.
- Масштабирование картинки.
- Обрезка.
- Отражение.
import cv2 import numpy as np import matplotlib.pyplot as plt from PIL import ImageПервой картинкой пойдут уже знакомые шашечки:
Доступ к отдельным пикселям
Изображение в OpenCV — матрица numpy, а значит, для доступа к пикселю будем использовать нотацию матриц: [ r , c ]. Первое значение — строка, второе — колонка. Не забывайте о том, что индексация начинается с нуля!
Для доступа к самому первому пикселю обратимся к элементу матрицы (изображения, то бишь) с индексами 0 и 0:
# Читаем картинку как чб cb_img = cv2.imread("checkerboard_18x18.png",0) # Выводим массив, представляющий картинку print(cb_img) # Выводим значение самого первого пикселя (верх-лево) print(cb_img[0,0]) # Выводим значение первого пикселя слева от чёрной зоны print(cb_img[0,6])С доступом разобрались, поиграем со значениями.
Изменение пикселей
Просто переназначаем пиксель:
Что-то похожее мы сделали в прошлый раз с каналами.
Продублируем картинку, и накидаем в неё серых пикселей:
cb_img_copy = cb_img.copy() # копируем загруженное изображение cb_img_copy[2,2] = 200 # пиксель в ячейке [2,2] будет равен 200 cb_img_copy[2,3] = 200 # и так далее cb_img_copy[3,2] = 200 cb_img_copy[3,3] = 200 # То же самое другими словами: # cb_img_copy[2:3,2:3] = 200 plt.imshow(cb_img_copy, cmap='gray') plt.show() print(cb_img_copy)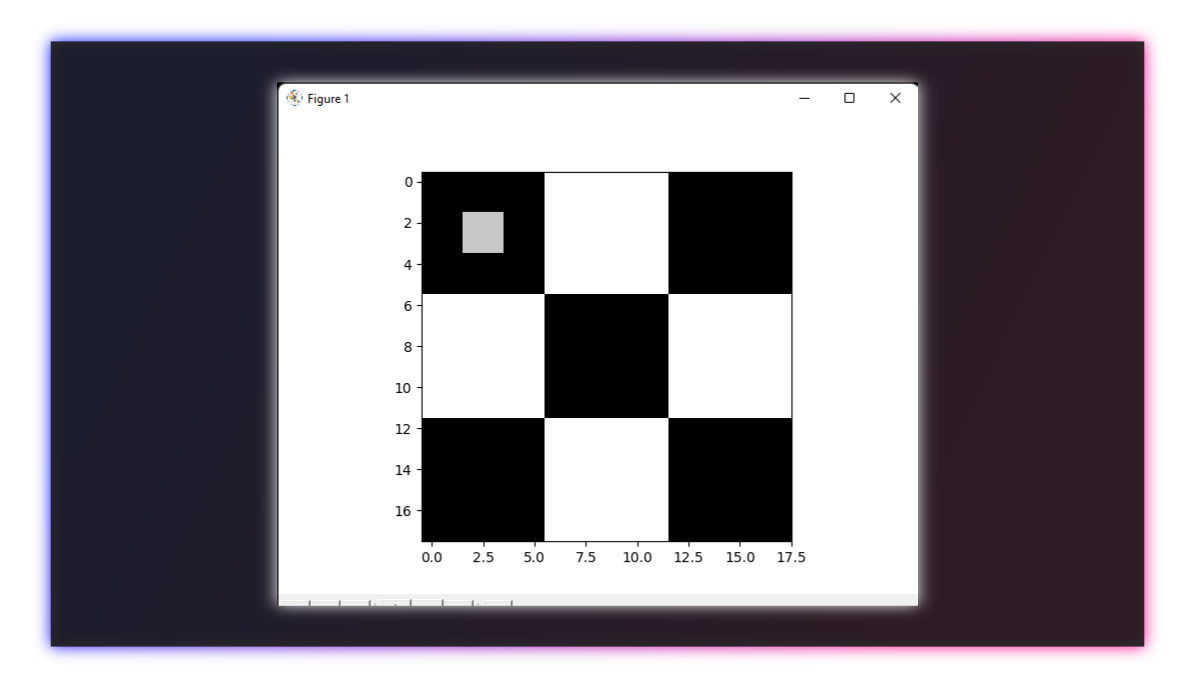
Обрезка картинок
Можно воспринимать кроп как задачу «из пачки пикселей берём только эти несколько».
Загрузим новозеландскую лодку и потренируемся на ней:
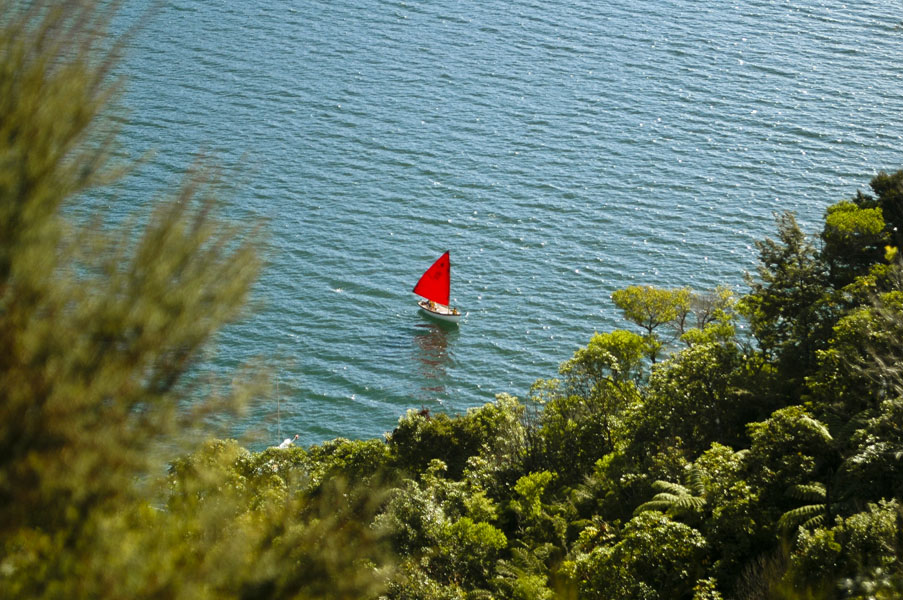
img_NZ_bgr = cv2.imread("New_Zealand_Boat.jpg",cv2.IMREAD_COLOR) # или так: # img_NZ_bgr = cv2.imread("New_Zealand_Boat.jpg",1) # img_NZ_bgr = cv2.imread("New_Zealand_Boat.jpg") img_NZ_rgb = img_NZ_bgr[. -1] # или так: # img_NZ_rgb = cv2.cvtColor(img_NZ_bgr, cv2.COLOR_BGR2RGB) # или разбить на каналы и пересобрать в правильном порядке :) plt.imshow(img_NZ_rgb) plt.show()# кропнутый регион = область загруженной картинки # c 200 по 400 строку (или Y, если хотите) # и 300 по 600 колонку (или X, если хотите) cropped_region = img_NZ_rgb[200:400, 300:600] plt.imshow(cropped_region) plt.show()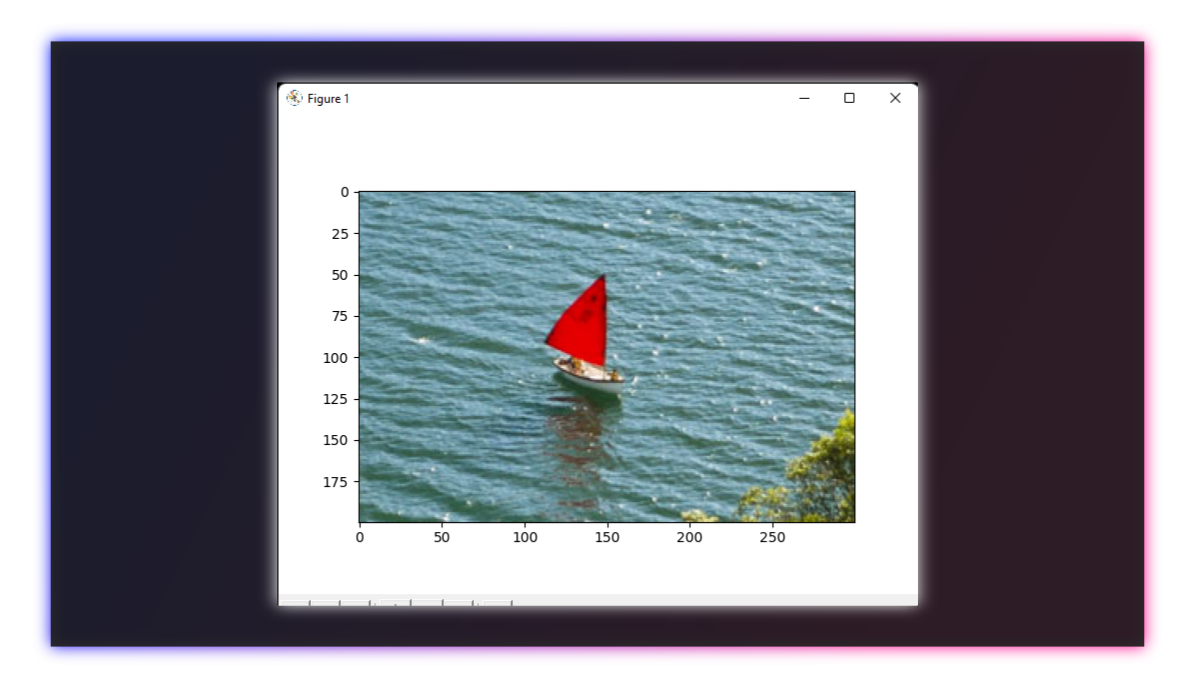
Масштабирование изображений
Функция resize() отресайзит картинку в больший или меньший размер. А регулируется это всё аргументами src , dsize (обязательные), fx , fy (факультативные).
cv2.resize() — синтаксис и аргументы
dst = resize( src, dsize[, dst[, fx[, fy[, interpolation]]]] )dst — изображение на выходе. Размер картинки будет равен dsize (если он ненулевой), или посчитан через src.size() , fx , fy .
Тип данных будет тем же, что и в оригинальной картинке.
src — понятно, сама картинка, требующая вмешательства. Обязательный аргумент.
dsize — необходимый размер, обязательный аргумент.
fx — коэффициент масштаба горизонтальный.
fy — коэффициент масштаба вертикальный.
Чуть подробнее о том, что тут происходит
В общем: в dsize кладётся кортеж с натуральными числами, две штуки: (500, 500). Это размер, в который картинка отмасштабируется.
Можно воспользоваться вместо этого коэффициентами масштаба, тогда вместо dsize надо впечатать None .
Коэффициенты масштаба — fx и fy — берут оригинальную картинку, и растягивают/стягивают её пропорционально.
dsize — имеет приоритет: конструкция resize(src, dsize=(100, 100),fx=20, fy=20) выдаст картинку 100×100 пикселей.
Первый вариант масштабирования: коэффициенты масштаба
Увеличим кропнутую лодку в два раза:
resized_cropped_region_2x = cv2.resize(cropped_region,None,fx=2, fy=2) plt.imshow(resized_cropped_region_2x) plt.show()Второй вариант масштабирования: сразу укажем нужные размеры
desired_width = 100 # желаемая ширина desired_height = 200 # желаемая высота dim = (desired_width, desired_height) # размер в итоге # Масштабируем картинку resized_cropped_region = cv2.resize(cropped_region, dsize = dim, interpolation = cv2.INTER_AREA) # Или так: # resized_cropped_region = cv2.resize(cropped_region, # dsize = (100, 200), # interpolation = cv2.INTER_AREA) plt.imshow(resized_cropped_region) plt.show()Масштабирование с сохранением пропорций
За основу возьмём вторую методу, но отталкиваться будем от желаемой ширины.
Немного несложной математики:
# Используем 'dsize' desired_width = 100 # желаемая ширина # соотношение сторон: ширина, делённая на ширину оригинала aspect_ratio = desired_width / cropped_region.shape[1] # желаемая высота: высота, умноженная на соотношение сторон desired_height = int(cropped_region.shape[0] * aspect_ratio) dim = (desired_width, desired_height) # итоговые размеры # Масштабируем картинку resized_cropped_region = cv2.resize(cropped_region, dsize=dim, interpolation=cv2.INTER_AREA) plt.imshow(resized_cropped_region) plt.show()Сохранимся-с!
# Приводим картинку к RGB resized_cropped_region_2x = resized_cropped_region_2x[. -1] # Сохраняем картинку cv2.imwrite("resized_cropped_region_2x.png", resized_cropped_region_2x) # Посмотрим на сокранённую картинку (тут-то нам и пригодится подгруженный PIL) im = Image.open('resized_cropped_region_2x.png') im.show()Отражение картинки
Происходит с помощью функции flip() .
src — понятно, сама картинка, требующая вмешательства. Обязательный аргумент.
flipCode — флаг, объясняющий функции, как конкретно мы хотим картинку отразить.
img_NZ_rgb_flipped_horz = cv2.flip(img_NZ_rgb, 1) img_NZ_rgb_flipped_vert = cv2.flip(img_NZ_rgb, 0) img_NZ_rgb_flipped_both = cv2.flip(img_NZ_rgb, -1) plt.figure(figsize=[18,5]) plt.subplot(141);plt.imshow(img_NZ_rgb_flipped_horz);plt.title("Horizontal Flip"); plt.subplot(142);plt.imshow(img_NZ_rgb_flipped_vert);plt.title("Vertical Flip") plt.subplot(143);plt.imshow(img_NZ_rgb_flipped_both);plt.title("Both Flipped") plt.subplot(144);plt.imshow(img_NZ_rgb);plt.title("Original")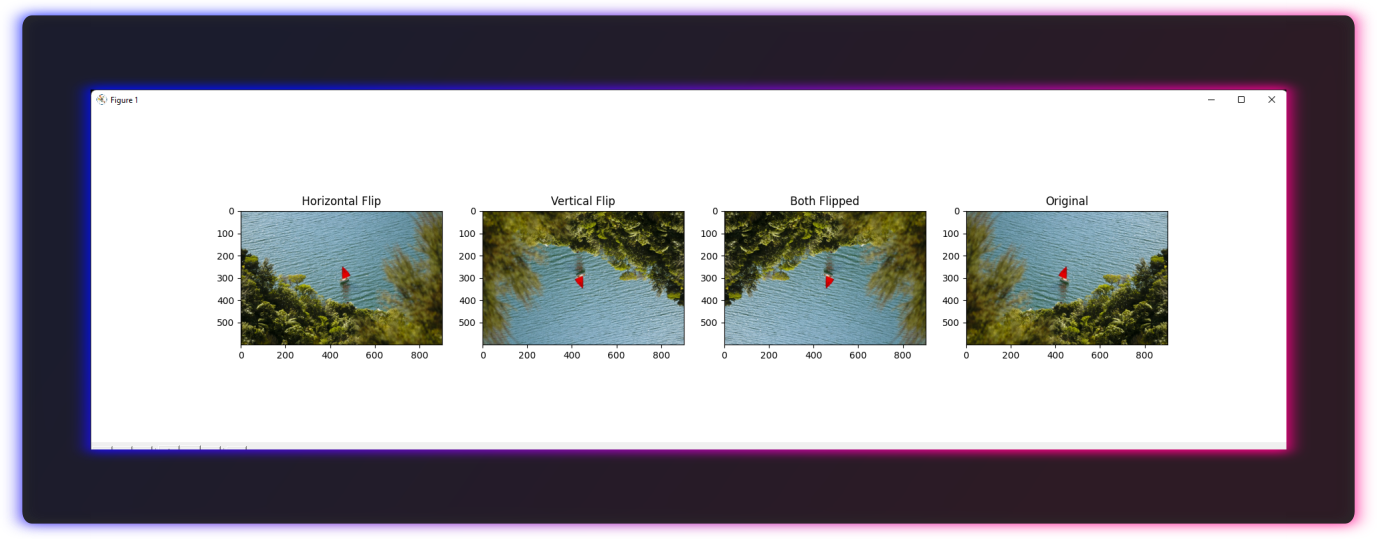
Вот и всё! Второй маленький шажок к человеку-фотошопу пройден! До встречи в следующих сериях.
Get image size (width, height) with Python, OpenCV, Pillow (PIL)
This article explains how to get the image size (width and height) in Python with OpenCV and Pillow (PIL).
You can obtain the image size as a tuple using the shape attribute of ndarray in OpenCV and the size attribute of PIL.Image in Pillow (PIL). It’s important to note that the order of width and height is different in OpenCV and Pillow (PIL).
Refer to the following articles for image resizing and getting the size of a file in bytes:
OpenCV: Get image size (width, height) with ndarray.shape
OpenCV treats an image as a NumPy array ndarray . The image size (width, height) can be obtained using the shape attribute, which returns a tuple of dimensions.
In addition to OpenCV, you can also obtain the image size using the shape attribute when using other libraries, such as Pillow, to read an image file and convert it into an ndarray .
Note that OpenCV loads color image files in BGR order, not RGB.
For color images
For color images, the ndarray is a 3D array with dimensions (height, width, 3) .
import cv2 im = cv2.imread('data/src/lena.jpg') print(type(im)) # print(im.shape) print(type(im.shape)) # (225, 400, 3) # To assign each value to a variable, unpack the tuple as follows:
h, w, c = im.shape print('width: ', w) print('height: ', h) print('channel:', c) # width: 400 # height: 225 # channel: 3 When unpacking a tuple, it is a common convention to assign unused values to _ . In the following example, the number of colors (or channels) is not used:
h, w, _ = im.shape print('width: ', w) print('height:', h) # width: 400 # height: 225 Of course, you can also directly access them by index.
print('width: ', im.shape[1]) print('height:', im.shape[0]) # width: 400 # height: 225 If you want to get tuples in the order of (width, height) , you can use slicing, as demonstrated in the following example:
When passing the size as an argument to functions such as cv2.resize() , ensure it follows the (width, height) format.
See the following article for details of slicing:
For grayscale (monochrome) images
For grayscale images, the ndarray is a 2D array with dimensions (height, width) .
import cv2 im_gray = cv2.imread('data/src/lena.jpg', cv2.IMREAD_GRAYSCALE) print(im_gray.shape) print(type(im_gray.shape)) # (225, 400) # The procedure for grayscale images is essentially the same as for color images:
h, w = im_gray.shape print('width: ', w) print('height:', h) # width: 400 # height: 225 print('width: ', im_gray.shape[1]) print('height:', im_gray.shape[0]) # width: 400 # height: 225 To assign width and height to variables, the following approach works for both color and grayscale images.
h, w = im.shape[0], im.shape[1] print('width: ', w) print('height:', h) # width: 400 # height: 225 If you want to get a (width, height) tuple, you can use slicing. The latter approach ( [1::-1] ) works for both color and grayscale images.
print(im_gray.shape[::-1]) print(im_gray.shape[1::-1]) # (400, 225) # (400, 225) Pillow (PIL): Get image size (width, height) with size , width , height
A PIL.Image object, obtained by reading an image using Pillow (PIL), has the size , width , and height attributes.
The size attribute returns a (width, height) tuple.
from PIL import Image im = Image.open('data/src/lena.jpg') print(im.size) print(type(im.size)) # (400, 225) # w, h = im.size print('width: ', w) print('height:', h) # width: 400 # height: 225 You can also get the width and height using the width and height attributes:
print('width: ', im.width) print('height:', im.height) # width: 400 # height: 225 The process is the same for grayscale (monochrome) images:
im_gray = Image.open('data/src/lena.jpg').convert('L') print(im.size) print('width: ', im.width) print('height:', im.height) # (400, 225) # width: 400 # height: 225