- Binarize image with Python, NumPy, OpenCV
- Image binarization with OpenCV: cv2.threshold()
- Automatic image thresholding (Otsu’s method, etc.)
- Image binarization with NumPy (without OpenCV)
- For grayscale image
- For color image
- How to create a black image and a white image using OpenCV Python?
- Steps
- Example 1
- Output
- Example 2
- Output
- Life2Coding
- Requirements:
- Goals:
- Documentation:
- imshow()
- waitKey()
- destroyAllWindows()
- Steps:
- Example Code:
Binarize image with Python, NumPy, OpenCV
This article describes how to binarize an image into black and white with a threshold.
There are two ways: one is to use OpenCV function cv2.threshold() , and the other is to process ndarray with a basic operation of NumPy. OpenCV is not necessary in the latter case.
- Image binarization with OpenCV: cv2.threshold()
- Automatic image thresholding (Otsu’s method, etc.)
- Image binarization with NumPy (without OpenCV)
- For grayscale image
- For color image
In the following sample code, OpenCV version is 4.2 . Note that the behavior may be different with different versions. You can get the official documentation of each version at the following.
Image binarization with OpenCV: cv2.threshold()
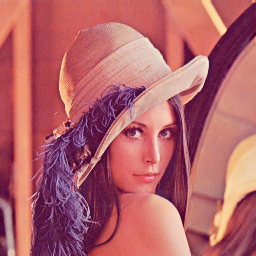
Take the following image as an example.
import cv2 im = cv2.imread('data/src/lena_square_half.png')
You can binarize an image with cv2.threshold() .
If type is set to cv2.THRESH_BINARY , any value greater than the threshold thresh is replaced with maxval and the other values are replaced with 0 .
In the case of color images, each color (channel) is processed separately. If you want black and white images, convert them to grayscale first as in the example of cv2.THRESH_OTSU described later.
th, im_th = cv2.threshold(im, 128, 255, cv2.THRESH_BINARY) print(th) # 128.0 cv2.imwrite('data/dst/opencv_th.jpg', im_th)A tuple of used threshold and processed array (output image) is returned. It can be stored in each variable as in the example above.
When type is set to cv2.THRESH_TOZERO , the value greater than the threshold thresh remains the same, and the other values are replaced with 0 .
th, im_th_tz = cv2.threshold(im, 128, 255, cv2.THRESH_TOZERO) print(th) # 128.0 cv2.imwrite('data/dst/opencv_th_tz.jpg', im_th_tz)See the official documentation below for the values you can specify for type .
maxval is not used with cv2.THRESH_TOZERO , and thresh is not used with cv2.THRESH_OTSU and cv2.THRESH_TRIANGLE described later, but they cannot be omitted.
Automatic image thresholding (Otsu’s method, etc.)
When type is set to cv2.THRESH_OTSU , the threshold is automatically selected by the Otsu’s method, and if it is set to cv2.THRESH_TRIANGLE , the threshold is automatically selected by the triangle method.
Note that cv2.THRESH_OTSU and cv2.THRESH_TRIANGLE only support 8-bit single channel images as of version 4.2.0 . An error will occur if a color image (three-dimensional array) is specified.
# th, im_th_otsu = cv2.threshold(im, 128, 192, cv2.THRESH_OTSU) # error: OpenCV(4.2.0) /tmp/opencv-20200105-17262-cwpzm4/opencv-4.2.0/modules/imgproc/src/thresh.cpp:1529: error: (-215:Assertion failed) src.type() == CV_8UC1 in function 'threshold'Convert to grayscale and then use cv2.threshold() .
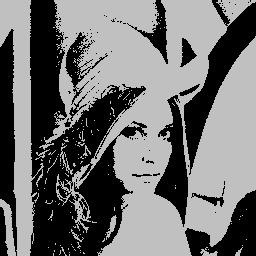
im_gray = cv2.cvtColor(im, cv2.COLOR_BGR2GRAY) th, im_gray_th_otsu = cv2.threshold(im_gray, 128, 192, cv2.THRESH_OTSU) print(th) # 117.0 cv2.imwrite('data/dst/opencv_th_otsu.jpg', im_gray_th_otsu)Values greater than the automatically selected threshold are replaced with maxval , and other values are replaced with 0 . In the above example, maxval is set to 192 for explanation. If you want to binarize to black and white, you can set it to 255 .
Image binarization with NumPy (without OpenCV)
If you just want to binarize to black and white with threshold values, you can do it with basic NumPy operations.
For grayscale image
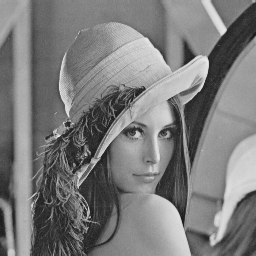
As a simple example, binarize a grayscale image.
import numpy as np from PIL import Image im_gray = np.array(Image.open('data/src/lena_square_half.png').convert('L')) print(type(im_gray)) #Here, as an example without OpenCV, the image is read by Pillow and converted to ndarray .
Of course, there is no problem reading images with OpenCV. Note that the order of colors is different when reading a color image with OpenCV.
The comparison operator for a NumPy array ndarray returns a boolean ndarray comparing each element of the array.
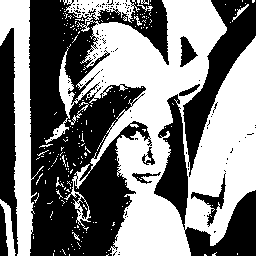
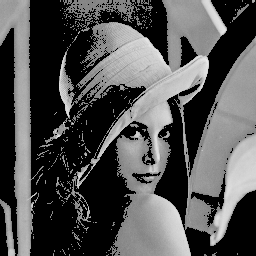
thresh = 128 im_bool = im_gray > thresh print(im_bool) # [[ True True True . True True False] # [ True True True . True True False] # [ True True True . True False False] # . # [False False False . False False False] # [False False False . False False False] # [False False False . False False False]]Since True is regarded as 1 and False is regarded as 0 , when multiplied by 255 which is the Max value of uint8 , True becomes 255 (white) and False becomes 0 (black).
maxval = 255 im_bin = (im_gray > thresh) * maxval print(im_bin) # [[255 255 255 . 255 255 0] # [255 255 255 . 255 255 0] # [255 255 255 . 255 0 0] # . # [ 0 0 0 . 0 0 0] # [ 0 0 0 . 0 0 0] # [ 0 0 0 . 0 0 0]] Image.fromarray(np.uint8(im_bin)).save('data/dst/numpy_binarization.png')The above example corresponds to cv2.threshold() with cv2.THRESH_BINARY .
If you multiply the boolean ndarray of the comparison result by the original ndarray , the pixel value of True remains original and the pixel value of False is 0 (black), which corresponds to cv2.THRESH_TOZERO .
im_bin_keep = (im_gray > thresh) * im_gray print(im_bin_keep) # [[162 161 156 . 169 169 0] # [162 161 156 . 169 169 0] # [164 155 159 . 145 0 0] # . # [ 0 0 0 . 0 0 0] # [ 0 0 0 . 0 0 0] # [ 0 0 0 . 0 0 0]] Image.fromarray(np.uint8(im_bin_keep)).save('data/dst/numpy_binarization_keep.png')For color image
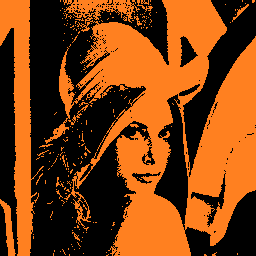
By applying different values to each RGB color, you can create a colorful image.
Generate a three-dimensional empty ndarray with np.empty() and store results of multiplying each color (each channel) by each value.
The size (height, width) obtained by shape is unpacked by * and specified in np.empty() .
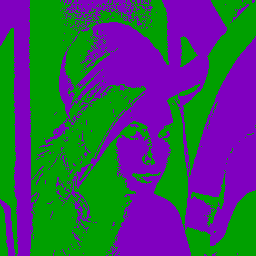
im_bool = im_gray > 128 im_dst = np.empty((*im_gray.shape, 3)) r, g, b = 255, 128, 32 im_dst[:, :, 0] = im_bool * r im_dst[:, :, 1] = im_bool * g im_dst[:, :, 2] = im_bool * b Image.fromarray(np.uint8(im_dst)).save('data/dst/numpy_binarization_color.png')It is also possible to apply the negation operator ~ to the boolean ndarray .
im_bool = im_gray > 128 im_dst = np.empty((*im_gray.shape, 3)) r, g, b = 128, 160, 192 im_dst[:, :, 0] = im_bool * r im_dst[:, :, 1] = ~im_bool * g im_dst[:, :, 2] = im_bool * b Image.fromarray(np.uint8(im_dst)).save('data/dst/numpy_binarization_color2.png')Note that when saving an image with the OpenCV function cv2.imwrite() , it is necessary to set the color sequence to BGR.
So far, it has been processed based on the grayscale image, but it is also possible to process the color image like cv2.threshold() with the same idea as the above example.
Generate an empty ndarray and store each result in each color (each channel). Since the original is a color image (three-dimensional array), np.empty_like() is used.
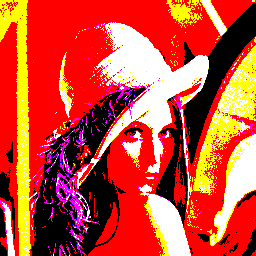
im = np.array(Image.open('data/src/lena_square_half.png')) im_th = np.empty_like(im) thresh = 128 maxval = 255 for i in range(3): im_th[:, :, i] = (im[:, :, i] > thresh) * maxval Image.fromarray(np.uint8(im_th)).save('data/dst/numpy_binarization_from_color.png')More flexible processing than cv2.threshold() is possible, such as changing the threshold value or changing the replacement value for each color. You can write neatly by using a list (or tuple) and zip() .
l_thresh = [64, 128, 192] l_maxval = [64, 128, 192] for i, thresh, maxval in zip(range(3), l_thresh, l_maxval): im_th[:, :, i] = (im[:, :, i] > thresh) * maxval Image.fromarray(np.uint8(im_th)).save('data/dst/numpy_binarization_from_color2.png')How to create a black image and a white image using OpenCV Python?
To create a black image, we could use the np.zeros() method. It creates a numpy n-dimensional array of given size with all elements as 0. As all elements are zero, when we display it using cv2.imshow() or plt.imshow() functions, it displays a balck image.
To create a white image, we could use the np.ones() method. It creates a numpy n-dimensional array of given size with all elements as 1. We multiply this array by 255 to create a white image. Now all elements are 255, so when we display it using cv2.imshow() or plt.imshow() functions it gives a white image.
Note − While creating numpy.ndarray using np.zeros() or np.ones(), we pass dtype = np.uint8 as an argument.
Steps
You can follow the steps given below to create a black and a white image −
Import the required libraries. In all the following Python examples, the required Python libraries are OpenCV, NumPy and Matplotlib. Make sure you have already installed them.
import cv2 import matplotlib.pyplot as plt import numpy as np
Create a numpy.ndarray using np.zeros() to create a black image. Pass the >size and dtype as arguments to these methods. Here dtype is np.uint8.
img = np.zeros((350, 500, 3), dtype = np.uint8)
Create a numpy.ndarray using np.ones() to create a white image. Pass the size and dtype as arguments to these methods. Here dtype is np.uint8. Now we multiply the array by 255.
img = np.ones((350, 500, 3), dtype = np.uint8) img = 255*img
Display the black or white image.
Let’s have a look at different examples for clear understanding.
Example 1
In this example, we create a 700×350 black image. Here the image width is 700 and height is 350.
# import required libraries import cv2 import numpy as np # create a black image img = np.zeros((350, 700, 3), dtype = np.uint8) # display the image using opencv cv2.imshow('black image', img) cv2.waitKey(0)Output
When you run the above python program, it will produce the following output window.
Example 2
In this example, we create a 700×350 white image. Note here the image width is 700 and height is 350.
# import required libraries import cv2 import numpy as np # create a white image img = np.ones((350, 700, 3), dtype = np.uint8) img = 255* img # display the image using opencv cv2.imshow('white image', img) cv2.waitKey(0)Output
When you run the above python program, it will produce the following output window.
Life2Coding
This post will be helpful in learning OpenCV using Python programming. Here I will show how to implement OpenCV functions and apply them in various aspects using some great examples. Then the output will be visualized along with the comparisons.
We will also discuss the basic of image processing and provide the detail explanation related to the OpenCV functions.
Requirements:
- OpenCV 3.4+
- Python 3.6+
- Numpy
- Image, Webcam or Video input
- Documentation Source: OpenCV Official Documentation
First, you need to setup your Python Environment with OpenCV. You can easily do it by following Life2Coding’s tutorial on YouTube: Linking OpenCV with Python 3
Goals:
The goal is to make you understand how to create a black background image using OpenCV
Documentation:
imshow()
Displays an image in the specified window.
Parameters
winname Name of the window. mat Image to be shown. waitKey()
Parameters
delay Delay in milliseconds. 0 is the special value that means “forever”. destroyAllWindows()
Destroys all of the HighGUI windows.
Steps:
- Create a numpy image using np.zeros()
- Display all the images using cv2.imshow()
- Wait for keyboard button press using cv2.waitKey()
- Exit window and destroy all windows using cv2.destroyAllWindows()
Example Code:
import numpy as np import cv2 my_img_1 = np.zeros((512, 512, 1), dtype = "uint8") cv2.imshow('Single Channel Window', my_img_1) my_img_3 = np.zeros((512, 512, 3), dtype = "uint8") cv2.imshow('3 Channel Window', my_img_3) cv2.waitKey(0) cv2.destroyAllWindows()