- Python Screenshot Tutorial – How To Take Screenshot Using Python
- Python Screenshot Tutorial – Getting Started
- Taking Screenshot Using PyAutoGUI
- Installing PyAutoGUI
- Code For Screenshot Using PyAutoGUI
- Taking Screenshot With Time
- How To Take A Screenshot In Python Using PIL
- Захват изображения экрана с помощью Python с примерами
- Вариант 1
- Вариант 2
- Вариант 3
- Делаем скриншот на Python: 3 способа
- Введение
- 1 способ – использование pyscreenshot
- 2 способ – использование pyautogui
- 3 способ – использование Pillow
- Видеоурок
- Заключение
Python Screenshot Tutorial – How To Take Screenshot Using Python
Hey guys, taking screenshot is necessary for most of the application so in this post you will learn how to take screenshot using python. So let’s start Python Screenshot Tutorial.
There are various ways to take screenshot using python. The first and most popular way is using PyAutoGUI module. You can also use pillow module for taking screenshots in python. And you will also learn here, how to take screenshots in tkinter application. So let’s move towards our main topic.
Python Screenshot Tutorial – Getting Started
Taking Screenshot Using PyAutoGUI
PyAutoGUI is a cross-platform GUI automation Python module for human beings. Used to programmatically control the mouse & keyboard.
Installing PyAutoGUI
To install PyAutoGUI module, you have to run following code on your command prompt.
Code For Screenshot Using PyAutoGUI
- screenshot( ) method of pyautogui class is used to take screenshot of your screen.
Now write the following code on your python IDE.
- First of all import pyautogui module.
- Then create a variable(file) that will store the screenshot.
- screenshot( ) method will take screenshot of your screen.
- Now save this image by calling save( ) method. You have to pass name of screenshot to the save( ) function.
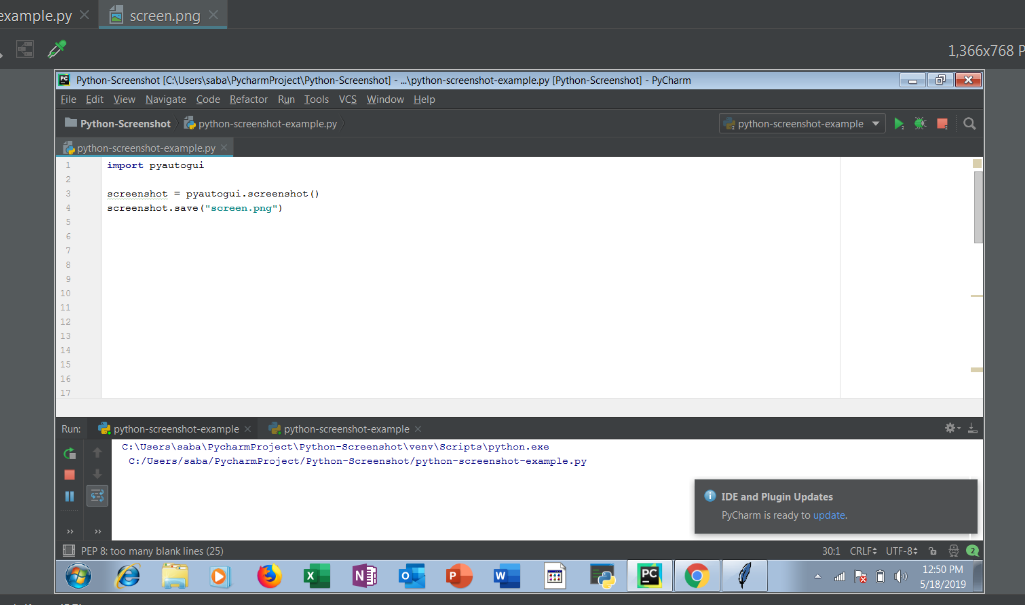
- Now you can see, the screenshot of your screen has been captured.
Taking Screenshot With Time
In the above example, you have seen that the screenshot of current screen is captured, but if you want to take screenshot of another screen such as your desktop or anything else, so what can you do. For this you have to use time module. sleep( ) method of time module is used to add delay in the execution of a program.
So now write the following program.
How To Take A Screenshot In Python Using PIL
In this tutorial, I will demonstrate how to take a screenshot using PIL in Python. Window, macOS and Linux are all supported.
PIL (Python Imaging Library / Pillow) is a Python library that adds support for opening, manipulating, and saving many different image file formats. It has a very friendly API with lots of help online including good documentation.
PIL supports Windows macOS and Linux and supports many versions of Python; see the installation notes to identify which version of PIL you will need for the version of Python you are using. At the time of wiring this, PIL 7 has been released and supports Python 3.8 — 3.5.
To install PIL, execute the following in a terminal:
python -m pip install Pillow To install an older version of PIL, execute python -m pip install pip= eg. python -m pip install pip=7.2.0 . You can find older versions released in the release notes.
To validate it was installed correctly, go to IDLE or a python shell and execute:
If no import error is raised, it was installed successfully.
Make sure you have executed the install command above; if you’re not sure you have executed it already, it is safe to execute it a second time.
If there were no errors when installing it and it says PIL is installed successfully, make sure you’re 100% sure that you installed PIL in the same distribution of Python that you’re trying to import it in. Go to my tutorial on How to Manage Multiple Python Distributions if you’re having some issues or are unsure about this.
To take a screenshot, we first need to import the ImageGrab module from PIL.
After we have the ImageGrab module, we can call .grab() to take a screenshot
from PIL import ImageGrab screenshot = ImageGrab.grab() # Take the screenshot On Linux, you must be using PIL 7.1.0 or higher for this to work; see release notes.
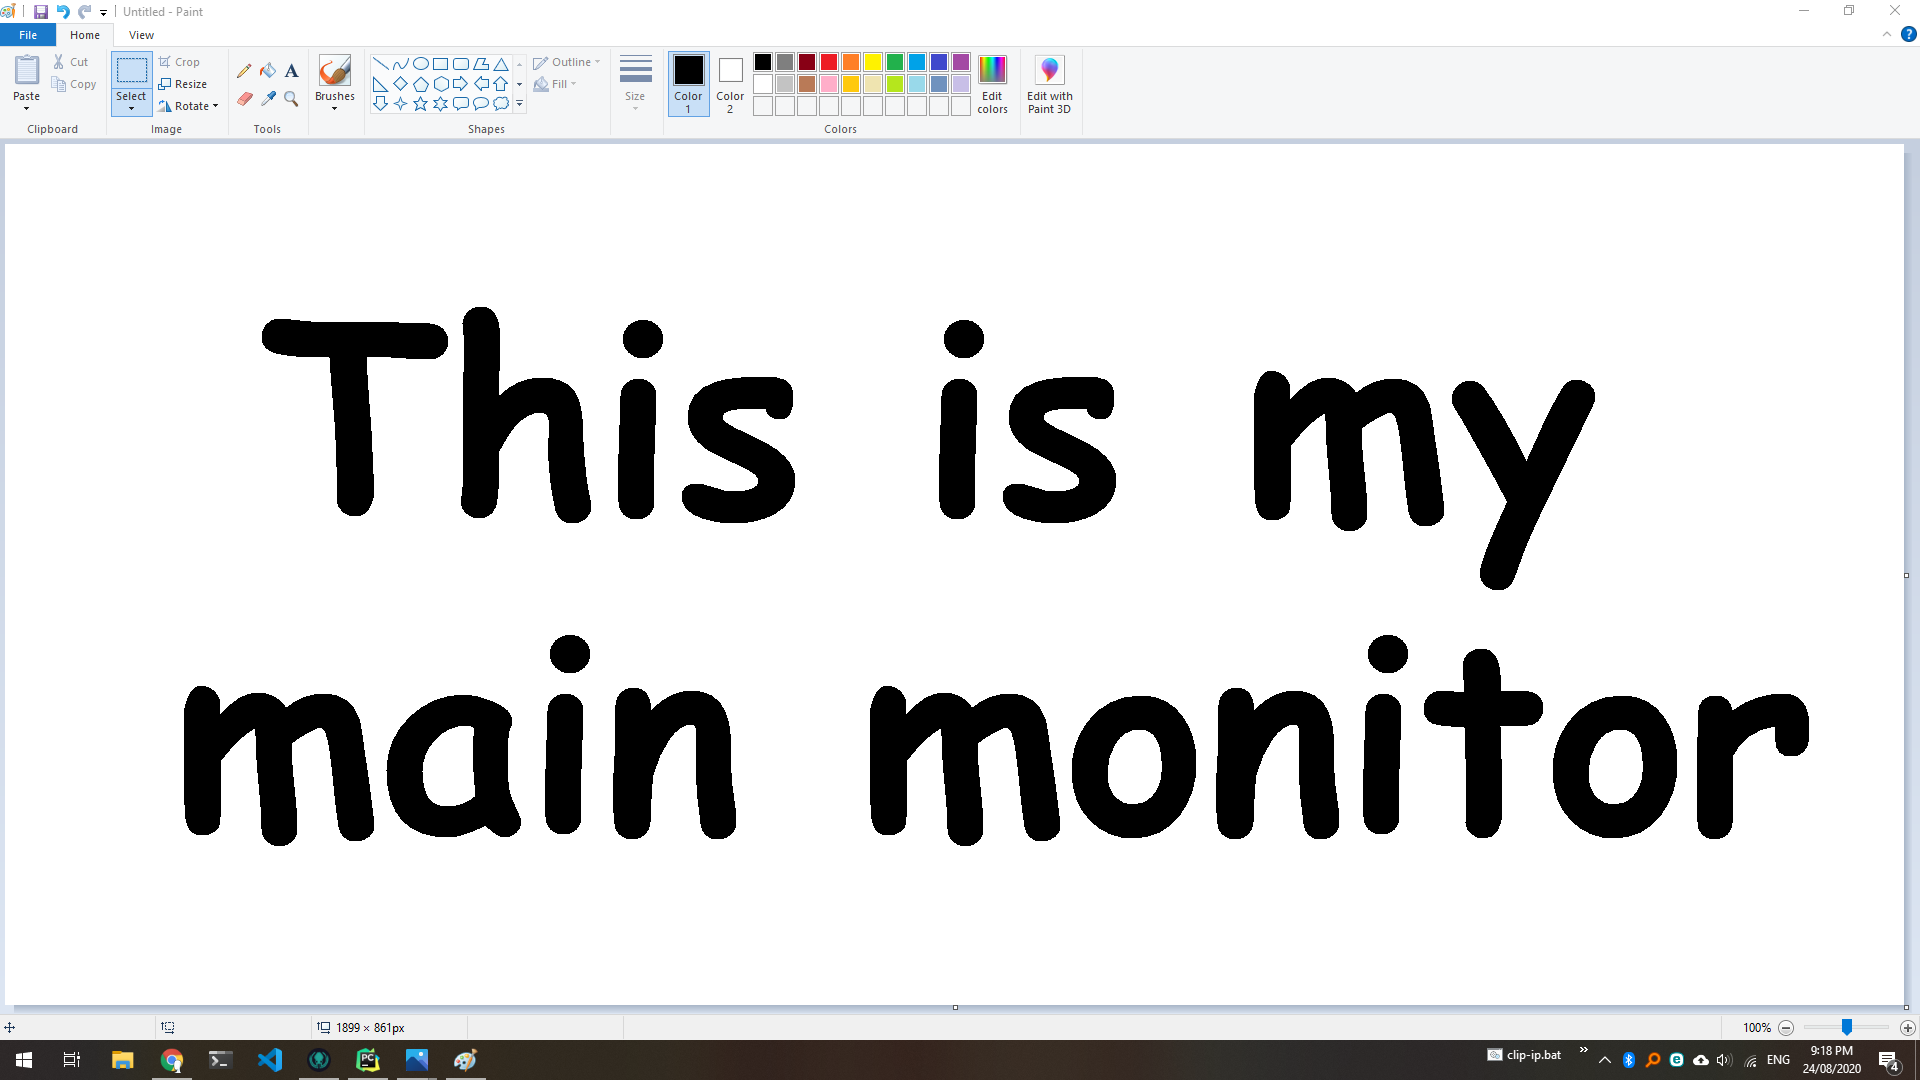
To view the screenshot, we can call .show() on the returned Image object. For example, using the code from above:
from PIL import ImageGrab screenshot = ImageGrab.grab() screenshot.show() # Show the image using the default image viewer Executing this will open the screenshot in your default image viewer. If you have more than one display, you will notice that this screenshot is only of the first display; I will expand on this further below.
Here is an example of a screenshot I took:
Saving images in PIL is very easy, calling .save() on the returned Image object will allow us to save the image into a file.
from PIL import ImageGrab filepath = 'my_image.png' screenshot = ImageGrab.grab() screenshot.save(filepath, 'PNG') # Equivalent to `screenshot.save(filepath, format='PNG')` Now if you go and open the file filepath («my_image.png» in the current working directory for this example), you will see the screenshot has been saved.
If you provide a file path with an extension of a supported image format, you can omit the format.
If you have a file already open in write mode or want to save the image to a file object, you can pass that instead of the filename. For example:
from PIL import ImageGrab file = open('my_file.png', 'w') screenshot = ImageGrab.grab() screenshot.save(file, 'PNG') # Save the image to the file object as a PNG file.close() # Make sure to close the file when you're done from io import BytesIO from PIL import ImageGrab bytes_io = BytesIO() screenshot = ImageGrab.grab() screenshot.save(bytes_io, 'PNG') # Save the image to bytes_io as a PNG # Do what you want with the bytes_io object Taking A Screenshot Of A Different Display
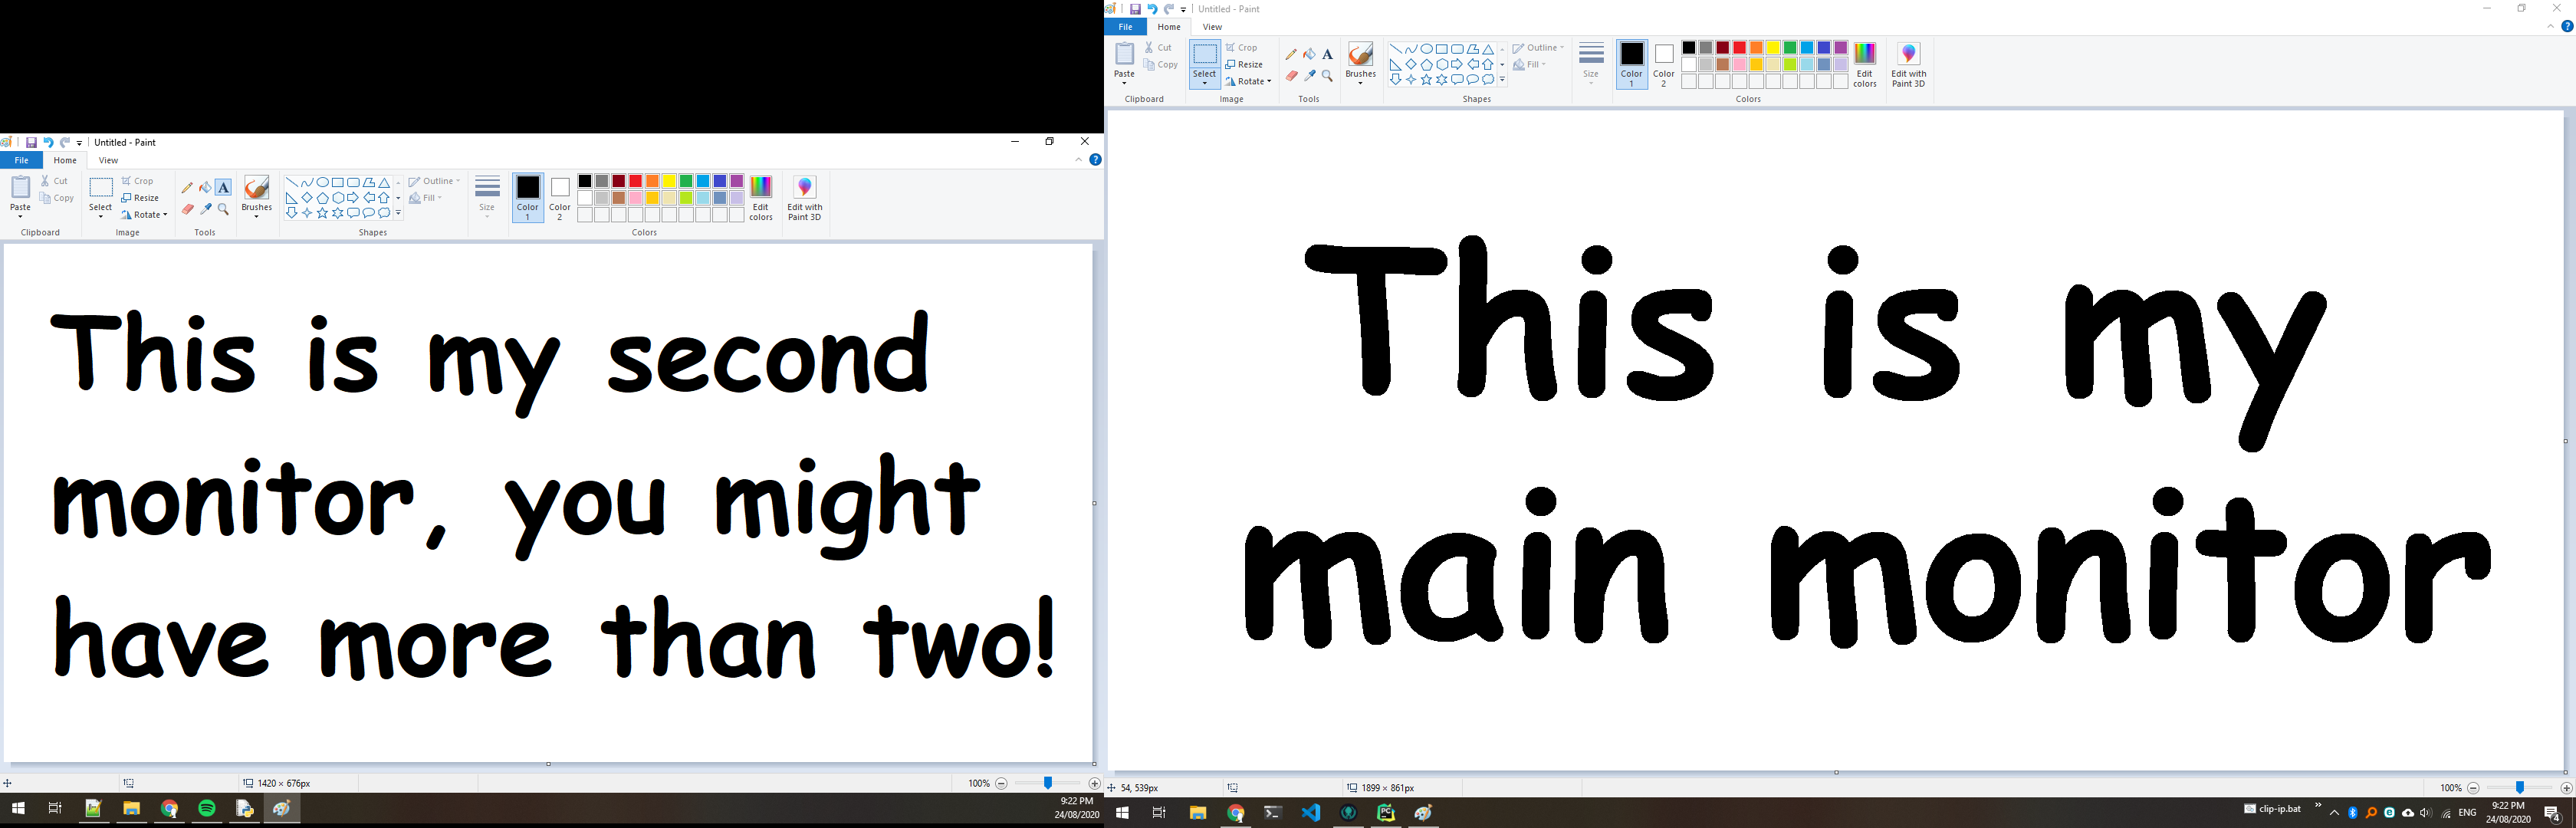
Back when we took a screenshot using ImageGrab.grab() , it only captured the main display. To take a screenshot of all displays, we can pass all_screens=True :
from PIL import ImageGrab screenshot = ImageGrab.grab(all_screens=True) # Take a screenshot that includes all screens Please note that all_screens is currently only supported in Windows
Now when you call screenshot.show() , you will see that multiple monitors are now displayed. Here is an example of my monitors:
Now that you have this larger image, you can crop it using other methods in PIL: How to crop an image using PIL.
Using MSS to Screenshot Each Displays
I also have a tutorial How To Take A Screenshot In Python Using MSS which goes over how to take screenshots using the Python MSS library. The tutorial is very similar, however MSS has better support for screenshots of different individual displays (including macOS and Windows).
Owner of PyTutorials and creator of auto-py-to-exe. I enjoy making quick tutorials for people new to particular topics in Python and tools that help fix small things.
Захват изображения экрана с помощью Python с примерами
Хотя стандартная библиотека Python не предоставляет никакого метода для захвата экрана, мы можем сделать это с помощью нескольких сторонних модулей.
Вариант 1
Первый из них – PyAutoGUI, кроссплатформенный модуль для автоматизации задач. Мы можем захватить экран с помощью трех строк кода.
Code language: PHP (php)import pyautogui # Снимок экрана. screenshot = pyautogui.screenshot() # Сохранение изображения. screenshot.save("screenshot.png")
PyAutoGUI внутренне использует Pillow, одну из самых популярных библиотек для работы с изображениями, поэтому screenshot является экземпляром PIL.Image.Image.
Code language: CSS (css)# Открыть изображение. screenshot.show()
Чтобы захватить только часть экрана, мы используем параметр region – кортеж со структурой (X, Y, Width, Height).
Code language: PHP (php)# Захват части экрана. screenshot = pyautogui.screenshot(region=(50, 50, 400, 300))
Самый простой способ установить модуль и все его зависимости – через pip.
Для корректной работы PyAutoGUI в Linux необходимо также установить следующие зависимости.
Code language: JavaScript (javascript)pip install python3-xlib sudo apt-get install scrot sudo apt-get install python3-tk sudo apt-get install python3-dev
В Max OS требуется следующее:
pip install pyobjc-core pip install pyobjc
В Windows пакет не требует дополнительной установки.
Вариант 2
Еще один пакет, похожий на PyAutoGUI – AutoPy, инструментарий автоматизации платформы, написанный на C.
Его API гораздо более элегантно, проще и приятнее, чем у предыдущего модуля, но на данный момент он поддерживает только Python 2 (именно поэтому он является вариантом номер два).
Захват экрана так же прост:
Code language: JavaScript (javascript)import autopy screenshot = autopy.bitmap.capture_screen() screenshot.save("screenshot.png")
Функция capture_screen может принимать заданную область экрана в виде структуры ((X, Y), (Width, Height)).
screenshot = autopy.bitmap.capture_screen(((50, 50), (400, 300)))
Установить можно также через pip.
Вариант 3
pyscreenshot – это модуль, созданный специально для выполнения этой задачи, доступный для Python 2 и 3.
Его единственная зависимость – PIL/Pillow.
В Linux также требуется один из следующих пакетов: scrot, ImageMagick, PyGTK, PyQt или wxPython.
В Mac OS X для этого требуется Quartz или screencapture.
Code language: JavaScript (javascript)im = pyscreenshot.grab() im.save("screenshot.png")
Функция всегда возвращает экземпляр PIL.Image.Image.
Можно также захватить только часть экрана.
im = pyscreenshot.grab(bbox=(50, 50, 450, 350))
Обратите внимание, что структура bbox имеет вид (X1, Y1, X2, Y2).
Чтобы установить его, просто введите:
В дистрибутивах Linux это также возможно:
easy_install pyscreenshot
Делаем скриншот на Python: 3 способа

Статьи
Введение
В данной статье рассмотрим 3 способа сделать скриншот при помощи языка программирования Python.
1 способ – использование pyscreenshot
В данном способе мы будем использовать модуль pyscreenshot, который требует установки. Для этого нужно перейти в терминал, или же командную строку, прописать pip install pyscreenshot, нажать Enter и ждать установки.
После инсталляции модуля мы его импортируем:
При помощи функции grab() делаем скриншот и сохраняем используя метод save():
import pyscreenshot image = pyscreenshot.grab() image.save('screenshot.png')2 способ – использование pyautogui
В данном способе мы будем использовать модуль pyautogui, который требует установки. Для этого нужно перейти в терминал, или же командную строку, прописать pip install pyautogui, нажать Enter и ждать установки.
Далее импортируем модуль pyautogui:
Используя функцию screenshot() сделаем скриншот, который автоматически сохранится:
import pyautogui pyautogui.screenshot('screenshot_pyautogui.png')3 способ – использование Pillow
В данном способе мы будем использовать модуль Pillow, который требует установки. Для этого нужно перейти в терминал, или же командную строку, прописать pip install Pillow, нажать Enter и ждать установки.
Далее импортируем ImageGrab из модуля Pillow:
from PIL import ImageGrabПри помощи функции grab() сделаем скриншот и сохраним методом save():
from PIL import ImageGrab image = ImageGrab.grab() image.save('screenshot_Pillow.png')Видеоурок
Заключение
В ходе статьи мы с Вами разобрали целых 3 способа сделать скриншот при помощи языка программирования Python. Надеюсь Вам понравилась статья, желаю удачи и успехов! 🙂