- How to install Python development versions on Fedora
- Managing multiple Python versions
- Prerequisites for building CPython
- Working with Pyenv
- Install Python development version
- How to Install Python (A Quick Guide)
- Install Code Editor for Python
- An Example Python Program with VSCode
- How to Install Python
- Installing Python
- How to Access Python
- How to Access Python IDLE
How to install Python development versions on Fedora

Using different Python versions is sometimes necessary for testing or performance reasons, or when we work with a number of projects that use incompatible versions.
Using development versions allow us to try new features and make sure our programs would run in the new versions too, even before a final version is released.
Managing multiple Python versions
Pyenv is a tool for Python version management. It allows us to install multiple Python versions and switch between them on one system. A very neat feature of Pyenv is that it makes it possible to use a particular Python version for a specific folder, so it is easy to set different version for each project we might have. It works well with both final releases as well as development versions.
There are a few steps to install Pyenv. First we should clone the repository. The suggested location for that is ~/.pyenv :
git clone https://github.com/pyenv/pyenv.git ~/.pyenv The next step is to set PYENV_ROOT environment variable and put Pyenv on the PATH . Change the location in case you cloned it into a different directory:
# for Bash echo 'export PYENV_ROOT="$HOME/.pyenv"' >> ~/.bash_profile echo 'export PATH="$PYENV_ROOT/bin:$PATH"' >> ~/.bash_profile # for Zsh echo 'export PYENV_ROOT="$HOME/.pyenv"' >> ~/.zshrc echo 'export PATH="$PYENV_ROOT/bin:$PATH"' >> ~/.zshrc Last step involves activating Pyenv every time we start a shell with eval «$(pyenv init -)» which we again need to put in either .bash_profile or .zshrc depending on our shell.
After restarting the shell we should be able to access Pyenv on the command line:
> pyenv --version pyenv 1.2.23-54-gabcbf6e1 We will see how to use Pyenv shortly, but first we need to make sure that we can build various CPython versions.
Prerequisites for building CPython
To build development versions of Python we need some CPython build dependencies on our system. In case of Fedora that means installing:
# First we install some common development tools like gcc and make, Fedora provides a group of packages for that call Development Tools
sudo dnf groupinstall "Development Tools" -y

# To build Python we need some additional packages
sudo dnf install zlib-devel bzip2 bzip2-devel readline-devel sqlite sqlite-devel openssl-devel xz xz-devel libffi-devel findutils -y
In case we miss any of the necessary packages, the installation of Python would fail. We would get an output similar to this (here OpenSSL is missing):
Cloning https://github.com/python/cpython. Installing Python-3.10-dev. WARNING: The Python bz2 extension was not compiled. Missing the bzip2 lib? WARNING: The Python readline extension was not compiled. Missing the GNU readline lib? ERROR: The Python ssl extension was not compiled. Missing the OpenSSL lib? Please consult to the Wiki page to fix the problem. https://github.com/pyenv/pyenv/wiki/Common-build-problems BUILD FAILED (Fedora 33 using python-build 1.2.23-54-gabcbf6e1) Inspect or clean up the working tree at /tmp/python-build.20210306120241.7314 Results logged to /tmp/python-build.20210306120241.7314.log Last 10 log lines: ./python -E -m ensurepip \ $ensurepip --root=/ ; \ fi Looking in links: /tmp/tmp8c5ul8mb Processing /tmp/tmp8c5ul8mb/setuptools-52.0.0-py3-none-any.whl Processing /tmp/tmp8c5ul8mb/pip-21.0.1-py3-none-any.whl Installing collected packages: setuptools, pip WARNING: The scripts pip3 and pip3.10 are installed in '/home/pstribny/.pyenv/versions/3.10-dev/bin' which is not on PATH. Consider adding this directory to PATH or, if you prefer to suppress this warning, use --no-warn-script-location. Successfully installed pip-21.0.1 setuptools-52.0.0 pyenv install 3.10-dev 270.71s user 19.84s system 374% cpu 1:17.53 total In case this happens to you, just consult the Common build problems page for instructions regarding your system.
Working with Pyenv
Pyenv offers various commands to install different Python versions and switch between them.
It is important to know that Pyenv can set either a global or a local version. The local option is useful if we need to set a Python version for a specific folder (it will work with the current working directory).
Simply typing pyenv global or pyenv local will reveal the currently set version. Upon a fresh installation we will probably see the system Python version set as the global version and no local version set for a folder we might be currently in:
> pyenv global system > pyenv local pyenv: no local version configured for this directory To see which versions of Python are installed on the system, type pyenv versions :
> pyenv versions * system (set by /home/pstribny/.pyenv/version) 3.10-dev In this case a Python 3.10 development version is already installed and we can see a star (*) indicating which version is currently in use.
Install Python development version
Assuming we don’t have any other version installed, we might want to see which versions can be installed:
> pyenv install --list . 3.8.7 3.8.8 3.9.0 3.9-dev 3.9.1 3.9.2 3.10.0a5 3.10-dev . graalpython-20.2.0 graalpython-20.3.0 . micropython-1.12 micropython-1.13 . pypy3.7-c-jit-latest pypy3.7-7.3.2-src pypy3.7-7.3.2 pypy3.7-7.3.3-src pypy3.7-7.3.3 As we can see, we can install alternative Python versions like Pypy, Micropython, or Graal Python as well.
Today we are mostly interested in development versions. Since the last release version is 3.9.2, we might want to try 3.10-dev to play with the new pattern matching feature. Let’s install it:
Now we can set it globally or for a folder:
pyenv global 3.10-dev pyenv local 3.10-dev After that python should point to the correct version:
> python --version Python 3.10.0a6+ We can always set Python back to our system version:
# for global pyenv global system # for local pyenv local --unset How to Install Python (A Quick Guide)
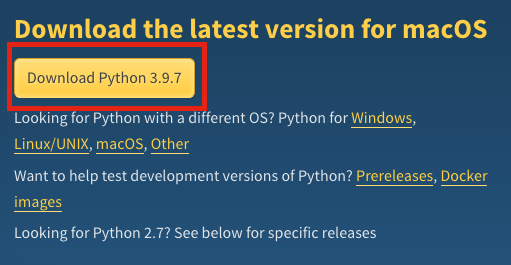
To start your journey as a Python developer, you need to install Python into your system.
To do this, open up python.org/downloads From there, download the most recent version by clicking on the yellow button
Next, head over to your downloads folder and click the downloaded Python package to start the installation.
If you are on Windows, you are going to see a checkbox that says Add Python x.x to PATH . Make sure to check this checkbox.
On Mac, just click through the installation wizard.
Once complete, you have successfully installed Python on your system.
But having Python installed is not enough for you to start writing code. You also need a code editor where you write your programs.
Install Code Editor for Python
Similar to using Word or Notepad to write documents, you need to use a code editor for writing Python programs.
In this guide, you will download Visual Studio Code.
Visual Studio Code or VSCode is one of the hottest code editors at the moment. You can use it to write programs in almost any programming language out there. Python is no exception.
Let’s install VSCode on your machine.
To do this, follow these 6 steps:
- To install VSCode, go to code.visualstudio.com, and click the blue download button.
- After the download has been completed, head over to your downloads folder.
- Double-click the VSCode installer file to install the VSCode editor.
- Ace through the installation wizard. If you are on Mac, drag and drop the VSCode icon to the Applications folder at the end of the setup wizard.
- Once the installation has been completed, open up a Visual Studio Code window.
- Now you have a code editor where you can write code.
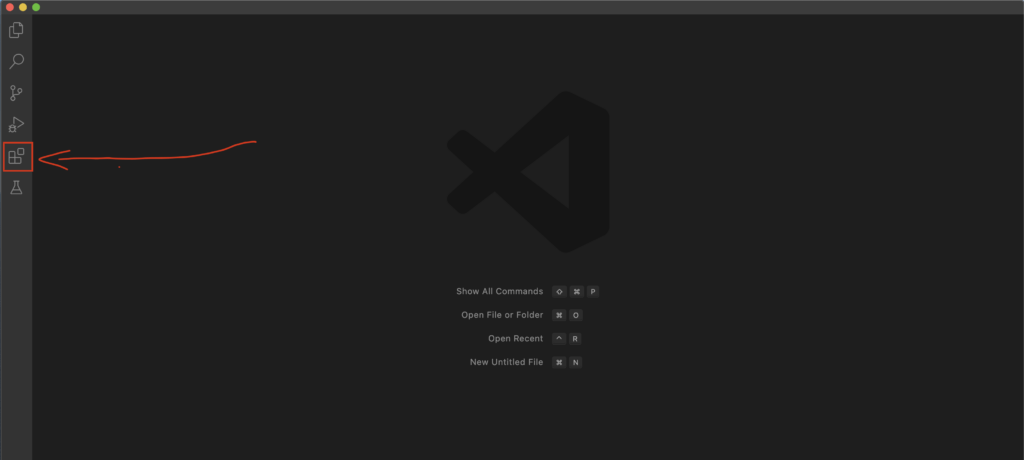
Before writing your first Python program, you need to configure the VSCode code editor to recognize Python.
In your VSCode window, open up the extensions tab:
Write “Python” in the search bar.
Install the first search result (with 40m+ downloads).
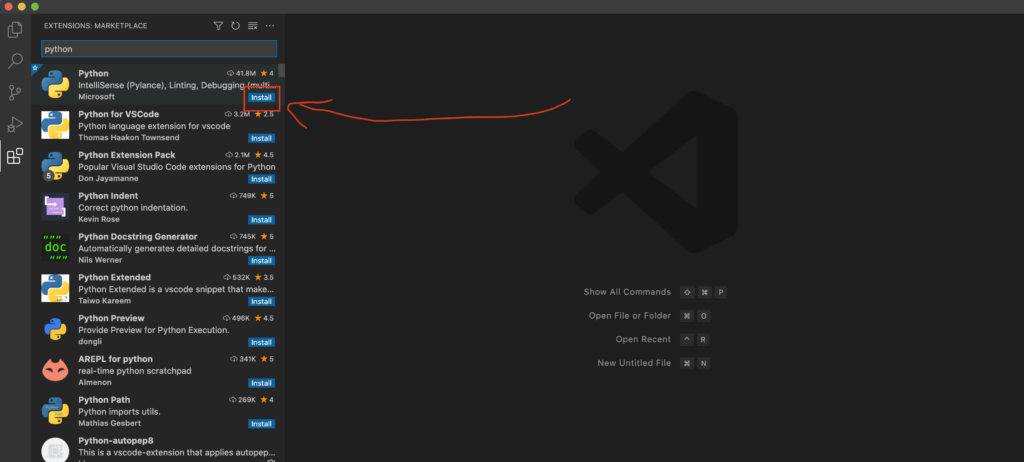
After installing, you are all set.
Next, let’s write a simple Python program to verify that everything works as expected.
An Example Python Program with VSCode
Open up a VSCode editor window (if you already haven’t).
- Go to File > New File
- A new file opens up. Go to File > Save As.
- Name the file example.py and save it on your Desktop for example.
You have now successfully created your first Python file. You can now start writing code to this file to create your first Python program.
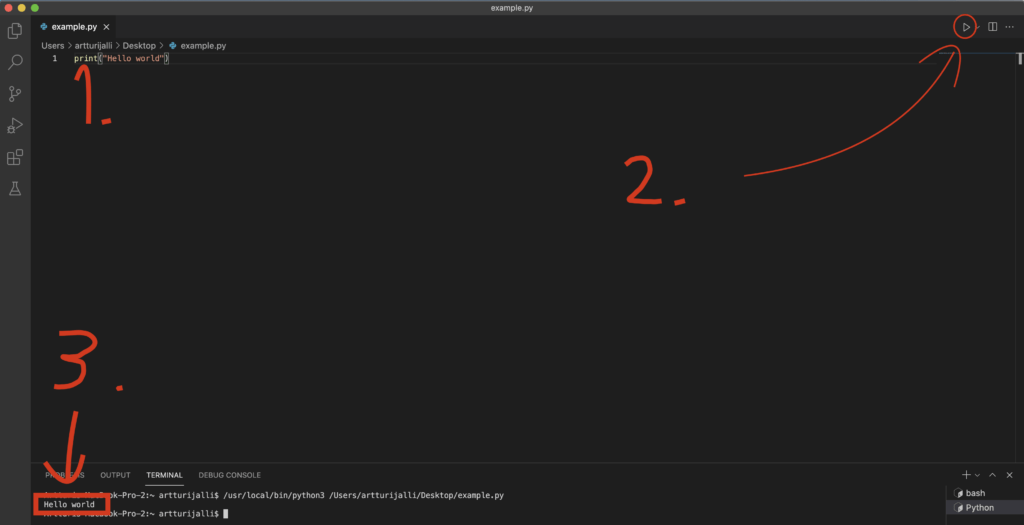
Step1. To create the simplest possible Python program, write the following code into your Python file in VSCode:
Step 2. Then click the “play button” at the top right corner of your VSCode editor.
Step 3. Look at the bottom of the code editor. It opens up a small command-line window. This window shows the output of your program. Now, it has some garbage text and then “Hello world” on a separate line. This “Hello world” is the output of your very first Python program!
Congrats, you have successfully created and run your first Python program!
If you for some reason do not see this output or have encountered errors along the way, please let me know in the comments section below.
Thanks for reading. I hope you enjoy it.
How to Install Python
Developer.com content and product recommendations are editorially independent. We may make money when you click on links to our partners. Learn More.
The current version of Python is Python 3.11.4 as of this writing. In this tutorial, we will discuss how to install and configure the current version of Python – a process that remains largely the same from Python version to Python version. We will include images and step-by-step instructions along the way.
Installing Python
Whether you are on a Windows system, Mac, or Linux, Installing Python is fairly simple. For our purposes here, we will be installing Python on a desktop with Windows 11 installed. To begin, navigate to the official Python website’s download page at: https://www.python.org/downloads/.
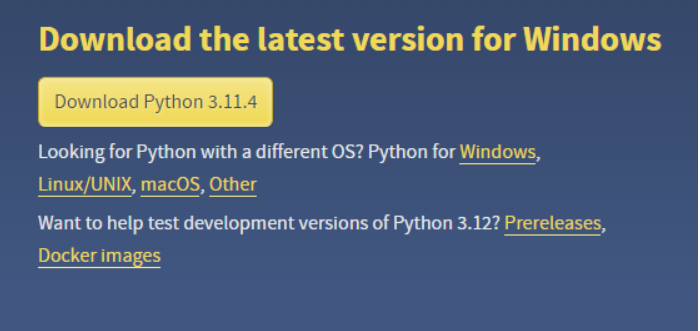
From there, you either click on the button for the current version of Python, or you can scroll down and choose an earlier version. We recommend installing the current stable version. If you need a version for Linux, macOS, or Linux, you can click on one of the highlighted links for those systems.
One you click on the Download Python button, a download will begin. Depending upon your system settings, you may have to allow the download – if so, click OK and wait for the download to complete.
Once finished, navigate to where the python.exe file downloaded (typically this will be your Downloads folder, but again, it depends on your system settings). Double-click on the Python executable, which will be named something along the lines of python-3.11.4-amd64, where the numeric part of the name will depend on the version you have downloaded.
The Python Setup page will appear, prompting you to either Install Now or Customize Installation. For our purposes, we will choose Install Now, but before you do, be certain to make sure the User admin privileges when installing py.exe and Add python.exe to PATH options are both checked, as shown in the image below:
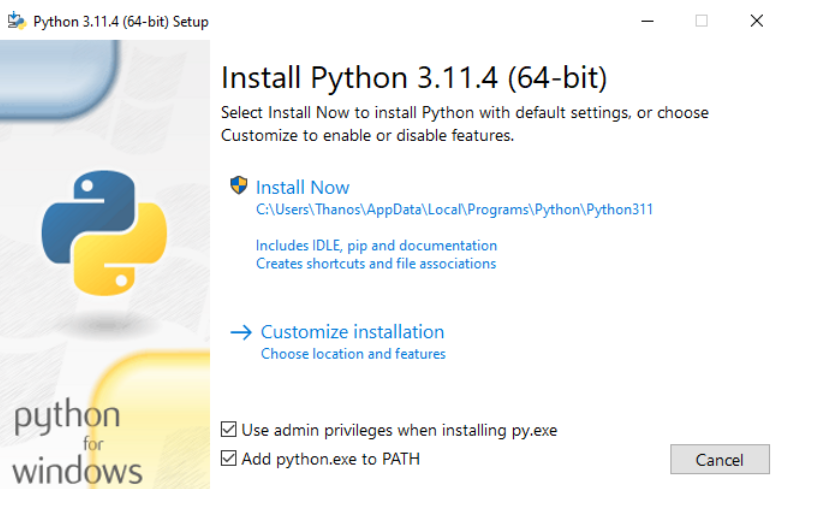
After click Install Now you may be prompted to allow Python to make changes to your system. Click to allow access, and you will be presented with the Setup Progress screen:
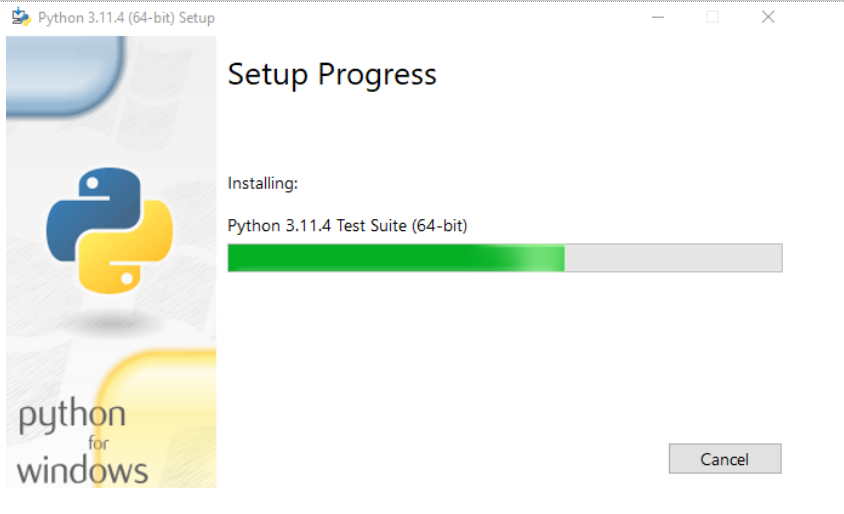
If all goes well, you will be presented with the Setup was Successful screen:

From here, you can view tutorials and documentation and see what is new in the latest version of Python. You can also decide to Disable path length limit, which we discourage developers from doing (it lets you create file names that are longer than 260 characters).
You can now click the Close button – you are all set and Python is installed!
How to Access Python
Now that Python is installed on your system, you can access the Python shell by click on the Windows button and navigating to the Python 3.11 menu item. Alternatively, you can click on the Windows Search box and type in Python to pull up the menu item. Note that if you choose the option and have more than one version of Python on your computer, you will be presented with several Python Shell options.
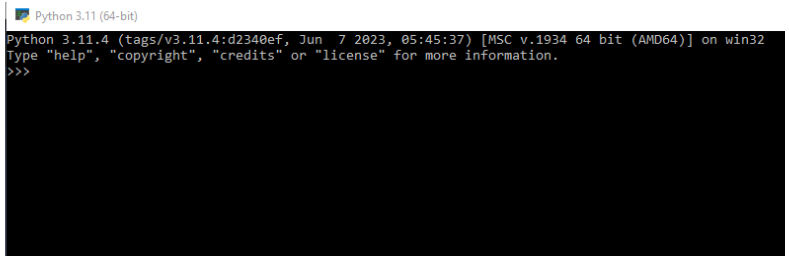
You can enter lines of code in the Python shell to test a line of code. For instance, typing in:
And pressing Enter will produce:
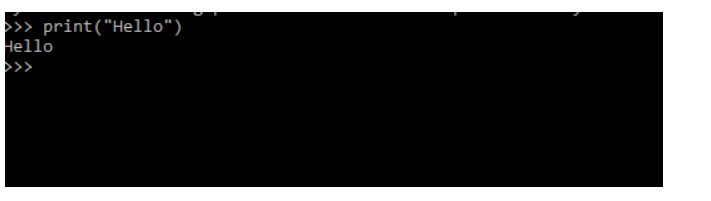
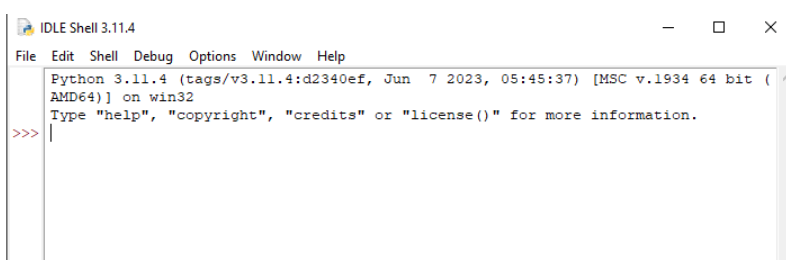
How to Access Python IDLE
IDLE is Python’s built-in code editor and integrated development environment. To access it, simply type IDLE in the Windows Search box. Here is what IDLE looks like:
You can type single lines of code in the IDLE editor, or, if you want to create an entire Python program, click on the File button and choose New File. You can then enter your code into the file and click File, then Save to save a new file with a .py extension. This extension denotes a Python file.
Once you have entered your code, you can execute it by click on the Run menu option. This will load the file in the IDLE editor and execute its code.