- Gerry Jenkins — Technology Learning (teklern)
- System Python version:
- Virtual Environments (venv):
- Using Inherit global site-packages
- The Take Away:
- Configure a virtual environment
- Create a virtualenv environment
- Use an existing interpreter
- Create a virtual environment using the project requirements
- Create a Python project
Gerry Jenkins — Technology Learning (teklern)
The newer PyCharm releases embrace the use ofbuilt-in virtual environments to isolate the project code dependency on third-party packages from the system python library packages.
Packages are the entities that you refer to when you have import statements in your code.
i.e. import requests
or from bs4 import BeautifulSoup
There are 212 built-in standard packages that are installed with python and over 150 thousand third-party packages available from PyPi.org and installed with the pip install package-name command
When you start doing more serious python development, the isolation of packages between projects will become more important since individual packages evolve though versions and depend on other packages in complex relationships.
A package being updated to a new version can break other packages or even project code that you already have.
The creators of PyCharm (JetBrains) have now made virtual environments kind of the ‘default’ for new projects.
System Python version:
Base or System Interpreter in PyCharm dialogs refer to python interpreter version that you installed that you what to use for your project. Some systems come with a python interpreter such as Mac, and Linux. Windows does not start with an interpreter.
Any installed python versions consist of the executable for the interpreter, a package library, and other tools and resources. We will be dealing with the interpreter and its associated package when talking about virtual environments.
You can add different versions of the python interpreter and have more than one available on your system. This might be important if you what to write code that works across a range of python versions from the old 2.7 to the newest version 3.7 as of this writing.
For PyCharm, you should be a bit familiar the two parts of the python environment that you will be controlling with the virtual environment: 1. The version of python, and 2. the associated packages
| Platform | Paths to Interpreter and Packages |
|---|---|
| Mac (10.13) | Interpreter: /System/Library/Frameworks/Python.framework/Versions/3.7/bin/python3.7 and /usr/local/bin/python3.7 — symlinked to above path Packages: /System/Library/Frameworks/Python.framework/Versions/3.7/bin/lib |
| Win 10 | Interpreter: C:\Users\name\AppData\Local\Programs\Python\Python37-32\python.exe Packages: C:\Users\name\AppData\Local\Programs\Python\Python37-32\lib\site-packages\ |
| Linux | Interpreter: /usr/bin/python3.7 Packages: /usr/lib/python3/dist-packages |
Virtual Environments (venv):
Since python 3.3, venv virtual environments have been part of the standard CPython distribution. You can create and manage your virtual environments from the command line with the python tools. (see python.org tutorial on venv) PyCharm will create and manage your virtual environment folders though a few dialogs.
A venv is a folder that holds information that points to the base system interpreter, tools, and resources and a folder which allows isolation of versions of packages from packages in the system packages folder.
By default, PyCharm will create a new project with a venv folder in your project folder that contains a copy of the packages from the system python version used.
Here is a picture of the New Project Dialog Box with the Project Interpreter drop down showing: (Note, the base interpreter is usually the last on you have set)

If you want a new base interpreter, this next dialog shows that PyCharm will try to show you all the installed versions of python to choose from. If you picked a custom location and it does not show in the dropdown, you can click the . button and browse for the python version.

Once you have created the default project without choosing any options, you should get the following setup:
- Your choice of project python version
- A venv folder at the top level of your project folder
- All python code in you project will search the venv folder from you project folder when doing imports of third-party packages
- There will be no connection to the python packages from your project. If you need any new python packages for your code, you will need to go to the PyCharm settings or preferences menu and choose Project Interpreter:

Notes: the packages you see are automatically populated into your virtual environment.
You are now free to use the + button at bottom to search and install any package, or update.
Here is a diagram showing this setup: (Note the arrow is showing the venv base interpreter pointing to the system level interpreter.)
Using Inherit global site-packages
If you commonly use a standard set of third-party packages in your projects, you can create a project with the «Inherit global site-packages» turned on as shown:

If you choose the Inherit global site-packages, your project will have the following features:
- Your choice of project python version
- A venv folder at the top level of your project folder
- All python code in you project will search the venv folder from you project folder when doing imports of third-party packages, and if it did not find the package in your project venv, then it will look for it in the base Interpreter package library (a.k.a. global site-packages.)
- Any new packages you install or modify from preferences > Project: Project Interpreter will ‘shadow’ the same package if it is in the installed system library, meaning your code will use the one you installed or modified in your project venv. If you remove the package from your venv area with the minus (-) button, then your project will again find the system package.
The Take Away:
- Usually, just let PyCharm default to create a venv that is not dependent on the system package library, then just add or change packages as needed for that project.
- In the case you want to ‘share’ your global packages, so you don’t have to setup up every project’s packages, then use the ‘inherit global site-packages’ option
- PyCharm can manage all your packages nicely from within the IDE dialogs.
Final Note, the terminal pane in PyCharm will open with the venv for the project already activated for you.
Configure a virtual environment
PyCharm makes it possible to use the virtualenv tool to create a project-specific isolated virtual environment . The main purpose of virtual environments is to manage settings and dependencies of a particular project regardless of other Python projects. virtualenv tool comes bundled with PyCharm, so the user doesn’t need to install it.
For Python 3.3+ the built-in venv module is used, instead of the third-party virtualenv utility.
Create a virtualenv environment
- Do one of the following:
- Click the Python Interpreter selector and choose Add New Interpreter .
- Press Control+Alt+S to open Settings and go to Project: | Python Interpreter . Click the Add Interpreter link next to the list of the available interpreters.
- Click the Python Interpreter selector and choose Interpreter Settings . Click the Add Interpreter link next to the list of the available interpreters.
- Select Add Local Interpreter .
- In the left-hand pane of the Add Python Interpreter dialog, select Virtualenv Environment .

- The following actions depend on whether you want to create a new virtual environment or to use an existing one. New virtual environment
- Specify the location of the new virtual environment in the Location field, or click and browse for the desired location in your file system. The directory for the new virtual environment should be empty.
- Choose the base interpreter from the list, or click
 and find the desired Python executable in your file system.
 - Select the Inherit global site-packages checkbox if you want all packages installed in the global Python on your machine to be added to the virtual environment you’re going to create. This checkbox corresponds to the —system-site-packages option of the virtualenv tool.
Existing virtual environment
- Choose the desired interpreter from the list.
- If the desired interpreter is not on the list, click , and then browse for the desired Python executable (for example, venv/bin/python on macOS or venv\Scripts\python.exe on Windows).

The selected virtual environment will be reused for the current project.
If PyCharm displays the Invalid environment warning, it means that the specified Python binary cannot be found in the file system, or the Python version is not supported. Check the Python path and install a new version, if needed.
You can create as many virtual environments as required. To easily tell them from each other, use different names.
Use an existing interpreter
- Press Control+Alt+S to open the IDE settings and select Project | Python Interpreter .
- Expand the list of the available interpreters and click the Show All link. Alternatively, click the icon and select Show All .
 Virtual environments are marked with .
 - Select the target environment from the list and click OK to confirm your choice.


PyCharm can create a virtual environment for your project based on the project requirements.
Create a virtual environment using the project requirements

- Open any directory with your source files that contains the requirements.txt or setup.py file: select File | Open from the main menu and choose the directory.
- If no virtual environment has been created for this project, PyCharm suggests creating it:
- Keep the suggested options, or specify the environment location or base Python interpreter. Click OK to complete the task.

Once you click OK , PyCharm creates an environment and installs all the required packages. On the completion, see the notification popup:

Note that if you ignore a suggestion to create a virtual environment, PyCharm won’t create a Python interperter for your project. So, any time when you open a .py file, you’ll see the warning with the options for configuring a project interpreter:
This approach is particularly helpful when you want to upgrade a version of Python your environment is based on, for example, from 3.5 to 3.9. You can specify a new base interpreter and use requirements.txt to ensure all the needed packages are installed.
For any of the configured Python interpreters (but Docker-based), you can:
Once you have create a new virtual environment, you can reuse it for your other projects. Learn more how to setup an existing environment as a Python interpreter.
Create a Python project
Pure Python projects are intended for Python programming. A project helps you organize your source code, tests, libraries that you use, and your personal settings in a single unit.
In case you don’t need a project, you can edit your file in LightEdit mode.
- To create a project, do one of the following:
- From the main menu, choose File | New Project
- On the Welcome screen, click New Project
- In the New Project dialog, specify the project name and its location. The dialog may differ depending on the PyCharm edition.


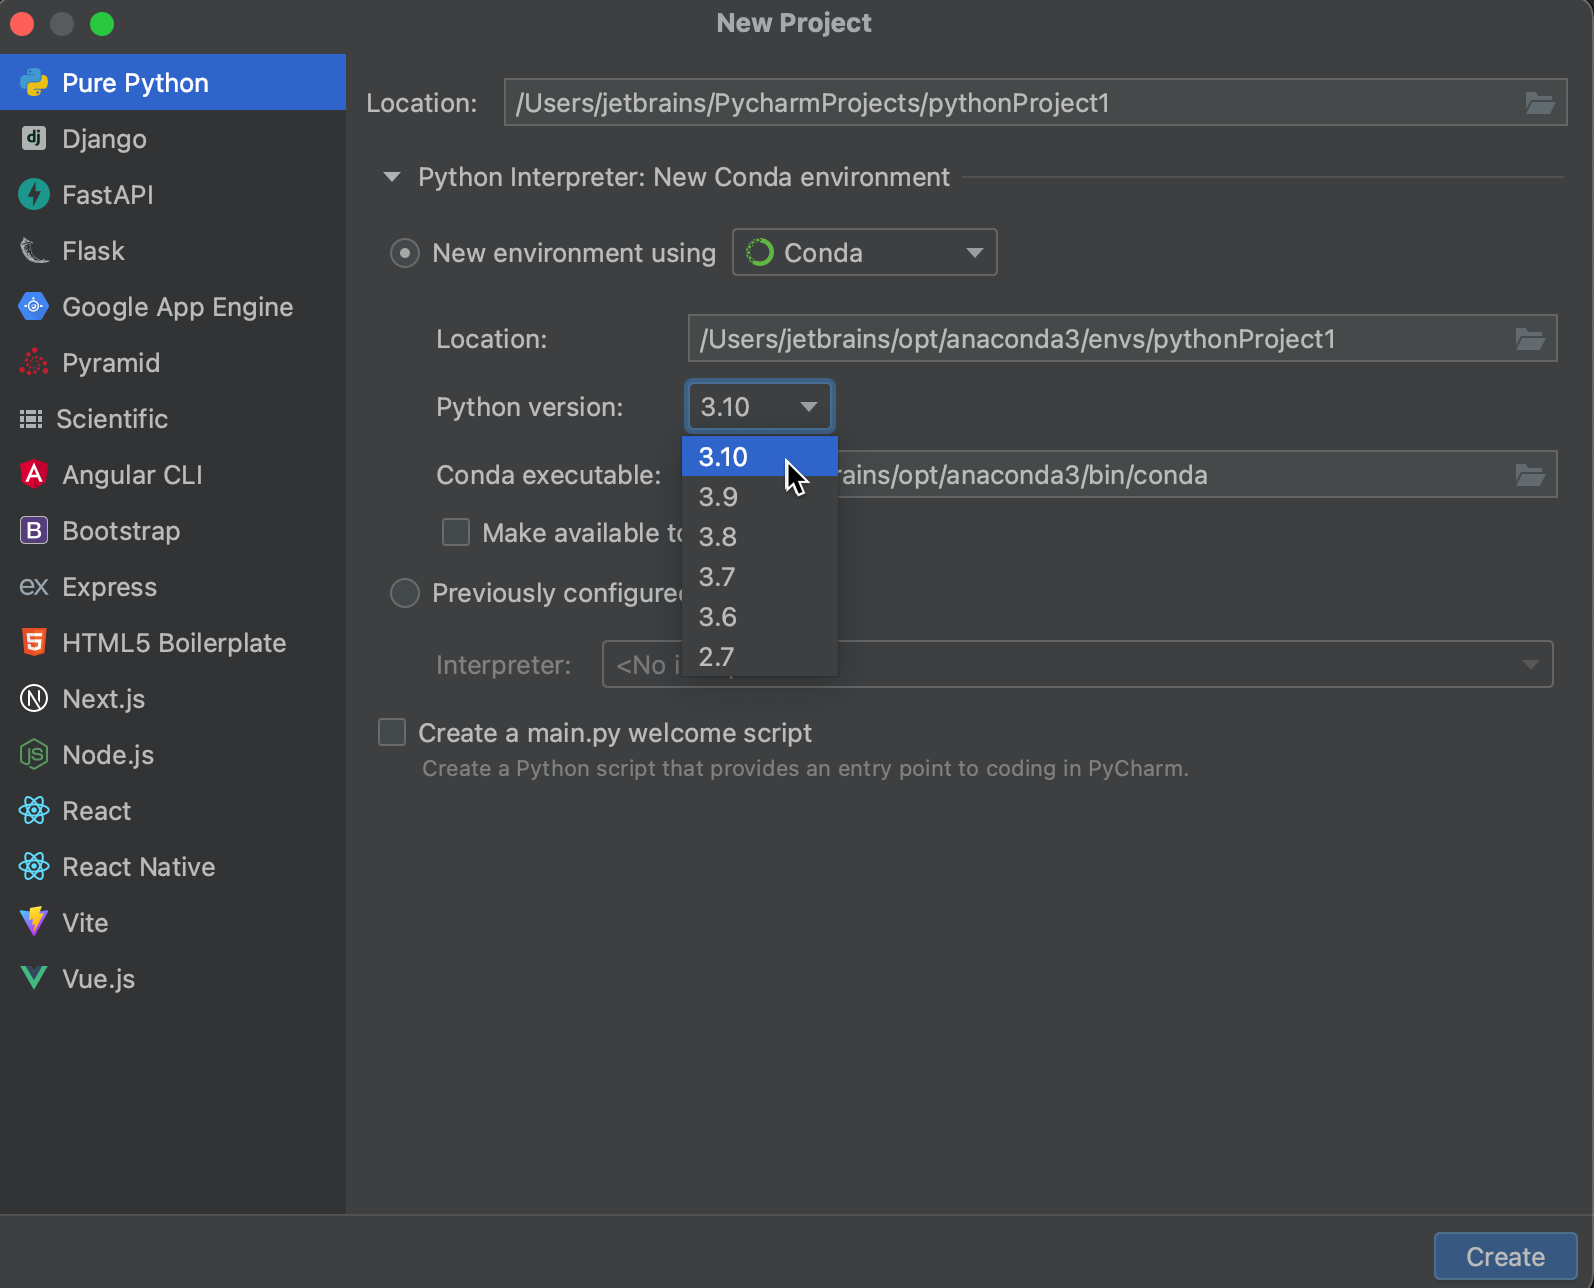
- Specify the location of the new conda environment in the Location field, or click and browse for the desired location in your file system. The directory for the new conda environment should be empty.
- Select the Python version from the list.
- Normally, PyCharm will detect conda installation. Otherwise, specify the location of the conda executable, or click to browse for it.
- Select the Make available to all projects checkbox if you want to reuse this environment when creating Python interpreters in PyCharm.

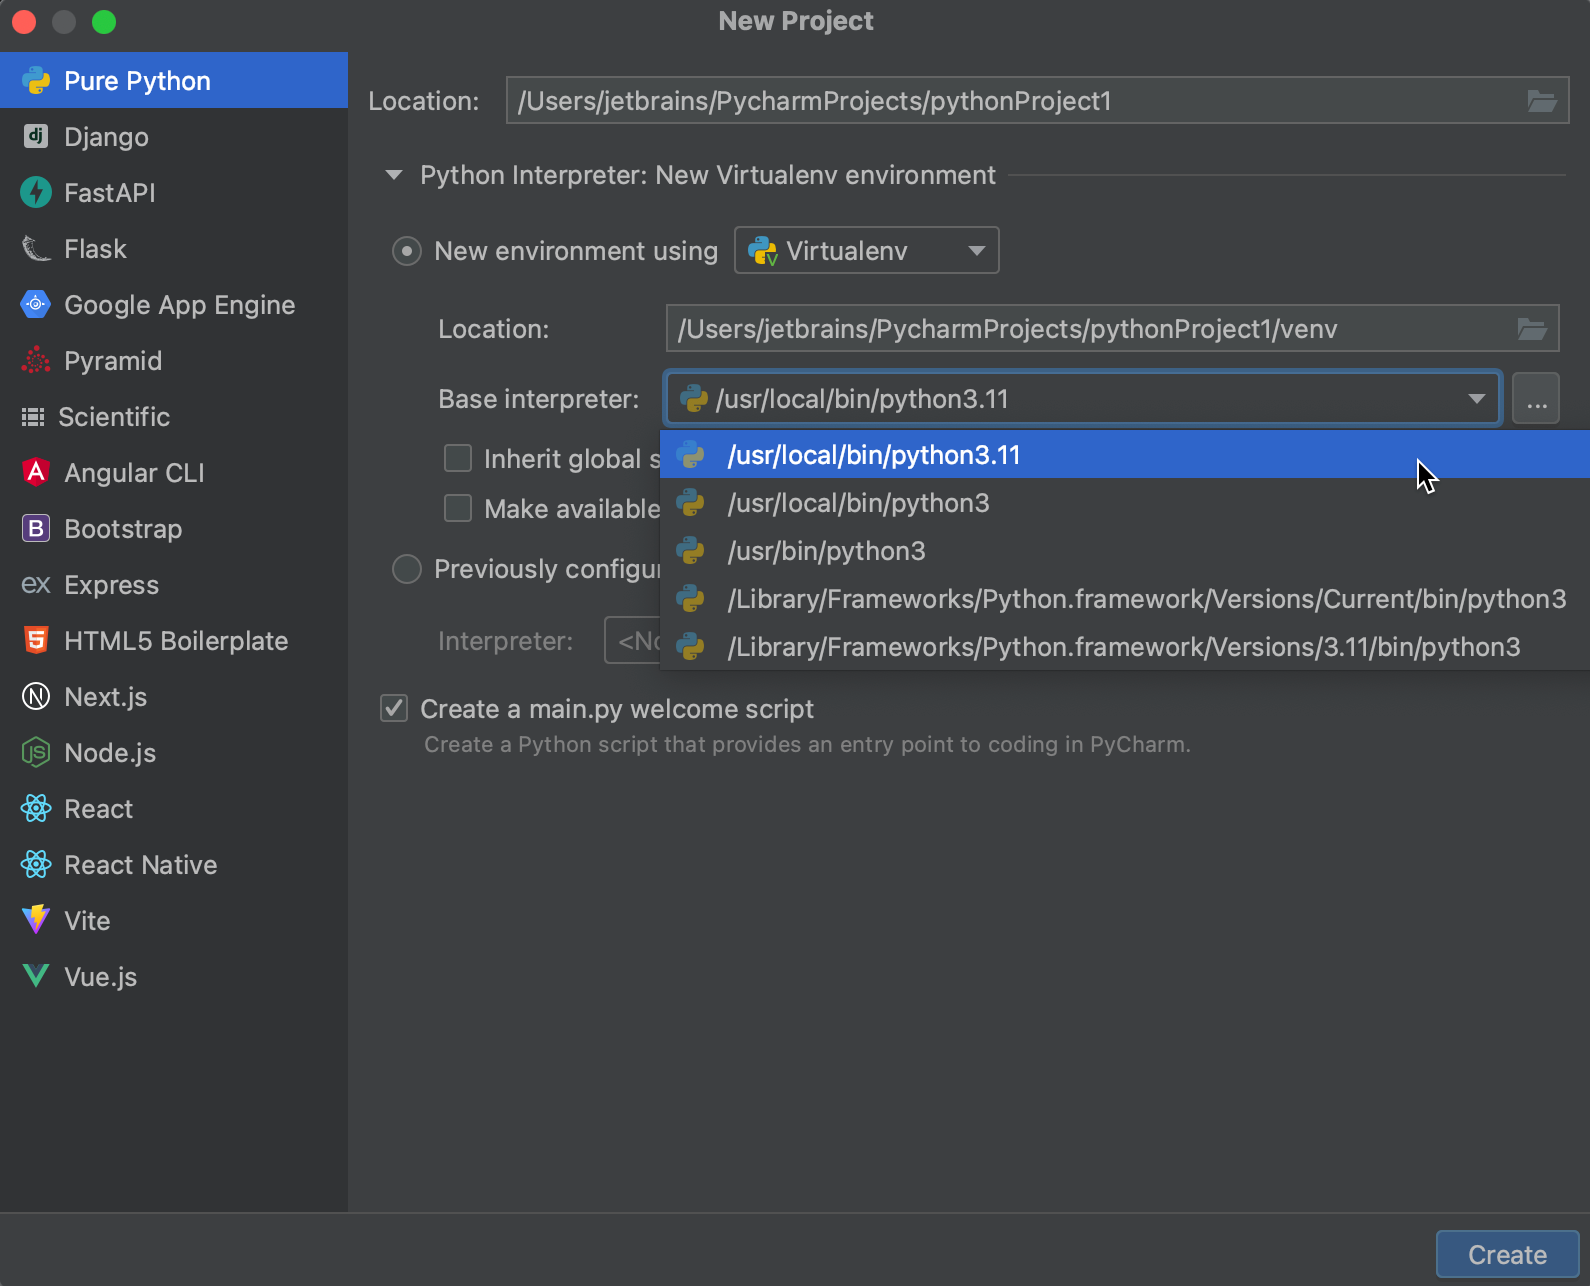
- Specify the location of the new virtual environment in the Location field, or click and browse for the desired location in your file system. The directory for the new virtual environment should be empty.
- Choose the base interpreter from the list, or click and find the desired Python executable in your file system.
- Select the Inherit global site-packages checkbox if you want all packages installed in the global Python on your machine to be added to the virtual environment you’re going to create. This checkbox corresponds to the —system-site-packages option of the virtualenv tool.
- Select the Make available to all projects checkbox if you want to reuse this environment when creating Python interpreters in PyCharm.
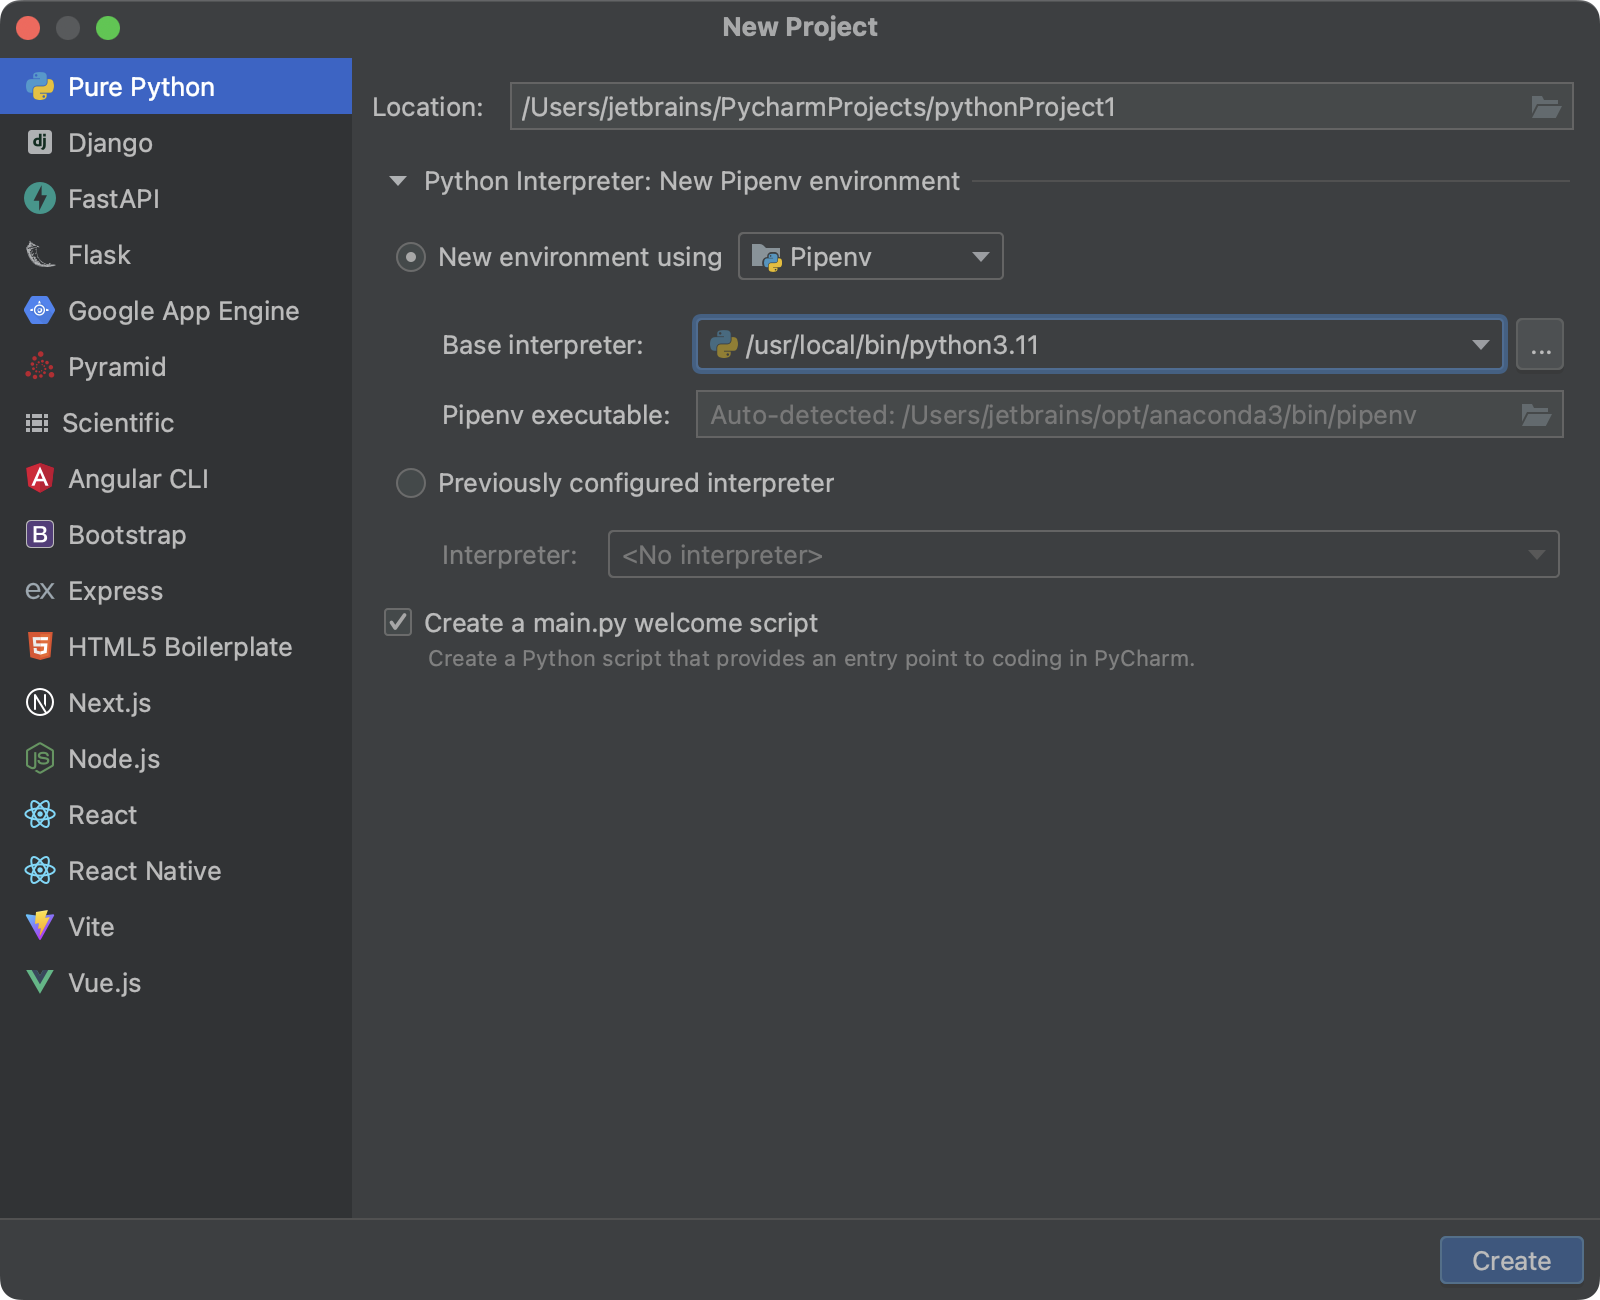

Choose the base interpreter from the list, or click and find the desired Python executable in your file system.
If you have added the base binary directory to your PATH environmental variable, you don’t need to set any additional options: the path to the pipenv executable will be autodetected.
If the pipenv executable is not found, follow the pipenv installation procedure to discover the executable path, and then paste it in the Pipenv executable field.
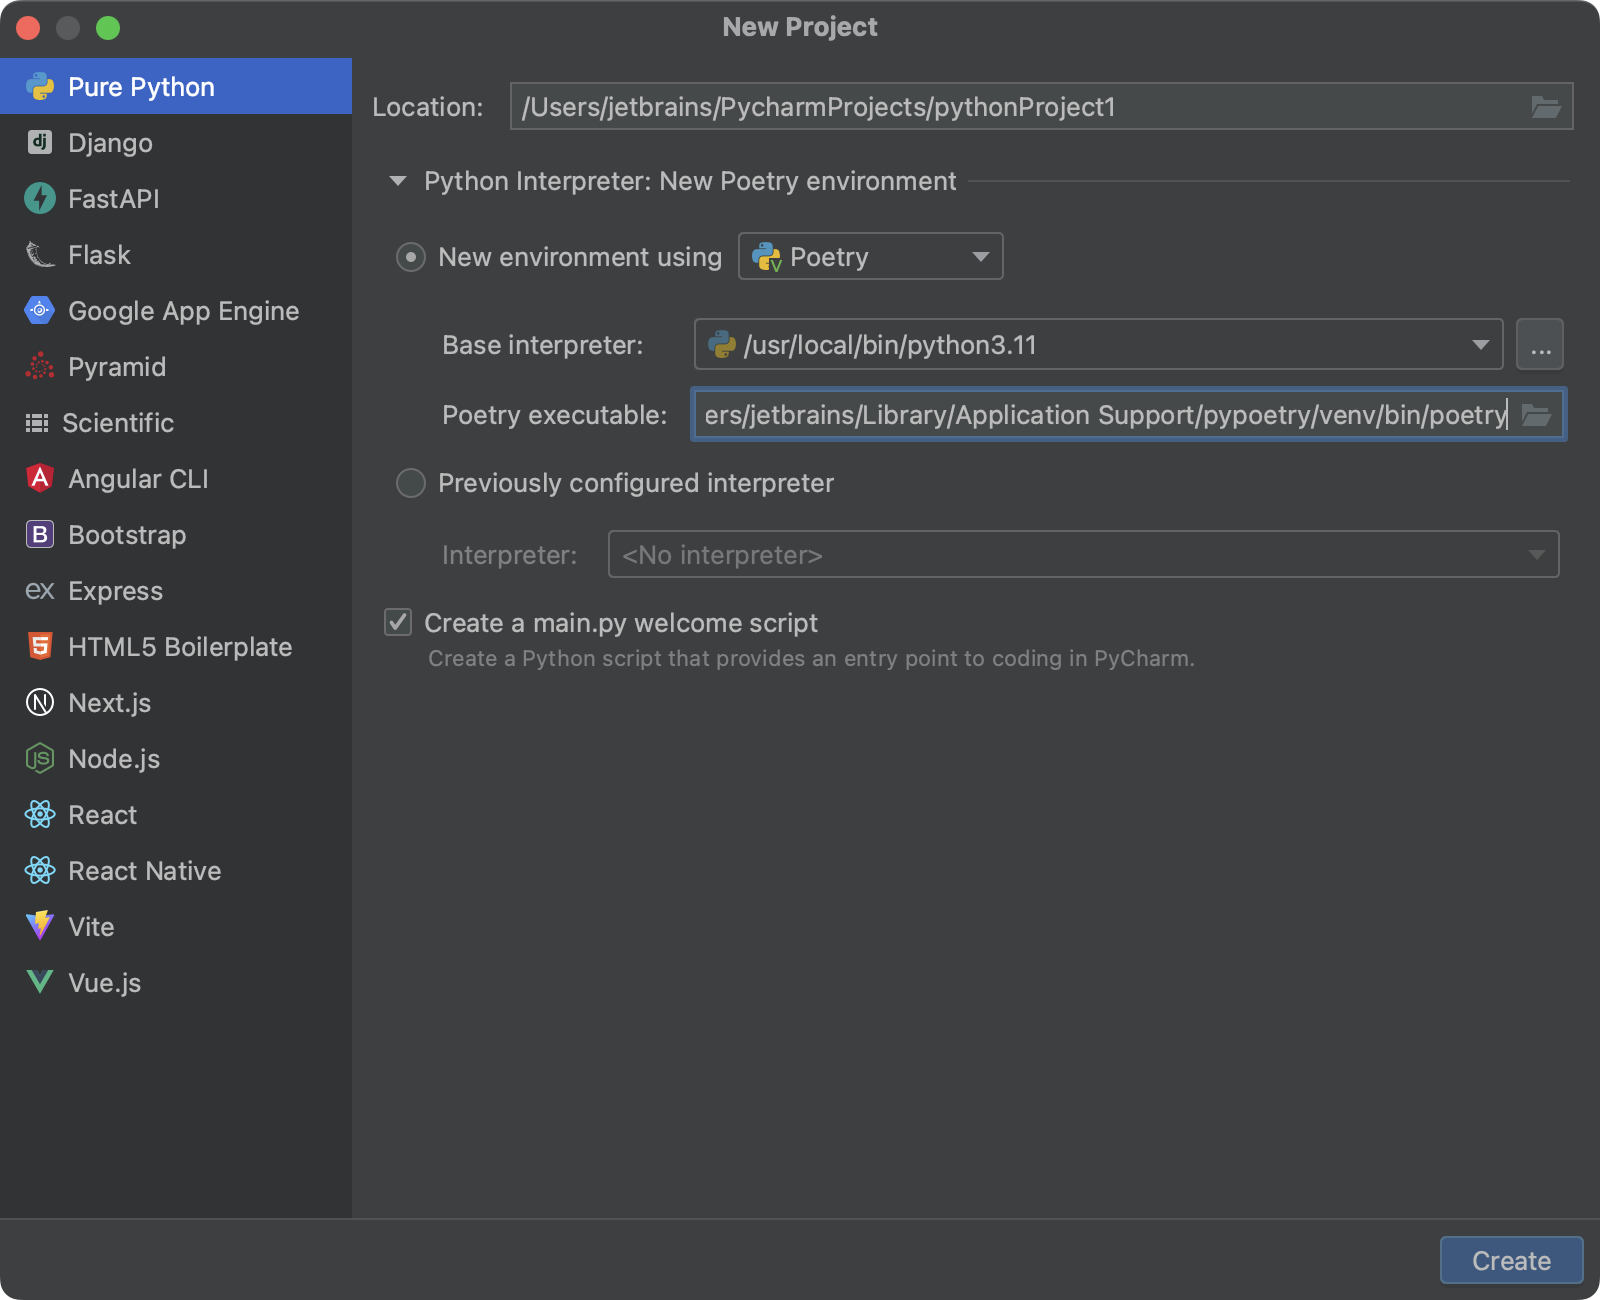
Choose the base interpreter from the list, or click and find the desired Python executable in your file system.
If PyCharm doesn’t detect the poetry executable, specify the following path in the Poetry executable field, replacing jetbrains with your username: