- Install PyQt5 on macOS Install PyQt5 on macOS
- Install PyQt5 on macOS
- Purchasing Power Parity
- Never miss an update
- 5. Using Python on a Mac
- 5.1. Getting and Installing MacPython
- 5.1.1. How to run a Python script
- 5.1.2. Running scripts with a GUI
- 5.1.3. Configuration
- 5.2. The IDE
- 5.3. Installing Additional Python Packages
- 5.4. GUI Programming on the Mac
- 5.5. Distributing Python Applications on the Mac
- 5.6. Other Resources
- PyQt5 для начинающих
- Установка PyQt5
- Hello, World!
- Меняем шрифт надписи
- Более продвинутая разметка с XHTML
Install PyQt5 on macOS
Install PyQt5 on macOS
Before you start the PyQt5 tutorial you will need to have a working installation of PyQt5 on your system. If you don’t have either set up yet, the following steps will guide you through how to do this on macOS.
This guide is also available for Linux and Windows.
Note that the following instructions are only for installation of the GPL licensed version of PyQt. If you need to use PyQt in a non-GPL project you will need to purchase an alternative license from Riverbank Computing to release your software.
Install PyQt5 on macOS
If you already have a working installation of Python 3 on macOS, you can go ahead and install PyQt5 as for any other Python package, using the following —
If you don’t have an installation of Python 3, you will need to install one first. You can download macOS installers for Python 3 from the Python homepage. Once installed, you should be able to use the pip3 install command above to install PyQt5.
Another alternative is to use Homebrew. Homebrew is a package manager for command-line software on macOS. Homebrew has both Python 3 and PyQt5 available in their repositories.

Homebrew — the missing package manager for macOS
To install homebrew run the following from the command line —
ruby -e "$(curl -fsSL https://raw.githubusercontent.com/Homebrew/install/master/install)" This is also available to copy and paste from the Homebrew homepage.
Once Homebrew is installed you can then install Python with —
With Python installed, you can then install PyQt5 as normal, using pip3 install pyqt5 , or alternatively choose to install it using Homebrew with —

Downloadable ebook (PDF, ePub) & Complete Source code
[[ discount.discount_pc ]]% OFF for the next [[ discount.duration ]] [[discount.description ]] with the code [[ discount.coupon_code ]]Purchasing Power Parity
Developers in [[ country ]] get [[ discount.discount_pc ]]% OFF on all books & courses with code [[ discount.coupon_code ]]
Never miss an update
Enjoyed this? Subscribe to get new updates straight in your Inbox.

Install PyQt5 on macOS was written by Martin Fitzpatrick .
Martin Fitzpatrick has been developing Python/Qt apps for 8 years. Building desktop applications to make data-analysis tools more user-friendly, Python was the obvious choice. Starting with Tk, later moving to wxWidgets and finally adopting PyQt.
Install PyQt5 on macOS was published in installation on May 21, 2019 (updated March 16, 2023 )
- Topics
- Where do I begin?
- Data Science
- Packaging & Distribution
- Databases & SQL
- QML/QtQuick
- Learn the fundamentals
- Raspberry Pi
- Games
- Start
Follow us for new tutorials
5. Using Python on a Mac
Python on a Mac running macOS is in principle very similar to Python on any other Unix platform, but there are a number of additional features such as the IDE and the Package Manager that are worth pointing out.
5.1. Getting and Installing MacPython
macOS used to come with Python 2.7 pre-installed between versions 10.8 and 12.3. You are invited to install the most recent version of Python 3 from the Python website (https://www.python.org). A current “universal binary” build of Python, which runs natively on the Mac’s new Intel and legacy PPC CPU’s, is available there.
What you get after installing is a number of things:
- A Python 3.12 folder in your Applications folder. In here you find IDLE, the development environment that is a standard part of official Python distributions; and PythonLauncher, which handles double-clicking Python scripts from the Finder.
- A framework /Library/Frameworks/Python.framework , which includes the Python executable and libraries. The installer adds this location to your shell path. To uninstall MacPython, you can simply remove these three things. A symlink to the Python executable is placed in /usr/local/bin/.
The Apple-provided build of Python is installed in /System/Library/Frameworks/Python.framework and /usr/bin/python , respectively. You should never modify or delete these, as they are Apple-controlled and are used by Apple- or third-party software. Remember that if you choose to install a newer Python version from python.org, you will have two different but functional Python installations on your computer, so it will be important that your paths and usages are consistent with what you want to do.
IDLE includes a help menu that allows you to access Python documentation. If you are completely new to Python you should start reading the tutorial introduction in that document.
If you are familiar with Python on other Unix platforms you should read the section on running Python scripts from the Unix shell.
5.1.1. How to run a Python script
Your best way to get started with Python on macOS is through the IDLE integrated development environment, see section The IDE and use the Help menu when the IDE is running.
If you want to run Python scripts from the Terminal window command line or from the Finder you first need an editor to create your script. macOS comes with a number of standard Unix command line editors, vim and emacs among them. If you want a more Mac-like editor, BBEdit or TextWrangler from Bare Bones Software (see http://www.barebones.com/products/bbedit/index.html) are good choices, as is TextMate (see https://macromates.com/). Other editors include Gvim (https://macvim.org/macvim/) and Aquamacs (http://aquamacs.org/).
To run your script from the Terminal window you must make sure that /usr/local/bin is in your shell search path.
To run your script from the Finder you have two options:
- Drag it to PythonLauncher
- Select PythonLauncher as the default application to open your script (or any .py script) through the finder Info window and double-click it. PythonLauncher has various preferences to control how your script is launched. Option-dragging allows you to change these for one invocation, or use its Preferences menu to change things globally.
5.1.2. Running scripts with a GUI
With older versions of Python, there is one macOS quirk that you need to be aware of: programs that talk to the Aqua window manager (in other words, anything that has a GUI) need to be run in a special way. Use pythonw instead of python to start such scripts.
With Python 3.9, you can use either python or pythonw.
5.1.3. Configuration
Python on macOS honors all standard Unix environment variables such as PYTHONPATH , but setting these variables for programs started from the Finder is non-standard as the Finder does not read your .profile or .cshrc at startup. You need to create a file ~/.MacOSX/environment.plist . See Apple’s Technical Document QA1067 for details.
For more information on installation Python packages in MacPython, see section Installing Additional Python Packages .
5.2. The IDE
MacPython ships with the standard IDLE development environment. A good introduction to using IDLE can be found at http://www.hashcollision.org/hkn/python/idle_intro/index.html.
5.3. Installing Additional Python Packages
There are several methods to install additional Python packages:
- Packages can be installed via the standard Python distutils mode ( python setup.py install ).
- Many packages can also be installed via the setuptools extension or pip wrapper, see https://pip.pypa.io/.
5.4. GUI Programming on the Mac
There are several options for building GUI applications on the Mac with Python.
PyObjC is a Python binding to Apple’s Objective-C/Cocoa framework, which is the foundation of most modern Mac development. Information on PyObjC is available from https://pypi.org/project/pyobjc/.
The standard Python GUI toolkit is tkinter , based on the cross-platform Tk toolkit (https://www.tcl.tk). An Aqua-native version of Tk is bundled with OS X by Apple, and the latest version can be downloaded and installed from https://www.activestate.com; it can also be built from source.
wxPython is another popular cross-platform GUI toolkit that runs natively on macOS. Packages and documentation are available from https://www.wxpython.org.
PyQt is another popular cross-platform GUI toolkit that runs natively on macOS. More information can be found at https://riverbankcomputing.com/software/pyqt/intro.
5.5. Distributing Python Applications on the Mac
The standard tool for deploying standalone Python applications on the Mac is py2app. More information on installing and using py2app can be found at https://pypi.org/project/py2app/.
5.6. Other Resources
The MacPython mailing list is an excellent support resource for Python users and developers on the Mac:
Another useful resource is the MacPython wiki:
PyQt5 для начинающих
Привет, Хабр! Сегодня я вас хочу научить делать интерфейс на Python 3&PyQt5.
Установка PyQt5
Для того, чтобы установить PyQt5 в Windows или MacOS, откройте Командную строку или Терминал и введите:
Для Linux, откройте Терминал и введите:
sudo apt-get update sudo apt-get upgrade sudo apt-get install python3-pyqt5Hello, World!
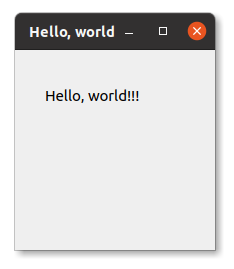
А сейчас сделаем Hello World приложение. Создайте файл Python, откройте его и введите такой код:
from PyQt5.QtWidgets import * import sys class MainWindow(QMainWindow): # главное окно def __init__(self, parent=None): super().__init__(parent) self.setupUi() def setupUi(self): self.setWindowTitle("Hello, world") # заголовок окна self.move(300, 300) # положение окна self.resize(200, 200) # размер окна self.lbl = QLabel('Hello, world. ', self) self.lbl.move(30, 30) if __name__ == "__main__": app = QApplication(sys.argv) win = MainWindow() win.show() sys.exit(app.exec_())Когда вы запустите, должна получится примерно такая картина:
Меняем шрифт надписи
А теперь поменяем шрифт надписи. Теперь код станет таким:
from PyQt5.QtWidgets import * from PyQt5.QtGui import * import sys class MainWindow(QMainWindow): # главное окно def __init__(self, parent=None): super().__init__(parent) self.setupUi() def setupUi(self): self.setWindowTitle("Hello, world") # заголовок окна self.move(300, 300) # положение окна self.resize(200, 200) # размер окна self.lbl = QLabel('Hello, world. ', self) self.lbl.move(30, 30) self.font = QFont() # создаём объект шрифта self.font.setFamily("Rubik") # название шрифта self.font.setPointSize(12) # размер шрифта self.font.setUnderline(True) # подчёркивание self.lbl.setFont(self.font) # задаём шрифт метке if __name__ == "__main__": app = QApplication(sys.argv) win = MainWindow() win.show() sys.exit(app.exec_()) Пример рассчитан на то, что у вас уже установлен шрифт Rubik от Google Fonts. Если нет, его всегда можно скачать отсюда.
Более продвинутая разметка с XHTML
А теперь добавим XHTML. Например, так:
from PyQt5.QtWidgets import * import sys class MainWindow(QMainWindow): # главное окно def __init__(self, parent=None): super().__init__(parent) self.setupUi() def setupUi(self): self.setWindowTitle("Hello, world") # заголовок окна self.move(300, 300) # положение окна self.resize(200, 200) # размер окна self.lbl = QLabel('Hello, world. 123', self) self.lbl.move(30, 30) if __name__ == "__main__": app = QApplication(sys.argv) win = MainWindow() win.show() sys.exit(app.exec_()) Те, кто хотя бы немного знают XHTML, заметят, что надпись Hello сделана курсивом, слово world — жирным, а 123 — и вычеркнуто, и жирное.