- Php вывод формы select
- Отправляем значение select на сервер
- Php код для отправки значения select на сервер
- Код select для получения данных через php:
- Пример получения значения из select php
- Получаем несколько значений(multiple) из select php
- Php получение нескольких значений select
- PHP Select Option
- A quick introduction to the element
- Getting the selected value from a element
- Select with multiple options
- Summary
- Многоуровневый select из базы данных
- Оформление вложенности пробелами
- Результат:
- Оформление символами псевдографики
- Результат:
- Использование optgroup
Php вывод формы select
Для того, чтобы получить значение из select в php вам потребуется:
Начнем с Html каркаса для получение из селект php:
Туда добавляем способ отправки — в нашем примере post
Если стоит задача, чтобы пользователь обязательно выбрал какой-то из пунктов select, то добавляем required
+ Обязательный атрибут атрибут name с произвольным значением «select_php»:
В option добавляем value со значениями(Один,Два,Три)
Отправляем значение select на сервер
Для того чтобы отправить»значение select на сервер» вам понадобится тип submit, это может быть input, либо button
Php код для отправки значения select на сервер
Php довольно простой. нам нужно проверить(условие if) массив post на наличие в нем имени php_select и получить его значение
Далее в этой же строке выводим. любой текст. echo
Соберем код получения значения из select php:
Код select для получения данных через php:
Код получения значения из select php соберем здесь:
if($_POST[php_select]) echo ‘Вы выбрали в select строку с номером :
Пример получения значения из select php
Выше я собрал весь код получения значения из select в php и далее выведем данный код прямо здесь::
Вам остается протестировать как работает пример кода select для получения значения через php:
Нажимаем по кнопке Выбрать php select и выбираем одно из значение селекта.
Потом нажимаем кнопку «Отправить php select«
Если что-то непонятно, вы всегда можете скачать готовый пример со страницы со всеми скриптами.
Получаем несколько значений(multiple) из select php
Возьмем теорию из выше описанных пунктов и + немного изменим код.
В теге form изменим атрибут «name»(+ изменим значение) добавим ему квадратные скобки, что будет означать получение массива или нескольких значений из select php
Чтобы при загрузке страницы сразу выбралось несколько значение . в пару строк добавлю «selected»
При использовании «multiple» select php будет отправлять массив, выводим с помощью print_r. Для вывода в строку используем «true»
Php получение нескольких значений select
if($_POST[php_select_arr]) $res_2 = ‘При «multiple» вы получите массив :
?>
PHP Select Option
Summary: in this tutorial, you will learn how to use the element to create a drop-down list and a list box and how to get the selected values from the element in PHP.
A quick introduction to the element
The is an HTML element that provides a list of options. The following shows how to define a element in HTML:
label for="color">Background Color: label> select name="color" id="color"> option value="">--- Choose a color --- option> option value="red">Red option> option value="green">Green option> option value="blue">Blue option> select>Code language: HTML, XML (xml)The element has two important attributes:
- id – the id associates the element with a element
- name – the name attribute associates with the value for a form submission.
The element nested inside the element defines an option in the menu. Each option has a value attribute. The value attribute stores data submitted to the server when it is selected.
If an option doesn’t have the value attribute, the value attribute defaults to the text inside the element.
To select an option when the page loads for the first time, you can add the selected attribute to the element.
The following example selects the Green option when the page first loads:
label for="color">Background Color: label> select name="color" id="color"> option value="">--- Choose a color --- option> option value="red">Red option> option value="green" selected>Green option> option value="blue">Blue option> select>Code language: HTML, XML (xml)Getting the selected value from a element
We’ll create a form that uses a element.
First, create the following folders and files:
├── css | └── style.css ├── inc | ├── footer.php | ├── get.php | ├── header.php | └── post.php └── index.php Code language: JavaScript (javascript)Second, place the following code in the header.php file:
html> html lang="en"> head> meta charset="UTF-8"> meta name="viewport" content="width=device-width, initial-scale=1.0"> link rel="stylesheet" href="css/style.css"> title>PHP select option title> head> body class="center"> main>Code language: HTML, XML (xml)Third, place the following code in the footer.php file:
main> body> html>Code language: HTML, XML (xml) Fourth, add the following code to the get.php file to create a form that has one element with a submit button:
form action="" method="post"> div> label for="color">Background Color: label> select name="color" id="color"> option value="">--- Choose a color --- option> option value="red">Red option> option value="green" selected>Green option> option value="blue">Blue option> select> div> div> button type="submit">Select button> div> form>Code language: HTML, XML (xml)The form uses the POST method to submit data to the webserver.
Finally, add the following code to the post.php file:
$color = filter_input(INPUT_POST, 'color', FILTER_SANITIZE_STRING); ?> if ($color) : ?> p>You selected span style="color:"> echo $color ?> span> p> p>a href="index.php">Back to the form a> p> else : ?> p>You did not select any color p> endif ?>Code language: HTML, XML (xml)To get the selected value of the element, you use the $_POST superglobal variable if the form method is POST and $_GET if the form method is GET .
Alternatively, you can use the filter_input() function to sanitize the selected value.
If you select the first option of the element, the selected value will be empty. Otherwise, the selected value is red, green, or blue.
Select with multiple options
To enable multiple selections, you add the multiple attribute to the element:
select name="colors[]" id="colors" multiple> . select>Code language: HTML, XML (xml)When you select multiple options of a element and submit the form, the name will contain multiple values rather than a single value. To get multiple selected values, you add the square brackets ( []) after the name of element.
Let’s take a look at an example of using a element with multiple selections.
First, create the following folders and files:
. ├── css | └── style.css ├── inc | ├── footer.php | ├── get.php | ├── header.php | └── post.php └── index.phpCode language: JavaScript (javascript)Second, place the following code into the header.php file:
html> html lang="en"> head> meta charset="UTF-8" /> meta name="viewport" content="width=device-width, initial-scale=1.0" /> title>PHP Listbox title> link rel="stylesheet" href="css/style.css"> head> body class="center"> main>Code language: HTML, XML (xml)Third, add the following code to the footer.php file:
main> body> html>Code language: HTML, XML (xml) Fourth, include the header.php and footer.php files in the index.php :
require __DIR__ . '/inc/header.php'; $request_method = strtoupper($_SERVER['REQUEST_METHOD']); if ($request_method === 'GET') < require __DIR__ . '/inc/get.php'; > elseif ($request_method === 'POST') < require __DIR__ . '/inc/post.php'; > require __DIR__ . '/inc/footer.php'; Code language: HTML, XML (xml)If the HTTP request is GET, the index.php file will show a form from the get.php file. When the form is submitted, the post.php file will handle the form submission.
Fifth, create a form that contains a element with the multiple attribute in the get.php file. The name of the element has an opening and closing square bracket [] so that PHP can create an array that holds the select values.
form action="" method="post"> div> label for="colors">Background Color: label> select name="colors[]" id="colors" multiple> option value="red">Red option> option value="green">Green option> option value="blue">Blue option> option value="purple">Purple option> option value="magenta">Magenta option> option value="cyan">Cyan option> select> div> div> button type="submit">Submit button> div> form>Code language: HTML, XML (xml)Finally, handle the form submission in the post.php file:
$selected_colors = filter_input( INPUT_POST, 'colors', FILTER_SANITIZE_STRING, FILTER_REQUIRE_ARRAY ); ?> if ($selected_colors) : ?> p>You selected the following colors: p> ul> foreach ($selected_colors as $color) : ?> li style="color:"> echo $color ?> li> endforeach ?> ul> p> p> else : ?> p>You did not select any color. p> endif ?> a href="index.php">Back to the form a>Code language: HTML, XML (xml)The post.php file uses the filter_input() function to get the selected colors as an array. If you select one or more colors, the post.php file will display them.
Summary
- Use the element to create a dropdown list.
- Use the multiple attribute to create a list that allows multiple selections.
- Use $_POST to get the selected value of the select element if the form method is POST (or $_GET if the form method is GET ).
- Add square brackets( [] ) after the name of the element to get multiple selected values.
Многоуровневый select из базы данных
Примеры построения многоуровневых выпадающих списков (select option) и базы данных с применением рекурсии PHP.
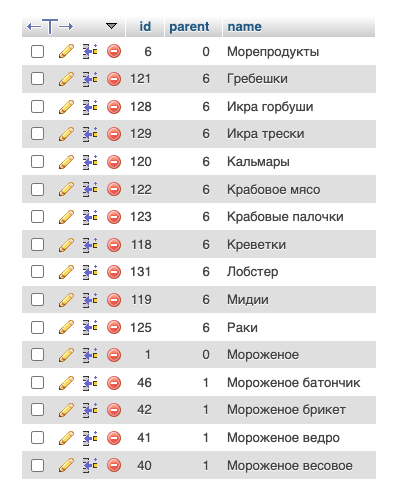
В скриптах используется MySQL-таблица `category` с полями `id` , `parent` , `name` , где поле `parent` содержит id родителя.
Оформление вложенности пробелами
- В начале получаем все записи из БД в виде ассоциативного массива.
- С помощью функции array_to_tree() преобразуем его в древовидный, к элементам массива добавляется элемент «children» в который перемещаются все дочерние элементы.
- С помощью функции out_options() рекурсивно выводятся все элементы массива.
- Во втором аргументе функции out_options() указывается id элемента, которому нужно установить selected .
prepare("SELECT * FROM `category` ORDER BY `name`"); $sth->execute(); $category = $sth->fetchAll(PDO::FETCH_ASSOC); $category = array_to_tree($category); function array_to_tree($array, $sub = 0) < $a = array(); foreach($array as $v) < if($sub == $v['parent']) < $b = array_to_tree($array, $v['id']); if(!empty($b)) < $a[$v['id']] = $v; $a[$v['id']]['children'] = $b; >else < $a[$v['id']] = $v; >> > return $a; > function out_options($array, $selected_id = 0, $level = 0) < $level++; $out = ''; foreach ($array as $i =>$row) < $out .= ''; if (!empty($row['children'])) < $out .= out_options($row['children'], $selected_id, $level); >> return $out; > ?> Результат:
Оформление символами псевдографики
Оформление ветвей дерева с помощью символов ├ и └:
prepare("SELECT * FROM `category` ORDER BY `name`"); $sth->execute(); $category = $sth->fetchAll(PDO::FETCH_ASSOC); $category = array_to_tree($category); function array_to_tree($array, $sub = 0) < $a = array(); foreach($array as $v) < if($sub == $v['parent']) < $b = array_to_tree($array, $v['id']); if(!empty($b)) < $a[$v['id']] = $v; $a[$v['id']]['children'] = $b; >else < $a[$v['id']] = $v; >> > return $a; > function out_options($array, $selected_id = 0, $level = 0) < $level++; $out = ''; foreach ($array as $i =>$row) < $out .= ''; if (!empty($row['children'])) < $out .= out_options($row['children'], $selected_id, $level); >> return $out; > ?> Результат:
Использование optgroup
Использование оправдано если необходимо выбрать только крайнюю категорию в дереве, но optgroup не поддерживает вложенность и никакие пробельные символы в начале label=». » . Поэтому в примере используется — – широкое тире.
prepare("SELECT * FROM `category` ORDER BY `name`"); $sth->execute(); $category = $sth->fetchAll(PDO::FETCH_ASSOC); $category = array_to_tree($category); function array_to_tree($array, $sub = 0) < $a = array(); foreach($array as $v) < if($sub == $v['parent']) < $b = array_to_tree($array, $v['id']); if(!empty($b)) < $a[$v['id']] = $v; $a[$v['id']]['children'] = $b; >else < $a[$v['id']] = $v; >> > return $a; > function out_optgroup_options($array, $selected_id = 0, $level = 0) < $level++; $out = ''; foreach ($array as $i =>$row) < if (empty($row['children'])) < $out .= ''; > else < $out .= ''; $out .= out_optgroup_options($row['children'], $selected_id, $level); > > return $out; > ?>