- PHP Installer MSI
- A MSI package for installing non-thread-safe build of PHP
- Project Activity
- License
- Follow PHP Installer MSI
- User Ratings
- User Reviews
- Additional Project Details
- Operating Systems
- Intended Audience
- Registered
- How to Install Composer and PHP on Windows 10
- 1. Download and Install Visual C++
- 2. Download and Extract PHP
- 3. Download and Install Composer
- 4. Test PHP
- 5. Add Path Environment Variable
- 6. Test Composer
- Install PHP
- Download XAMPP
- Install XAMPP on Windows
- Step 1. Start the installation
- Step 2. Select components to install
- Step 3. Specifying the installation folder
- Step 4. Selecting a language
- Step 5. Bitnami for XAMPP
- Step 6. Begin installing XAMPP
- Step 7. Completing the XAMPP setup
- Step 8. Completing the XAMPP setup
- Step 9. Launch the XAMPP
- Troubleshooting
PHP Installer MSI
A MSI package for installing non-thread-safe build of PHP
MSI package for installing non-thread-safe build of PHP. The PHP source code is available at http://svn.php.net/viewvc/. The PHP installer source code is available at http://svn.php.net/viewvc/php/win-installer/.
Project Activity
License
Follow PHP Installer MSI
Centralize and streamline indirect tax management across the enterprise.
Vertex Indirect Tax O Series is a robust indirect tax calculation engine that integrates with ERPs, billing systems, or e-commerce platforms to deliver accurate tax determination on every sales and purchase transaction.
User Ratings
User Reviews
There is no MSI installer inside this project. The other positive reviews are probably fake — this project should be removed for being outright misleading.
Just successfully installed PHP 5.4. on IIS7 Make sure you install the non-thread safe version and run php-win.exe rather than looking for a msi file. Also you need to edit a php.ini file from php.ini-production
This is useless because it doesn’t actually contain an MSI file. It is completed misnamed. I’m not sure what you are supposed to do with it. And what a lot of phoney reviews here! Bunch of made up reviewers parroting a lot of nonsense. SourceFourge should remove this page as it is misleading and useless.
Additional Project Details
Operating Systems
Intended Audience
Registered
Windows Cache Extension for PHP is a PHP accelerator that is used to increase the speed of PHP applications running on Windows and Windows Server. The extension includes PHP opcode cache, user data cache, session cache, file system cache and relative path cache.
How to Install Composer and PHP on Windows 10

In this guide we will install Composer and PHP on Windows 10 so that we can install dependencies for our web apps directly from Windows command line.
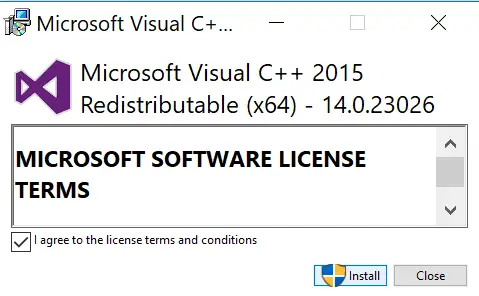
1. Download and Install Visual C++
In order to run PHP on Windows 10, you will need to install Visual C++ Redistributable for Visual Studio. You can download it from the Windows Download page or click the direct link below.
Once downloaded, run the installer and click Install.
2. Download and Extract PHP
Go to the Windows PHP download page and download the .zip of the version of PHP you require. In this guide, we are installing PHP 7.4 VC15 x64 Non Thread Safe, which is the latest version as of writing (Jan 2020).
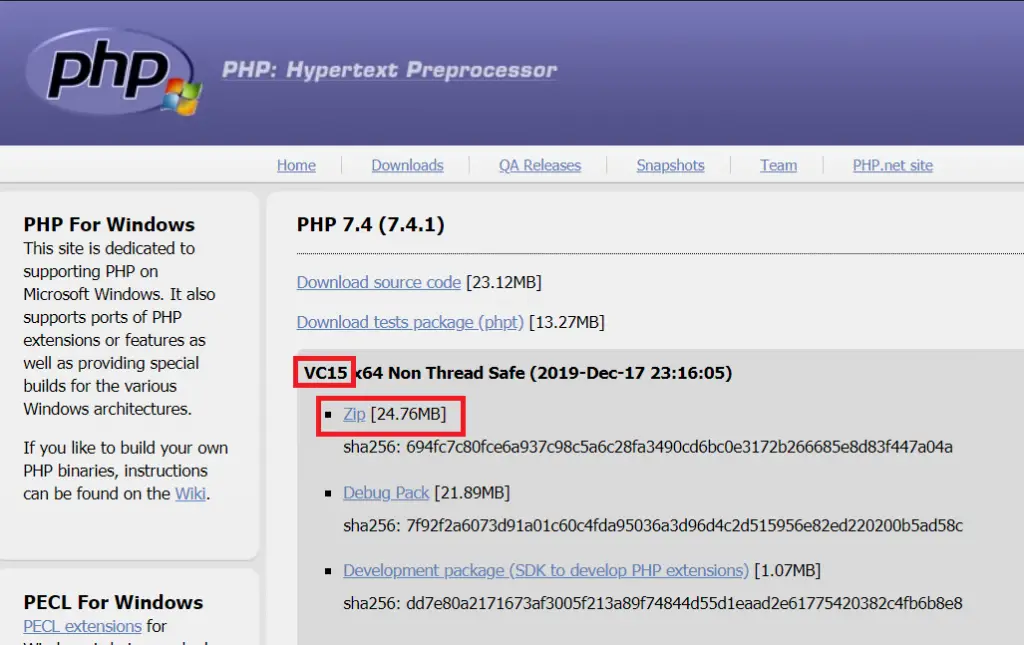
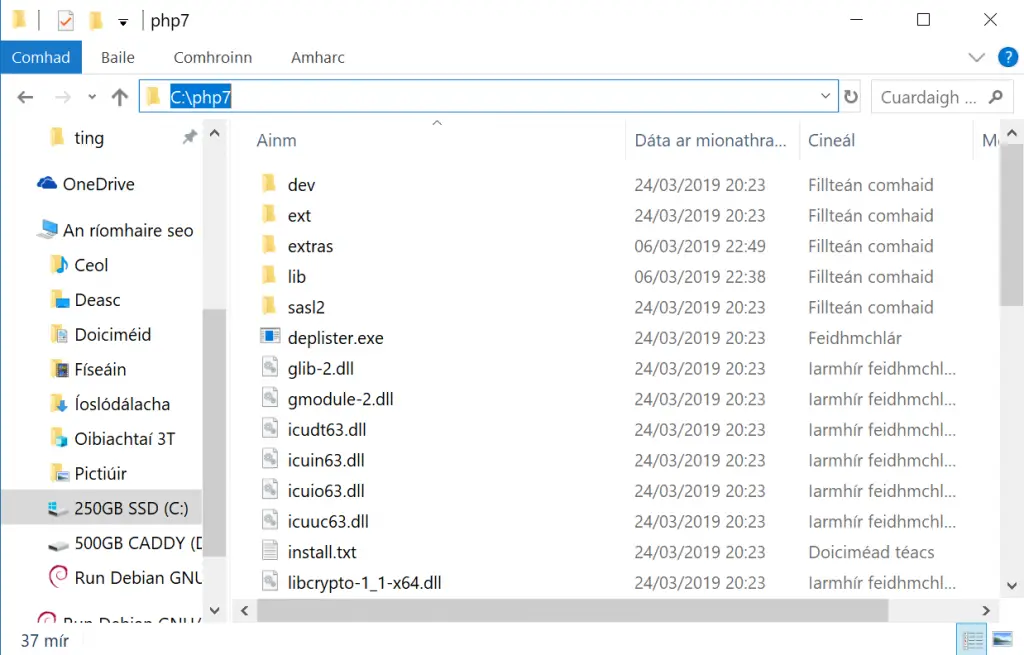
Once downloaded, create a new folder in c:\php7 (or wherever you prefer) and extract your PHP zip to it.
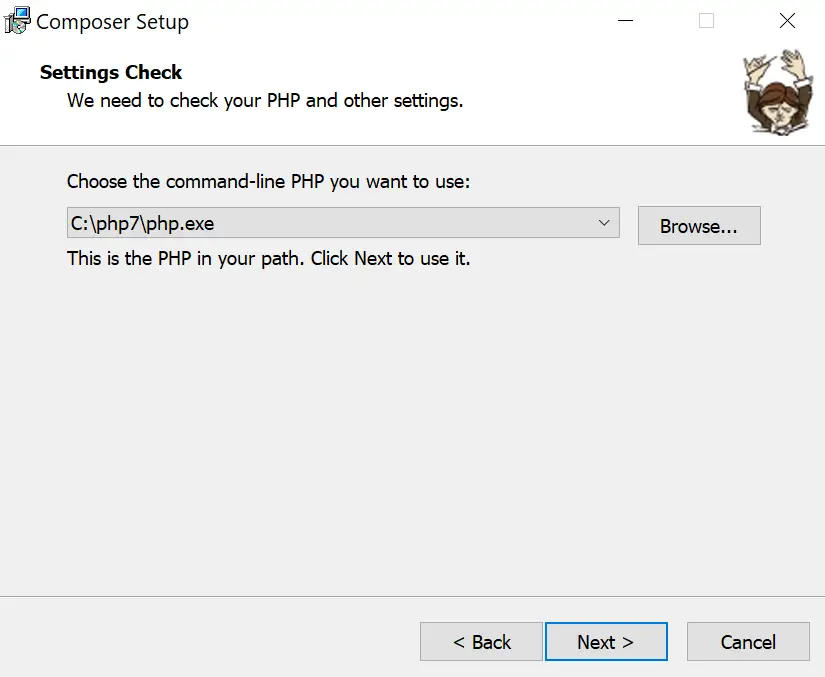
3. Download and Install Composer
In the second step of Composer Setup, make sure the correct path to php.exe is set and click Next.
If Setup prompts to create php.ini, allow it and click Next.
Skip the Proxy URL settings, just click Next then click Install.
Click Finish once install is complete.
4. Test PHP
If you have any Command Prompt windows currently open, close them now.
Open Command Prompt, type php -v and press Enter. You should now see the PHP version.
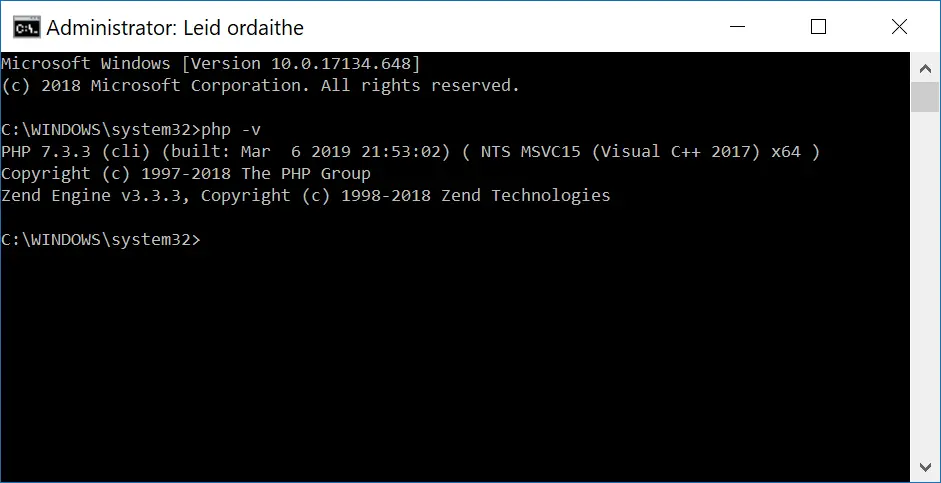
If it returns a PHP version, you can skip to Step 6 to test Composer.
If you get an error “‘php’ is not recognized as an internal or external command,
operable program or batch file.”, you may need to Add a Path Environment Variable.
5. Add Path Environment Variable
Composer setup usually does this for you, but if for whatever reason it didn’t, you can set one up manually.
So that you don’t have to type the whole path to php.exe every time you run a PHP command, you should add c:\php7 as a path environment variable.
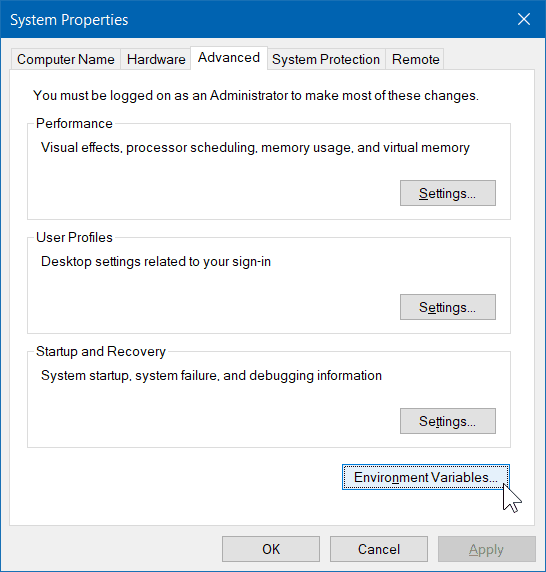
Open System Properties by clicking the start menu and typing sysdm.cpl and press Enter.

In System Properties, click Environment Variables.
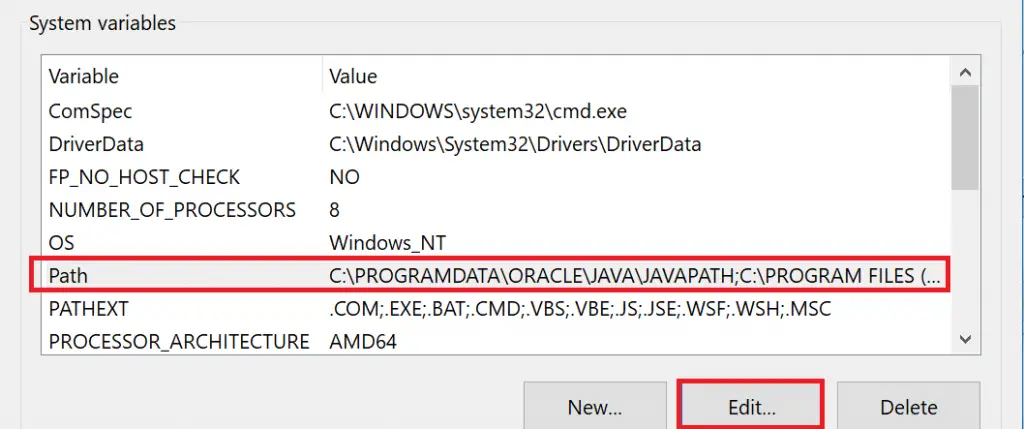
In System Variables, click Path and then click Edit.
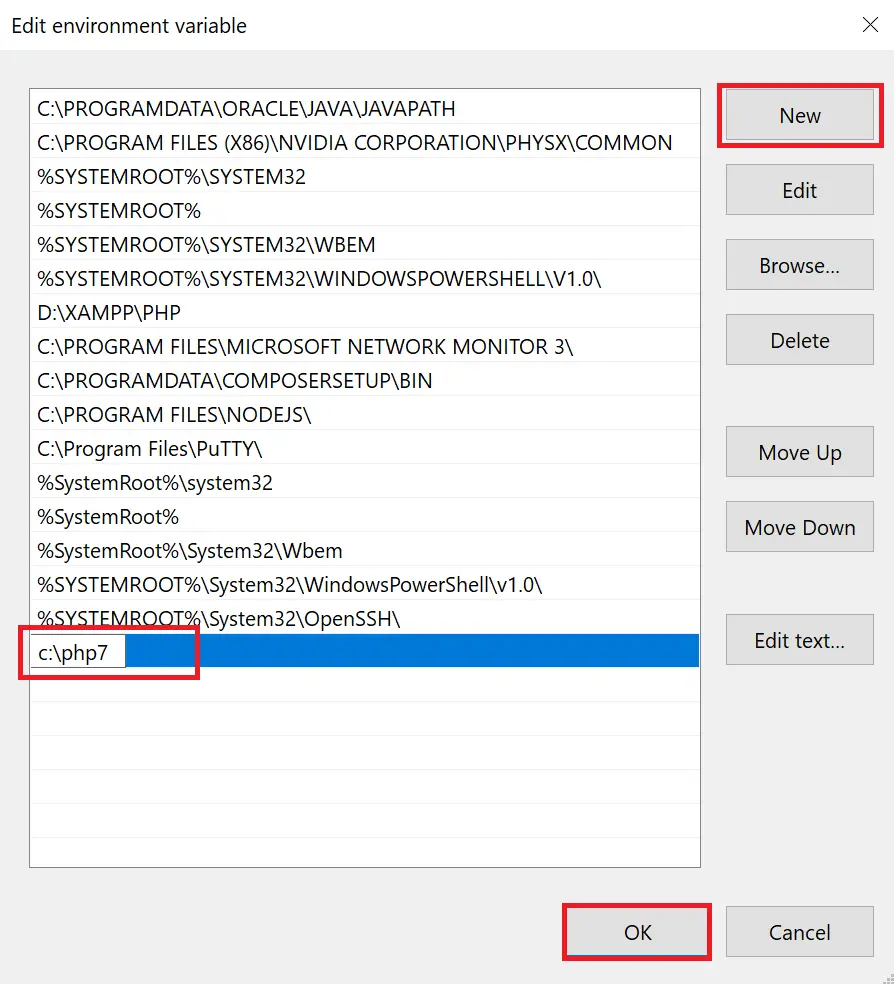
Click New, type the path to your PHP folder ( c:\php7 ) and click OK.
Close the System Properties dialogue by clicking OK.
6. Test Composer
Open up Command Prompt and type composer -V (that’s uppercase V).
If all was installed correctly, you should see a version number.
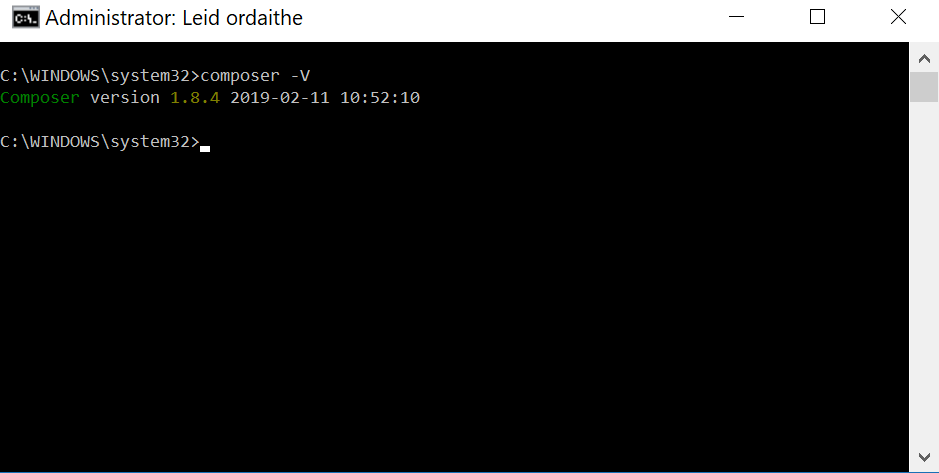
Hurrah! You can now run Composer and PHP on Windows 10.
Let me know if this helped. Follow me on Twitter, Facebook and YouTube, or 🍊 buy me a smoothie.
p.s. I increased my AdSense revenue by 200% using AI 🤖. Read my Ezoic review to find out how.
Install PHP
Summary: in this tutorial, you’ll learn how to install PHP on your computer locally to start learning PHP.
Installing PHP on your computer allows you to safely develop and test a web application without affecting the live system.
To work with PHP locally, you need to have the following software:
- PHP
- A web server that supports PHP. We’ll use the Apache webserver.
- A database server. We’ll use the MySQL database server.
Typically, you won’t install all this software separately because connecting them is tricky and not intended for beginners.
Therefore, it’s easier to find an all-in-one software package that includes PHP, a web server, and a database server. One of the most popular PHP development environments is XAMPP.
XAMPP is an easy install Apache distribution that contains PHP, MariaDB, and Apache webserver. XAMPP supports Windows, Linux, and macOS.
Note that MariaDB is a fork of the most popular relational database management system, MySQL.
Download XAMPP
To install XAMPP on windows, you can go to the XAMPP official website and download the suitable version for your platform.
Install XAMPP on Windows
To install XAMPP on Windows, you can follow these steps:
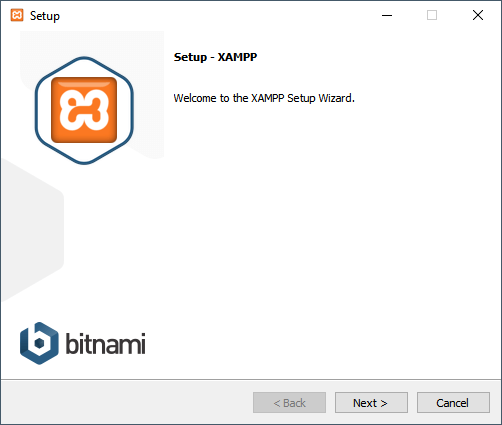
Step 1. Start the installation
Double-click the downloaded file to start setting up XAMPP:
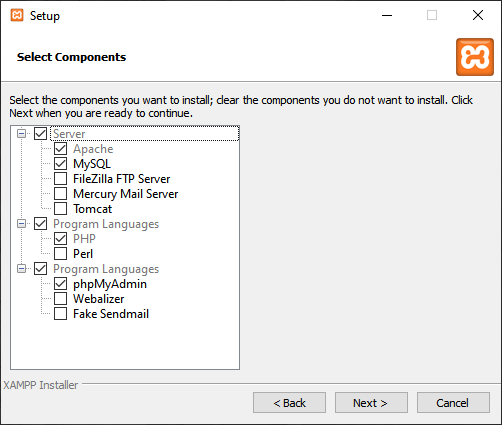
Step 2. Select components to install
Select the components that you want to install. In this step, you can select Apache, MySQL, PHP, and phpMyAdmin, deselect other components like the following, and click the Next button to go to the next step.
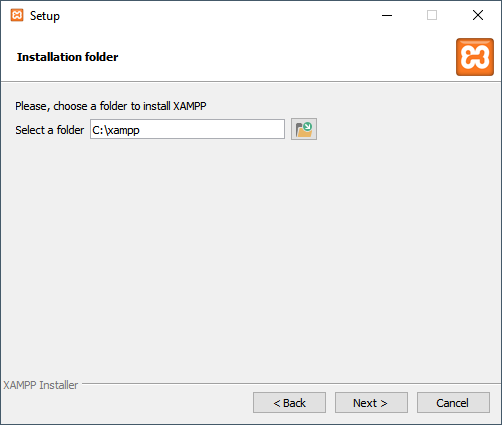
Step 3. Specifying the installation folder
Select a folder to install XAMPP. It’s recommended to install XAMPP in the c:\xampp folder. Click the Next button to go to the next step.
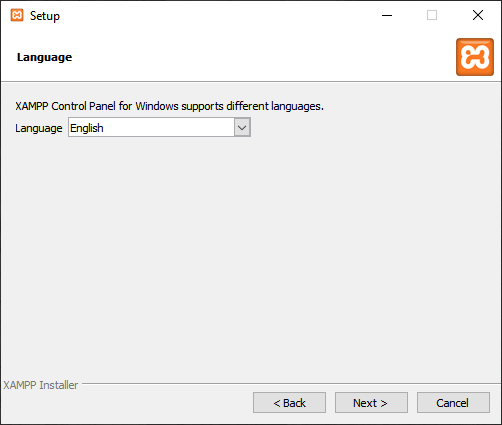
Step 4. Selecting a language
Select a language for XAMPP Control Panel. By default, it’s English. And you can select your preferred language and click the Next button to go to the next step.
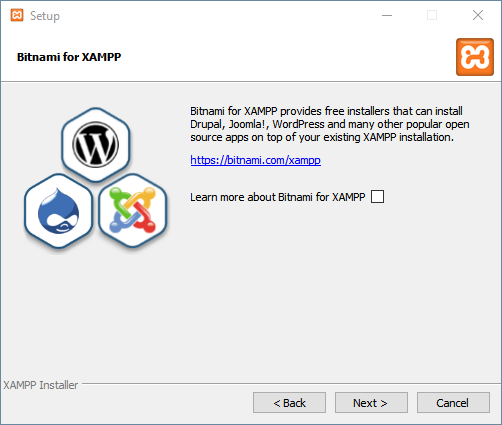
Step 5. Bitnami for XAMPP
Feel free to skip this step because you don’t need Bitnami for learning PHP. Just click the Next button to go to the next step.
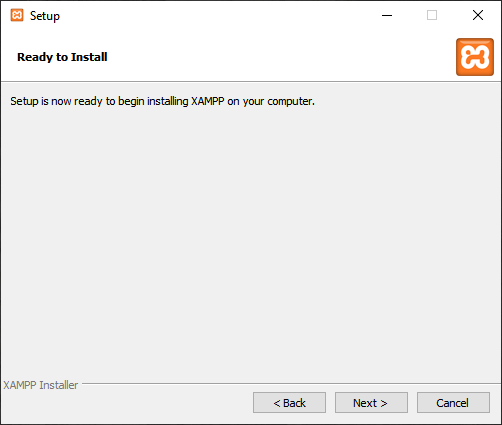
Step 6. Begin installing XAMPP
And you’re now ready to install XAMPP. Click the Next button to start the installation. It’ll take a few minutes to complete.
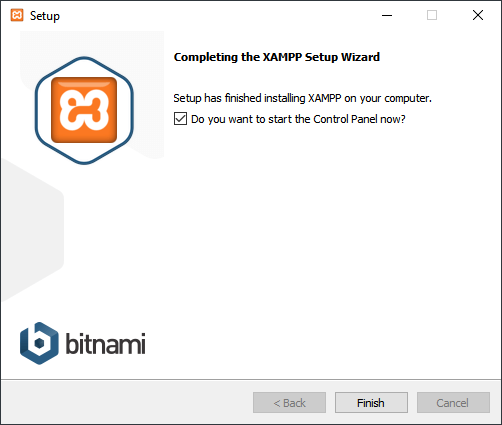
Step 7. Completing the XAMPP setup
Once completed, the XAMPP setup wizard shows the following screen. You can click the Finish button to launch the XAMPP Control Panel:
Step 8. Completing the XAMPP setup
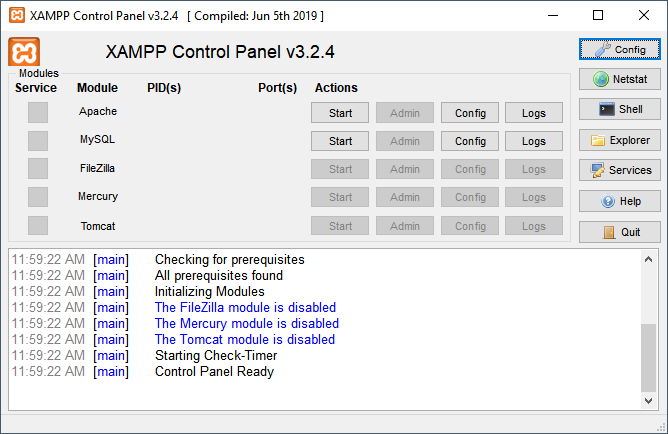
The XAMPP Control Panel lists installed services. To start a service, you click the corresponding Start button:
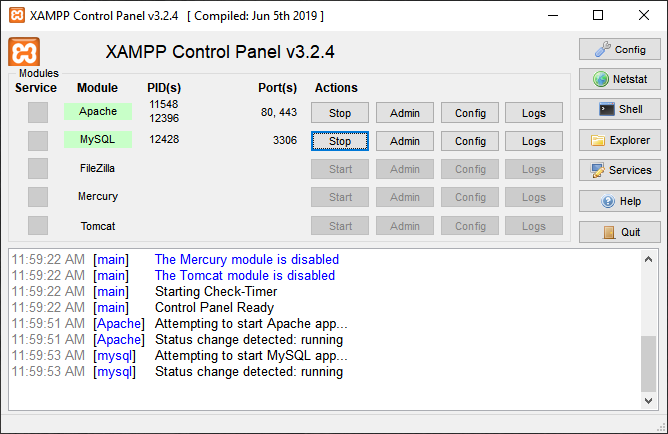
The following shows the Apache web server and MySQL are up and running. The Apache web server listens on the ports 80 and 443 while the MySQL listens on port 3306:
Step 9. Launch the XAMPP
Open the web browser and navigate to the following URL: http://localhost/. If the installation is completed successfully, you’ll see the welcome screen of the XAMPP.
Troubleshooting
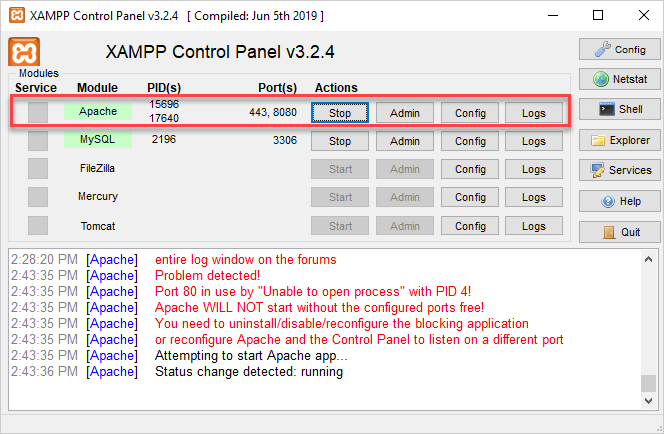
By default, Apache uses port 80. However, if port 80 is used by another service, you’ll get an error like this:
Problem detected! Port 80 in use by "Unable to open process" with PID 4! Apache WILL NOT start without the configured ports free! You need to uninstall/disable/reconfigure the blocking application or reconfigure Apache and the Control Panel to listen on a different portCode language: plaintext (plaintext)In this case, you need to change the port from 80 to a free one, e.g., 8080. To do that, you follow these steps:
First, click the Config button that aligns with the Apache module:
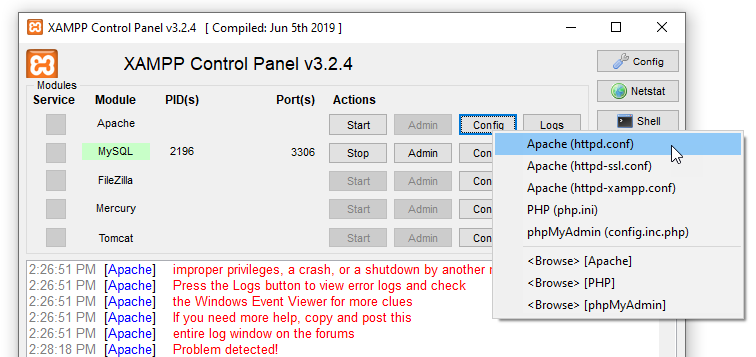
Second, find the line that has the text Listen 80 and change the port from 80 to 8080 like this:
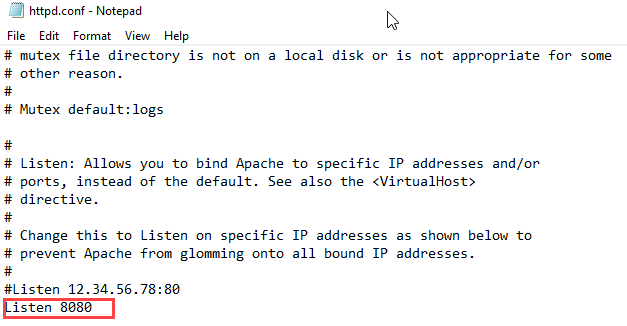
Third, click the Start button to start the Apache service. If the port is free, Apache should start properly, as shown in the following picture:
In this tutorial, you’ve learned step by step how to install the XAMPP PHP development environment on your computer.